Summary
- Buy a 12-14 pound USDA Prime whole brisket.
- Watch the video linked in this article to see how Harry Soo trims and injects a brisket for competition.
- Remove any fat and silverskin from the lean side and remove the thick seam of fat to expose the point section. Trim the fat side down to 1/8″ to 1/4″ thick.
- Prepare the injection mixture and inject the brisket several hours before cooking. Apply Slap Yo’ Daddy beef rub about 1 hour before cooking.
- Cook the brisket fat-side down at 250-275°F to an internal temperature of 170°F.
- Wrap in foil, add more beef broth, and continue cooking fat-side up until flat reaches 203-205°F and is probe tender.
- Separate point from flat, return point to the WSM to continue cooking until completely tender. Let flat cool to 170°F then move into an empty cooler and rest for several hours before slicing.

This article features a brisket that I never thought I would show you. I smoked it in March 2015 but I’m just now writing about it in April 2021.
Why? Because there were a couple of things about how this brisket turned out that I didn’t like. But when I recent came across these old photos, I decided it wasn’t a half bad effort and thought you could learn a few things from it.
Sherman, set the WABAC machine to March 6, 2015 when I made this USDA Prime brisket using a competition-style trim, a competition injection, and aluminum foil. I’ll point out the parts that I was unhappy about along the way.
What Is A Competition Trimmed Brisket?
A competition trimmed brisket is one where you remove the deep vein of fat between the brisket flat and point. This exposes the surface of the point so you can season it thoroughly, apply smoke flavor to it during cooking, then finish it as cubes and serve it as burnt ends.
Watch Slap Yo’ Daddy BBQ Video On Competition Brisket Trimming & Injection
I took my inspiration for this brisket from my friend Harry Soo of Slap Yo’ Daddy BBQ. Harry has many YouTube videos that show various ways of trimming a brisket, but the video below will give you a good sense of how he does a competition trim and injection on a brisket.
Now, as you know, I’m not a barbecue competitor, so my purpose in trying this technique was not to help me win a barbecue contest, but to see if the technique would improve my backyard barbecue game.
Find A Prime Brisket
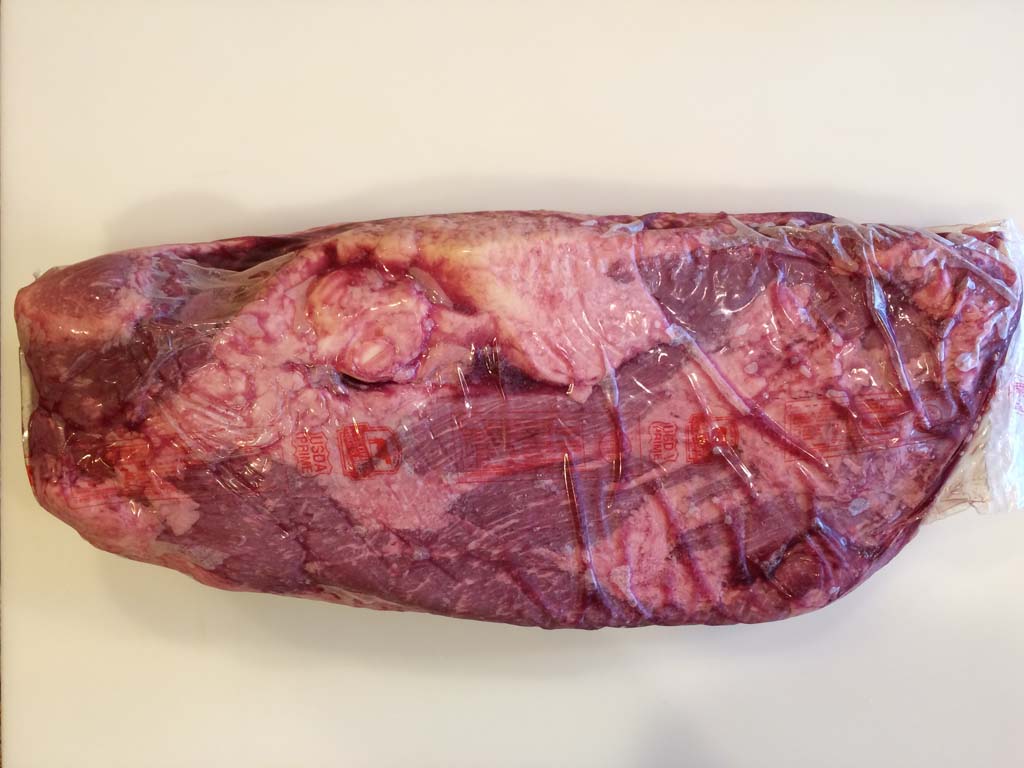
Back in 2015, you couldn’t just walk into Costco and buy a USDA Prime brisket—they started showing up there in 2016. So I reached out to a local barbecue joint that cooked USDA Prime Certified Angus Beef briskets to see if they’d sell me one, and they did.
This brisket weighed in at about 15 pounds. Here’s how it looked in the Cryovac packaging.
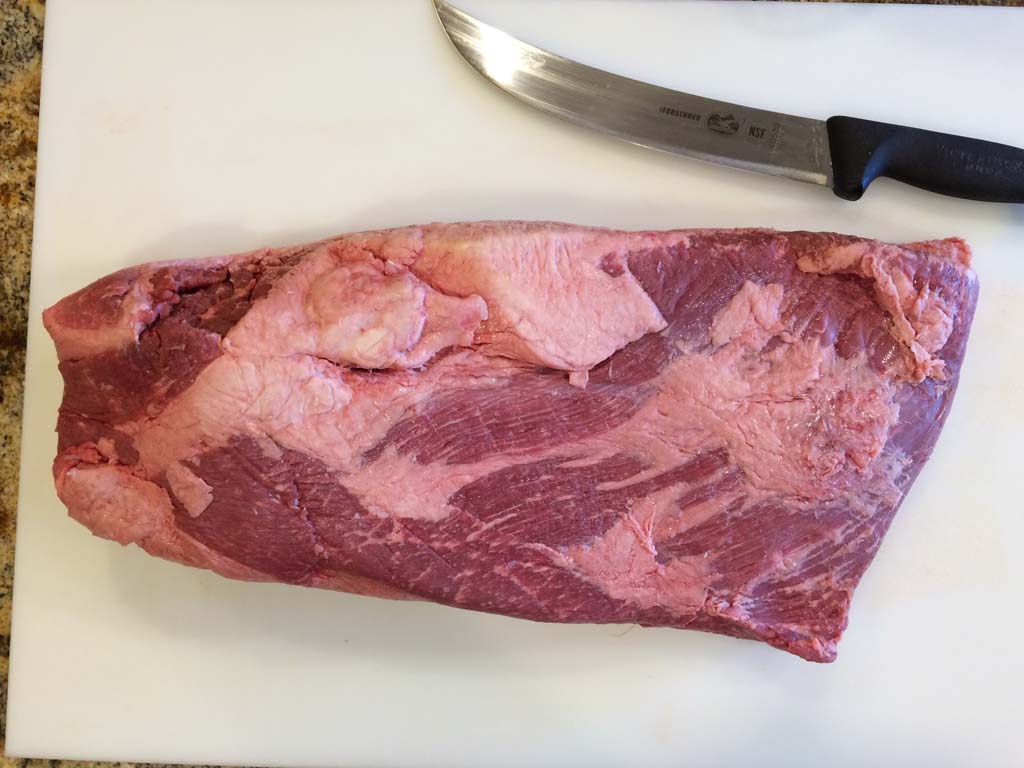
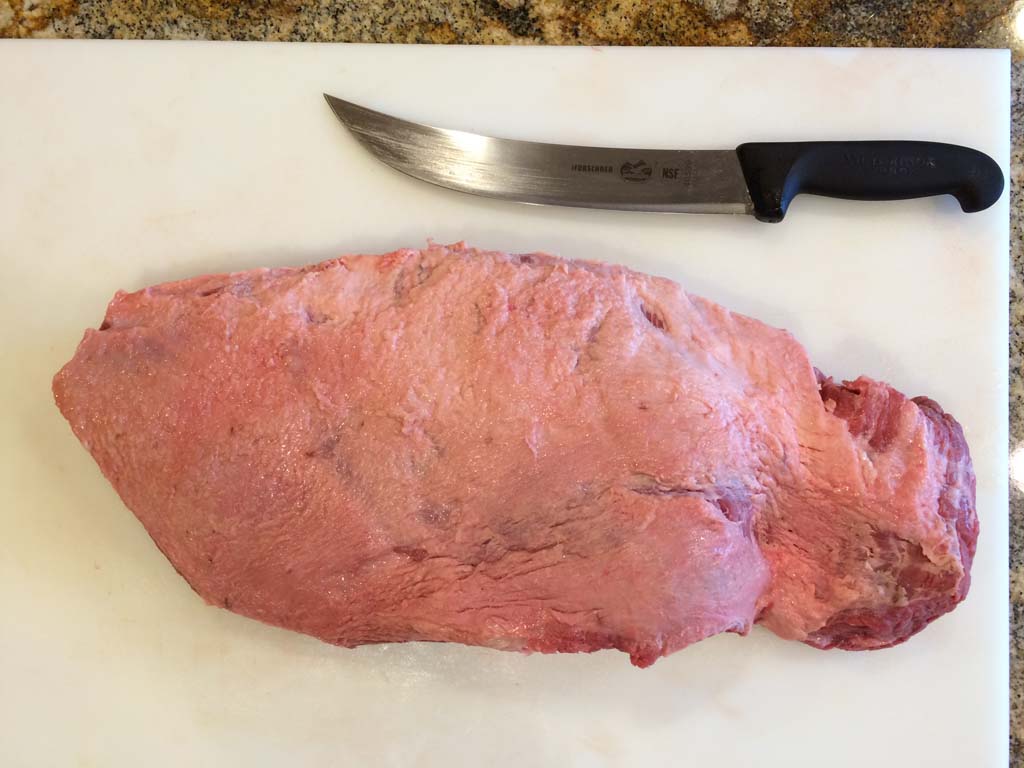
Here’s the brisket out of the packaging, looking at the flat (lean) side.
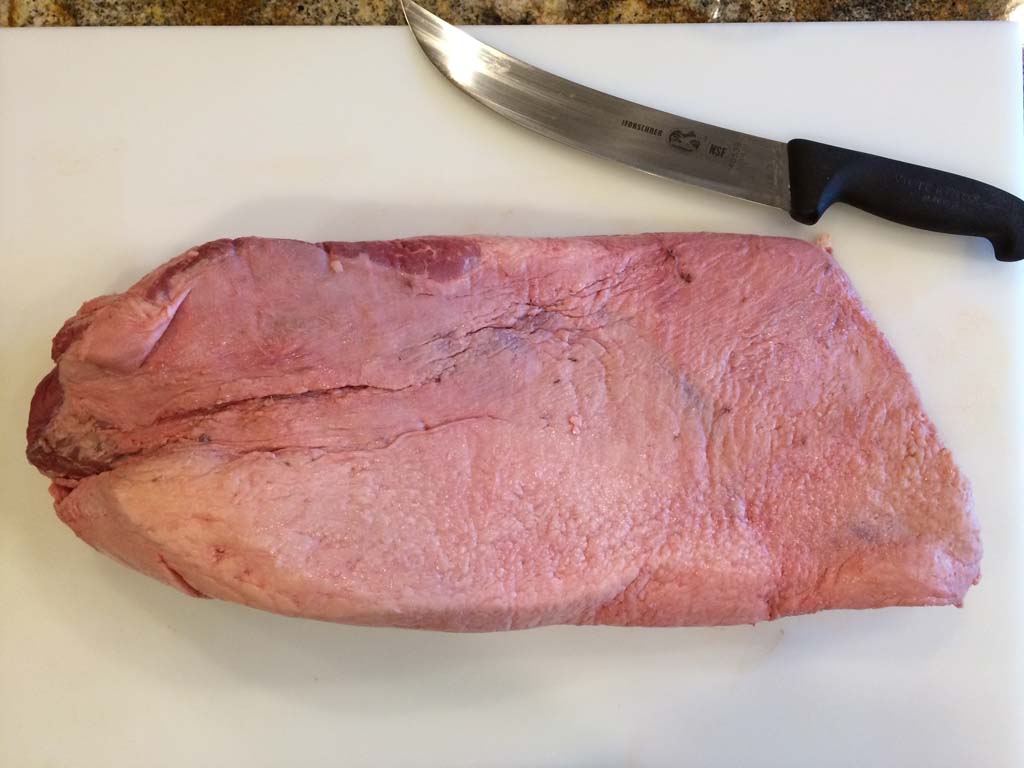
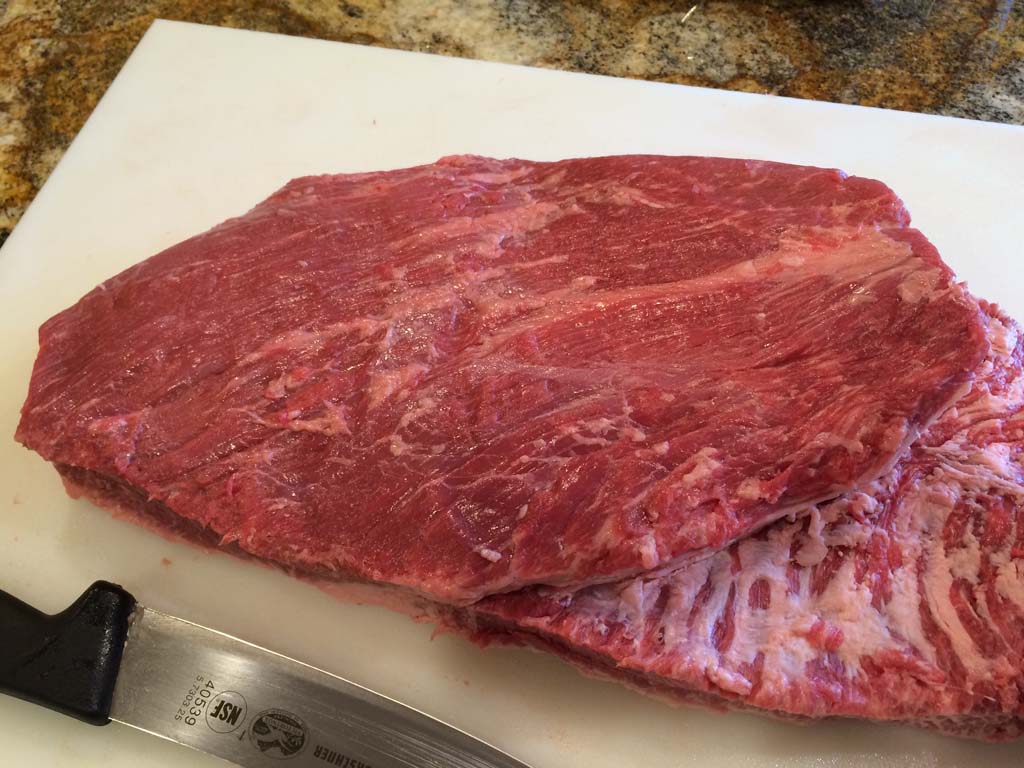
 And here’s a view of the point (fatty) side.
Trim The Brisket
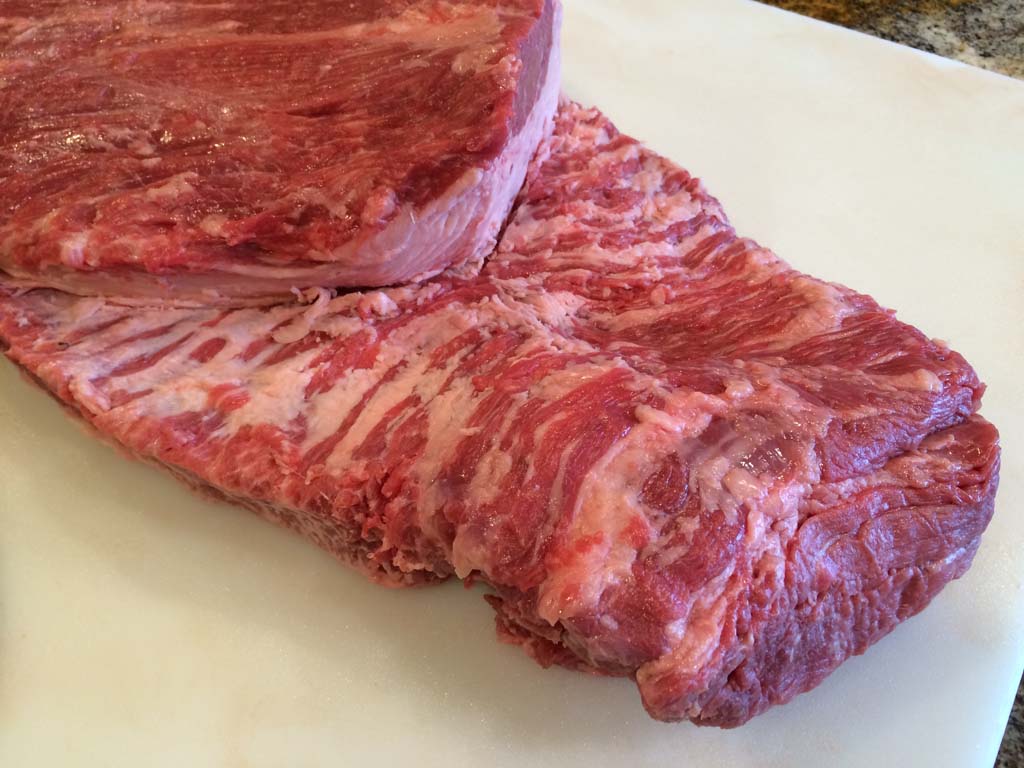
Like in Harry’s video, I trimmed away the large fat vein from the flat side of the brisket to expose the point section underneath.
I trimmed off any surface fat and silverskin on the flat portion. I trimmed off the discolored edge of the brisket—that’s the edge that’s exposed to a hot water antimicrobial treatment during the slaughter process. It’s completely safe to eat, but I like to remove it for looks.
I also marked the flat to make it easier to slice the meat across the grain after cooking—that little flat edge on the left end of the brisket shown here.
As for the fat side, I trimmed it down to 1/8″ to 1/4″ thickness.
Inject The Brisket
I prepared a batch of beef injection liquid using a recipe from Harry Soo.
SYD Beef Injection
- 2 10.5 oz cans Campbell’s Beef Broth
- 2 teaspoons Worcestershire sauce
- 1 teaspoon liquid smoke
Place beef broth in sauce pan. Bring to a gentle boil and reduce the volume to 50% of original, leaving about 10 ounces of concentrated broth.
Let broth cool to room temperature, then stir in Worcestershire sauce and liquid smoke.
Choose a liquid smoke that says “natural” on the label, meaning that it’s smoke that’s been distilled from a real wood fire and diluted with water. Liquid smoke comes in various flavors; look for hickory, pecan, or apple flavor for this brisket. Wright’s and Colgin are two reputable brands that I have used.
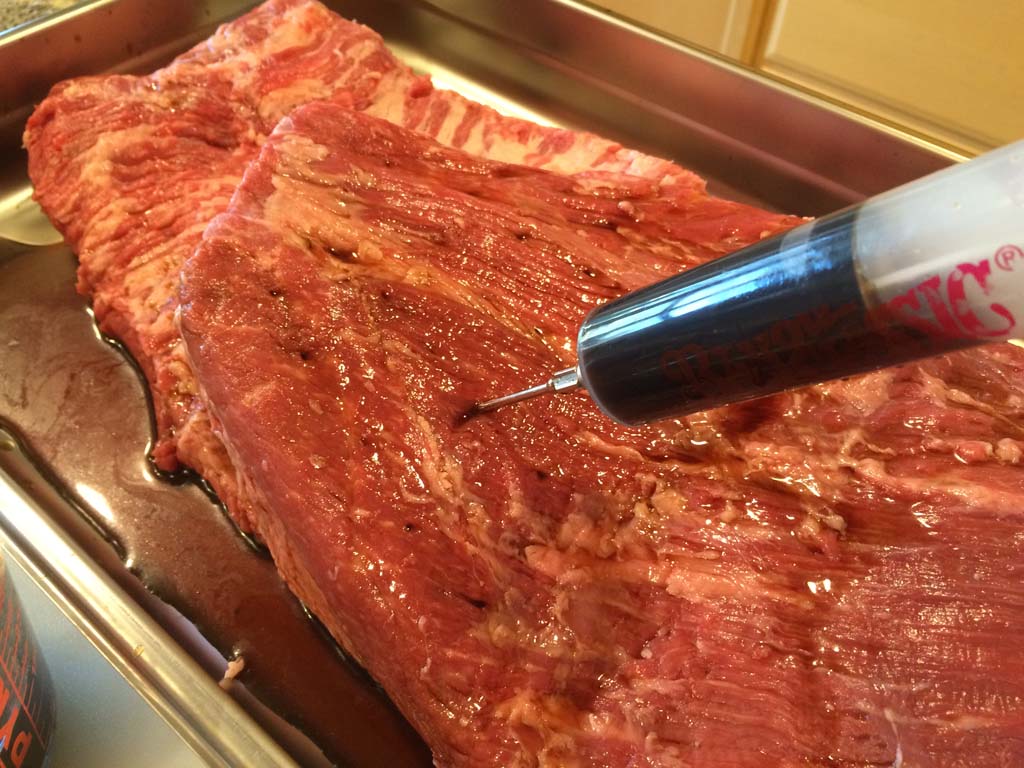
To inject the brisket, place it fat-side down in a hotel food pan or in a disposable aluminum full-sized steam table pan, something large enough to hold the brisket and deep enough to contain any injection liquid that leaks out of the meat.
Using an injector syringe, inject the liquid into the lean side of the brisket in a 1″ matrix. Insert the needle at an angle, as shown in the photo below, without puncturing the bottom fat side of the meat. Inject the liquid slowly as you withdraw the needle slowly. Inject both the flat and point portions.
The brisket is not a sponge and won’t hold all of the injection liquid. Some of it will collect in the pan; feel free to re-inject it into the brisket, as needed.
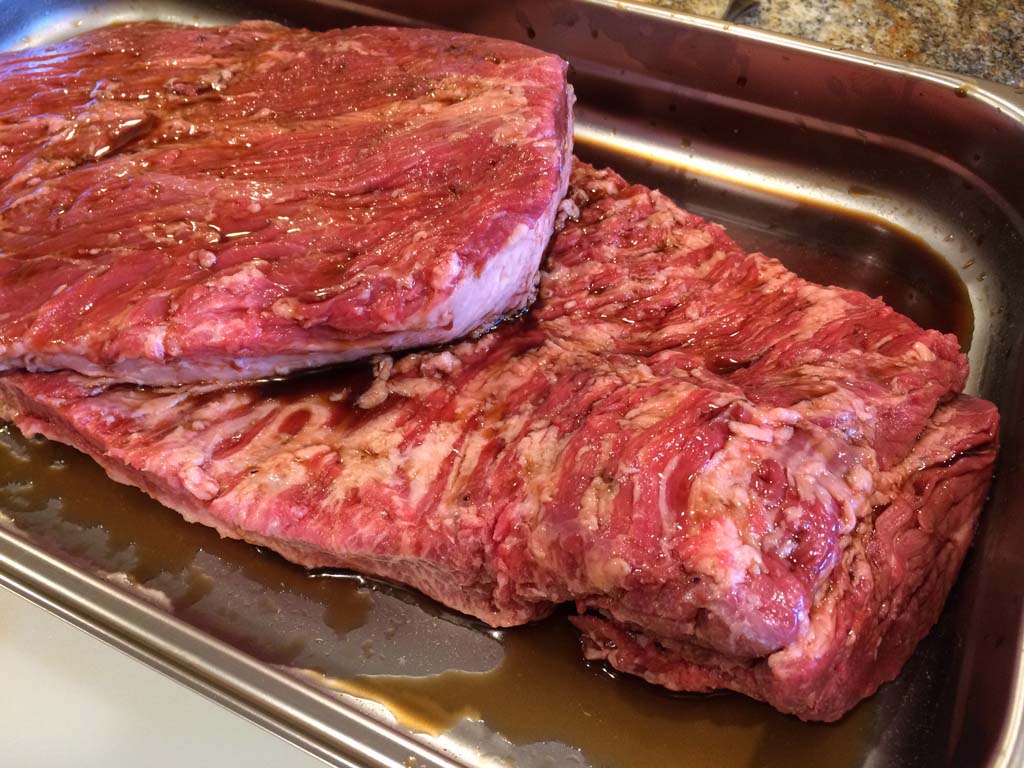
Once you’ve got the brisket injected, cover it with plastic wrap and place it in the refrigerator for several hours. I refrigerated this brisket from 5:00 PM to 11:00 PM.
Rub The Brisket
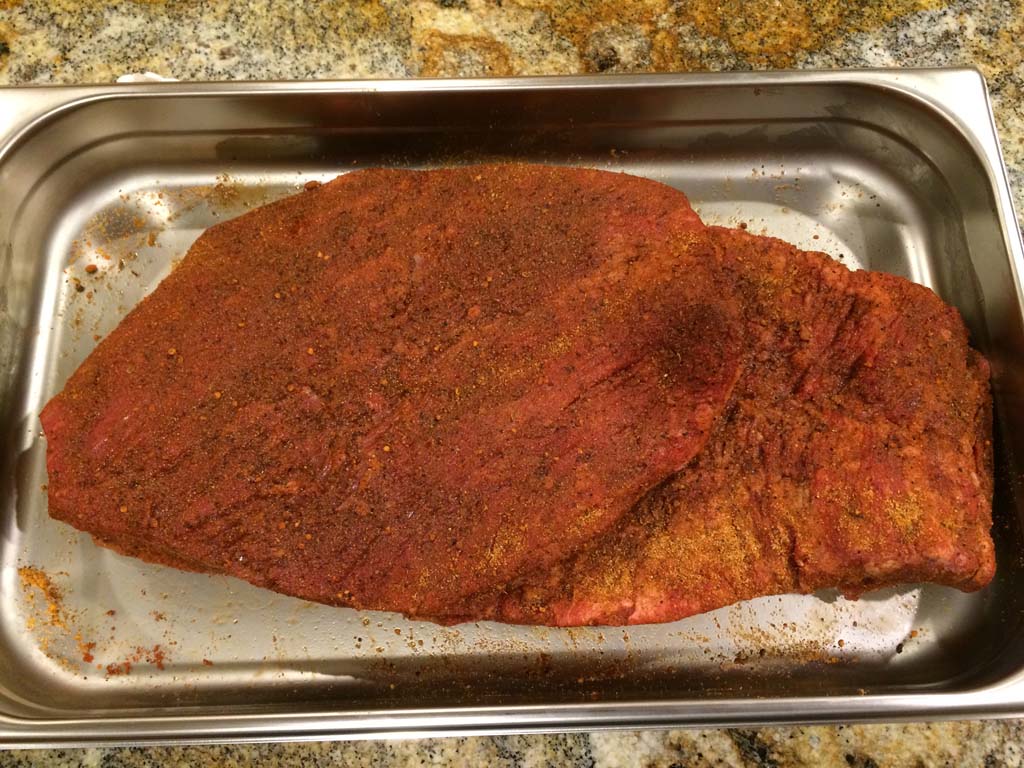
I took the brisket out of the refrigerator 1 hour before cooking it and applied a generous amount of Harry Soo’s Championship Moola Beef Rub to all surfaces. I returned the brisket to the refrigerator while I prepared to fire-up the WSM.
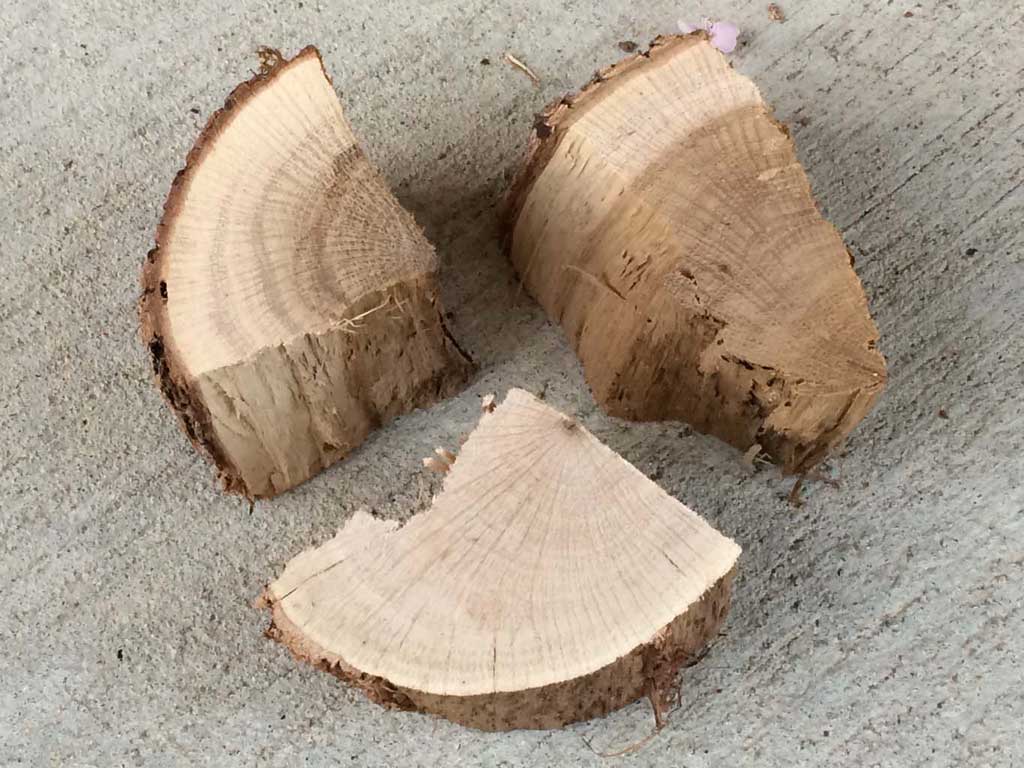
Choose The Smoke Wood
Select 3 fist-sized chunks of dry smoke wood. I used 3 chunks of oak wood. There’s no need to soak the wood in water or remove the bark before using it.
Fire The WSM
Fire-up the WSM using the Minion Method. Fill the charcoal chamber almost to the top with unlit Kingsford Charcoal Briquets. Nestle the smoke wood chunks into the unlit charcoal so the top surface of the chunks are exposed.

Light 20-40 briquettes using a Weber chimney starter and spread them evenly over the unlit charcoal and smoke wood. For my cook, I lit 40 briquettes.
Barbecue The Brisket
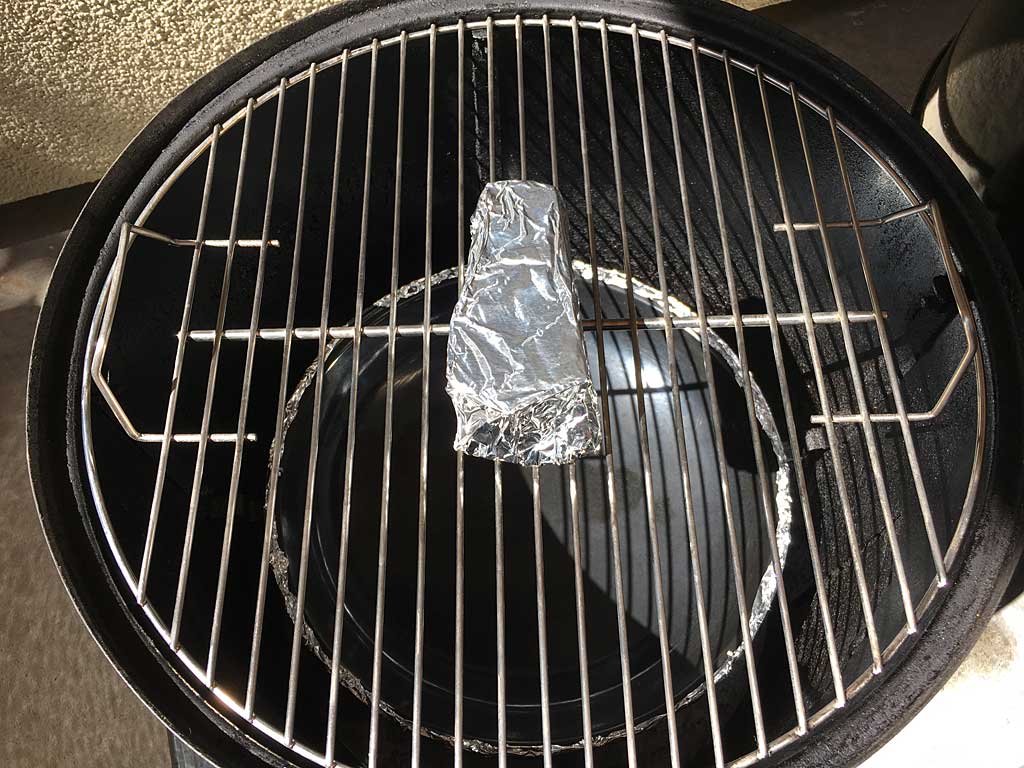
Assemble the cooker and put the water pan in place, but leave it empty. Wrap the pan in foil for easy cleanup later.
Place the brisket on the top cooking grate fat-side down and cover with the lid. The fat helps shield the lean brisket flat from the heat.
Large briskets can be “shoehorned” between the handles on the cooking grate and will shrink during cooking. Other approaches include placing a large chunk of foil-wrapped smoke wood under the brisket. That’s what I did with my brisket.
Set the top vent to 100% open and leave it that way throughout the entire cooking process. Start with all 3 bottom vents 100% open. As the cooker approaches 250°F, begin to partially close all 3 bottom vents to maintain 250-275°F. Adjust the bottom vents as needed to maintain this temperature range throughout the cooking process.
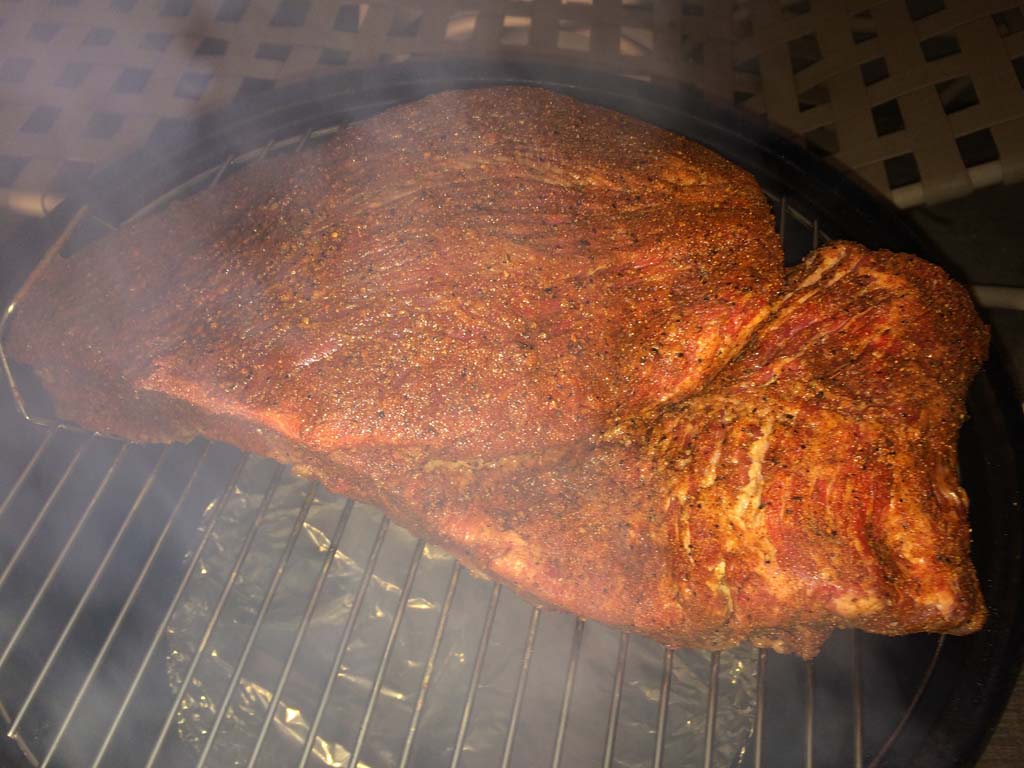
Problem #1: Waiting Too Long To Spritz The Brisket
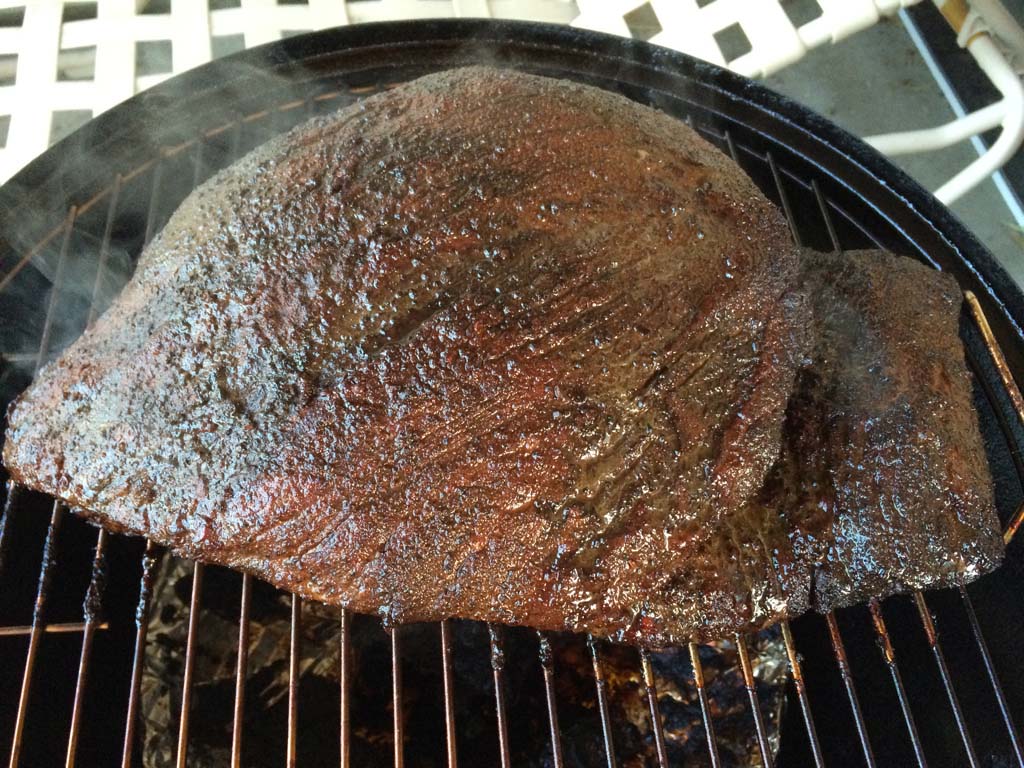
I waited 5 hours before spritzing the brisket with water for the first time, then sprayed every 30 minutes for the next two hours. In retrospect, I should have started spritzing the brisket after 3 hours in the cooker and again every 30 minutes until it was time to foil the brisket. Spritzing helps keep the surface of the meat from drying out and enhances development of the smoke ring.
Problem #2: Wrapping The Brisket Too Soon
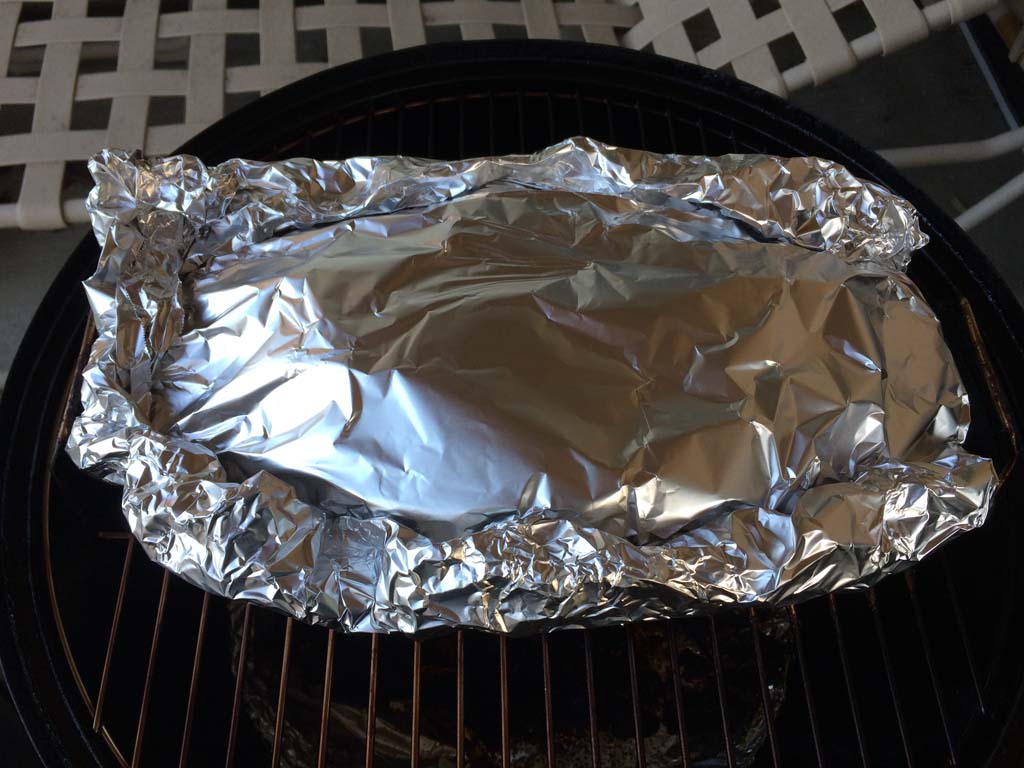
After 7 hours of cooking, the brisket reached an internal temperature of 155-157°F. At this point, I wrapped it tightly in aluminum foil, added 1/2 cup of Campbell’s Beef Broth straight from the can to the foil, and returned the brisket to the WSM. In retrospect, I was impatient and wrapped the brisket too soon. I should have waited until the brisket reached at least 160°F and probably 170°F before wrapping in foil.
Return the wrapped brisket to the smoker fat-side up (so the sticky fat doesn’t stick to the foil under the weight of the brisket) and continue cooking for several hours until it reaches 203-205°F internal temperature. Check for tenderness by inserting an instant-read thermometer vertically into the center of the flat. If it goes in and out like butter, the brisket is done.
Problem #3: Pulling The Brisket Too Early
Again, it seems like impatience was the theme for this brisket. Instead of waiting for an internal temp of 203-205°F, I pulled the brisket off the cooker at 195-198°F. As a result, the brisket flat was not as tender as it could have been.
Problem #4: Coagulated Matter On Surface Of Brisket
This was the main reason I avoiding sharing the details of this cook for all these years.
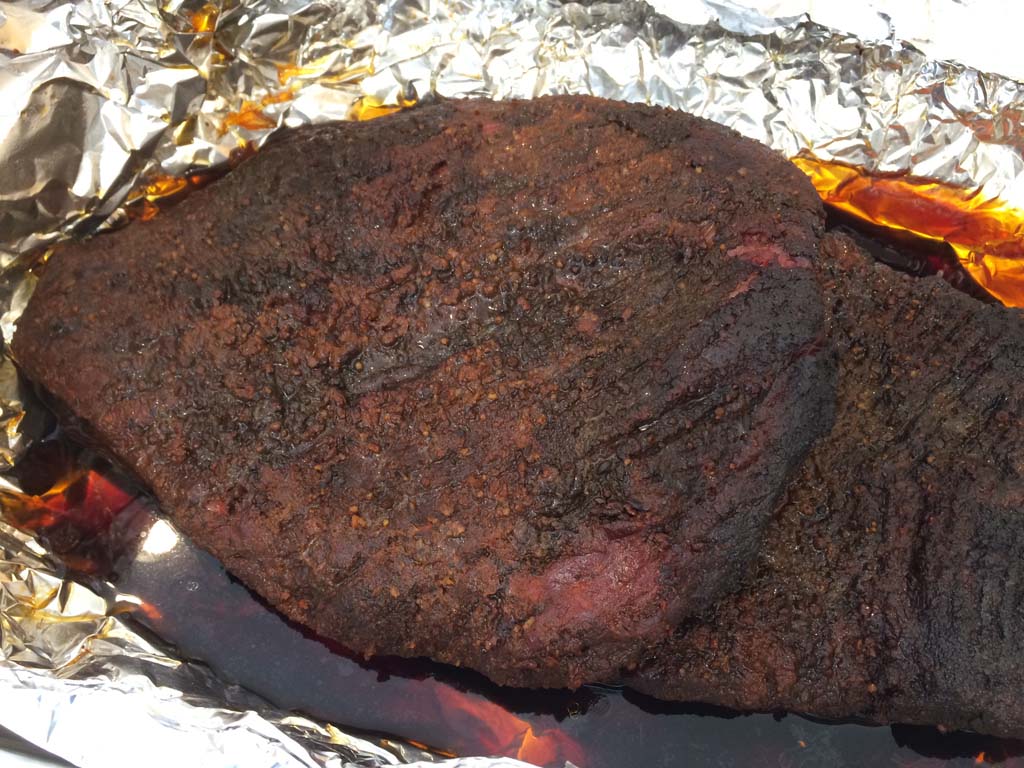
Take a close look at the surface of the brisket flat and you’ll notice little orange balls of coagulated matter. This may have started before foiling and was accelerated during foiling.

I’m not sure what caused this, perhaps a mix of injection liquid and meat juices and rub that formed little balls on the surface. It didn’t stop me from eating the brisket, I just gently scraped them off with a knife.
I know that Harry Soo’s injection method is something he’s used successfully countless times on briskets, so I don’t know what went wrong here. I should probably give it a try with another brisket, but it’s been 6 years since I cooked this brisket and I’ve not injected another one since then. These days I’m more likely to do a simple Central Texas style salt & pepper rub.
Here’s how the temperature and vent settings went during my cook. You’ll notice that the WSM ran pretty hot. By 5:30 AM, I had all bottom vents closed and the cooker was till running about 265°F.
| Lid Temp | Meat Temp | Vent 1 % | Vent 2 % | Vent 3 % | |
| 11:50 pm | – | – | 100 | 100 | 100 |
| 12:10 am | 245 | – | 100 | 0 | 0 |
| 12:25 am | 250 | – | 100 | 0 | 0 |
| 12:45 am | 255 | – | 100 | 0 | 0 |
| 1:00 am | 255 | – | 100 | 0 | 0 |
| 1:30 am | 275 | – | 50 | 0 | 0 |
| 2:00 am | 250 | – | 50 | 0 | 0 |
| 2:45 am | 263 | – | 25 | 0 | 0 |
| 3:30 am | 259 | – | 25 | 0 | 0 |
| 4:30 am | 282 | – | 10 | 0 | 0 |
| 4:45 am | 277 | – | 10 | 0 | 0 |
| 5:00 am (s) | 273 | – | 10 | 0 | 0 |
| 5:30 am (s) | 275 | – | 0 | 0 | 0 |
| 6:00 am (s) | 265 | – | 0 | 0 | 0 |
| 6:30 am (s) | 262 | – | 0 | 0 | 0 |
| 7:00 am (s) | 262 | 155-157 | 0 | 0 | 0 |
| 7:05 am (w) | – | – | 0 | 0 | 0 |
| 7:30 am | 258 | – | 0 | 0 | 0 |
| 8:00 am | 255 | – | 0 | 0 | 0 |
| 8:30 am | 255 | – | 0 | 0 | 0 |
| 9:00 am (x) | 248 | 195-198 | 0 | 0 | 0 |
(s) sprayed with water
(w) wrapped in foil, returned to cooker
(x) separated flat and point; returned point to cooker for 90 minutes; cooled flat to 170°F then foiled and rested in cooler for 4 hours
Note that the vent percentages represent the way I set the vents at the time indicated.
Rest The Flat, Continue Cooking The Point
Once the brisket reaches your target internal temperature, remove it from the cooker and separate the point and flat sections. Apply additional rub to the point where there is none and return it to the WSM unwrapped for additional cooking until the meat is probe tender. This took about 90 minutes for my brisket point.
In this photo, the brightness of the foil confused the camera, making the brisket look almost black, but you can see the point section in the background before application of additional rub.
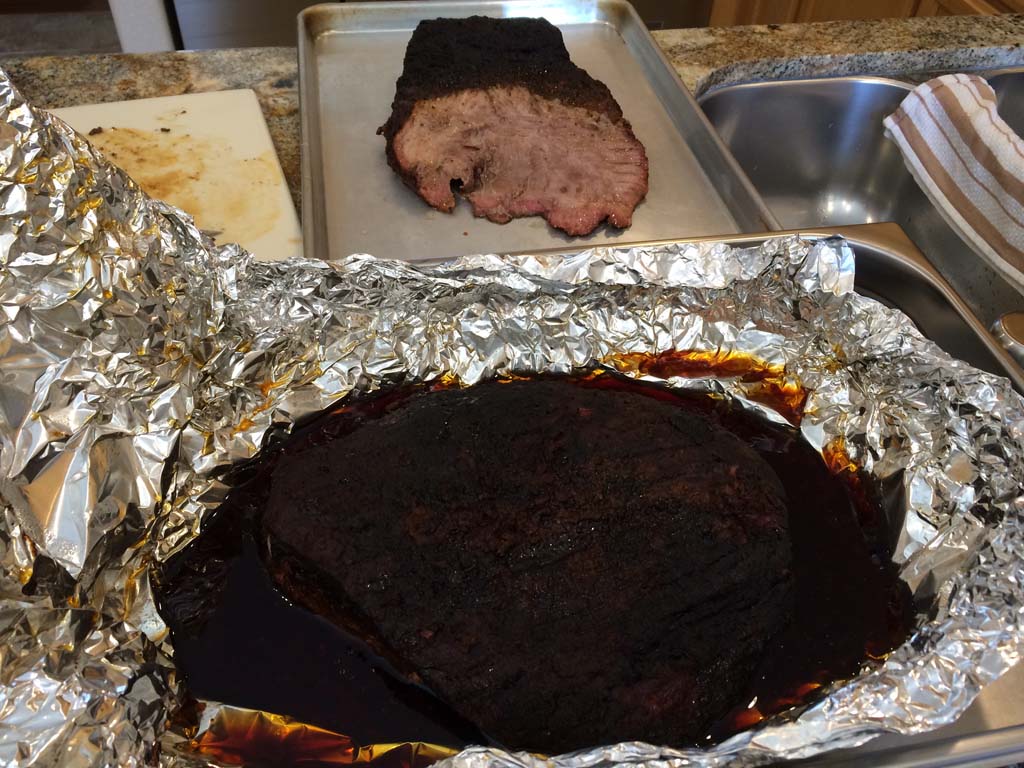
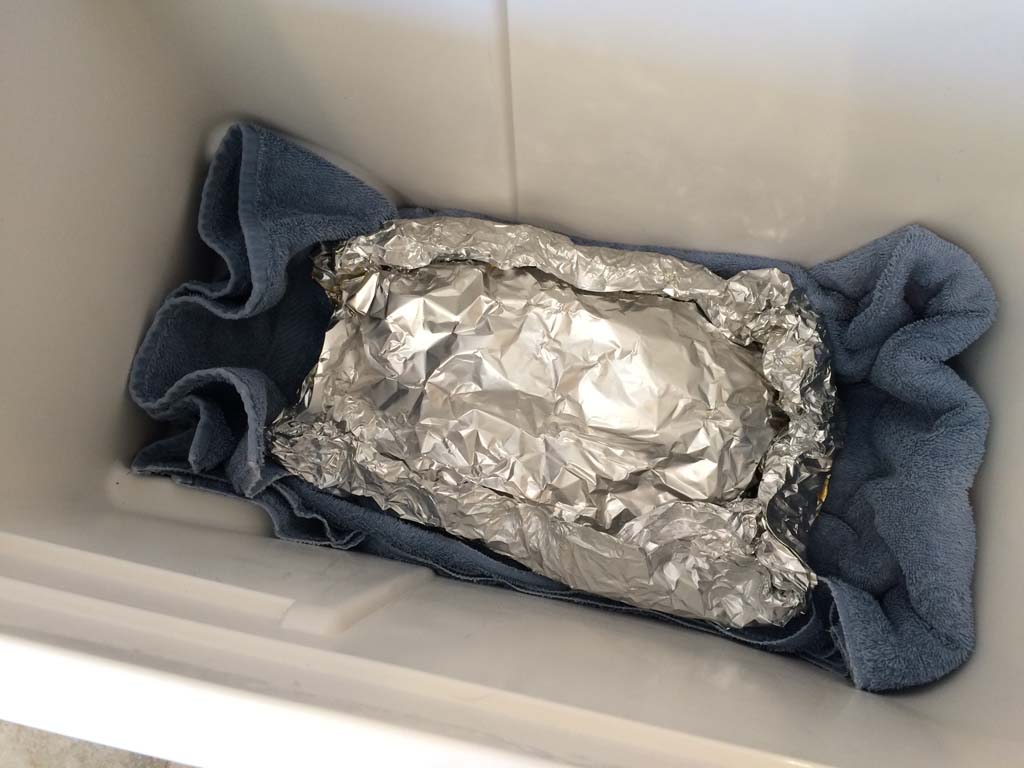
As for the flat, close the foil but leave it partially open to arrest the cooking process, allowing the flat to cool down to 170°F internal temperature (this took about 45 minutes for my brisket flat). Then close the foil completely, leaving the accumulated liquid inside, and rest the flat in an empty cooler for four hours before serving. Place an old bath towel in the bottom of the cooler, then the wrapped brisket, then cover with another towel.
Slice & Serve The Brisket
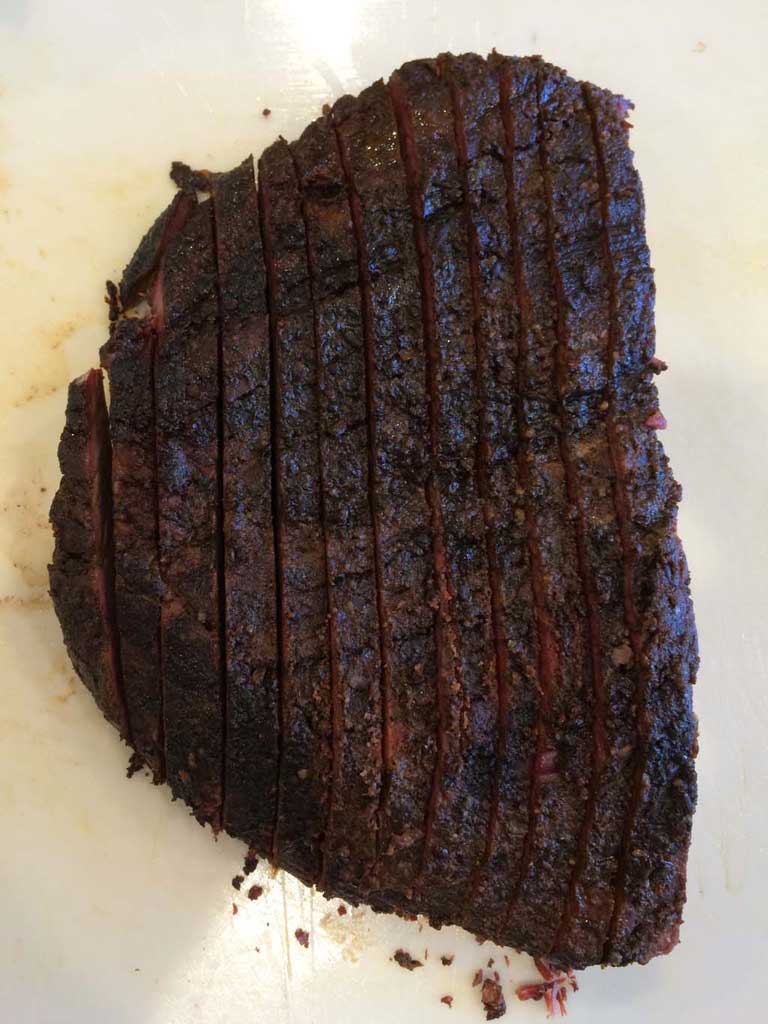
Here’s how the brisket flat looked coming out of the cooler. It was moist but not super juicy.
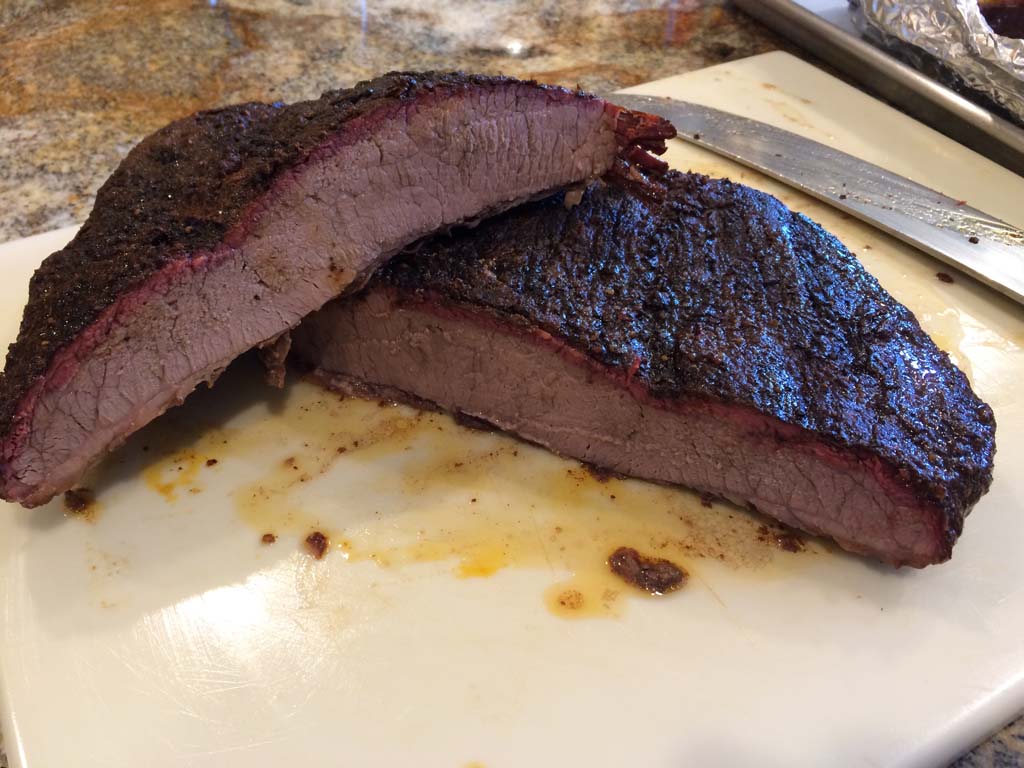
I sliced the flat portion about 1/4″ thick using Aaron Franklin’s favorite brisket slicing knife…
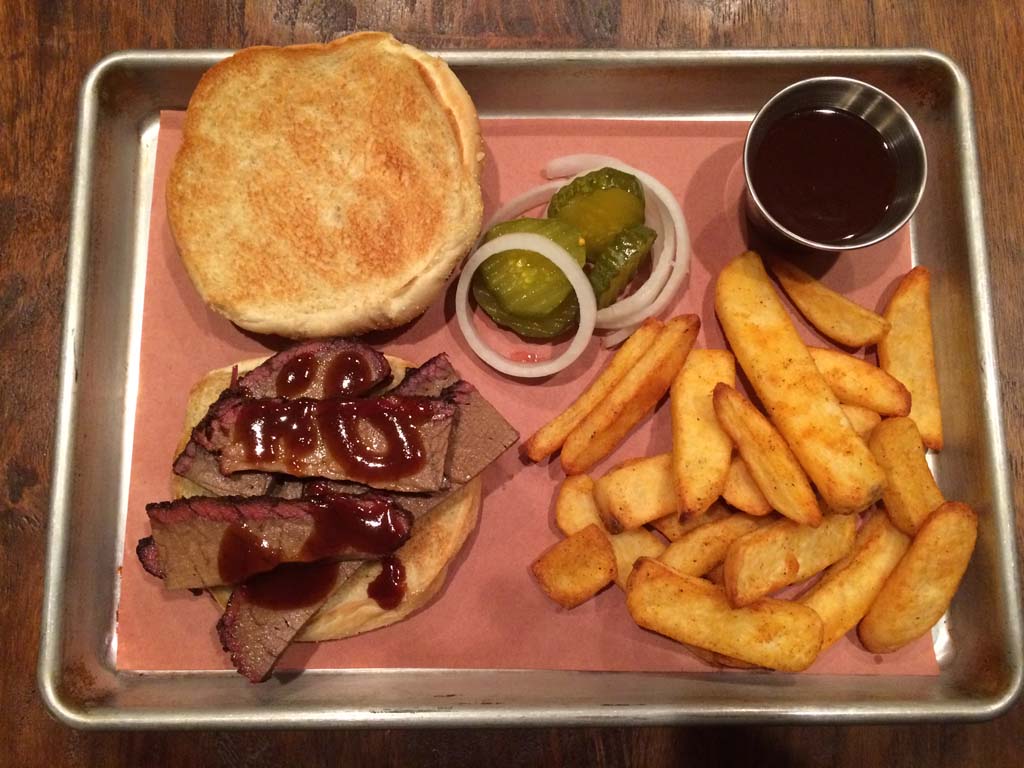
…and made a tasty brisket sandwich with fries, pickles, and onions on the side.
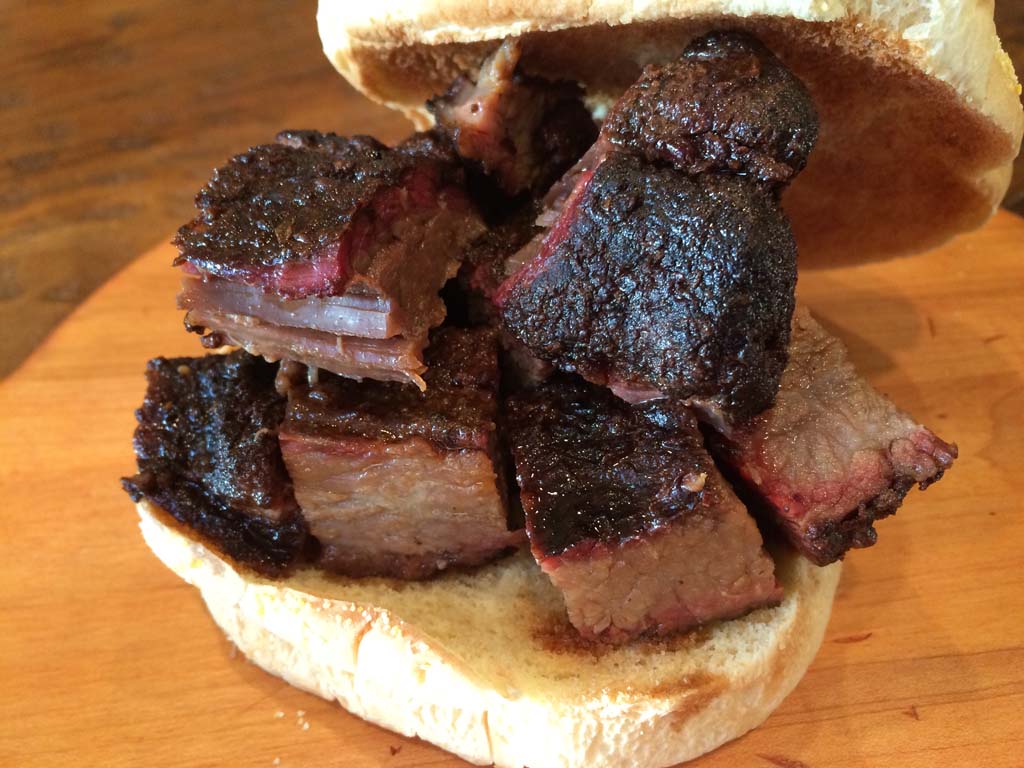
I sliced the brisket point across the grain into strips, then cut the strips with the grain to create chunks…
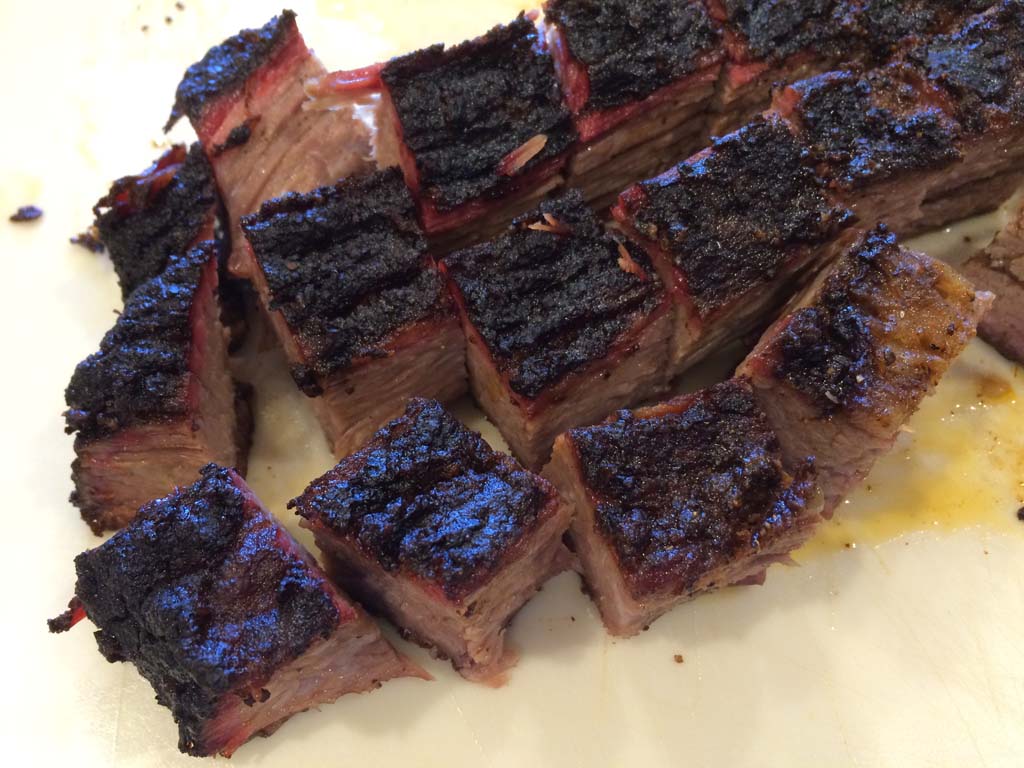
…that I piled onto a toasted bun for a burnt end sandwich with barbecue sauce on the side.
Whatever brisket was leftover got frozen, sealed using my FoodSaver vacuum sealer, and reheated later to make more sandwiches.
Would I Do It Again?
At the time I’m writing this article, I think the answer is no, I would not attempt this technique again. The fact that I’ve not attempted a competition trimmed and injected brisket in the last 6 years tells me that, at least for me, it’s not worth the effort. In the intervening years, I have had good success with a simple Central Texas style brisket trim and salt & pepper rub and that has become my go-to brisket, at least for now. But I reserve the right to go back and revisit this method again in the future if I feel so inclined.
As for taste, I think both the brisket flat and point had pretty good taste, but I prefer the clean taste of an uninjected brisket over an injected one. As for tenderness, the flat could have used a bit more time in the cooker to become more tender and was not as juicy as I would have liked, but we ate it all up so it wasn’t really a failure. The burnt end cubes were the star of this cook, as they were nice and tender, and I really enjoyed them on a few sandwiches.
Should you give this method a try? Why not! You learn something new every time you try something new. Maybe a competition trimmed and injected brisket is the perfect brisket for you…you’ll never know if you don’t give it a try.
More Brisket Links On TVWB
- Brisket – High Heat
- Brisket – Smoked & Oven Finished
- Brisket – Midnight Cook
- Brisket – Wet Rub
- Whole Brisket – Central Texas Style Butcher Paper
- Brisket Flat – Central Texas Style Butcher Paper
- Burnt Ends – Kansas City Style
- Burnt Ends – Smoky, Sticky, Sweet
- Pastrami – Dry Cured
- Quick Pastrami – Smoked Corned Beef Brisket
- Brisket Servings Calculator
- Brisket Selection & Preparation
- Separating Brisket Flat & Point
- Using An Electric Oven To Hold Brisket At Temperature
- Camp Brisket 2020 Trip Report


