In this topic:
Page 1
Page 2
The Minion Method
Pros
- Designed for cooking sessions lasting 6-18 hours.
- Perfect for overnight cooking.
- Start cooking in just 15-30 minutes.
- No need to add fuel during the cooking process.
- Long, consistent burn times over many hours.
- Less chance of the cooker running hotter than desired.
Cons
- Not acceptable to those who prefer all briquettes to be fully lit during cooking.
- Not for cooking in the 325-350°F range.
“I was cooking in a competition, and on the morning of the turn-ins I had my wife go to a shop and pick up my first WSM. I put it together, filled the ring with charcoal, and needed a way to light if off. I never did read the directions. I decided to do what is today call ‘The Method’.
“We took a 1st in chicken and 2nd in ribs that day. I got home and was reading Ray’s forum and the question was asked on how to control the temps on a WSM. I answered, and the rest is history.
“The only real debate was the fact that you were putting unburnt charcoal in the ring and it was lighting off as you go. Knowing a little about Jedmasters, I knew this was not really a problem and the results answered that question.”
– The history of the Minion Method, as told by Jim Minion to The Virtual Weber Bulletin Board
The concept behind the “Minion Method” is simple:
- Place a small number of hot coals on top of a full charcoal chamber of unlit briquettes.
- Use the bottom vents to control the amount of air entering the cooker, to keep the fire burning low and steady.
- The unlit fuel catches fire gradually throughout the cooking session, resulting in long burn times of up to 18 hours, depending on weather conditions.
One of the advantages this method has over the Standard Method is that there’s less of a chance that the cooker will run hotter than you want. This is because it’s easier to start with just a few hot coals and bring the cooker up to 225-250°F than it is to start with a red-hot cooker and fight to bring it down to 225-250°F.
If there’s any controversy about the Minion Method, it’s that it contradicts the conventional wisdom that says all charcoal briquettes must be fully lit and covered with gray ash before cooking begins. Everyone knows how bad charcoal briquettes smell while lighting, so some people assume that this smell permeates the meat during cooking, since fuel is lighting continuously over many hours. Interestingly, the Minion Method does not seem to affect the appearance, aroma, or taste of food, and it is used with great success by many winning teams on the competition barbecue circuit.
There are some individuals with sensitive palates who claim they taste an off-flavor in food cooked using the Minion Method. If you find yourself in this group, or if you have health concerns about cooking food over charcoal that is not fully lit, use the Standard Method instead, replenishing the cooker with pre-lit coals every 4-6 hours.
I use the Minion Method whenever cooking at 225-250°F, regardless of the length of cooking time. When finished, close all vents to extinguish the fire. When the charcoal is cold, sift out the ashes and save the remaining unburned fuel for next time.
Fill The Charcoal Chamber
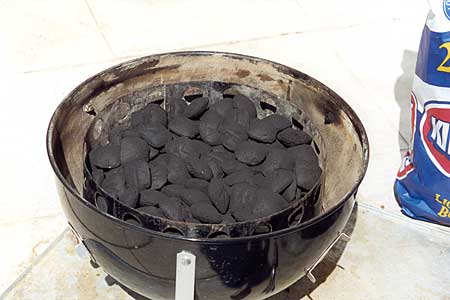
Start by filling the charcoal chamber to the top with unlit charcoal briquettes. You can use any charcoal product, but experience shows that Kingsford Charcoal Briquets provides the longest, most consistent burn.
Light A Few Briquettes
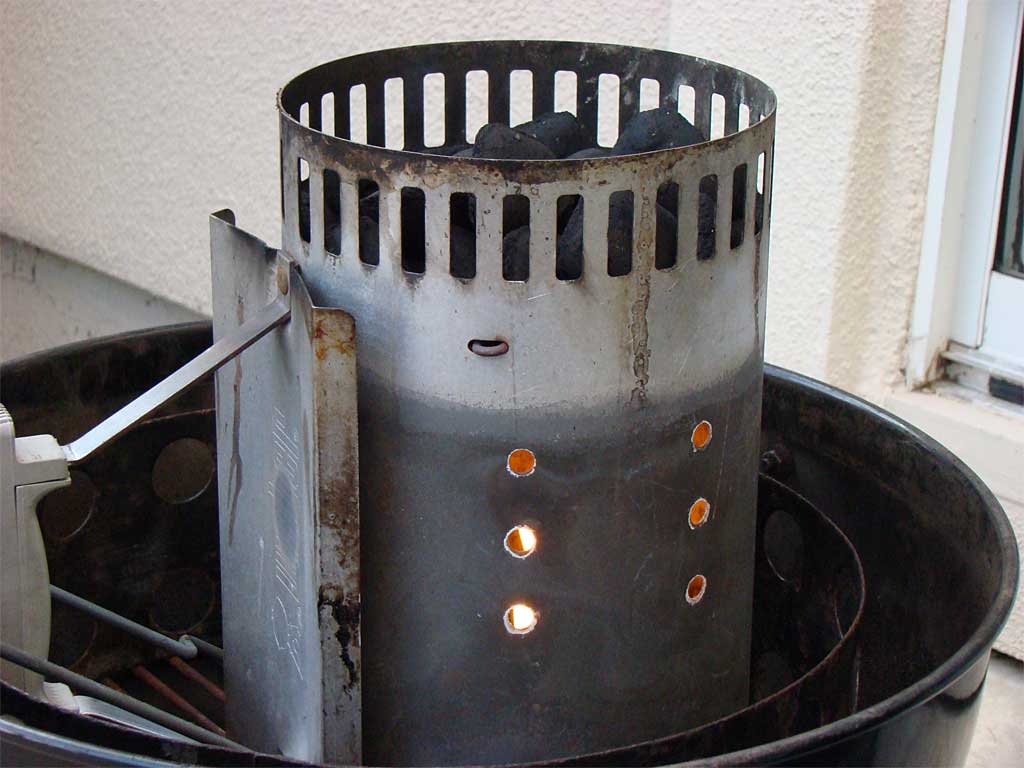
Using a Weber chimney starter, light a small number of briquettes:
- On warm, calm days, light 20 briquettes.
- On cold, rainy, or windy days, light 20-40 briquettes.
- On extremely cold days, light 40-60 briquettes or more.
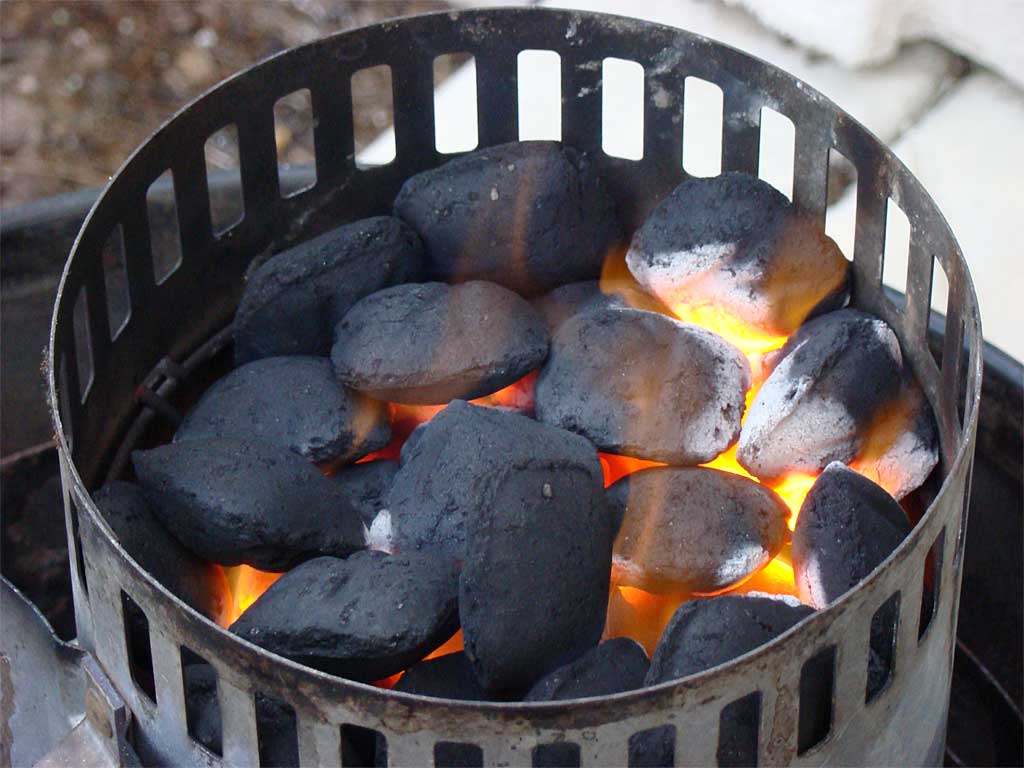 These pictures show 30 briquettes being lit in an upside-down Weber chimney starter. Tips on lighting small amounts of charcoal can be found in the How To Use A Chimney Starter article.
Spread The Lit Coals
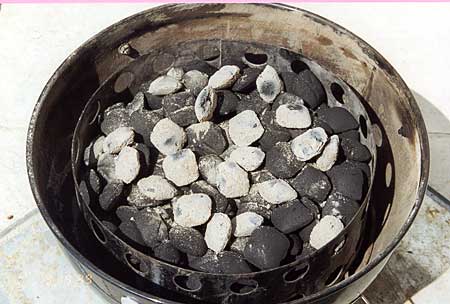
When the coals are covered with gray ash, spread them evenly over the unlit briquettes in the charcoal chamber.
Assemble The Cooker
Fill the water pan:
- Use cool tap water on warm days.
- Use hot tap water on cold days. Some folks use boiling water on extremely cold days.
Fully open all three bottom vents. Leave the top vent fully open for ventilation throughout the entire cooking process.
Add the meat and smoke wood to the cooker immediately. The cool meat helps to control the ascent of the cooker temperature.
The cooker temperature will begin to rise gradually. When it reaches 200°F, adjust all three bottom vents to 25% open and monitor the temp carefully until it reaches 225-250°F. Adjust the vents as necessary to maintain this temp.
It Keeps Going, And Going, And Going…
Using the Minion Method, you can start cooking in about the time it takes to light a few briquettes in a chimney starter—15-20 minutes tops.
If the cooker temperature begins to drop after 10 hours, gently tap on the charcoal bowl legs to dislodge accumulated ashes and refresh the coals without getting ashes on your food. If you’re daring, you can remove the lid and middle cooking section as a unit and stir the coals vigorously with tongs. This can be dangerous and messy, especially if you dump the contents of your cooker on the ground or into the hot coals. Remove the cooking section at your own risk. Weber warns that you should never move a hot cooker and you should never operate it unless all parts are in place.
Check the water pan every 2-4 hours and add hot water, as needed.
Depending on the weather and the amount of food being cooked, it may be necessary to add fuel after 12 hours of cooking. Light a full or partial Weber chimney starter of charcoal and add the hot coals to the cooker.
Fire-Up Variations
There are countless variations on both the Standard Method and the Minion Method. Here are some of the most popular ones. Use these as-is, or as a starting point for developing your own variation.
Empty Water Pan And Alternatives To Water
Besides using water, the water pan can be used empty…and some people use alternatives to water and alternatives to the pan itself. See Using A Water Pan In Weber Smokers for a discussion of these alternatives.
Minion Method – Old School
Over the years, Jim Minion made adjustments to “The Method” as he learned more about barbecue and the Weber Bullet. Back in the early days, he did a few things differently. He would use hot water in the pan and allow the cooker to come up to 240-250°F before adding the meat. The cooker temperature would drop after the meat goes in, so he would leave the bottom vents fully open until the temp came back up to about 200°F, then start adjusting the bottom vents to maintain 225-250°F.
Minion Method – Hot Coals In A Pile
Fill the charcoal chamber with unlit briquettes, but move some briquettes from the center toward the edges, creating a depression into which you pour the hot coals. Thanks to Tom Kitslaar for suggesting this method on The Virtual Weber Bulletin Board.
Minion Method – Hot Coals In A Coffee Can
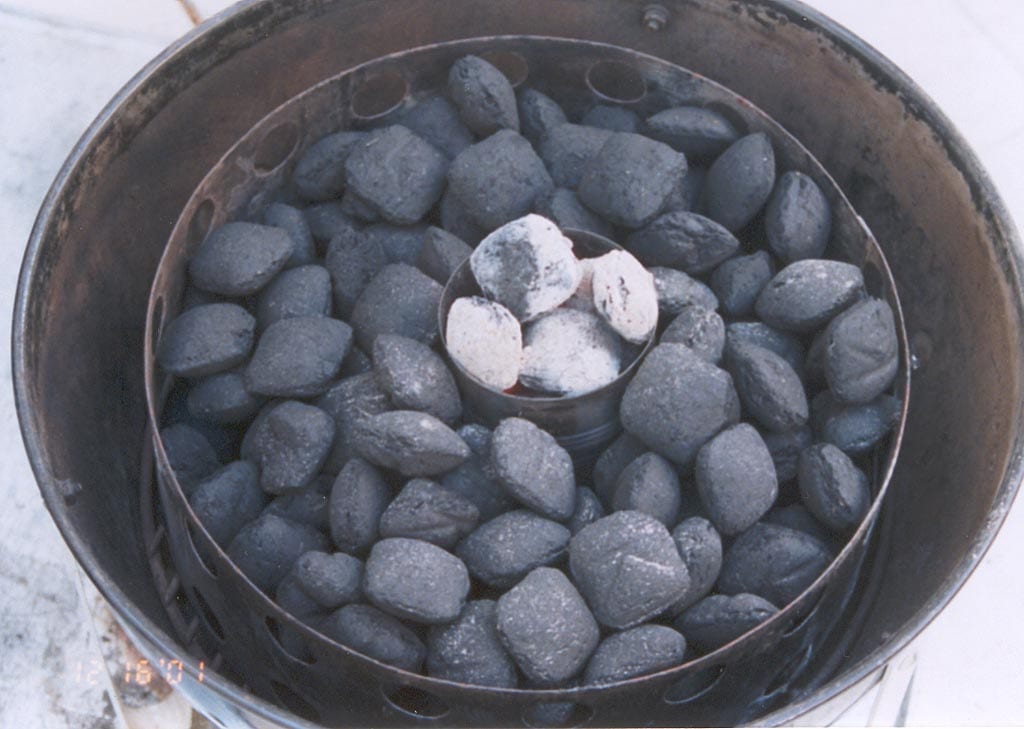
Place a small, bottomless coffee can in the center of the charcoal chamber. Fill around the can with unlit fuel. Put hot coals inside the can, then carefully remove using a pair of channel locks and heat-resistant gloves. A photo of this approach is shown here. Thanks to Bruce Kennedy for suggesting this method on The Virtual Weber Bulletin Board.
Minion Method – Weed Burner
Today, instead of using a chimney starter to light a few briquettes, Jim Minion simply hits the unlit charcoal with a weed burner or propane torch to get a few burning, then assembles the cooker, adds meat, and starts monitoring the pit temp and vent settings.
“Mini” Minion Method
For shorter cooking sessions, follow the Minion Method steps described at the top of this page, but only partially fill the charcoal chamber with unlit charcoal, then add 20 lit coals on top. This works well for 6-8 hour cooks.
Modified Snake Method
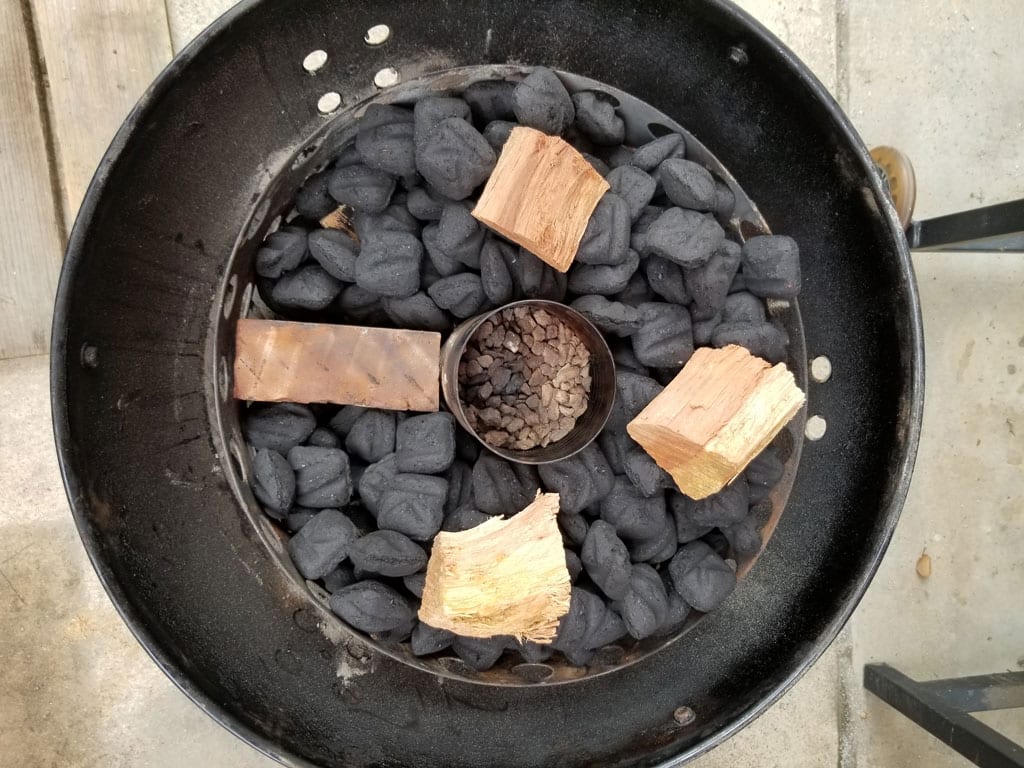
The snake charcoal method is a popular way to fire a Weber kettle for low & slow barbecue, using rows of layered briquets and smoke wood arranged in a circle around the perimeter of the charcoal bowl. Light one end of the snake and the fire burns slowly until it reaches the other end.
This modified snake method, shown here in a 22.5″ WSM, uses a piece of firebrick as a separator between the start and end of the snake. The coffee can in the middle keeps the fire moving in a circular direction; the gravel inside stabilizes the can while pouring briquets around it. Several fist-sized chunks of smoke wood are buried under the charcoal and placed on top. Light a small amount of charcoal, pour it on one end of the snake, and away you go. Leave the lid vent open 100% during the cook, start with all three bottom vents 50% open and adjust as needed to maintain around 250°F.
Thanks to David Orona for sharing this method and photo.
Waterless Cooking Tips
Variations using no water in the water pan result in even longer burn times, since no energy is spent heating water. However, no water means potentially higher cooker temperatures, so the amount of fuel you start with and the vent settings become critical. Even small changes in settings can result in large temperature swings, so be careful.
- If using the Standard Method for 225-250°F cooking, fire-up less fuel than you would normally, but otherwise follow the method as described. Once the cooker is assembled, the temperature will hover at 350-450°F. Keep the bottom vents closed and add lots of cold meat straight from the refrigerator to drive the cooker temperature down to your target temp.
- If using the Minion Method, start with the bottom vents set to 50% open and monitor the temperature carefully throughout the cook.
Adding Smoke Wood To The Fire
Here are some of the ways that people add smoke wood to the fire.
By the way, don’t bother soaking wood chunks before use. It’s not necessary as long as you’re using decent-sized chunks, and the water doesn’t penetrate seasoned wood very much, anyway.
Place Smoke Wood On Top Of Hot Coals
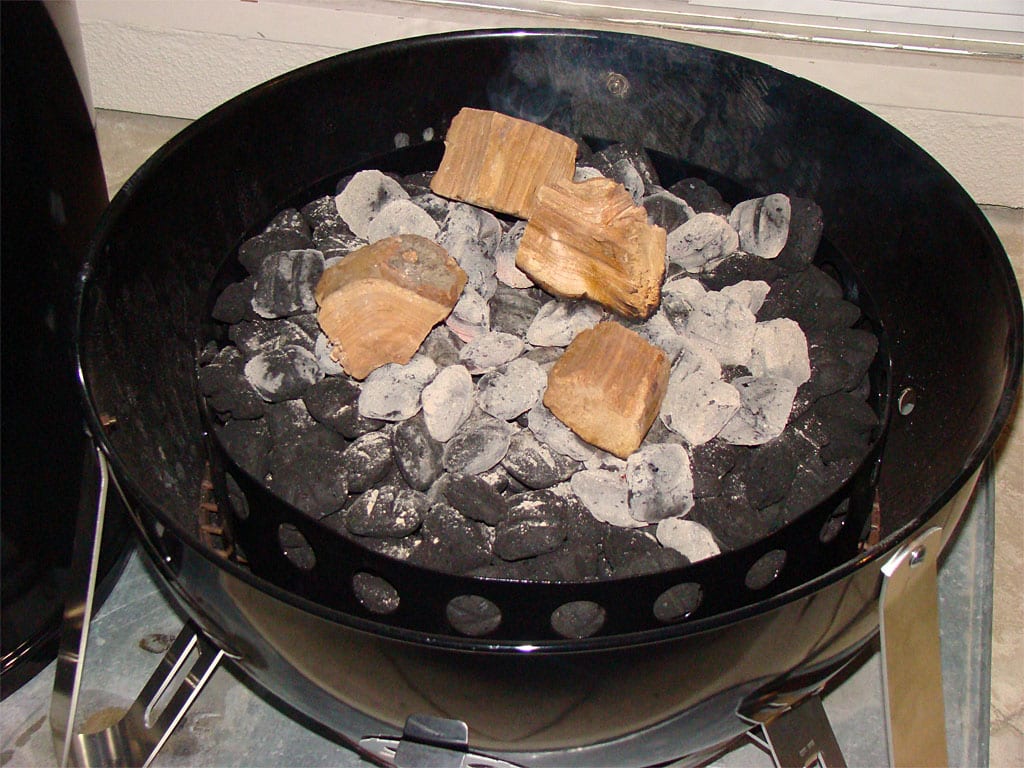
This is how I add smoke wood when firing-up my WSM using the Standard Method. Distribute the wood chunks evenly over the surface of the lit charcoal through the access door after putting the meat in the cooker. This keeps you from getting blasted with smoke while adding the meat, getting the probe thermometer setup, etc. If using the Minion Method, make sure some wood touches the hot coals to start generating smoke right away.
Bury Smoke Wood In Unlit Charcoal
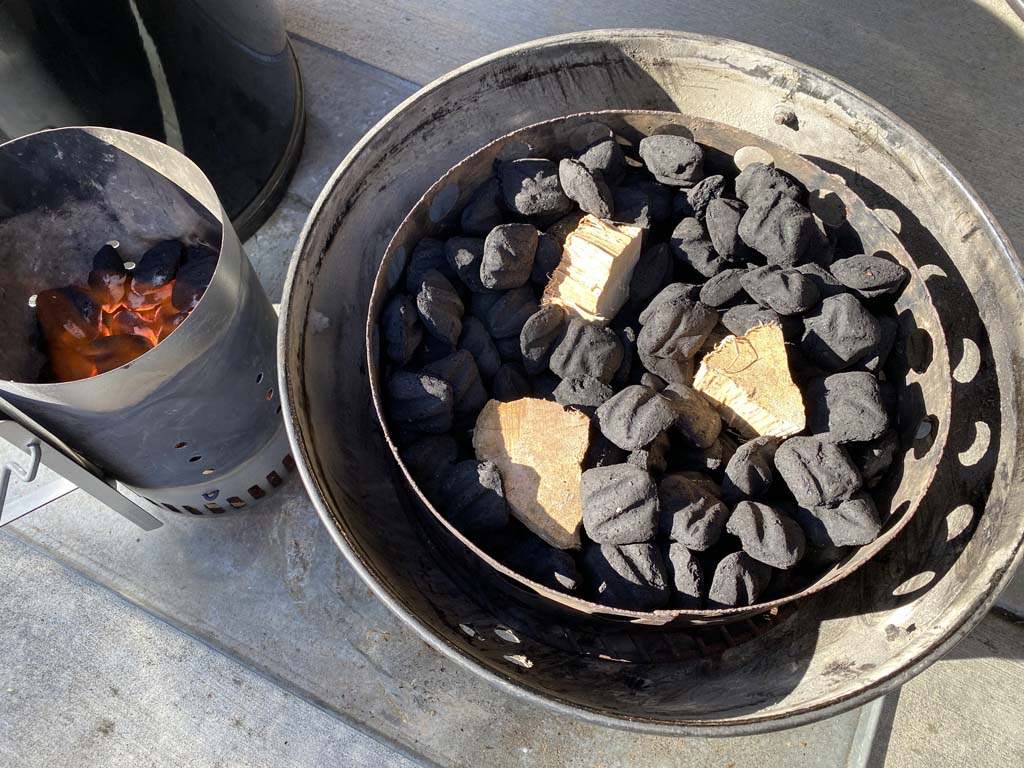
This technique is only possible when firing the cooker using the Minion Method. Bury wood chunks throughout the unlit fuel so the tops of the chunks are exposed. Distribute the hot charcoal evenly over the unlit fuel, making sure some of the coals touch the smoke wood to start generating smoke right away.
Layering Charcoal And Wood Chips
I don’t advocate the use of wood chips, because I think chunks burn longer and more evenly. However, some people put down a layer of charcoal in the bottom of the chamber, then a layer of wood chips, a layer of charcoal, a layer of wood chips, and so on until the chamber is filled to the top. Light using the Minion Method.
Using Lump Charcoal
All of the fire-up methods described in this topic will work using lump hardwood charcoal instead of briquettes. However, there are a few things to keep in mind when using lump.
Lump charcoal is a natural product that is inconsistent by nature. It tends to burn very hot for a while, then drop off in temperature. It does not burn as long as briquettes, and performance may vary from one batch or variety of wood to another. As a result, you must pay careful attention to vent settings to make sure the fire does not get too hot. Otherwise, you’ll be fighting to bring the cooker down to your target temp. Also, you may have to add more fuel to the cooker sooner than if you use briquettes.
For longer burn times, make sure that lump charcoal is packed tightly into the charcoal chamber. Break very large pieces into more manageable chunks, and give the charcoal chamber a shake to help the lump settle and eliminate voids.
For methods to prevent small pieces of lump charcoal from falling through the charcoal grate, visit the Charcoal Grate Modifications page.
Using Leftover Charcoal
You can save leftover charcoal and use it the next time you barbecue. Run tongs through the charcoal to remove the ashes, or wire the charcoal chamber to the charcoal grate and use it as a sifter to remove the ashes.
I would suggest storing leftovers in a separate charcoal bag. Next time you cook, lay down a bed of fresh charcoal first followed by leftover charcoal on top. This ensures that almost all of your leftover charcoal gets consumed during the cook and is not carried over to subsequent cooks.
These two videos demonstrate how to wire the charcoal chamber to the charcoal grate and how to effectively light your leftover charcoal in a chimney starter.
Using Wood Chunks Or Logs Instead Of Charcoal
The WSM is designed to use charcoal as its fuel source. Occasionally, someone notices that other cookers are fired using split logs and attempts this in the WSM. Wood chunks or logs can be used, but with considerable effort, inconvenience, and expense. Wood must be burned down into coals before cooking can begin, and often it doesn’t burn as hot as charcoal. More wood must be added throughout the cooking process, causing wide fluctuations in cooker temperature. Wood can be expensive, unless you have free or cheap access to seasoned split logs, while charcoal is relatively inexpensive. Most people only try this once and go back to charcoal.
Photo of modified snake method: 2020 by David Orona


