Summary
- Choose a brisket flat with even thickness across the end of the meat.
- Trim the fat side to 1/8″. Remove any portion of brisket point remaining on the flat, if any.
- Dry-cure for seven days in the refrigerator.
- Rinse and soak for three hour before cooking, then apply the cooking rub.
- Smoke at 250-275°F to 165°F internal temperature.
- Wrap in foil and let rest in an empty cooler for two hours, then slice thin across the grain.
- Alternatively, refrigerate overnight, then steam to 203°F internal temperature and slice thin across the grain.
 I’ve loved pastrami for years but never gave much thought to making it myself. I figured that I could buy good pastrami at the store for less money than it would cost me to make it, so why bother? Well, I found that I could make pastrami that gave the store-bought stuff a run for its money, and it was a fun process as well. If you like pastrami and know how to cook a brisket, you might want to give it a try, too.
Here are some pictures I took March 2005 and November 5-13, 2017 when I cured and smoked pastrami on the Weber Bullet. This isn’t exactly barbecue by traditional standards, but it is one more great use for your WSM!
Select & Prepare The Brisket
Pastrami is made by curing a beef brisket or bottom round for several days, then cooking it slowly to an internal temperature of 160-165°F. The pastrami you see in the grocery store is usually made from bottom round, which yields a large, round slice of meat. The pastrami you find at the best delicatessens is made from brisket, which yields a long, narrow slice.
When making pastrami, I like to use a USDA Choice brisket flat with a 1/8″ fat cap.
It’s important to leave no more than a 1/8″ layer of fat, otherwise the curing agent may not penetrate the meat fully, leaving an uncured area in the middle of the brisket.
When choosing a brisket:
- Select a brisket flat weighing 5-8 pounds, with a layer of white, hard fat that you can trim down to 1/8″. Many brisket flats at the grocery store are “super-trimmed” by the butcher, leaving no fat cap at all, so ask for an untrimmed flat still in the Cryovac with the fat cap intact. That 1/8″ layer of fat will help retain moisture in the brisket during cooking, and will add flavor when eaten.
- If you can, choose a brisket flat that is fairly thick, and with even thickness across the end of the meat. If the brisket is too thin, especially at the edges, you’ll end up with pastrami jerky, which might sound appealing, but it’s not.
I do not recommend using a whole brisket. The thickness of a whole brisket requires that a liquid curing solution be injected every 1″ or so throughout the entire brisket, in order for the meat to cure all the way through. This is easily done in a factory using specialized equipment, but it’s a hassle to do in the kitchen using a single cooking syringe. By using a brisket flat, you can use the dry cure method described below and avoid having to inject the meat altogether.
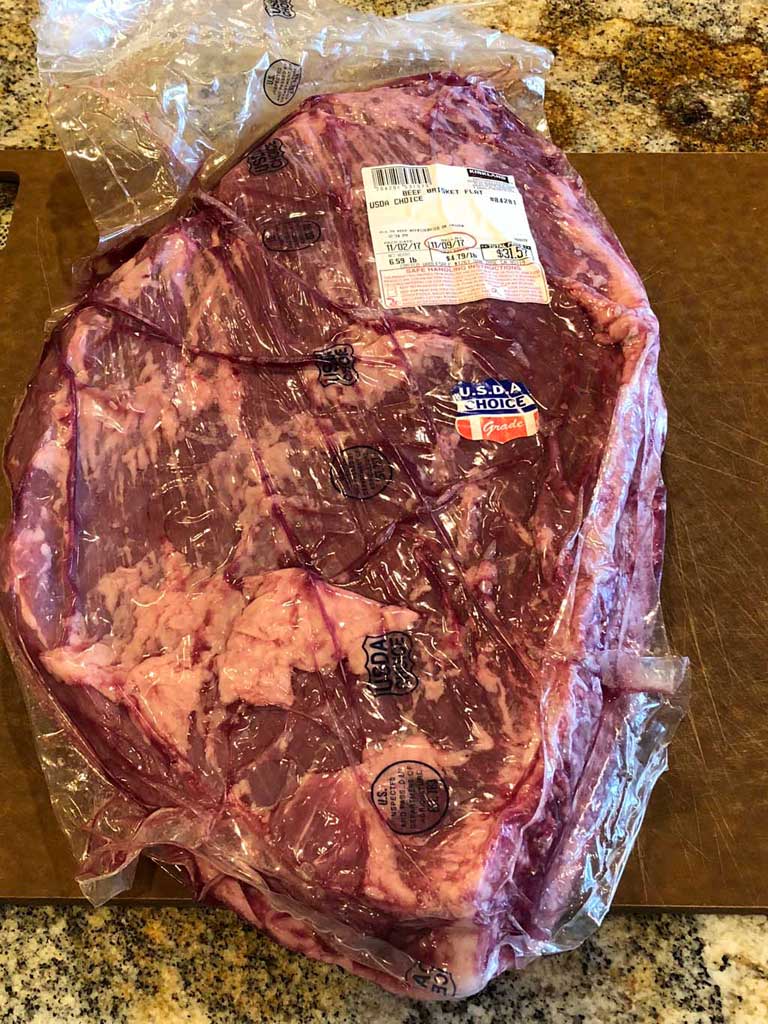
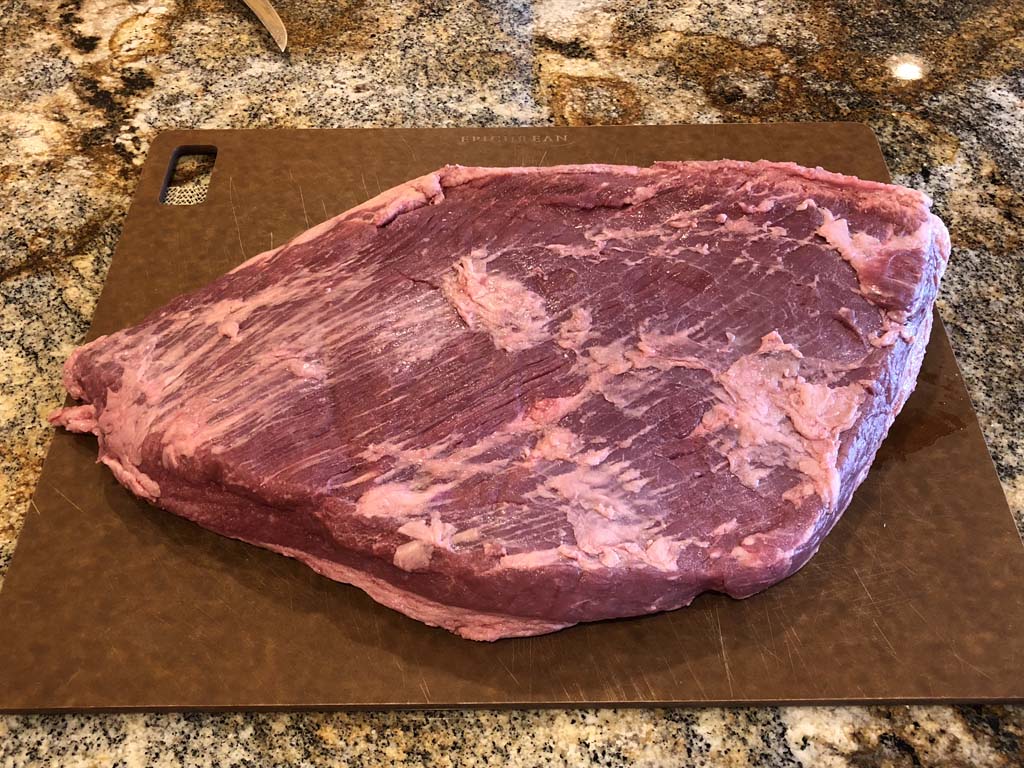
Here’s the brisket flat I purchased in Cryovac in November 2017. It was USDA Choice and weighed 6.59 pounds before trimming.
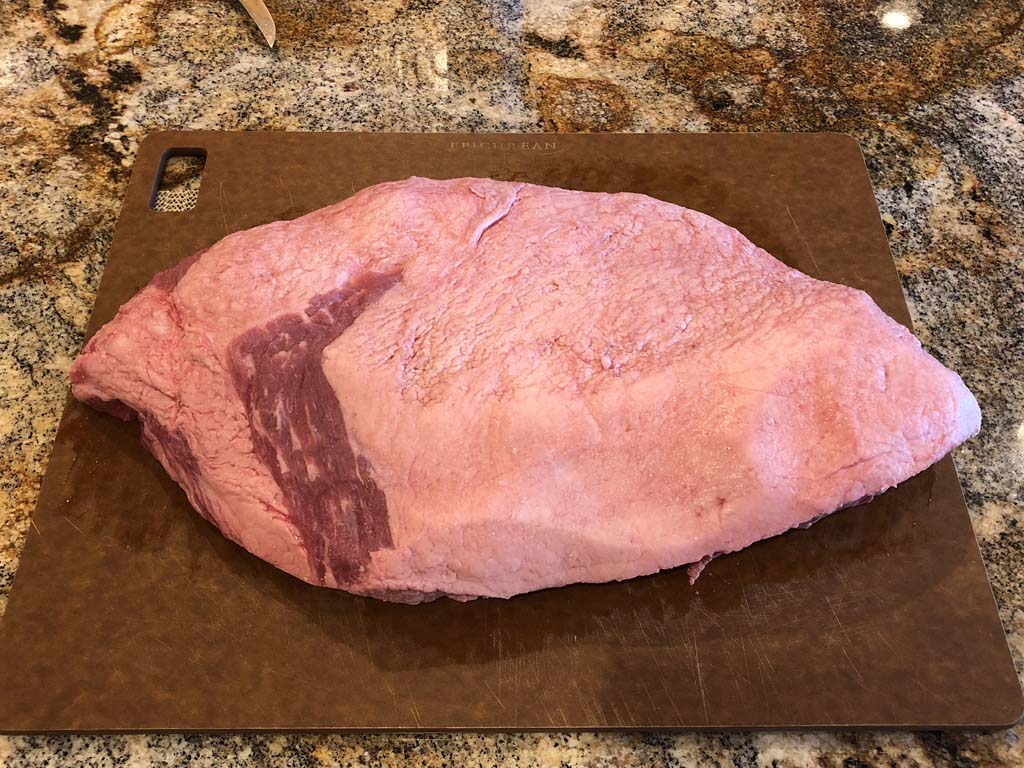
These photos show the fat side of the brisket before and after trimming to about 1/8″ fat. Note there’s a small area of point still attached on the left side of the brisket flat that I removed. I nicked the flat in a few spots in the middle and on the right, exposing the lean meat. Not perfect, but good enough.
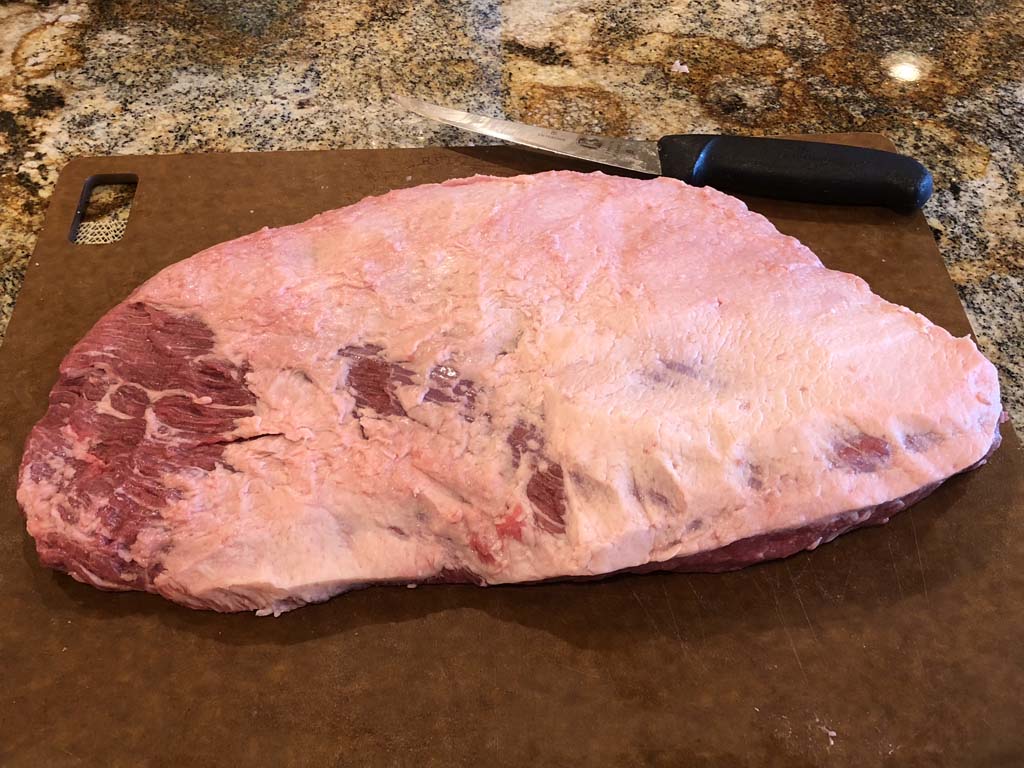
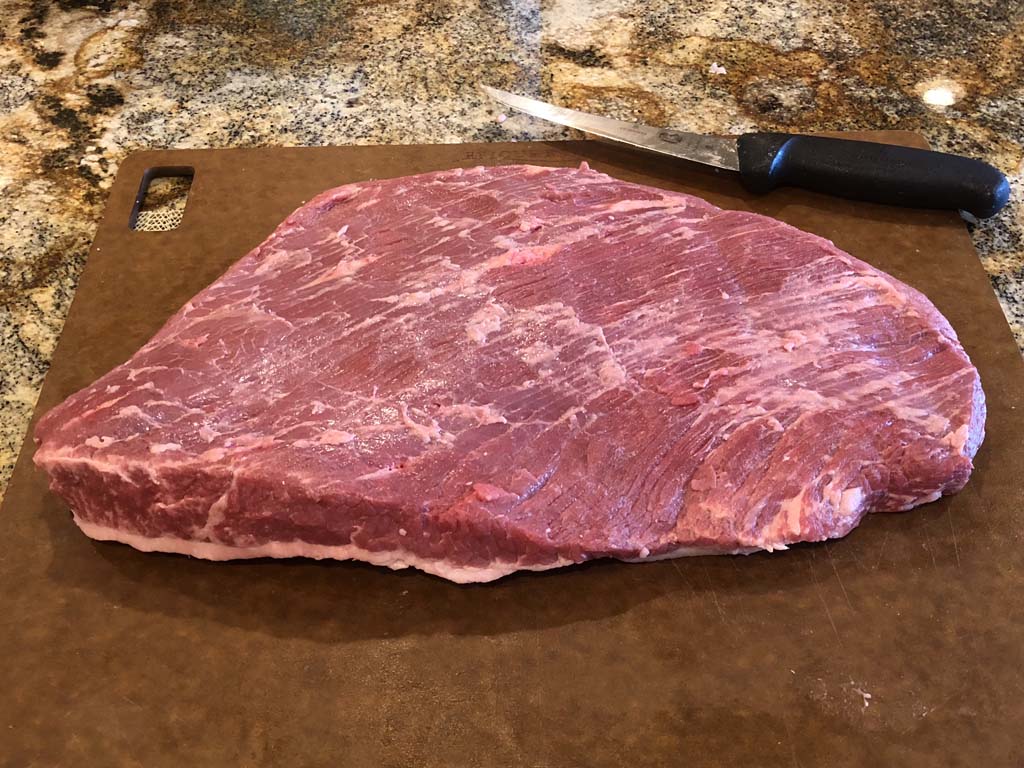
These photos show the lean side before and after trimming of surface fat and silverskin. I also trimmed the rough edges of the brisket to make it more aerodynamic.
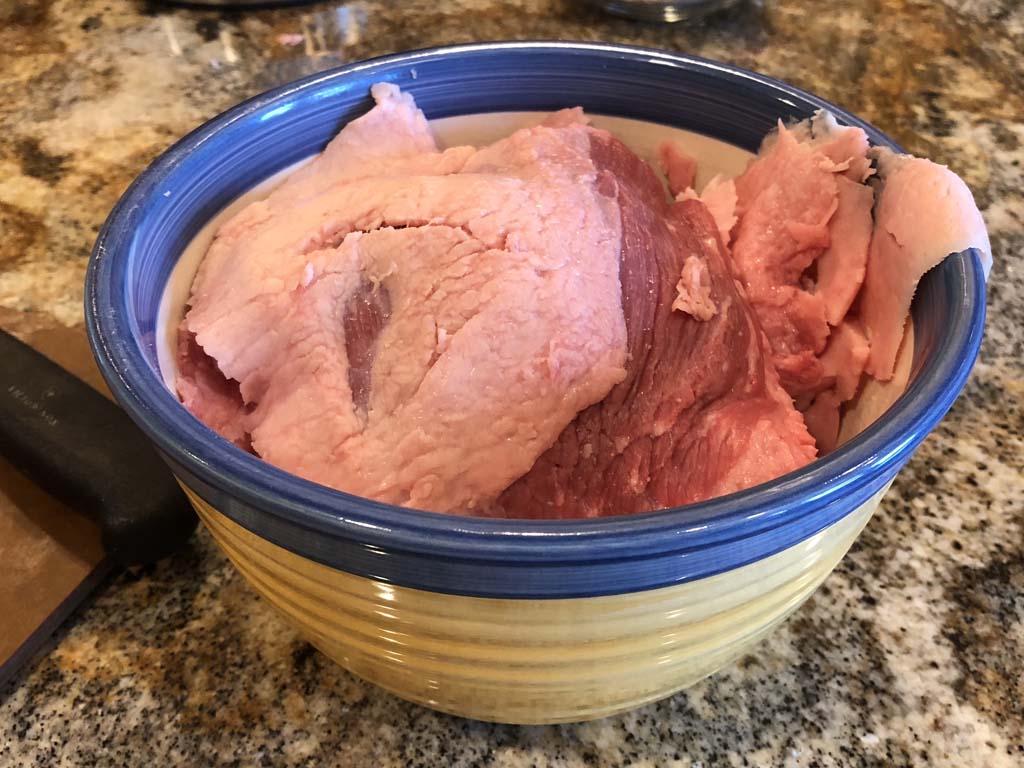
After trimming, I was left with a 4.54 pound brisket flat ready for curing. These photos show the 1.91 pounds of scrap I trimmed off, including the small portion of brisket point.
 Apply The Dry Cure
To transform a fresh brisket flat into pastrami, you must cure the meat. Sodium nitrate is the primary ingredient that creates the distinctive color and flavor that we associate with cured meats.
In commercial applications, a liquid curing solution is injected into the meat, then the meat is refrigerated and allowed to soak in the solution for several days before seasoning and cooking. At home, however, it’s much easier to use a dry curing method in the refrigerator, and you’ll get the same great results.
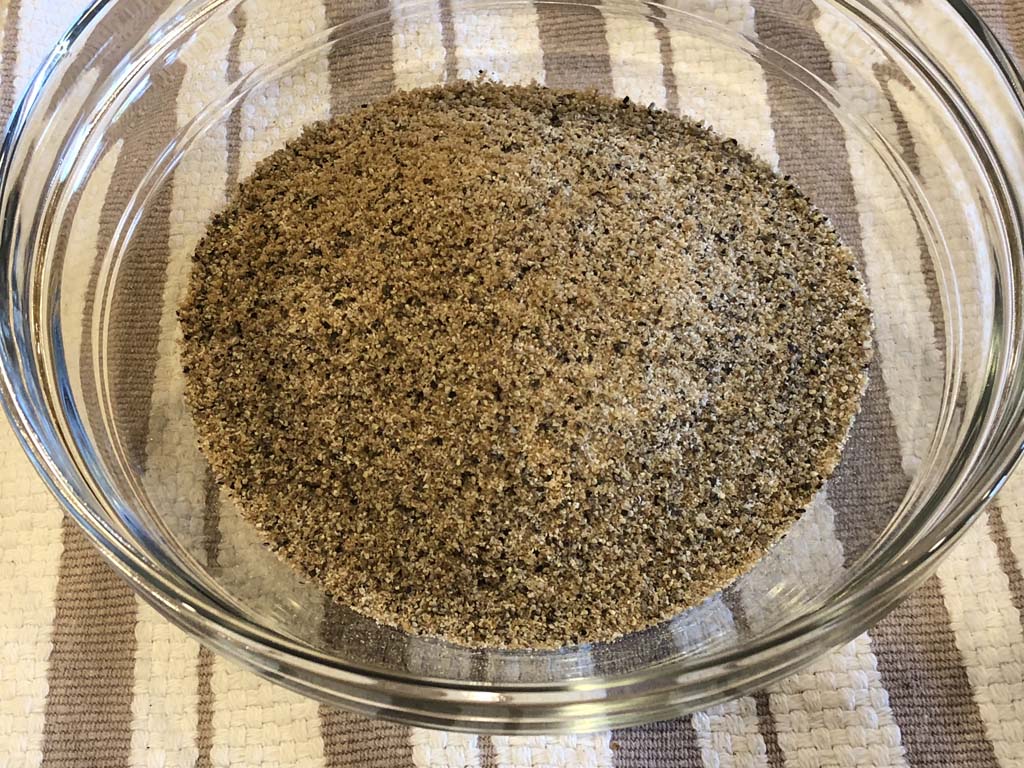
Here’s the recipe:
Pastrami Dry Cure
- 1/4 cup Morton Tender Quick
- 1/4 cup dark brown sugar, packed
- 1/4 cup freshly ground black pepper
- 2 Tablespoons granulated garlic powder
- 2 Tablespoons ground coriander
Combine all ingredients and mix thoroughly. Makes enough cure for one brisket flat.
Black pepper and coriander are the primary flavors that we associate with pastrami. Morton Tender Quick (salt, sugar, sodium nitrate, sodium nitrite, and propylene glycol) acts as the curing agent and provides salt and sugar to flavor the meat. It can be found at many Wal-Mart stores throughout the U.S. (on the same aisle where salt is sold), and at butcher supply stores and online suppliers like Allied Kenco or Amazon.com.
Pour half of the dry cure on one side of the brisket, rubbing it evenly over the surface and the edges, then repeat on the other side. It will seem like way too much cure to use, but it’s not—use it all.
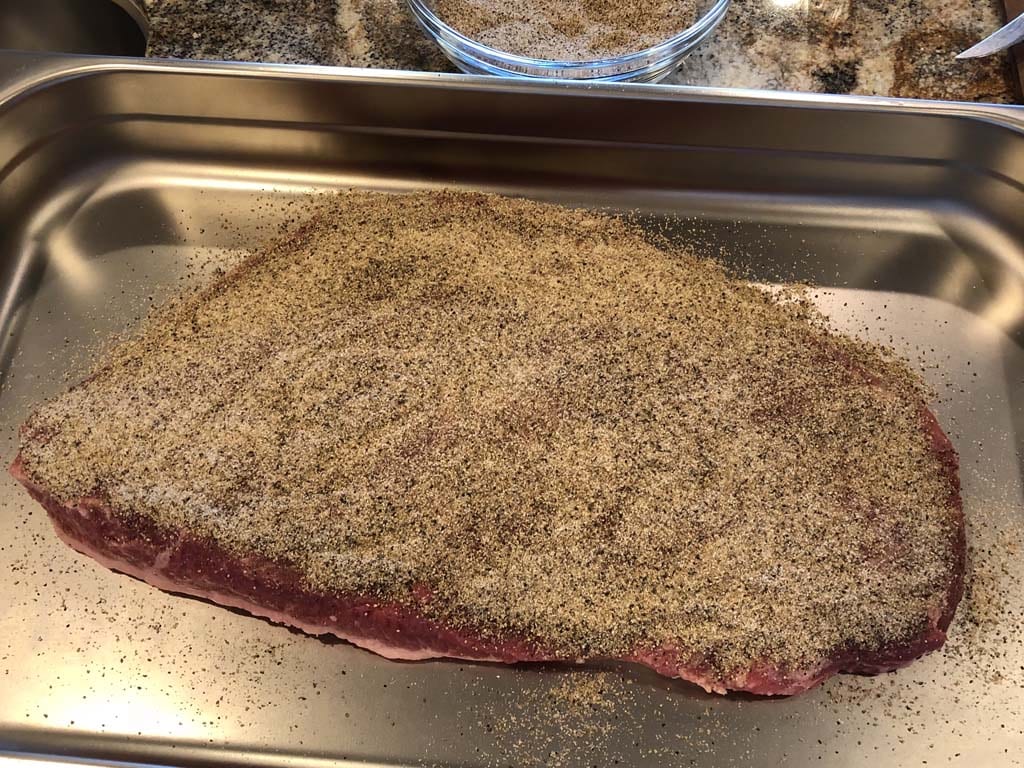
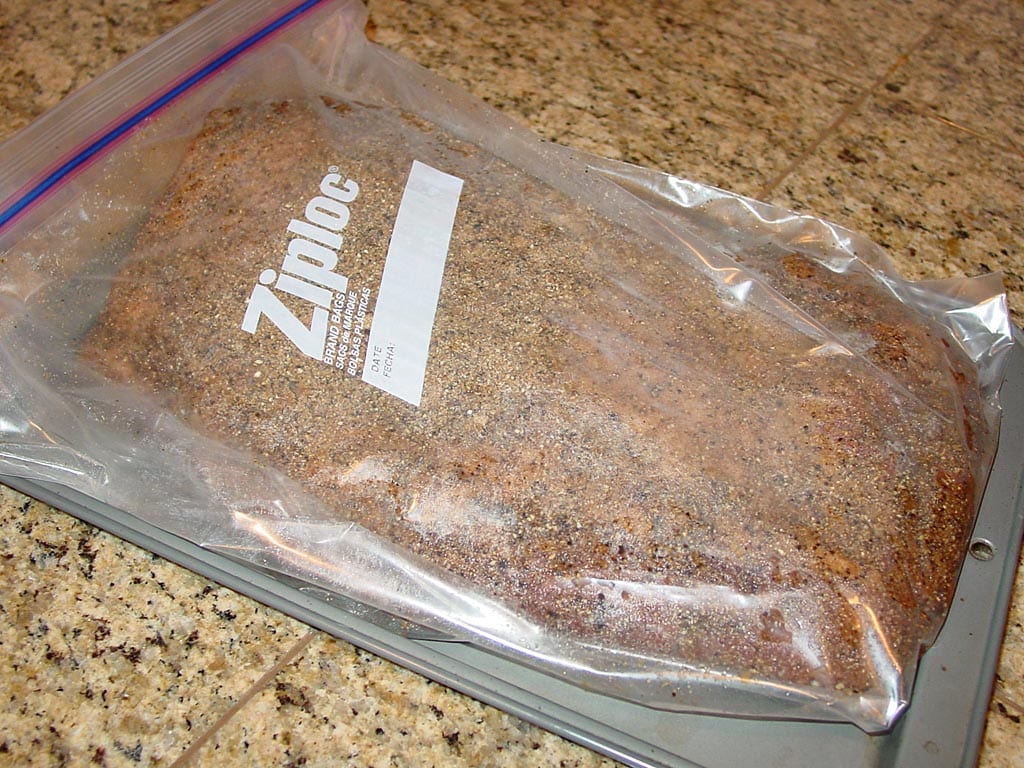
Do not shake off the excess cure. Place the brisket in a 2-gallon Ziploc bag, seal the bag, lay it out flat on a rimmed baking sheet pan, and refrigerate.
Cure The Brisket For Seven Days
Refrigerate the brisket for seven days, turning the bag over twice a day, each time giving it a gentle shake back and forth to mix things up. The turning and mixing helps the meat to cure evenly.
By the end of the first day, you may notice some liquid collecting in the bottom of the bag. This liquid is being drawn out of the meat by the salt in the cure. By the second day, the dry mixture will have turned into a paste covering the meat, and you’ll get a strong, spicy odor coming from the bag. In fact, it will really start to smell up your refrigerator!
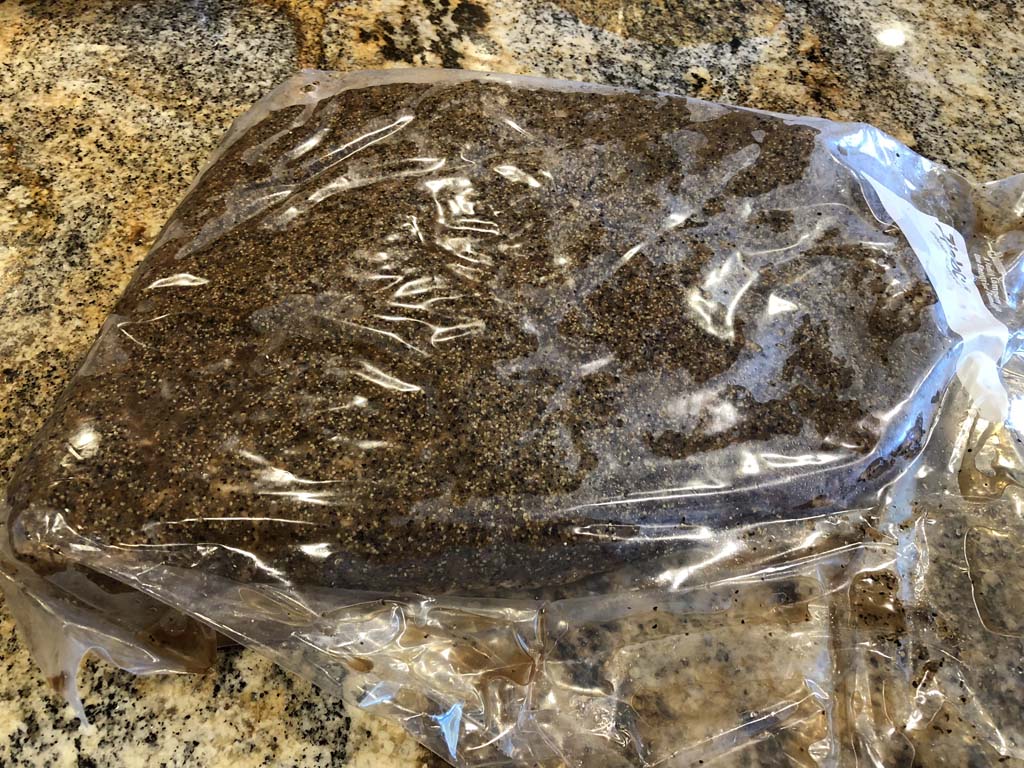
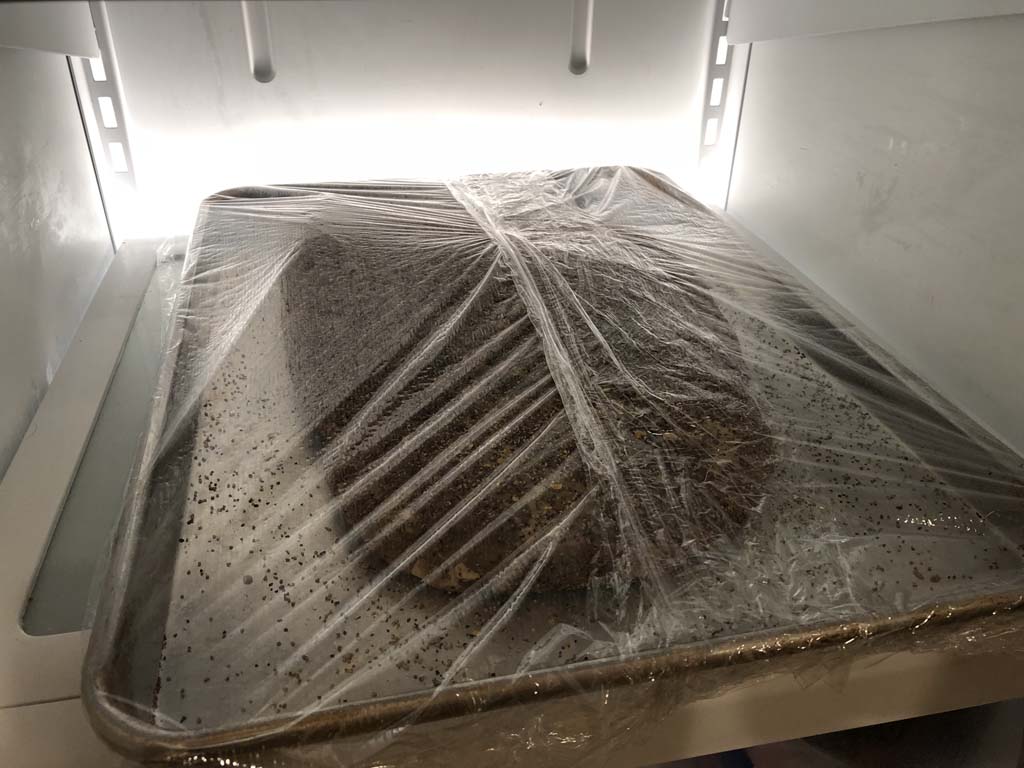
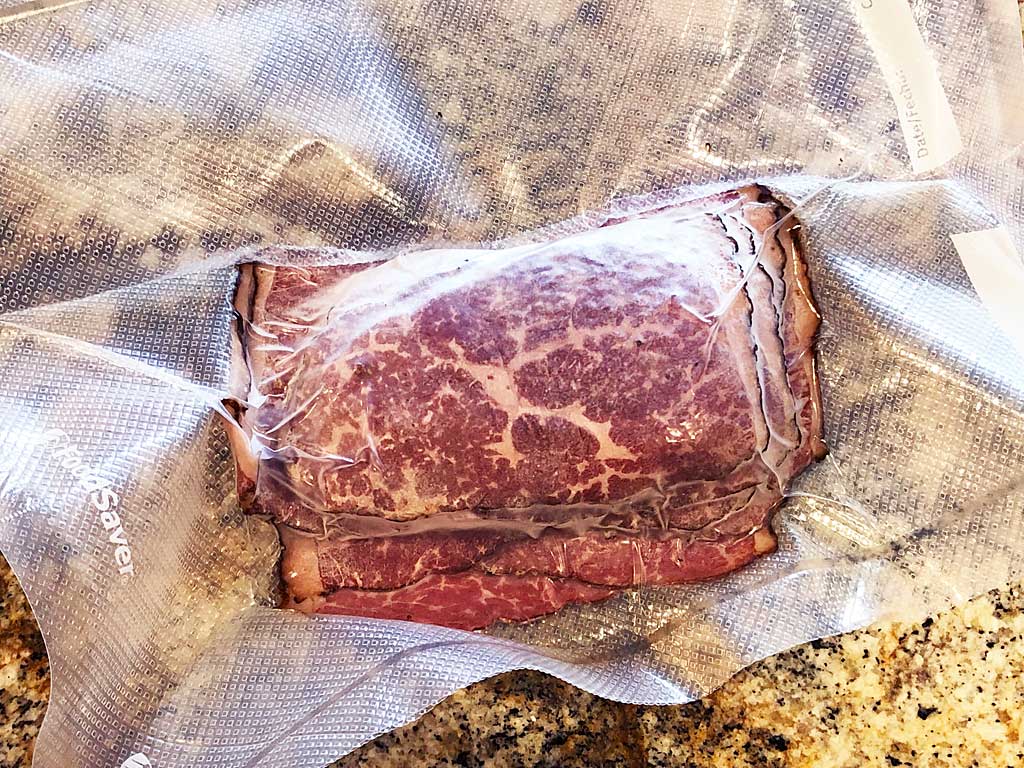
Here’s how the brisket looks in the bag after seven days of curing.
Rinse & Soak The Brisket
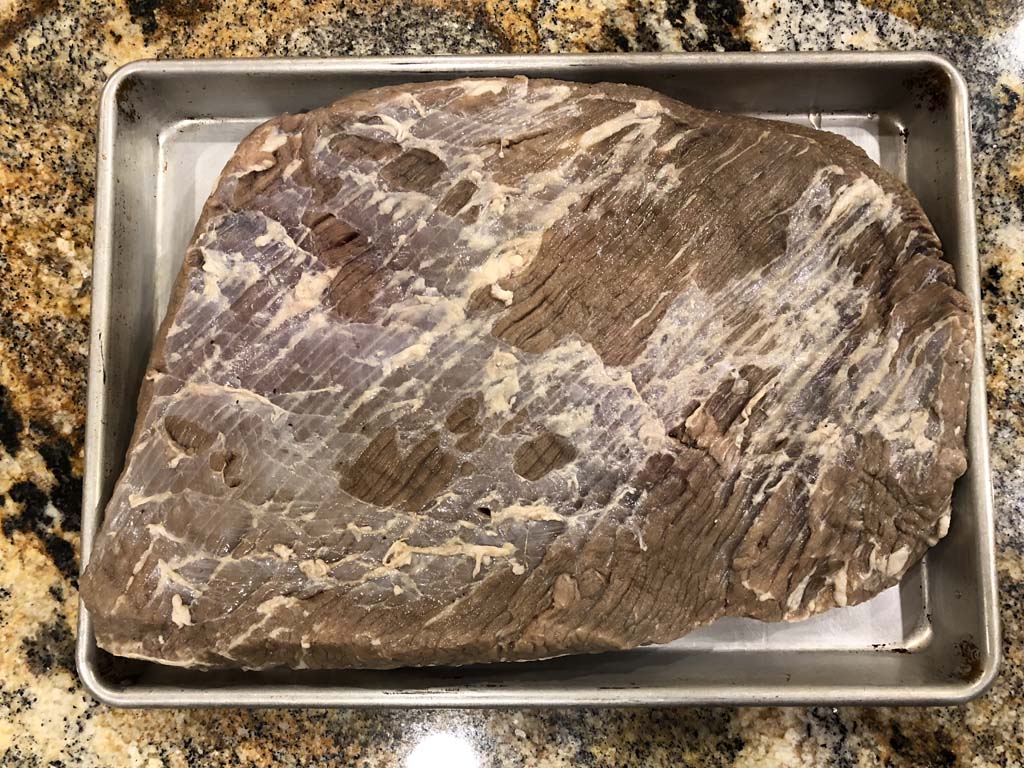
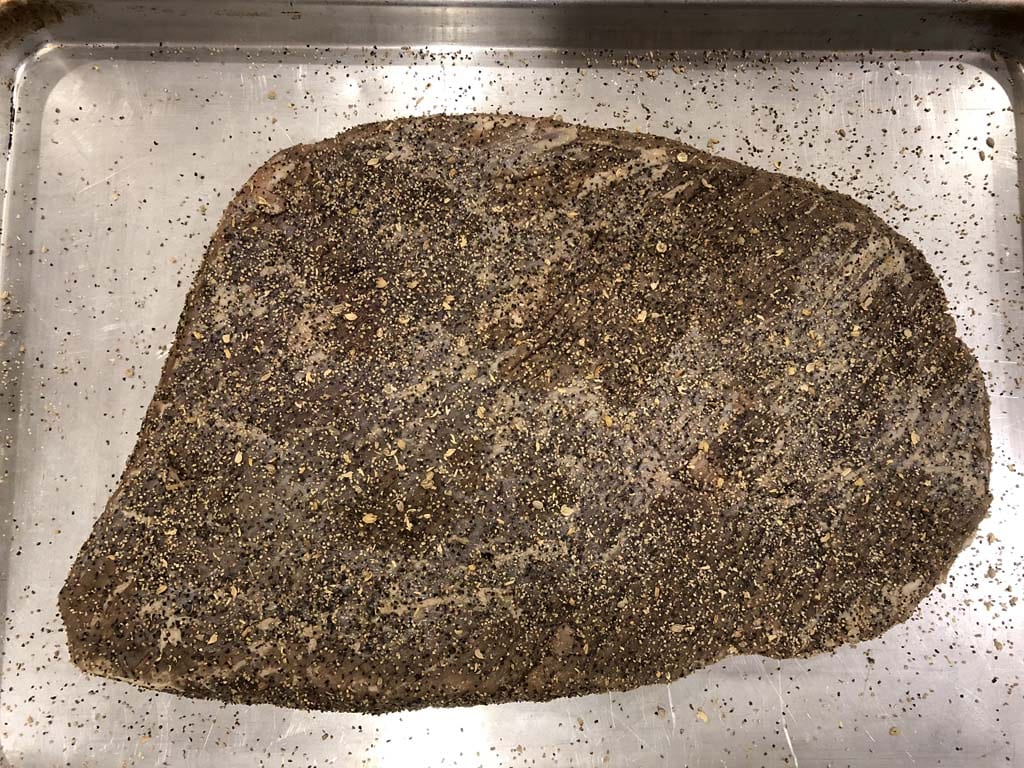
This photo shows how the brisket looks after curing, turning a red-brown color.
Rinse the brisket thoroughly under cold running water. While rinsing, rub the surface to remove as much of the pepper and other seasonings as you can from the meat. You can’t rinse too much.
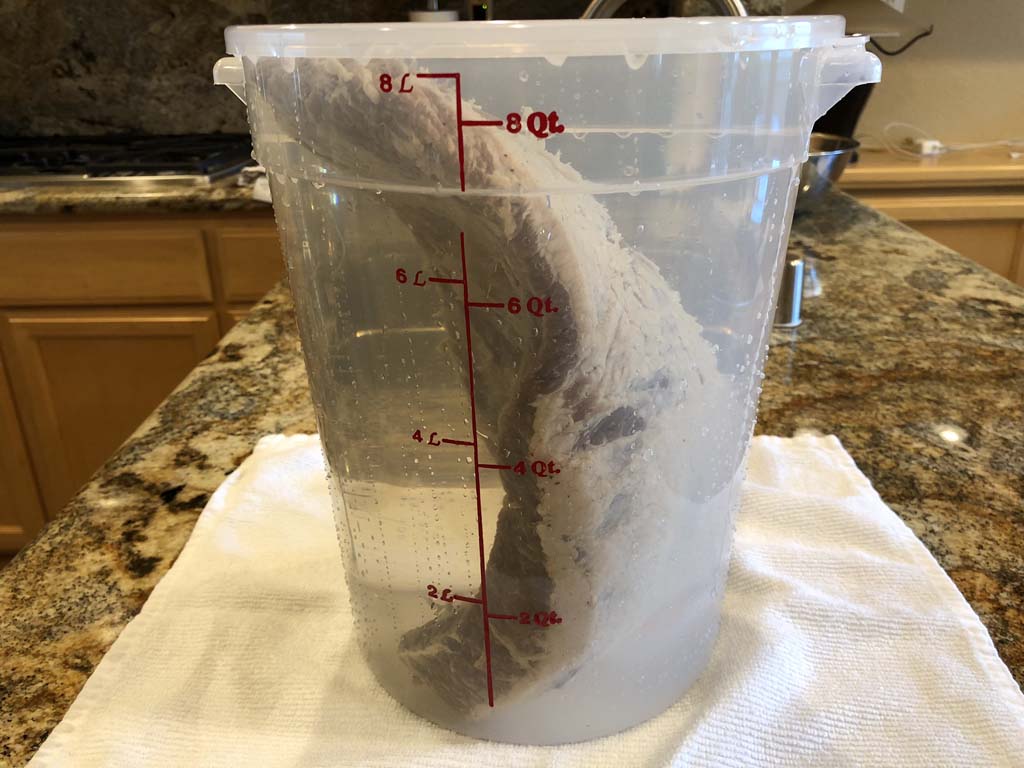
After rinsing, place the meat in a container and cover with cold water. Let the meat soak for 3 hours, changing the water every 30 minutes. This helps reduce the saltiness of the meat.
After soaking, dry thoroughly with paper towels.
Apply The Cooking Rub
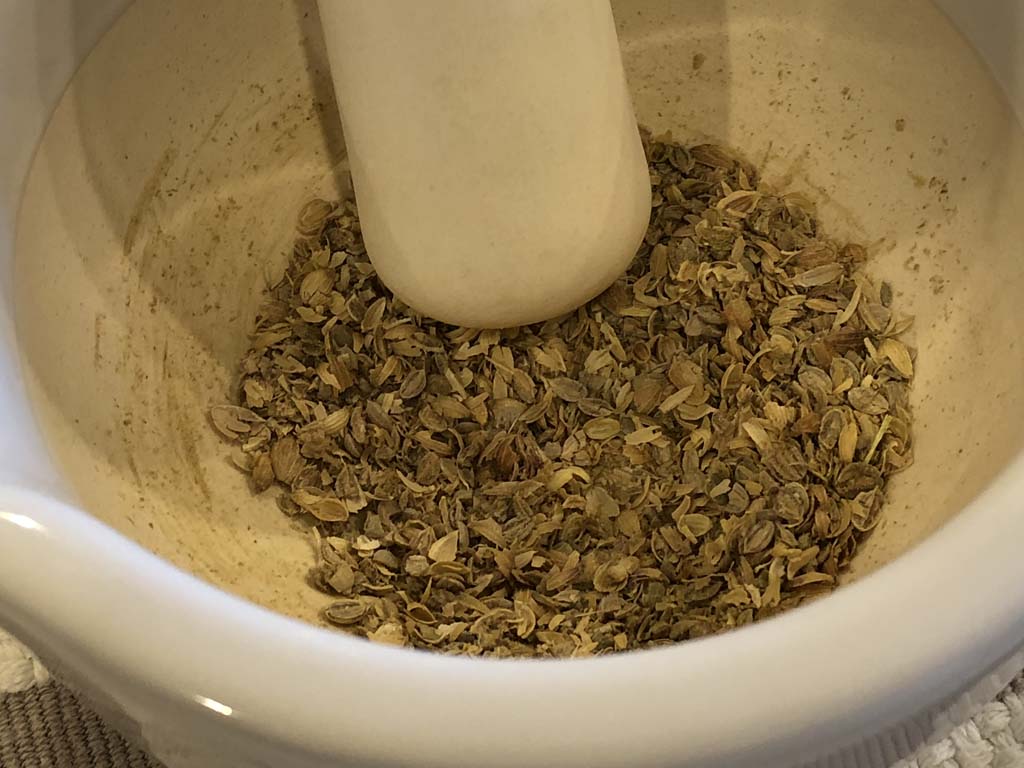
This salt-free rub provides a peppery finish to the smoked pastrami. I like to use a slightly coarse grind of black peppercorns and coriander seeds, because it creates a crusty exterior I like to see on pastrami. You can substitute regular ground coriander if you don’t want to go to the trouble of grinding coriander seeds.
Pastrami Cooking Rub
- 3 Tablespoons freshly ground black pepper, slightly coarse grind
- 1 teaspoon freshly ground coriander seeds, slightly coarse grind
- 1 teaspoon granulated garlic powder
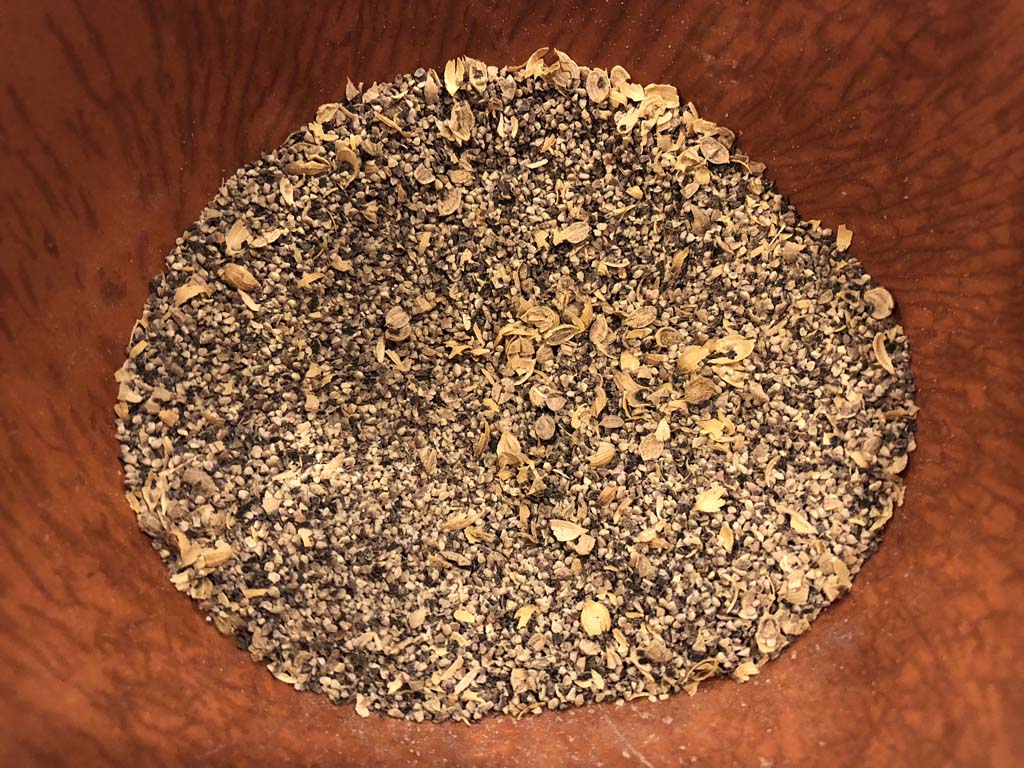
Combine all ingredients and mix thoroughly.
Apply a generous amount of rub to all surfaces of the meat, more than you would for normal barbecue. I used almost all of this rub on my brisket.
Once the rub is applied, put the meat into the cooker immediately or refrigerate overnight.
Fire The WSM
Fire-up the cooker using the Minion Method. Fill the charcoal chamber 1/3 full with unlit Kingsford Charcoal Briquets. Light 20-40 briquettes using a Weber chimney starter and spread them over the unlit briquettes.
Foil the water pan before use for easy cleanup and fill it with cool water. There’s no need to refill the pan during the cook.
Smoke The Brisket
Assemble the cooker and place the meat on the top cooking grate.
Set the 3 bottom vents to 100% open. Open the top vent fully and leave it that way throughout the entire cook.
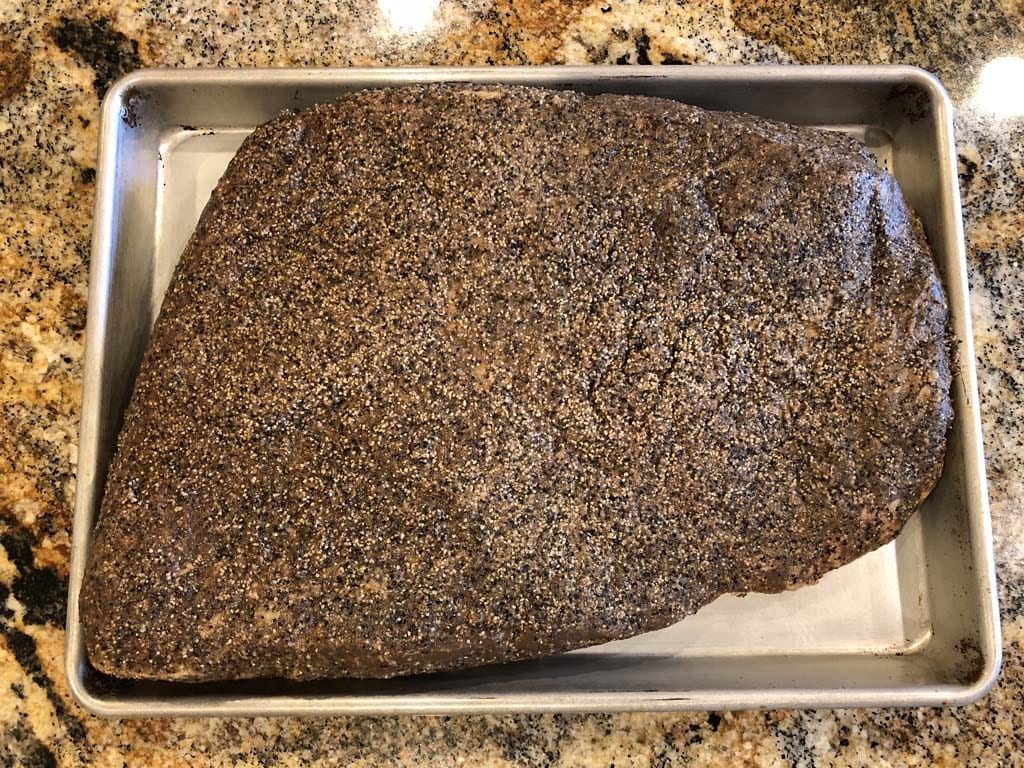
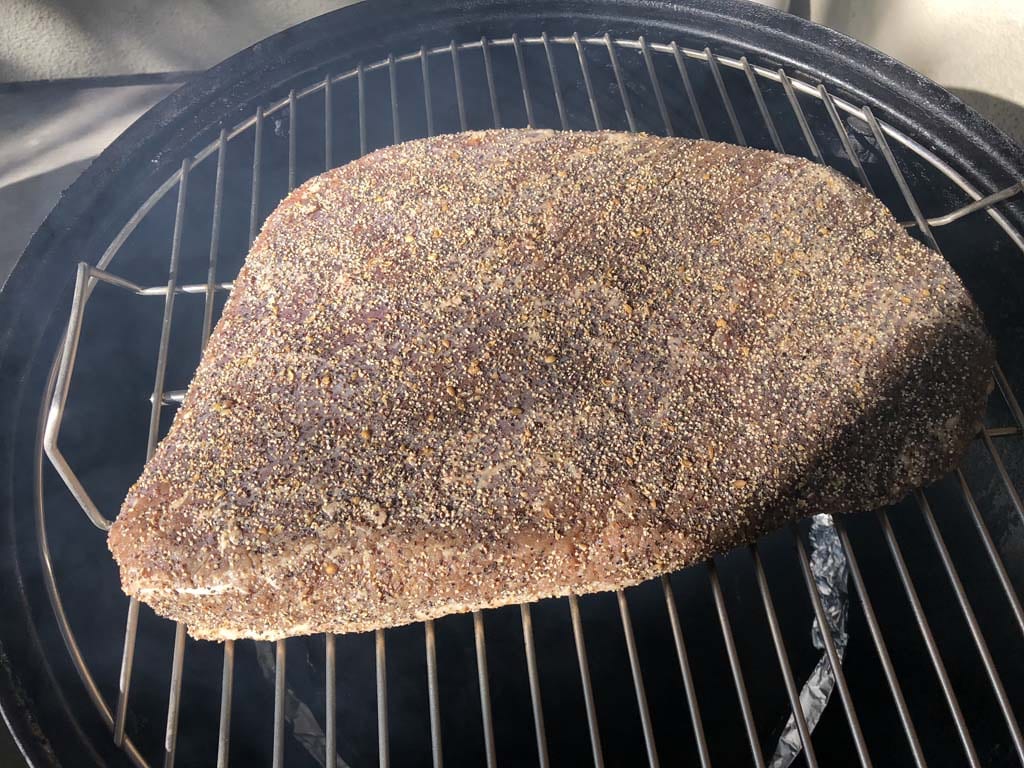
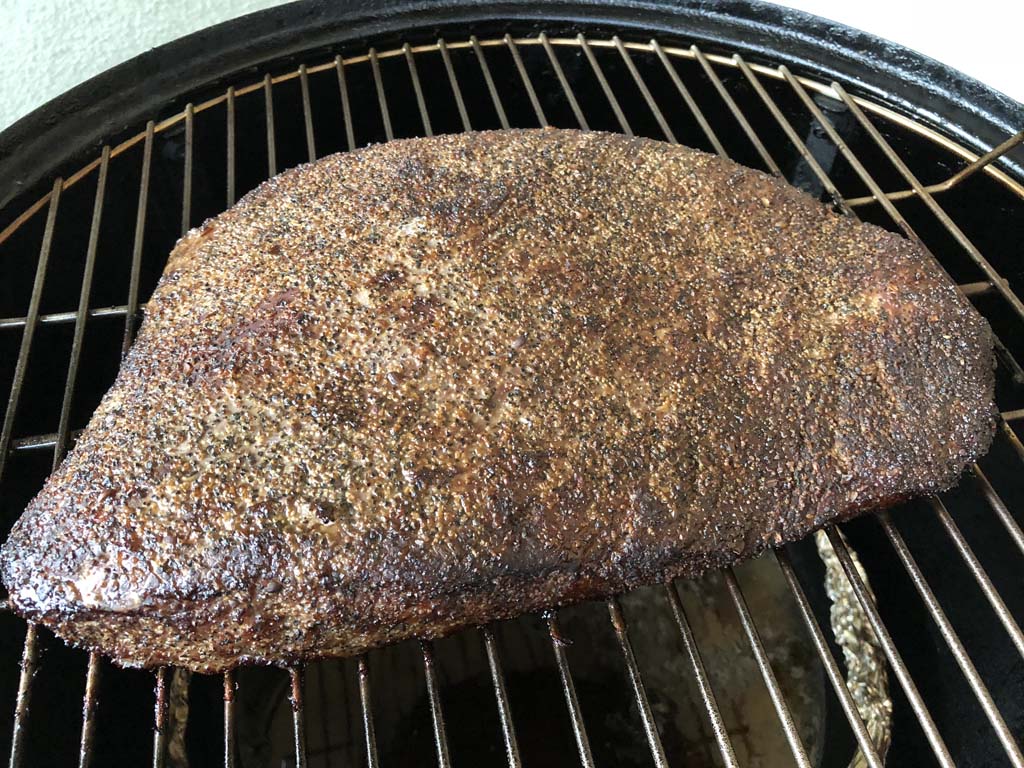
Place the brisket fat-side down on the top grate. The fat layer will help shield the brisket from the heat radiating up from the bottom of the cooker. This photo shows the cured and seasoned brisket going into the WSM.
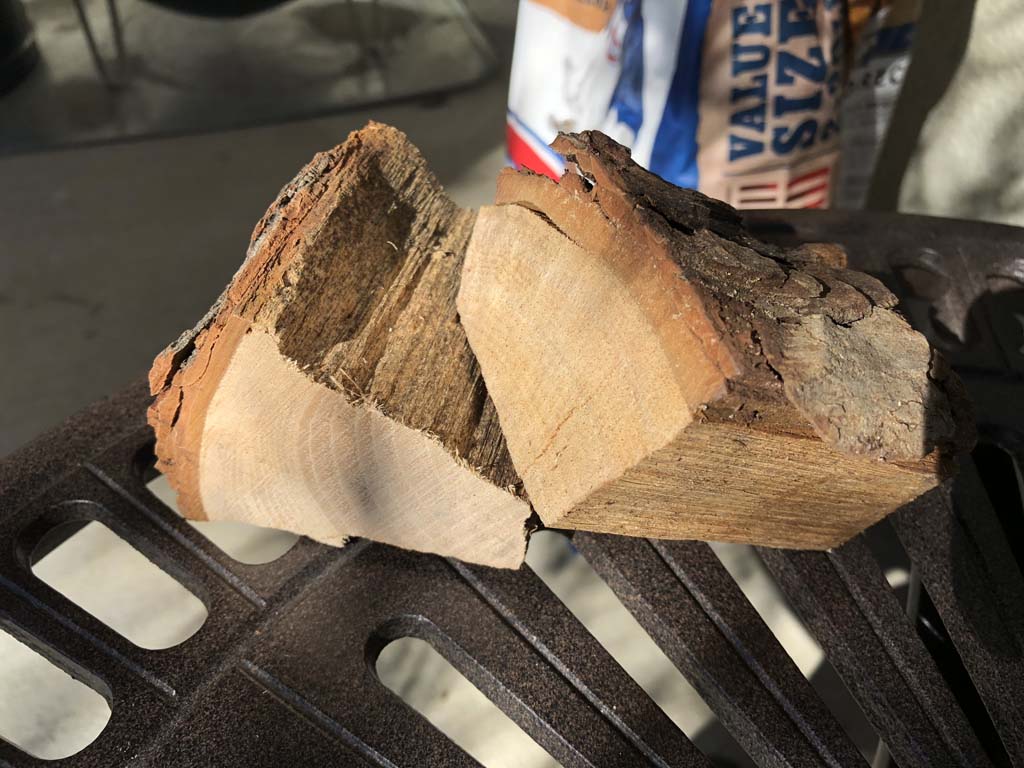
Place two fist-sized chunks of dry pecan wood on the hot coals through the access door. Go light on the amount of smoke wood—you want to impart a moderate smokiness that will compliment, not overwhelm, the flavor of the pastrami.
When the cooker reaches about 250°F, set the 3 bottom vents to 25% open so the cooker settles in at 275°F measured at the lid. Adjust the 3 bottom vents as necessary to maintain this temperature range throughout the cooking session.
Cook the brisket until it reaches an internal temperature of 165°F measured with an instant-read thermometer. It will probably read higher or lower in various locations, depending on the thickness of the meat, so check the temp in several locations and average the results.
The brisket does not need to be turned or basted during cooking, nor does the water pan need to be refilled.
Here’s how the cooker temperatures and vent settings went during the cook:
| Time | Lid Temp | Meat Temp | Vent 1 % | Vent 2 % | Vent 3 % |
| 1:00 pm | – | – | 100 | 100 | 100 |
| 1:30 pm | 245 | – | 100 | 100 | 100 |
| 1:45 pm | 265 | – | 100 | 50 | 50 |
| 2:15 pm | 272 | 142-155 | 100 | 50 | 50 |
| 3:00 pm | 270 | 146-161 | 100 | 50 | 50 |
| 3:30 pm | 275 | 160-165 | 100 | 50 | 50 |
| 4:00 pm | 270 | 165-170 | 100 | 50 | 50 |
Note that the vent percentages represent the way I set the vents at the time indicated.
After 3 hours, this brisket hit 165°F in the thicker spots and 170°F in the thinner spots, so I removed the meat from the cooker.
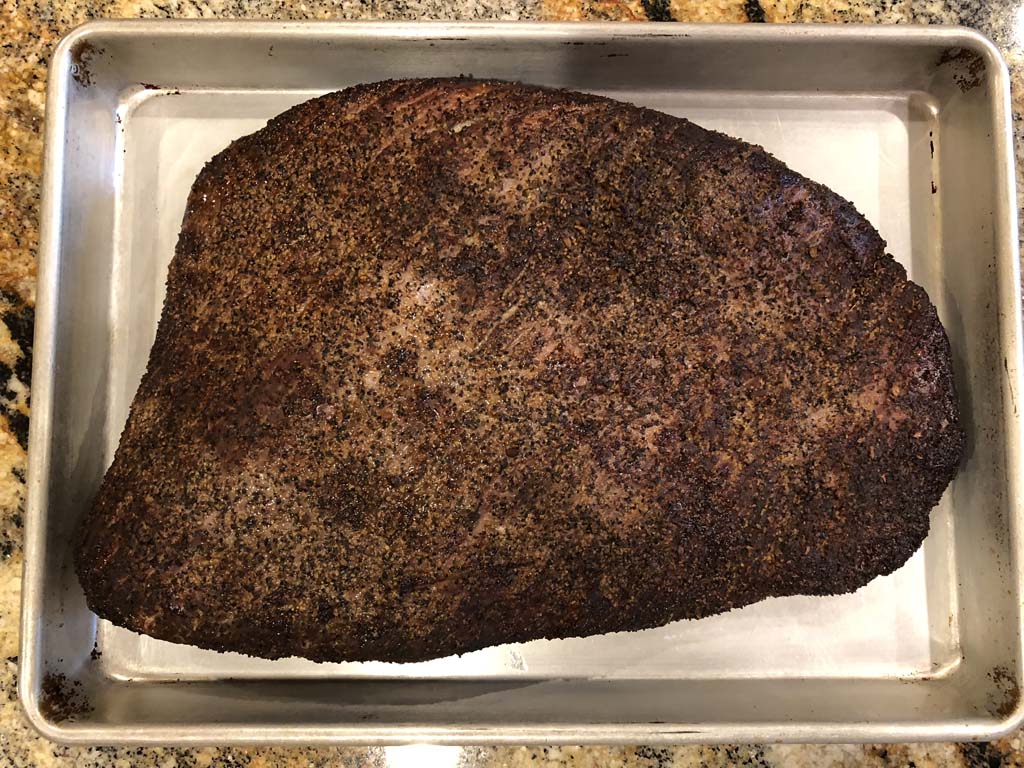
Here’s how the smoked pastrami looked coming out of the WSM.
Let The Pastrami Rest
 Wrap the brisket in two layers of wide, heavy-duty aluminum foil and place it fat-side up in an empty cooler.
Let the meat rest for two hours in the cooler. Carryover heat will continue to cook the brisket, and juices collecting in the foil will reabsorb and redistribute within the meat. Placing the meat fat-side up allows the lean side of the brisket to bathe in the juices, helping to soften the meat.
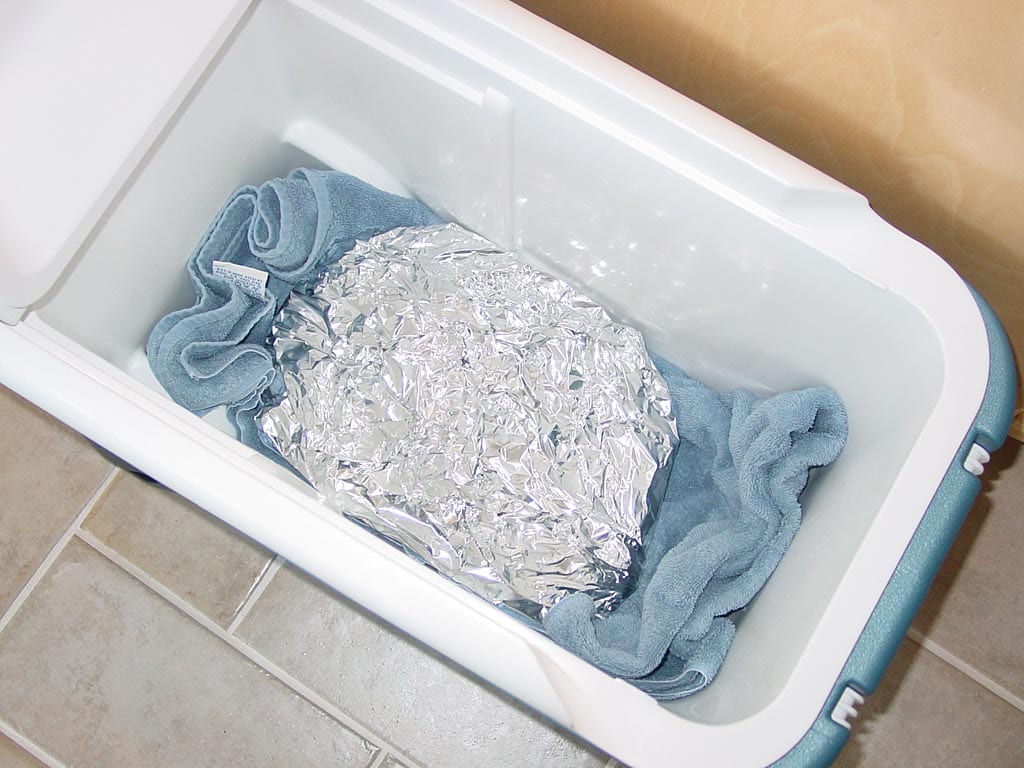
The photo above shows the brisket going into the empty cooler. The bath towel in the bottom helps protect the interior of the cooler from the hot brisket.
You Made Real Pastrami!
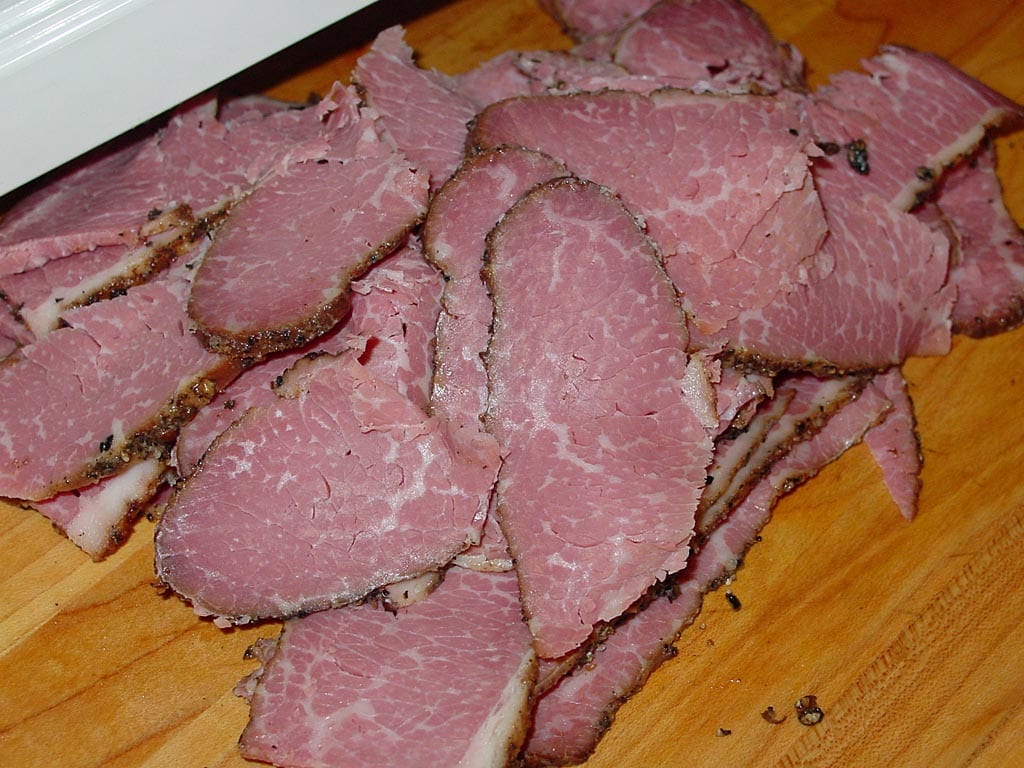
After a two hour rest, slice the meat thin across the grain and eat it immediately in your favorite sandwich. Alternatively, refrigerate the meat overnight and slice it cold the next day.
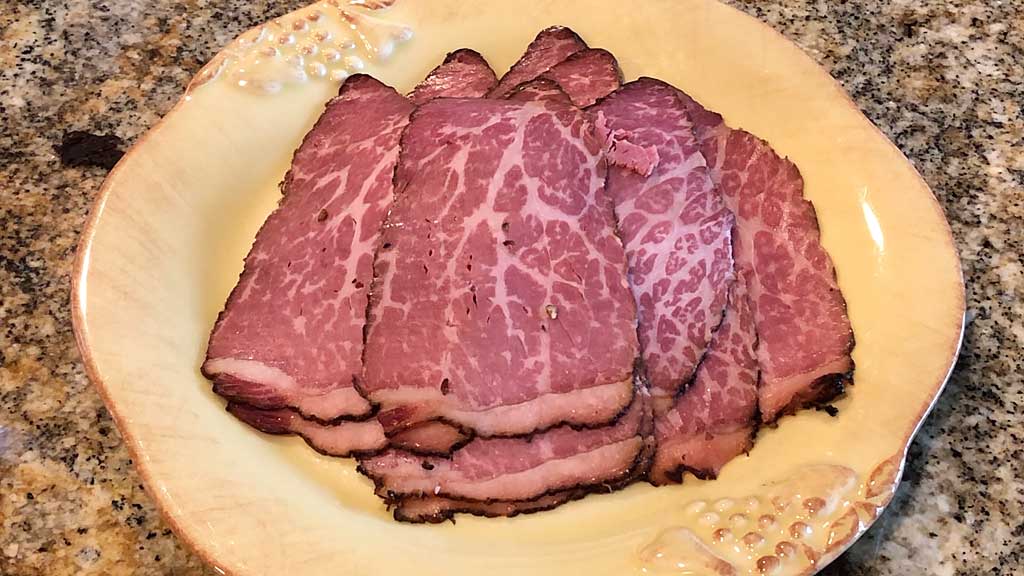
I refrigerated this pastrami overnight before slicing. This photo shows how the pastrami looked when I cut into it. That little 1/8″ layer of fat doesn’t even need to be trimmed away before eating; in fact, it adds a lot of flavor.
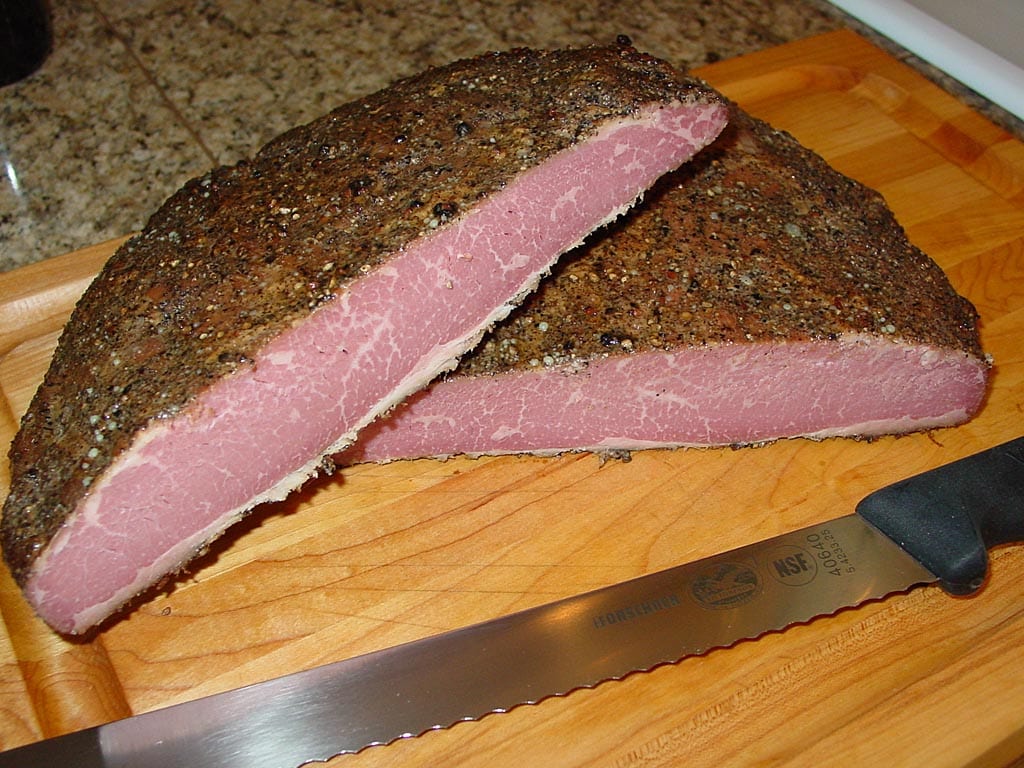
My cooking log notes that the pastrami had a dark brown, crusty exterior, yet it appeared moist. When I cut into it, the meat had good texture and was quite moist inside, exhibiting the pink color you associate with pastrami. It had a very peppery aroma and taste, which I liked a lot. My notes shout, “Insane! Surpassed my expectations! Blown away!”
Steaming Pastrami
Some people like to smoke pastrami, let it cool and refrigerate it overnight, then steam it before slicing and serving. This method is inspired by the way Jewish delicatessens prepared their pastrami back in the day.
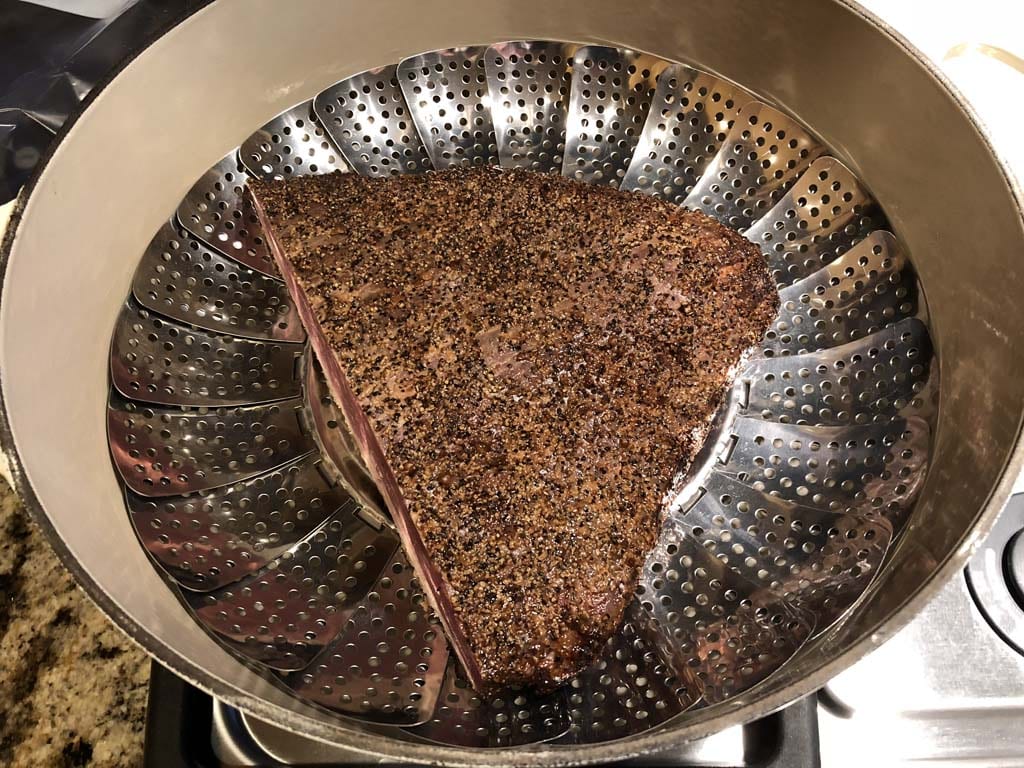
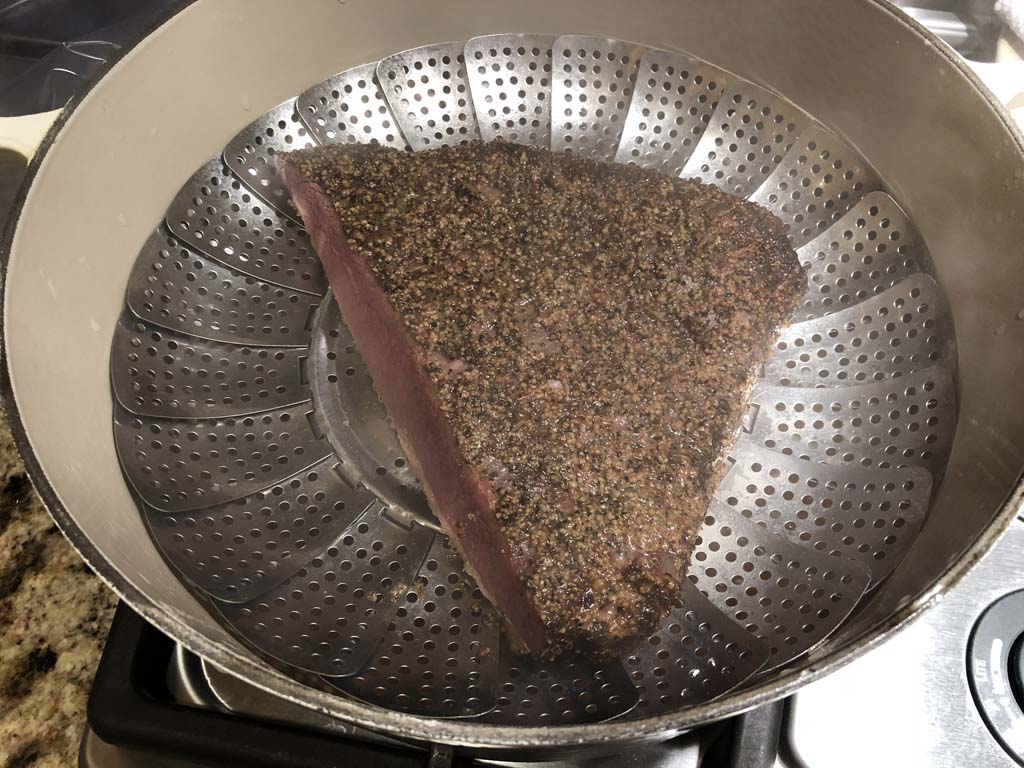
Place a small amount of water in a Dutch oven outfitted with a steamer rack with the handle removed. Bring the water to a gentle boil. Place a chuck of pastrami on the rack and cover the pot.

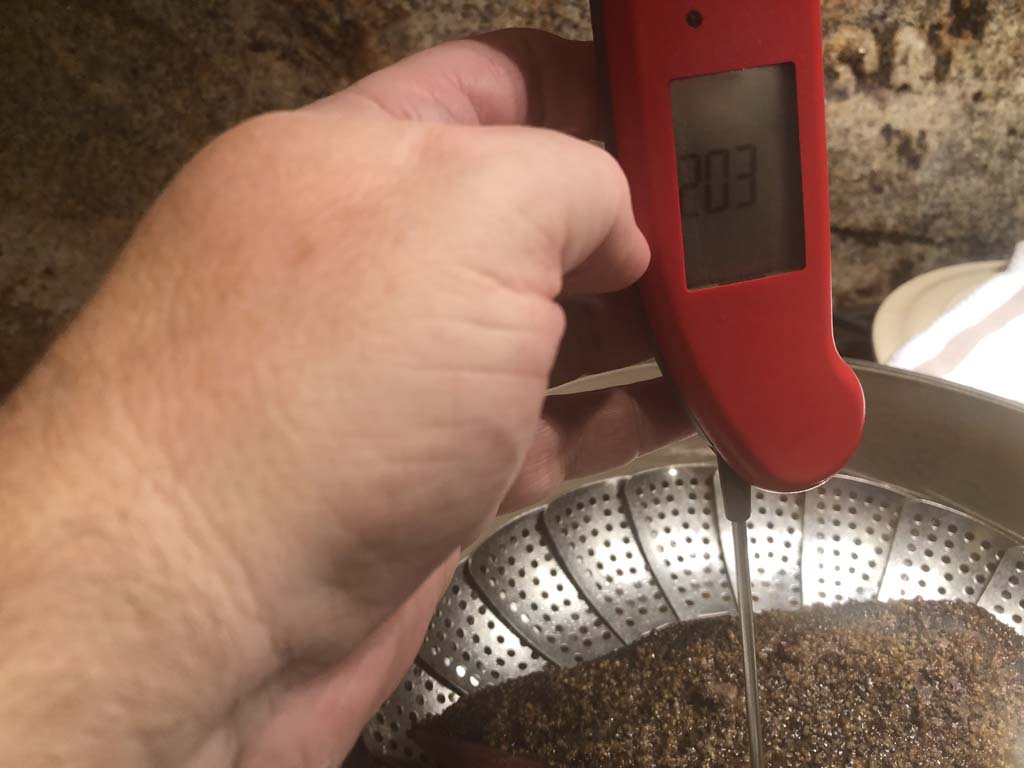
Heat the pastrami to 203°F internal temperature measured using an instant-read thermometer.
Slice pastrami across the grain and enjoy!

Slicing Pastrami
If you compare the tenderness of this pastrami to that of barbecued brisket, you’ll notice that it’s not as tender—the slices do not pull apart easily. This isn’t a problem. Remember, this is not barbecued brisket. It has an entirely different texture as a result of the curing process. This is why you want to slice the pastrami across the grain as thinly as possible.
It takes some practice to slice pastrami thin across the grain using a knife. Of course, a sharp knife helps a lot. I recommend the Dexter-Russell 12″ Scalloped Slicer. This is the knife used by the renowned Aaron Franklin of Franklin Barbecue in Austin, TX to slice brisket in his restaurant. It’s stupid sharp, and since it’s under $35 at time of writing, you don’t have to be too fussy about how you care for it.
On a number of occasions, I have sliced cold pastrami from the refrigerator using a mandoline (a tool used to slice vegetables) set to the thinnest setting. The next two photos show what a great job the mandoline does at making deli-style, thin-sliced pastrami.
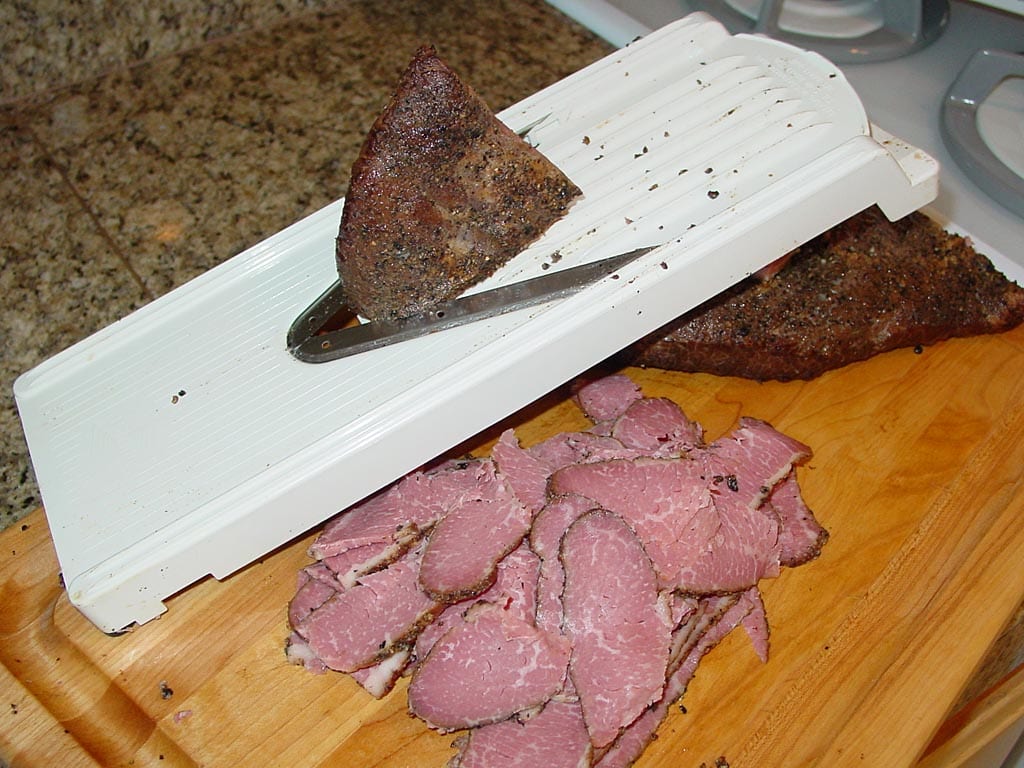
This video demonstrates the results of slicing pastrami using a mandoline.
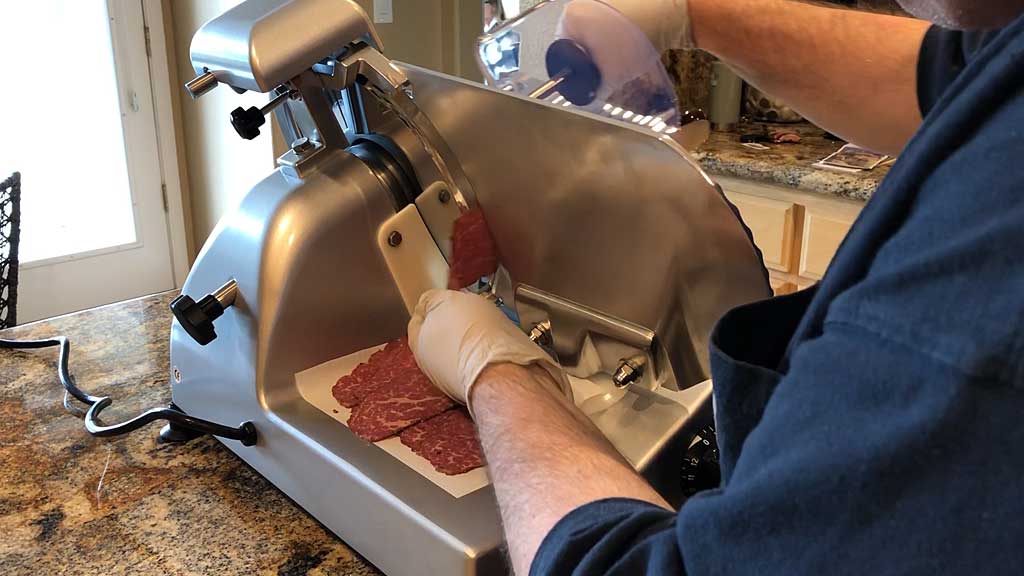
Of course, the ultimate thin sliced pastrami is achieved using an electric meat slicer like this Beswood 250 10″ slicer.
I like to portion the slices into 4 ounce servings, freeze them in a vacuum container, then move the frozen portions into vacuum freezer bags. This method avoids squeezing juices out of the meat when sealing the meat in bags.
Leftover Pastrami
A 5-6 pound brisket flat will yield about 4 pounds of pastrami after cooking, so you’re going to have leftovers. Handle your pastrami the same way they do at the deli—slice off what you need, and wrap the remainder tightly in plastic wrap (or vacuum pack using a FoodSaver) and store in the refrigerator.
To reheat, place sliced meat on a plate, cover with plastic wrap, and microwave gently at 20% power for just a minute or two, taking care not to overheat. If you’ve vacuum-packed sliced pastrami, just drop the sealed package of frozen or thawed meat into boiling water, turn off the heat, and let it steep for 10-15 minutes or until the meat is heated through.
It’s just about as good as it was on Day One…maybe even better!
Pastrami Problems
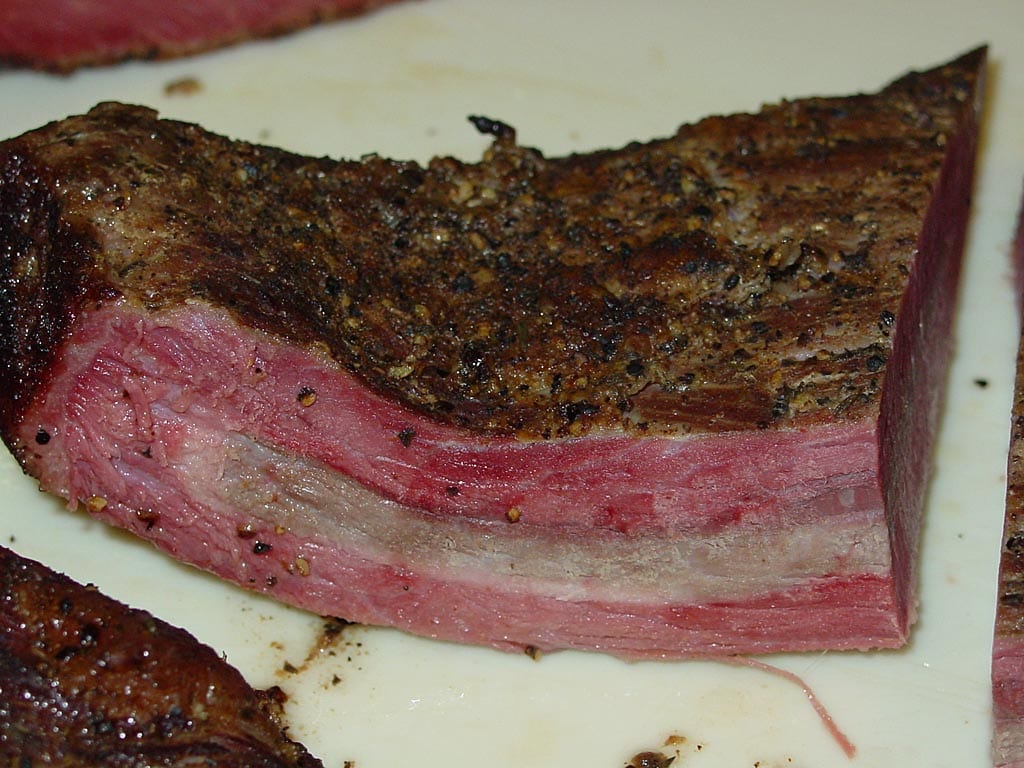
This photo shows a brisket flat that did not cure all the way through. This happened because I did not cure the brisket long enough.
Cook’s Illustrated magazine says that meat cure moves inward 1/4″ per day on all sides. They say that a brisket that’s 2-1/2″ to 3″ thick takes about 6 days to cure all the way through. So the curing time of 7 days in this recipe seems to be a good rule of thumb for most dry-cured briskets.
More Pastrami Links On TVWB
- Quick Pastrami – Smoked Corned Beef Brisket
- Quick Pastrami – Snake River Farms American Wagyu Corned Beef Round
More Brisket Links On TVWB
- Brisket – High Heat
- Brisket – Smoked & Oven Finished
- Brisket – Midnight Cook
- Brisket – Wet Rub
- Whole Brisket – Central Texas Style Butcher Paper
- Whole Brisket – Competition Trim
- Brisket Flat – Central Texas Style Butcher Paper
- Burnt Ends – Kansas City Style
- Burnt Ends – Smoky, Sticky, Sweet
- Brisket Servings Calculator
- Brisket Selection & Preparation
- Separating Brisket Flat & Point
- Using An Electric Oven To Hold Brisket At Temperature
- Camp Brisket 2020 Trip Report

Is Pastrami The Same As Smoked Corned Beef?
I used to believe the answer to this question was “No”, that corned beef and pastrami were always cured differently and were distinctly different products. However, in speaking with experts, I’ve learned that often times corned beef and pastrami both start out the same way—cured using the same liquid injection or the same dry curing process. It is only after the curing process that corned beef and pastrami diverge in terms of their seasoning and cooking method.
Corned beef—usually a whole brisket, brisket flat, brisket point, or bottom round—is seasoned with pickling spices that may include any or all of the following: cinnamon, allspice, mustard seed, coriander, bay leaves, ginger, chilies, cloves, black pepper, mace, cardamom. Traditional corned beef is then boiled slowly for several hours over medium heat.
Pastrami—usually a whole brisket, brisket flat, or bottom round—is seasoned with ground black pepper and ground coriander. At some of the famous New York City delicatessens, pastrami is made using beef navel (a cut located on the underside of the cow, starting where the brisket ends) that is smoked at low temperature for a few hours, then steamed to complete the cooking process. On the WSM, we smoke pastrami at 250-275°F to an internal temperature of 165-175°F, let it rest for two hours and slice it thin, or we take it up to 195-205°F, let it rest for two hours, an slice it about 1/8″ thick. Another alternative is to smoke the meat to 165-175°F, refrigerate overnight, then steam it to an internal temp of 195-205°F before slicing.
Most corned beef and pastrami is injected with a liquid cure—it’s fast and can be automated by machine. Some pastrami is dry-cured, as I did in this article. In my opinion, this results in pastrami that tastes more intense and less like corned beef.
Around St. Patrick’s Day, some WSM owners like to make quick pastrami using the corned beef briskets that are so abundant in supermarkets at that time. You can read about this in the Quick Pastrami – Smoked Corned Beef Brisket article.
About Curing Agents
Curing agents help preserve meat and create the distinctive color and flavor we associate with cured meats. The two main curing agents are sodium nitrite and sodium nitrate.
Sodium nitrite is combined with salt and used to cure meat during smoking at temperatures below 140°F. This mixture is often referred to as Prague Powder #1.
Sodium nitrate is combined with salt and used to dry cure meats that don’t require cooking, smoking, or refrigeration. The sodium nitrate breaks down into sodium nitrite over time, and then into nitric oxide, providing the very long curing times required for these products. This mixture is often referred to as Prague Powder #2.


