Video: Easy Baby Back Ribs
This short video discusses the details found in this article.
Easy Baby Back Ribs…Yes, I’m Getting Lazy
At the time of writing in August 2022, I’ve been using my Weber Smokey Mountain Cooker for over 24 years. As time passes, I have come to appreciate simple approaches to making barbecue. Maybe I’m getting lazy, but I don’t have a lot of patience for complex recipes and techniques.
Take baby back ribs, for example. I have tried cooking better brands of ribs; I have made my own complex rubs; I have slathered them with different concoctions; I have spritzed them during cooking; I have wrapped them in foil with various fats and sweeteners; I have smoked them 3-2-1 style, 3-1-1 style, and 2-1-1 style; and I have made a variety of sauces. It can all be a lot of work.
In response to all of this complexity, here’s an example of some easy baby back ribs that I have smoked in my Weber Bullet.
Here are some photos I took when making these ribs for WSM Smoke Day 13 on May 27, 2017.
Choose A Commercial Rub & Sauce
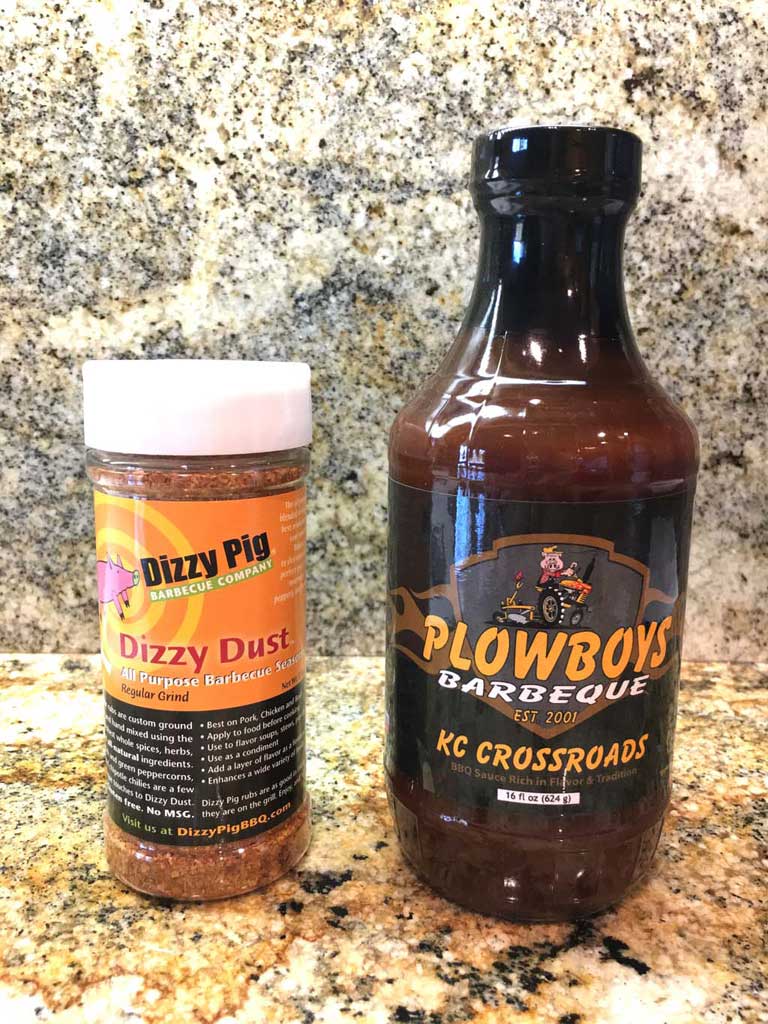
If you’ve already got a shaker of commercial rub and a bottle of commercial barbecue sauce on-hand, use them. If not, pick up something next time you’re at the supermarket.
I had Dizzy Pig Dizzy Dust and Plowboys Barbeque KC Crossroads sauce in my pantry, so I used those.
Select & Prepare The Ribs
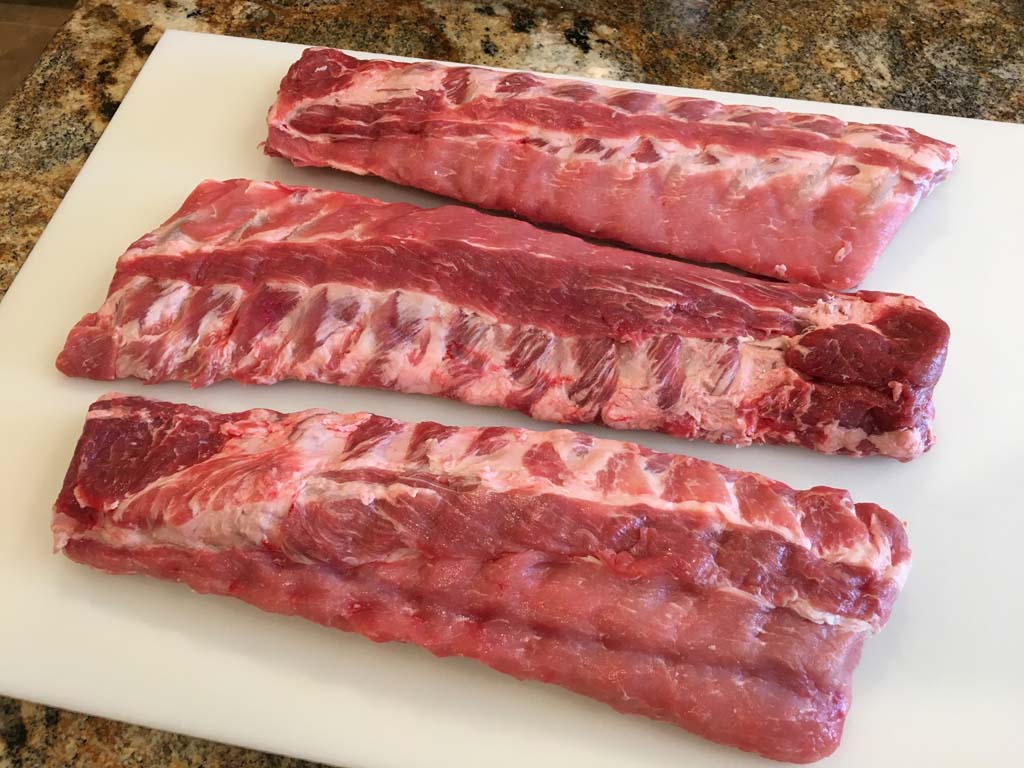
Get yourself to Costco, Sam’s Club, Walmart, or the supermarket and buy three racks of baby back ribs—nothing fancy. Buy the lowest weight package(s) you can find in the hopes of getting smaller slabs. These three racks weighed a total of 8.84 pounds, more than I would have liked but the best I could do at the time.
I got these ribs at Costco, and as usual, the membranes on the back had already been removed. If your ribs have the membranes on, remove them as shown in the Pork Loin Back Rib Preparation article. Yes, it is a bit of work, but necessary in my opinion to improve the way the ribs eat after cooking.
If you see anything weird or unappetizing hanging off the ribs, trim it off, otherwise no trimming is necessary.
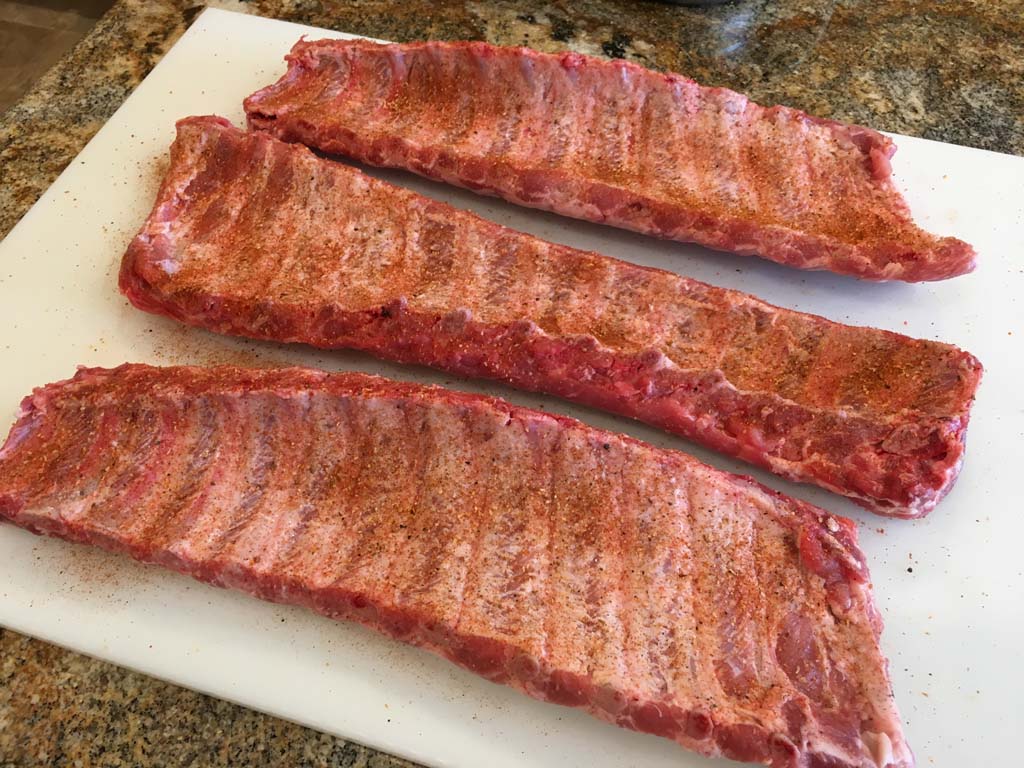
Remove the ribs from their packaging and pat dry with paper towels.
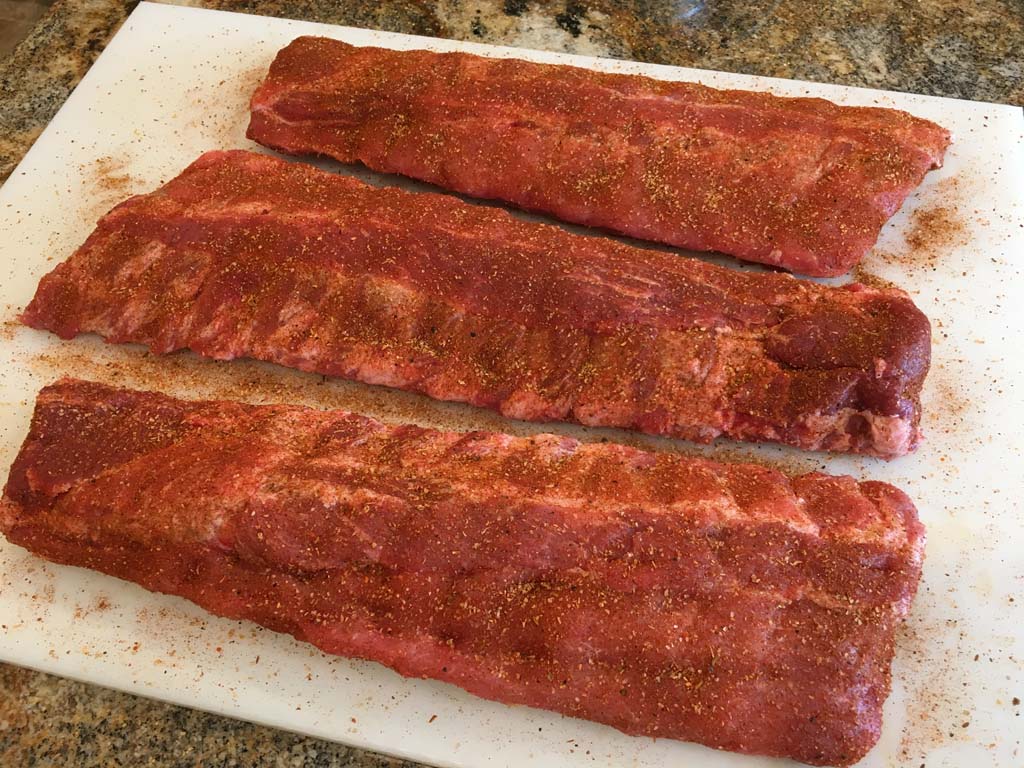
Sprinkle a generous amount of rub to the meat side of the ribs and a lesser amount to the bone side. No need to apply mustard or a slather to the ribs before applying the rub.
Return the rubbed ribs to the refrigerator while you get your Weber Bullet ready.
Choose The Smoke Wood
Use two chunks of apple, cherry, or other mild fruit wood. I used two chunks of apple for the ribs shown here. Each chunk should be about the size of your fist.
There is no need to soak the wood or remove the bark before use.
Fire The Cooker
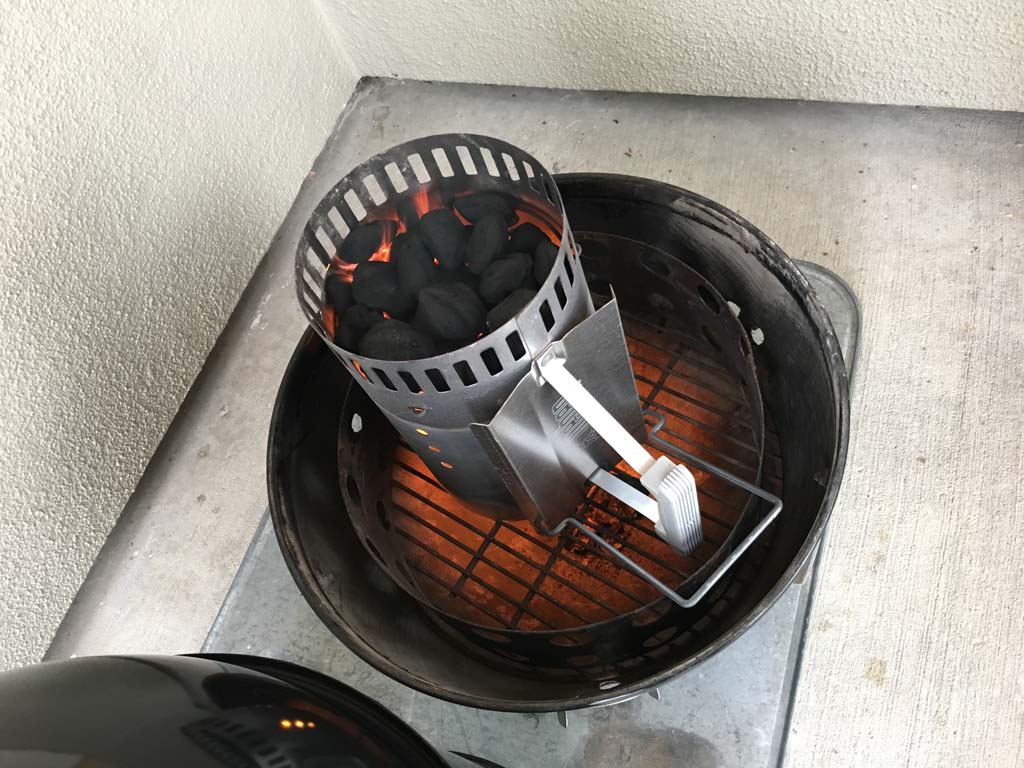
Light 30 Kingsford Charcoal Briquets in a Weber chimney starter.
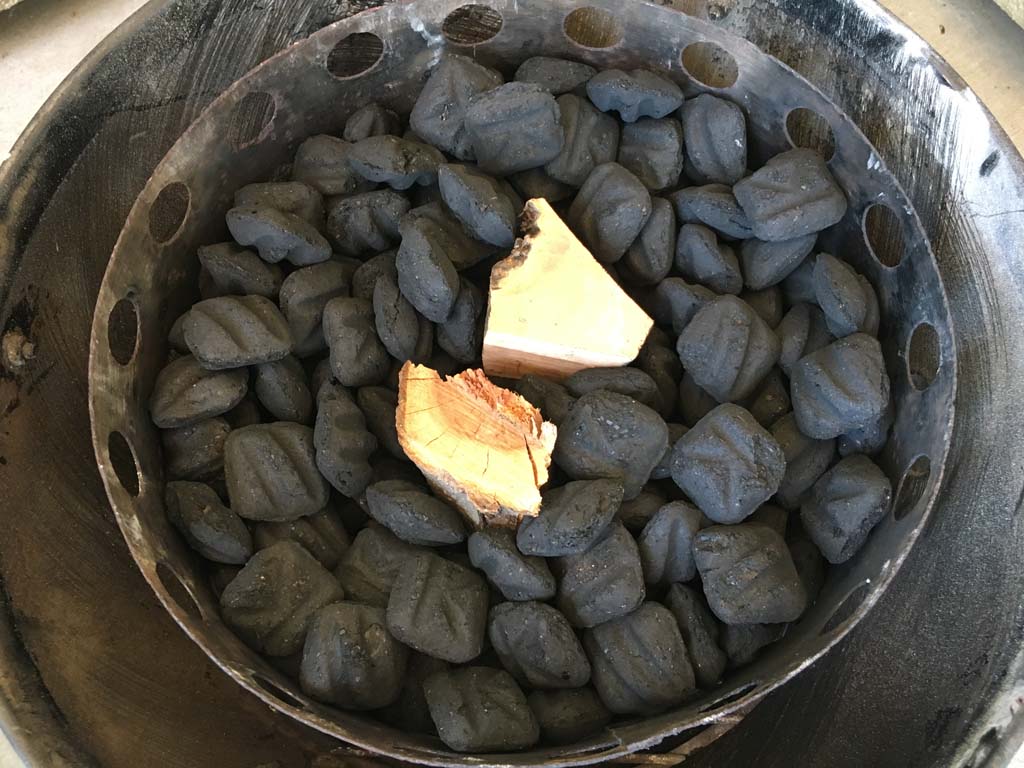
Fill the charcoal chamber half full with unlit briquets. Tuck the smoke wood into the charcoal so the tops of the chunks are exposed.
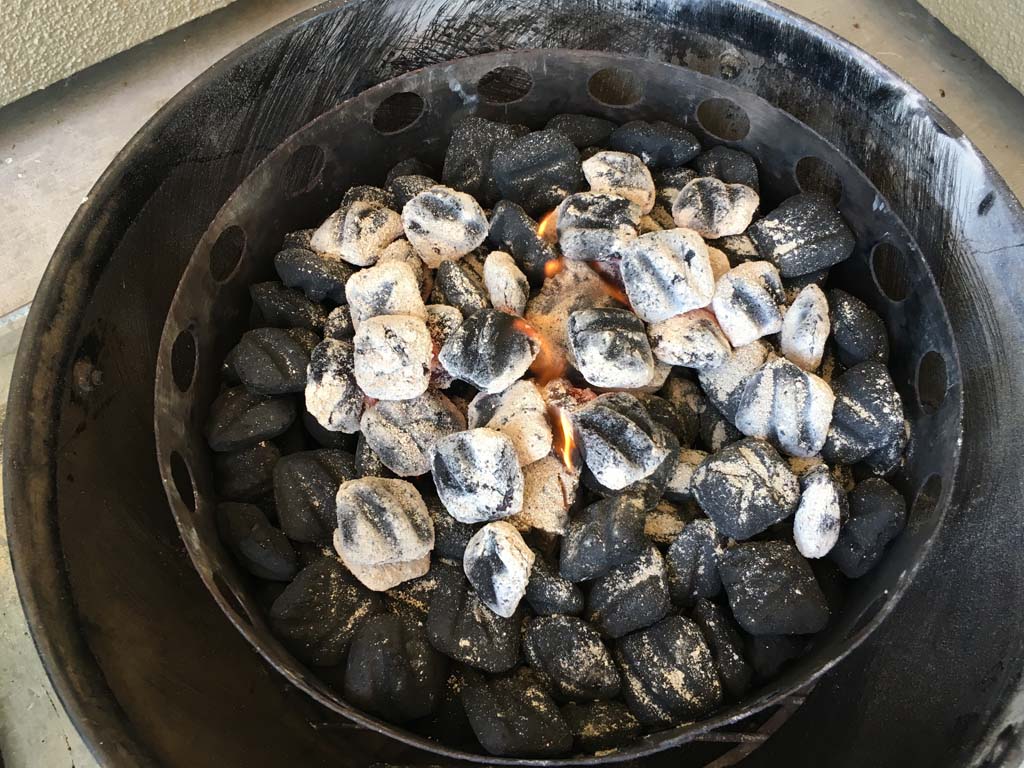
When the charcoal in the chimney starter is lit, spread it across the unlit briquets. Make sure some of the hot charcoal is in contact with the smoke wood chunks.
Now assemble the cooker:
- Put the water pan in the middle cooking section.
- Insert the middle cooking section into the charcoal bowl.
- Carefully fill the water pan from above with hot tap water.
- Put the top cooking grate in place.
There is no need to check the water level or add water to the pan during the cooking process. The water you add at the beginning will be enough.
Some will say that foregoing water in the pan would make these ribs even easier. Perhaps, but I like using water for low & slow cooking for the reasons I outline in Using A Water Pan In Weber Smokers.
Barbecue The Ribs
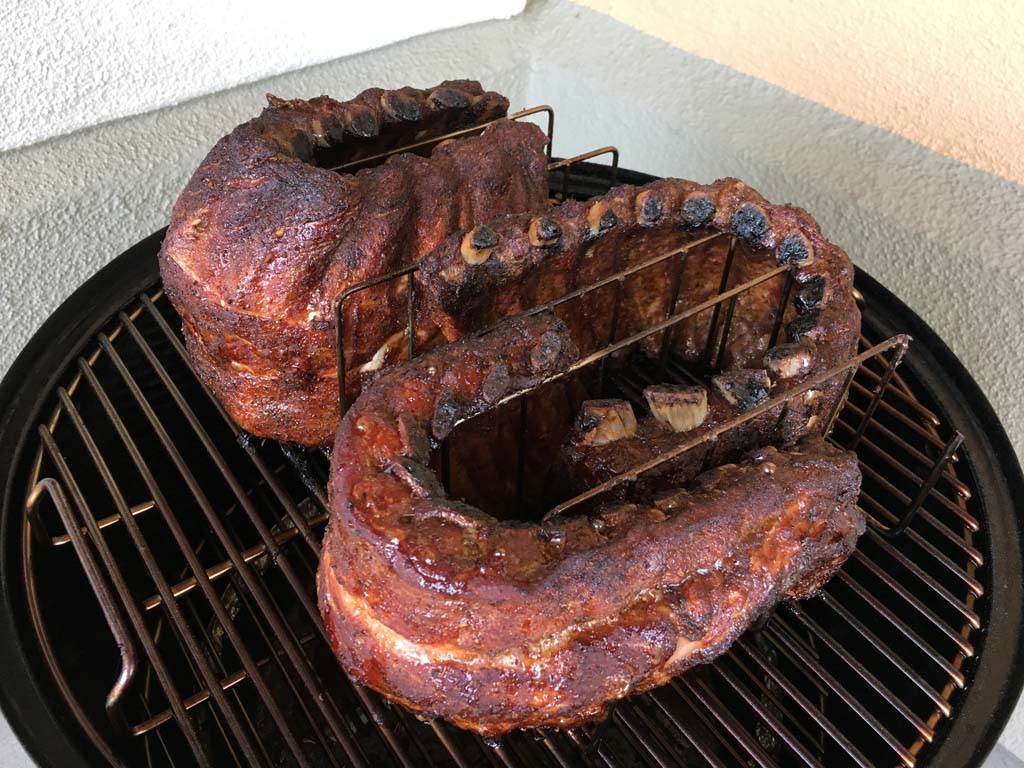
Arrange the ribs meat-side up on the top cooking grate. If you bought small enough slabs, they may lay flat on the grate. If they don’t, use a rib rack to cook the ribs on edge.
This 6-slot Char-Broil 4740 Potato-and-Rib Rack allows me to snake 3 slabs back and forth, as shown here. It’s hard to find these days, but you can get good results using the 5-slot Weber 6605 Original Rib Rack.
Set the 3 bottom vents to 100% open. Open the top vent fully and leave it that way throughout the entire cook.
When the cooker reaches about 225°F, set the 3 bottom vents to 25% open so the cooker settles in at 250-275°F measured at the lid. Adjust the 3 bottom vents as necessary to maintain this temperature range throughout the cooking session.
No turning the ribs, no spritzing the ribs, no mopping the ribs!
It takes 3-4 hours for these ribs to cook, so start checking for doneness at the 3 hour mark. The best way to tell when your ribs are done is to use the “tear test”. Take hold of two adjacent bones toward the middle of the slab and give them a pull. If the meat offers a bit of resistance but then tears easily, you know the ribs are done just right. Other indicators of doneness, such as how far the meat has pulled down the bone or whether a toothpick passes easily through the meat, are not as reliable as the tear test.
If you have an instant-read thermometer, you can probe through the width of the rib meat. According to ThermoWorks, the accepted range for tenderness is 180-195°F…I would go to 195°F.
Continue to cook the ribs and check for tenderness every 15 minutes until they’re done.
Here’s how the cooker temperatures and vent settings went during my cook:
| Time | Lid Temp | Vent 1 % | Vent 2 % | Vent 3 % |
| 1:50 pm | – | 100 | 100 | 100 |
| 2:15 pm | 275 | 25 | 25 | 25 |
| 2:30 pm | 250 | 50 | 75 | 75 |
| 2:40 pm | 275 | 50 | 75 | 75 |
| 2:55 pm | 260 | 50 | 100 | 100 |
| 3:50 pm | 258 | 100 | 100 | 100 |
| 5:00 pm | 272 | 100 | 100 | 100 |
| 5:50 pm | 252 | 100 | 100 | 100 |
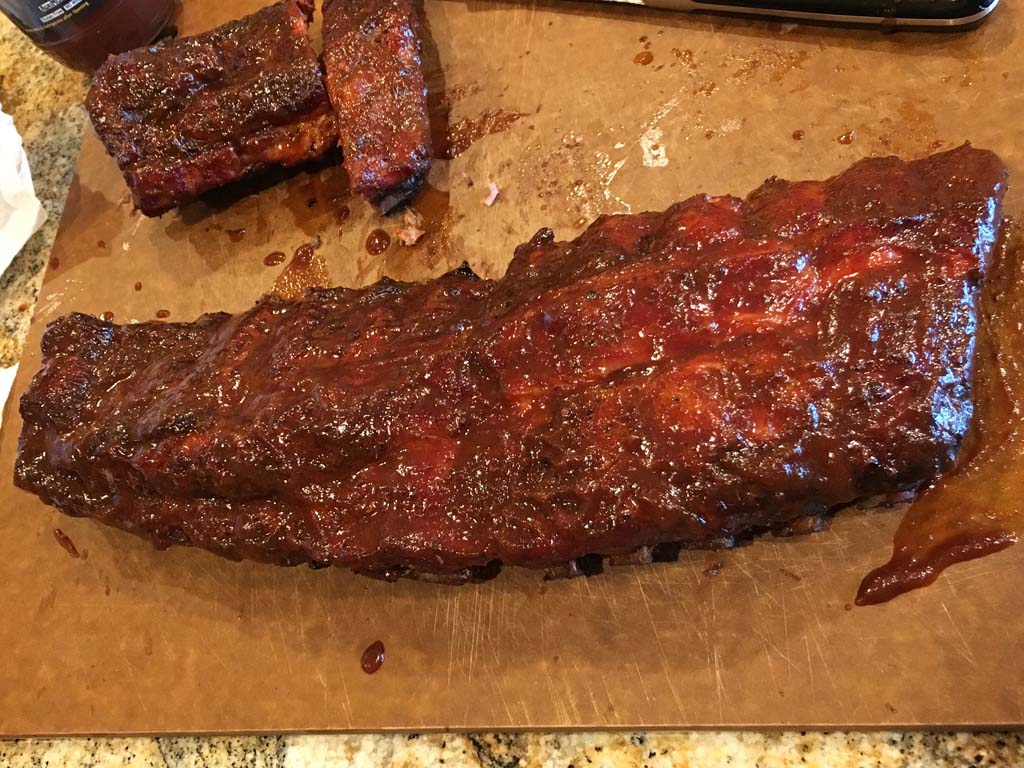
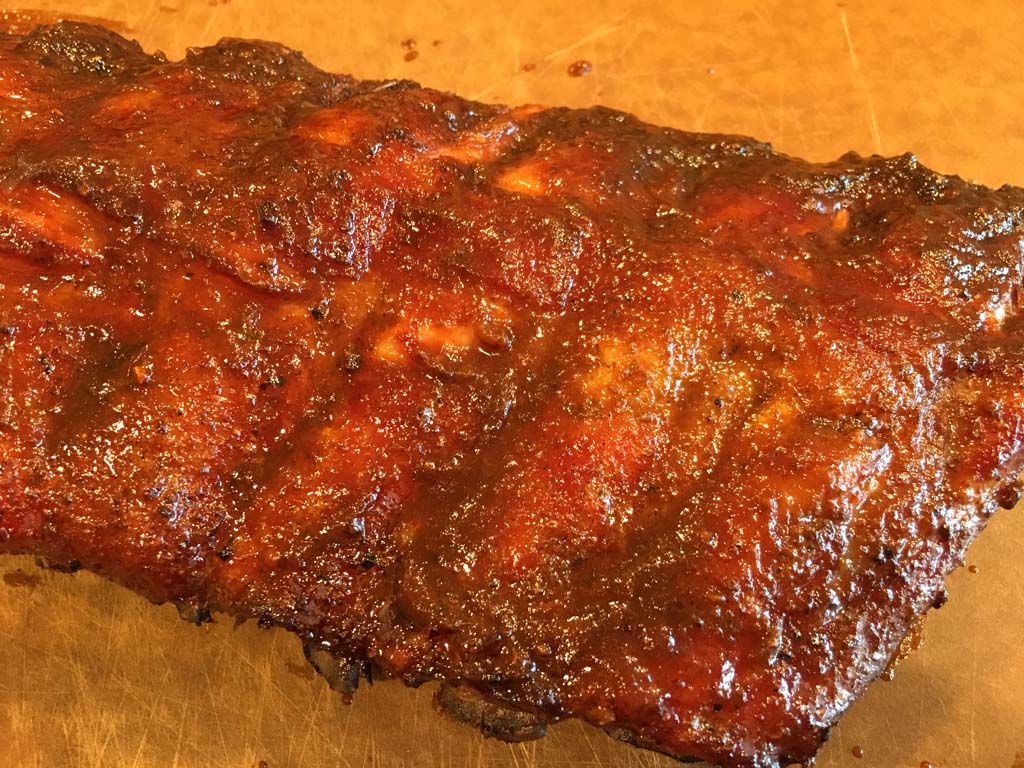
Sauce And Enjoy!
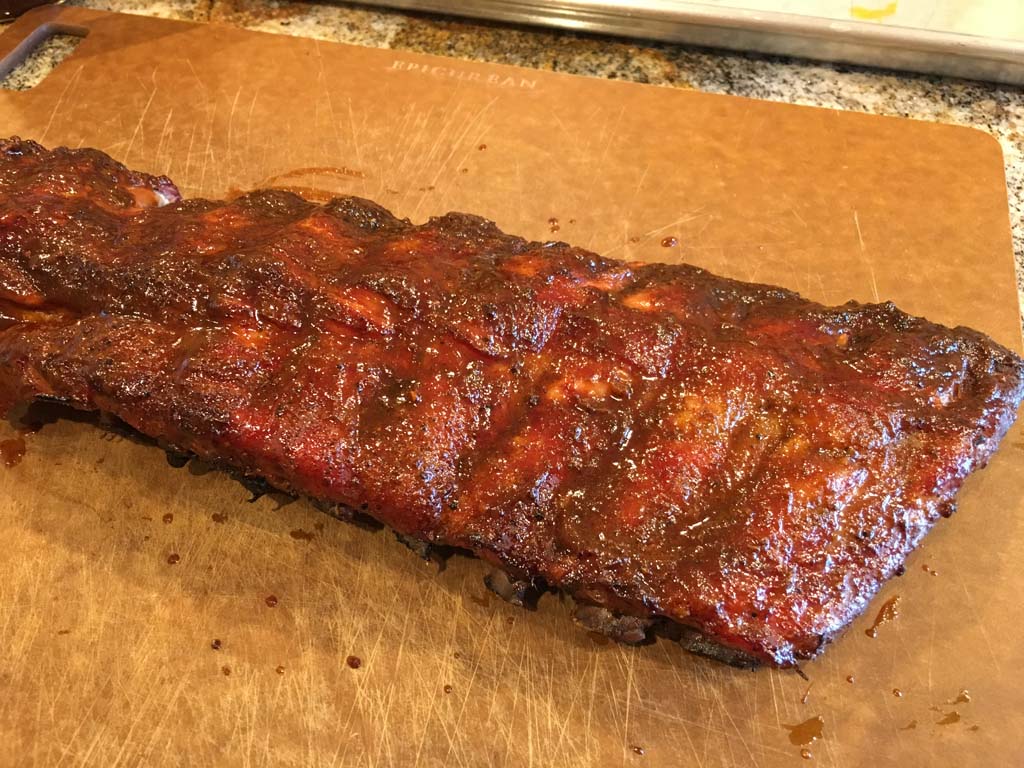
When the ribs pass the tear test, bring them into the kitchen and brush the meat side immediately with a very thin coat of barbecue sauce. The residual heat in the meat will cause the sauce to thicken a bit in the few minutes it takes to gather everyone together to devour these ribs.
Serve additional barbecue sauce on the side for those who like their ribs a little more saucy!
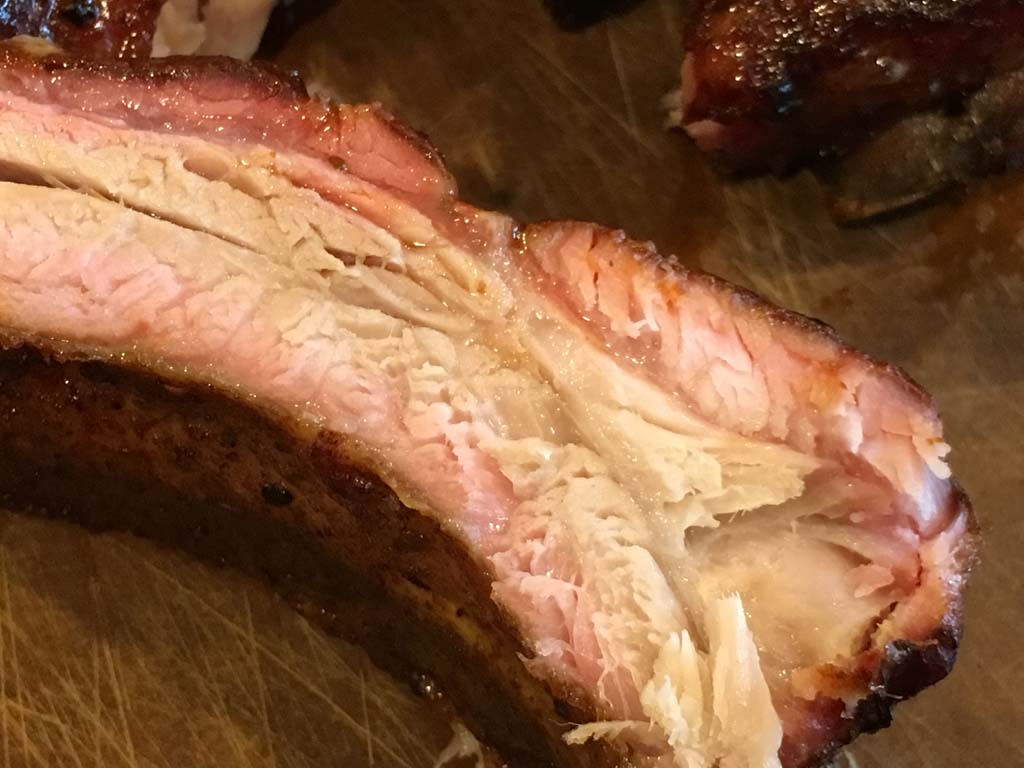
This photo shows the pink smoke ring of these moist, delicious ribs.
Are they perfect? No. Are they delicious? Yes. Are they worth the small amount of effort that goes into making them? Absolutely.
Next time you want baby back ribs, think about how you can make the prep and cooking process easier, then give it a try and see if you enjoy the results. I think you will!


