In This Topic
- Turkey Terminology
- White Meat & Dark Meat
- Inspection & Grading
- Hormones, Antibiotics & Additives
- Food Safety, Product Dating & Freezer Life
- How Much Turkey Should I Buy?
- Choosing A Turkey For Barbecue
- How Big Of A Turkey Will Fit In The WSM?
- Will The WSM Hold Two Turkeys?
- Thawing Turkey
- Prepping Turkey
- Flavor Brining & Salting
- Can I Brine A Self-Basting Turkey?
- Don’t Stuff The Bird
- Basting
- Vertical Vs. Horizontal Cooking
- Cooker Temperature
- Where To Measure Internal Meat Temperature
- Ignore The Pop-Up Timer
- Cooking Times & Temperatures
- Resting Period After Cooking
- Holding A Turkey At Temperature Before Carving
- Carving
- Solving Common Turkey Problems
- Is Pink Meat Safe To Eat?
- Collecting Pan Drippings For Gravy
- Storing Leftovers
- Nutrition
- Learn More About Turkey
- More Turkey Links On TVWB
Turkey Terminology
Regular Turkey
While not an official turkey term, “regular turkey” is the term I use to describe a turkey that is not injected, self-basting, kosher, or in any way enhanced. A regular turkey contain just two things: turkey and water.
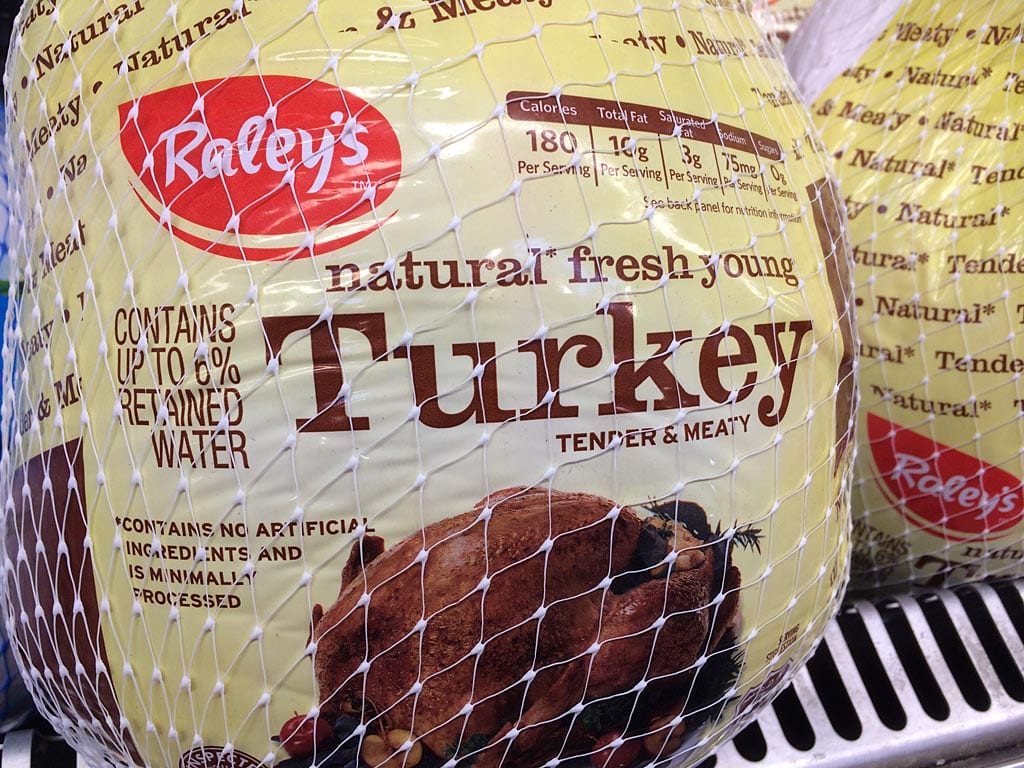
The label on a regular turkey may include the phrase, “Contains up to X% retained water”. Do not confuse this with a self-basting turkey. Retained water is water that is absorbed and retained by the skin and meat as a result of washing and water-immersion chilling during processing. The USDA requires that poultry producers prove that the retained water is an unavoidable consequence of the process used to meet food safety requirements and that they list the actual or maximum percentage of retained water on the label.
Young
According to USDA regulations, a “young” turkey is a turkey of either sex that is less than 8 months old at the time of slaughter. Most turkeys reach market maturity at 4-5 months of age.
Hen vs. Tom
Turkeys weighing 8-16 pounds are usually female hens, while larger birds are male toms. Since supermarket turkeys are slaughtered at a young age—under 28 weeks old—both hens and toms are about the same in terms of taste, juiciness, and tenderness. Buy a turkey based on weight and don’t worry about sex.
Natural
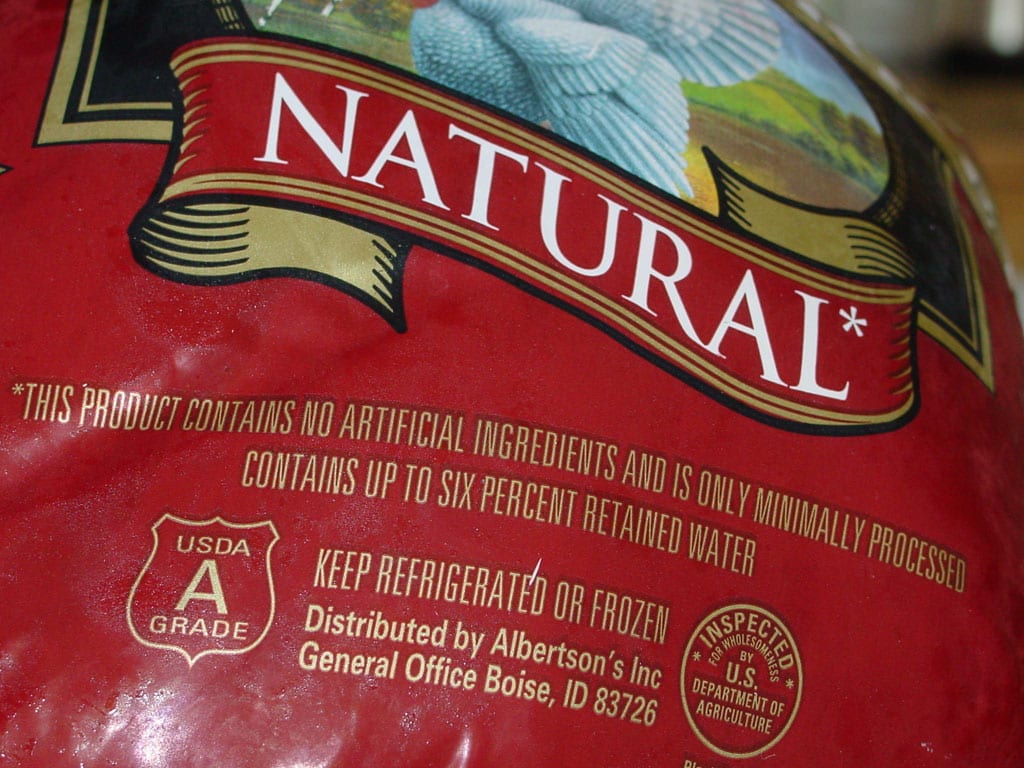
Natural turkeys may not contain artificial flavorings, coloring ingredients, chemical preservatives, or other synthetic ingredients. They must also be minimally processed, meaning they have only been handled as necessary to slaughter, clean, and make them ready for human consumption. Look for the words “natural”, “minimally processed”, and “no artificial ingredients” on the label.
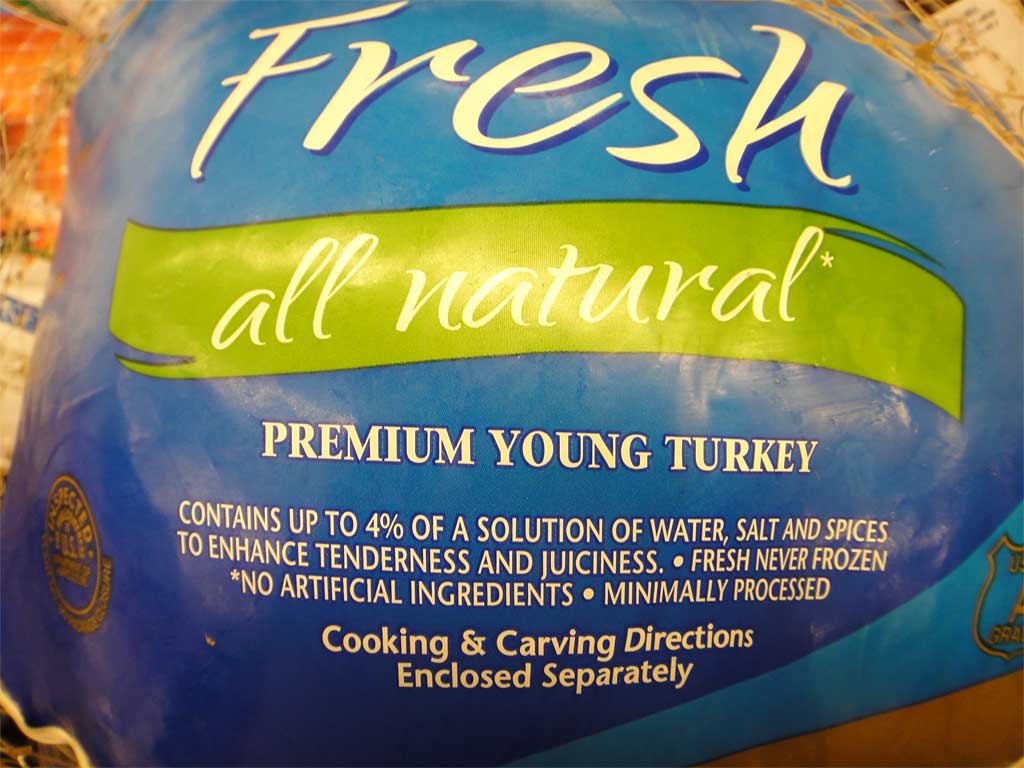
Oddly enough, a natural turkey may contain a solution of water, salt, and other natural flavorings to enhance tenderness and juiciness. Natural does not mean “not injected” or “not self-basted” or “not enhanced”. If you’re looking for a turkey that has not been injected or enhanced, read the label carefully to make sure salt, natural flavorings, or other ingredients are not listed. A statement such as, “Contains up to X% retained water” is fine; that’s just the result of washing and chilling the bird in cold water during processing.
Commodity Turkey
Commodity turkey describes those birds raised by large regional and national producers in high volume using modern agricultural methods, in accordance with USDA guidelines. This is your basic supermarket turkey that is tasty, safe, and inexpensive.
Free-Range
Free-range or free-roaming turkeys are produced by a growing number of regional producers that offer their birds as a higher quality, better tasting, and more humane alternative to commodity turkey. According to the USDA, turkeys must have access to the outdoors in order to be called free-range.
Producers like Norbest say that their free-range birds have unrestricted access to the outdoors and “may roam freely outside in the fresh air and sunshine, but still have access to shelter, fresh water, and nutritious feed.” This means the birds have the ability to go outside if they want to, but it doesn’t mean they actually did.
Free-range turkeys command a higher price due to the inefficiencies of the process, including problems with disease and predator control.
Organic
Organic turkeys are free-range birds that have not been treated with hormones or antibiotics, and were fed pesticide-free feed. Look for the “USDA Organic” symbol on the package. This turkey will cost even more than a free-range bird.
Heritage
Heritage or heirloom turkeys are unusual breeds that were once quite common in America, but fell out of favor as growers concentrated on the specially bred, big-breasted birds preferred by consumers. Heritage varieties include Narragansett, American Bronze, Jersey Buff, and Bourbon Red.
Producers like Diestel say that their heritage turkeys are free-range and organic. “Being range grown in the Sierra Nevada Foothills, our Heirloom Turkeys enjoy the large open pens covered in grass and shaded by large oak and pine trees. The deep well water complements their vegetarian diet of certified organic corn and soy, free of animal by-products, GMOs, antibiotics, growth enhancers and hormones. Bringing back these bronze birds provides our customers with the ‘best of both worlds’—old world history, flavor and beauty in combination with a wonderful yield of meat and that great old-fashioned turkey flavor.”
Heritage turkeys tend to have less breast meat and are stronger in flavor than commodity turkeys, but may also contain less fat and water, too. This turkey is the most expensive of all and is found in limited numbers at high-end supermarkets and butcher shops.
Self-Basting
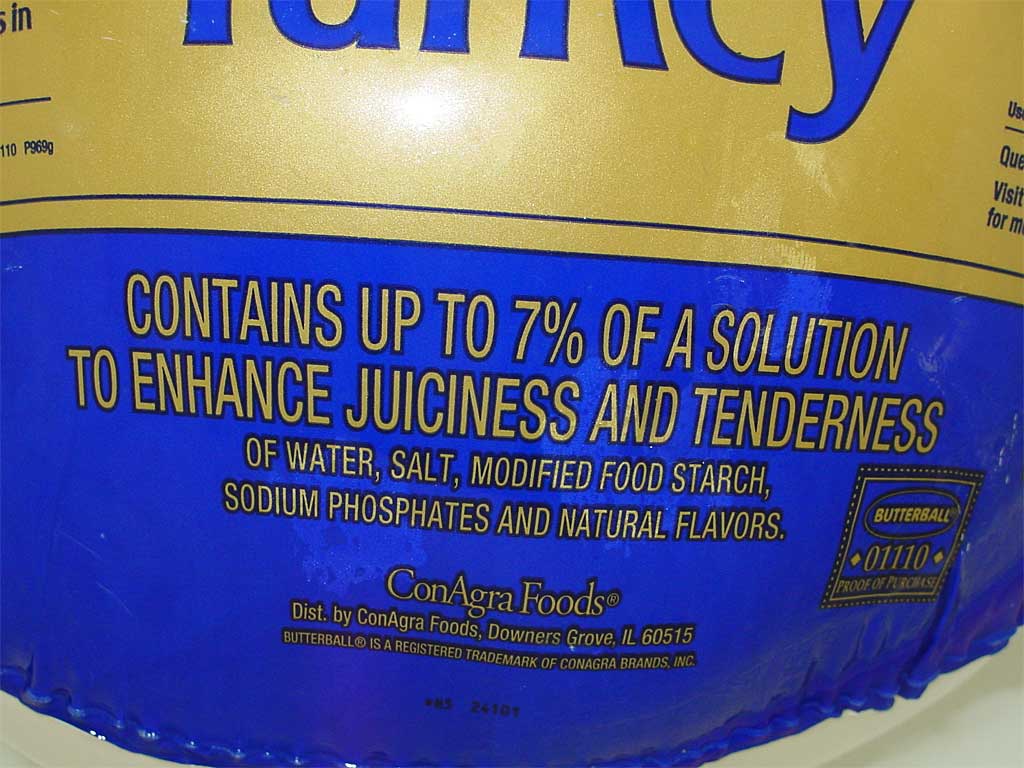
Self-basting turkey is injected with a solution to improve the flavor and juiciness of the meat. Some manufacturers inject only the breast meat, while others inject the entire bird. The package label must carry the phrase “basted” or “self-basted” and must list the quantity and common name of the ingredients used in the solution.
Look for the phrase, “Contains up to 7% of a solution to enhance juiciness and tenderness…” on the label. The net weight of the turkey includes the weight added by the solution.
Kosher
Kosher turkey is raised and processed in accordance with Jewish religious law and is clearly labeled as kosher. These turkeys are hand-slaughtered rather than killed by machine, and the carcass is buried in salt for about an hour and rinsed to remove blood and impurities before packaging, in what amounts to a short brining process.
Fully-Cooked
Fully-cooked turkey is a whole turkey that has been pre-cooked and frozen by the processor. After thawing, it can be reheated or served cold. These turkeys sometimes come in a variety of flavors, like baked, honey-roasted, and smoked.
Fresh, Refrigerated & Frozen
“Fresh” and “frozen” are defined by the USDA as follows:
“The term ‘fresh’ may only be placed on raw poultry that has never been below 26°F. Poultry held at 0°F or below must be labeled ‘frozen’ or ‘previously frozen.’ No specific labeling is required on poultry between 0 and 26°F.
“…the term ‘fresh’ should not be used on the labeling of raw poultry products that have been chilled to the point they are hard to the touch.”
So in the context of turkey, “fresh” has to do only with the temperature at which it’s been maintained from the time it was processed until the time you bought it at the store. It has nothing to do with how long it’s been sitting in the display case at the store.
The USDA does not define the term “refrigerated”, but producers like Norbest use it to denote turkeys that are handled at temperatures between 0-26°F.
White Meat & Dark Meat
Myoglobin is a protein that stores oxygen in muscle cells. This substance is primarily responsible for the color of meat, and the more myoglobin in the muscle cells, the darker the color of the meat. Turkeys and chickens have lower levels of myoglobin in their muscle cells than cattle, which accounts for the lighter color of poultry compared to beef.
Within an individual animal, the amount of myoglobin varies depending on the muscle group in question. Muscles that work the hardest contain the most myoglobin, and as a result are darker in color compared to muscles that don’t get much exercise. In a turkey, which basically just stands or walks around all day, the legs and thighs get the most exercise and are therefore dark meat; the wings and breasts, white meat.
Inspection & Grading
All turkeys sold in retail stores in the U.S. are inspected for wholesomeness by either the USDA or a state agency using equivalent standards.
Grading is voluntary and takes into account meatiness, appearance, and freedom from defects. Grade A is the highest quality grade and is the only grade you are likely to find at retail stores. The USDA describes Grade A turkey as being “virtually free from defects such as bruises, discolorations, and feathers.” It should have no broken bones, no tears in the skin, good fat coverage under the skin, and plenty of meat on the bones.
Hormones, Antibiotics & Additives
According to the USDA, hormones are not approved for use in the production of turkey in the U.S.
Antibiotics can be administered to turkeys to prevent disease and increase feed efficiency. However, a withdrawal period is required to allow these substances to leave the turkey before it is slaughtered, ensuring there are no residues in the meat.
The USDA does not allow the use of additives in fresh turkey. If turkey is processed, additives like salt, MSG, or other substances must be listed on the label.
Food Safety, Product Dating & Freezer Life
Frozen turkey should be stored at 0°F or below. Fresh or refrigerated turkey should be stored below 40°F.
The USDA does not require product dating on turkeys, but some producers provide it on a voluntary basis.
- Turkeys should be purchased before the “sell-by” date.
- Fresh turkeys should be cooked or frozen before the “use-by” date.
- Frozen turkey is safe indefinitely from a food safety standpoint; however, quality begins to suffer after 12 months.
Turkey should be cooked within 1-2 days of thawing. Keep turkey refrigerated until at least two hours before barbecuing. Make sure to wash your hands, counters, cutting boards, knives, utensils, and anything else that comes into contact with raw turkey using hot, soapy water or a bleach solution. Avoid cross-contamination by not letting raw turkey, turkey juices, or your hands come into contact with foods that will be eaten raw.
USDA guidelines state that bacteria found in turkey are destroyed by cooking to 160°F or higher. These include salmonella, staphylococcus aureus, campylobacter jejuni, and listeria monocytogenes.
How Much Turkey Should I Buy?
When buying whole turkey, figure 3/4 pound per person for a generous serving with no leftovers, or 1 to 1-1/2 pounds per person with leftovers. For a bone-in breast only, figure 3/4 pound per person.
Choosing A Turkey For Barbecue
Fresh, Refrigerated, Or Frozen?
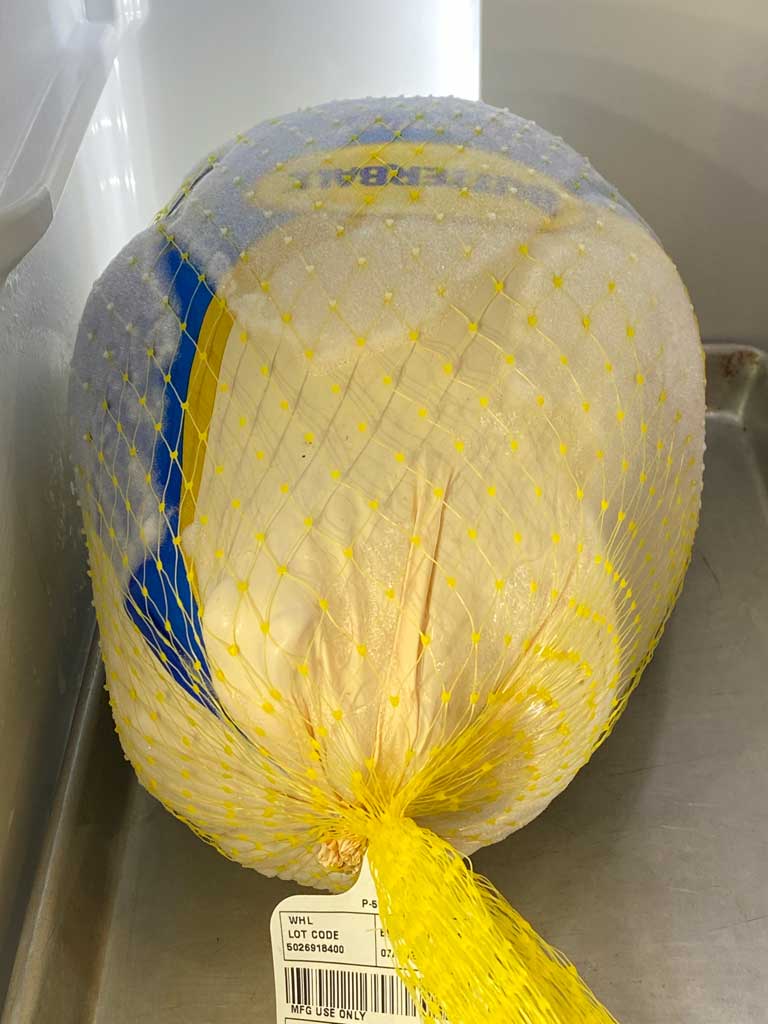
Fresh or refrigerated turkey is convenient because it does not require thawing. On the other hand, frozen turkey can be purchased when prices are low, stored for a long time, and barbecued at your convenience.
Some people think fresh or refrigerated turkey tastes better than frozen, while others believe that frozen is actually “fresher” since the birds are flash-frozen immediately after slaughter. I don’t think most people can tell the difference. You’ll have to judge these claims for yourself.
Regular, Self-Basting, Or Kosher?
If you intend to flavor brine or salt the turkey, choose a fresh or frozen regular turkey that has not been injected with a solution of water, salt, and other flavorings. This turkey will be a “blank canvas” on which you can apply whatever flavors you like. Read the fine print on the label—you do not want a turkey that says, “Contains up to X% of a solution to enhance juiciness and tenderness…”
If you won’t be flavor brining or salting, buy a self-basted or kosher turkey. These turkeys are essentially already brined—just apply your favorite rub and barbecue.
How Big Of A Turkey Will Fit In The WSM?
You can cook almost any size turkey you like in the 18.5″ or 22.5″ WSM, as long as you use a vertical roasting stand on the bottom cooking grate. According to Kevin Kolman, Weber’s Grill Master and blogger, the largest turkey that will fit in the 18.5″ WSM is 25-30 pounds, and for the 22.5″ WSM, 35-40 pounds. “It has to do with how round the turkey is, not the height,” says Kevin.
The biggest turkey I’ve ever seen cooked in the 18.5″ WSM was a 28.5 pound bird cooked vertically on a large pineapple juice can. Kevin says he’s cooked a 40 pound beer can turkey in the 22.5″ WSM!
And what about the 14.5″ WSM? You’d be hard-pressed to fit a whole turkey in the little guy, even vertically on the bottom grate, but you can certainly smoke turkey parts, a bone-in breast, or boneless skinless breasts with ease.
My preference is to cook 12-14 pound turkeys breast-side up on the top cooking grate of the Weber Bullet. They are easy to handle, cook quickly, and always turn out moist. Cook’s Illustrated magazine says, “We find that the larger the bird, the higher the likelihood that it will be overcooked. With its delicate breast meat and tougher legs, a turkey is already hard to cook. But if the bird weighs 22 pounds, it’s very difficult to get the meat close to the bone cooked through without causing the outer layers to dry out.” Cook’s recommendation: Instead of cooking one large turkey, cook two turkeys weighing 12-15 pounds each.
Will The WSM Hold Two Turkeys?
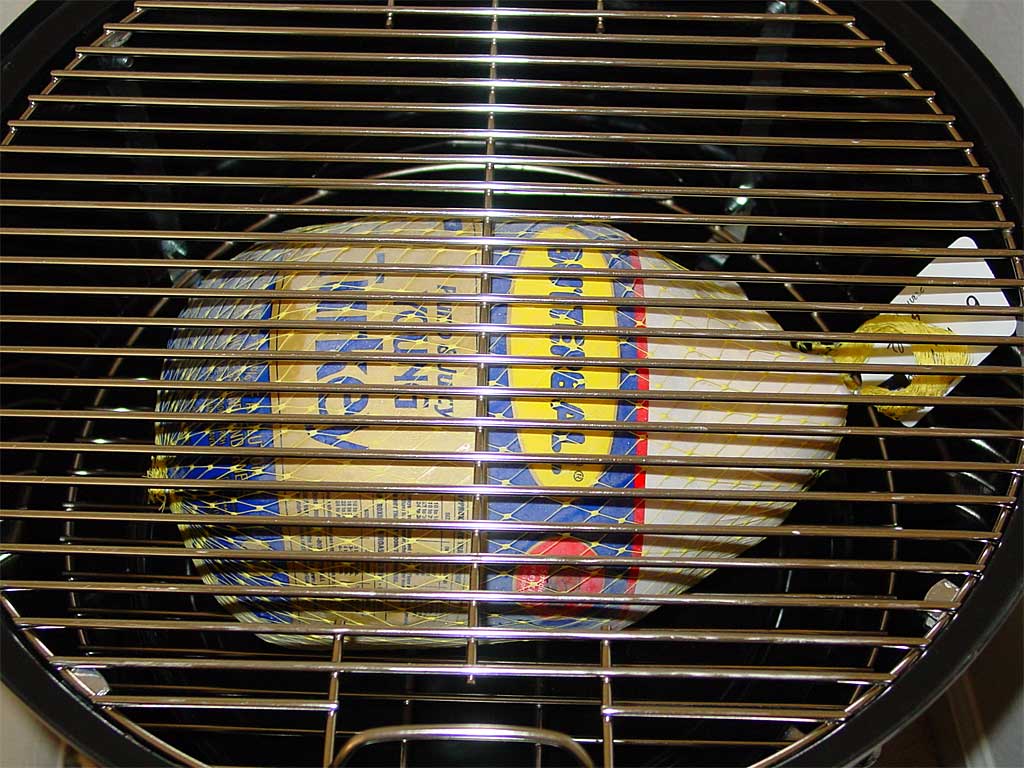
Yes, two 12-14 pound turkeys will fit in the 18.5″ or 22.5″ WSM, one on each cooking grate. The distance between the top and bottom grates is 7.5″ in the 18.5″ WSM and 9″ in the 22.5″ WSM, so purchase birds that are broad and flat. You may want to take a ruler or measuring tape to the grocery store…better safe than sorry.
You may want to place a foil pan under the turkey on the top grate to keep the drippings from fouling up the pretty skin on the turkey below.
It doesn’t take a lot more time to cook two turkeys than just one, perhaps 30 minutes at most. However, in order to maintain 325-350°F in the cooker, start with more lit fuel than you would for a single turkey.
When cooking a turkey on the bottom grate, make sure it fits within the circumference of the water pan to prevent burning the meat.
Thawing Turkey
Never thaw a frozen turkey on the kitchen counter at room temperature. Instead, use one of these safe methods to thaw a frozen turkey still in its unopened package:
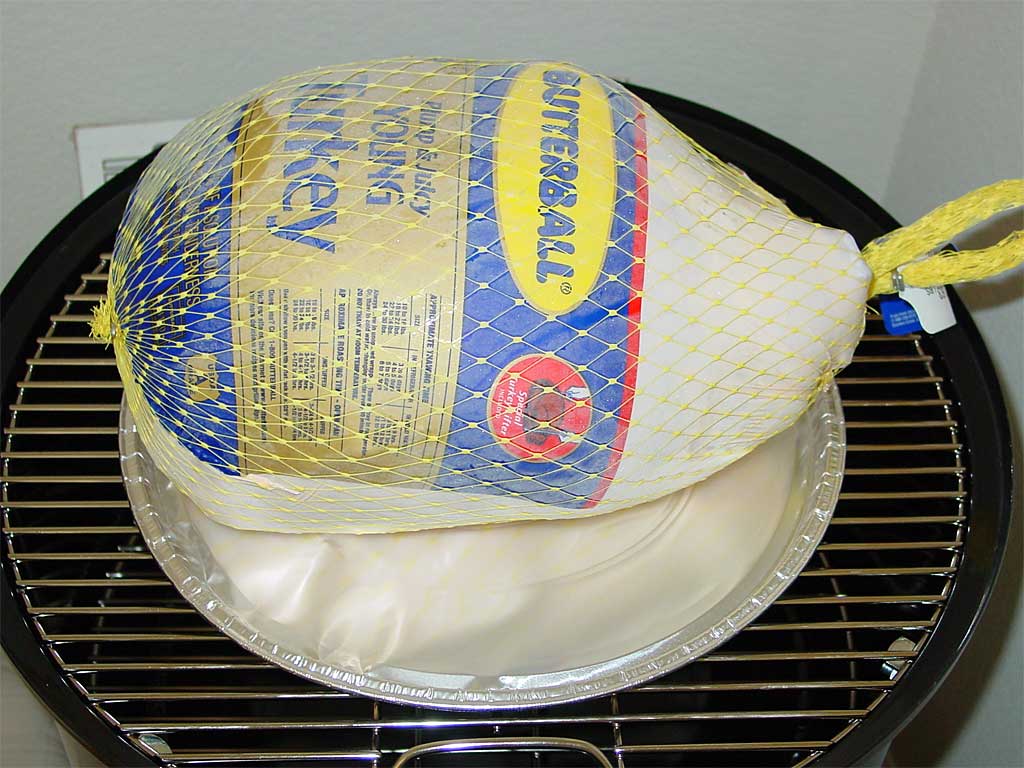
- Place breast-side up on a rimmed baking sheet pan in the refrigerator. Allow 1 day of thawing for every 4-5 pounds of turkey.
- Fully submerge in cold water in a large container placed in the refrigerator. This accelerates thawing compared to the method described above. Thanks to Konrad Haskins for sharing this method with TVWB.
- Fully submerge in cold water in the kitchen sink or in a large container. Let sit 30 minutes, then drain and replace the water. Repeat until thawed, approximately 30 minutes per pound of turkey.
Thawed turkey should be cooked within 1-2 days.
Prepping Turkey
- Remove and discard the leg truss.
- Cut off any large areas of fat at the cavity opening.
- Remove the neck and giblets from the turkey. The neck is usually found in the body cavity and the giblet packet is found in the neck cavity. Reserve these for gravy or discard.
- Rinse the turkey under cool running water and pat dry inside and out with paper towels.
- Flavor brine or salt the turkey (optional). See next section for more information.
- For neat appearance, tuck the wing tips behind the back and pin the neck skin to the back using toothpicks or short skewers.
- If using a vertical roasting stand, you may want to leave the neck skin loose so heat can flow up through the body cavity.
- Apply rub to the turkey (optional).
- Allow the turkey to sit at room temperature while firing up your cooker or up to 1 hour.
Flavor Brining & Salting
Let’s be honest, regular turkey doesn’t have much taste and it tends to dry-out even if slightly overcooked. The self-basting turkey is the industry’s response to these problems.
If you’re looking for an alternative to a self-baster, consider flavor brining or salting a regular turkey . Flavor brining is a process in which a regular turkey is soaked in a solution containing salt, sugar and other ingredients for several hours to enhance flavor and moisture throughout the entire bird. It provides a cushion of moisture even if you slightly overcook the meat. Salting is a different process in which a regular turkey is rubbed inside and out with salt, allowed to sit for a period of time to absorb some of the salt, and then rinse—no soaking in a solution in required.
See All About Brining for flavor brining recipes and Whole Turkey – Salted aka Dry Brined for an example of the salting process.
Can I Brine A Self-Basting Turkey?
Many people have brined self-basting turkeys and have reported good results. If you want to brine a turkey, I usually recommend that you buy a regular turkey that is not self-basting so you have complete control over the flavor and moisture you’re added to the meat. However, if you can’t find a regular turkey at your supermarket, try brining a self-basting turkey. I’ve done one myself and it turned out well—see Whole Turkey – Brined Butterball Self-Basting for details.
Don’t Stuff The Bird
Sunset Magazine says, “A stuffed turkey may be traditional, but it carries a slightly higher risk of incubating harmful bacteria than an unstuffed one; moist dressing in a warm cavity is bacteria’s ideal growth environment. You can avoid this problem by cooking the bird and the stuffing separately. Another advantage of separation is that both cook more evenly and quickly.”
If you insist on stuffing the turkey, cook the bird at 325-350°F. According to Sunset, harmful bacteria are killed after 3 minutes at 140°F and instantly at 160°F. “Check the temperature in the center of the dressing; if the stuffing hasn’t met either of these guidelines, scoop it from the bird into a casserole and bake, covered, until it achieves the right temperature.”
One trick is to preheat the stuffing in the microwave to 120-130°F. Wrap loosely in cheesecloth and stuff the package into the cavity. Remove the package immediately after cooking and serve.
Basting
There are two schools of thought when it comes to turkey basting. Many people believe basting is essential for beautiful, tasty skin. Others believe it’s a waste of time and energy, it interrupts the cooking process, and it doesn’t add anything to the skin. Alton Brown of Good Eats on Food Network is famous for saying, “Basting is evil.” He suggests that since skin is waterproof, the flavor and moisture of the basting liquid will not penetrate the skin, and so much heat escapes during basting that cooking time is extended, which can result in dry meat.
Should you baste? Yes, if you want to, or if a recipe suggests it. Just remember that every time you open the cooker, you lose heat and extend the cooking time a bit. If you’re cooking a self-basting turkey, however, it may not be necessary. When I cook a whole turkey, I just brush the skin with vegetable oil or melted butter before putting it in the WSM and that’s it.
Vertical Vs. Horizontal Cooking
I prefer to cook a turkey on the top cooking grate, breast side up, just like in the oven. I have used a vertical roasting stand on the bottom cooking grate, but this method has several problems. If you put water in the water pan, then the breasts cook faster than the legs/thighs because the cooker is hotter at the level of the breasts. If you use an empty water pan (my preferred method for poultry), the radiant heat coming off the empty pan cooks the legs/thighs faster than the breasts. This is why I gave up on vertical roasting and now smoke turkeys horizontally on the grate.
Really big turkeys will only fit vertically on the bottom grate. If using a vertical stand, put some water in the pan to protect the legs/thighs, and place foil over the breasts/wings at some point to keep them from overcooking.
When cooking a turkey on the bottom grate, make sure it fits within the circumference of the water pan to prevent burning the meat.
Cooker Temperature
Turkey is naturally tender and does not benefit from “low and slow” cooking the way a tough old brisket does. I’ve cooked turkeys from 225°F all the way up to 350°F and I’m convinced that 325-350°F is the way to go. This temperature gets the fat under the skin hot enough so that it sautés the skin. At lower temps, the fat just renders out without crisping anything, and the result is rubbery skin.
Another benefit of cooking at 325-350°F is that the turkey will cook as quickly as if you did it in the oven. Don’t worry, the turkey will have plenty of time to pick up whatever smoke flavor you choose to impart to it.
If you insist on cooking at a traditional barbecue temp of 225-250°F, Butterball says that to assure food safety the turkey must reach an internal temperature of 140° within the first 4 hours of cooking. A turkey weighing 12-15 pounds should be fine, but a turkey over this weight should either be cooked at 325-350° or flavor brined in a solution that includes a curing agent like Morton Tender Quick to slow the growth of bacteria.
Why gamble? Just smoke that turkey at 325-350°F. You’ll be glad you did.
To achieve a temperature of 325-350°F, you’ll have to cook with an empty water pan. Methods for running the Weber Bullet at 325-350°F can be found on the Firing Up Your Weber Bullet page.
Where To Measure Internal Meat Temperature
Internal temperature should be measured in the deepest part of the breast and thigh. Measuring in the thigh can be tricky, so I will often use a probe thermometer to measure in the breast from the front of the turkey, parallel to the breast bone. When the breast gets into the 160-165°F range, I will probe both breasts in a couple of different locations and average the readings, then I will also probe the thigh in several spots and average those readings. Remember, a probe thermometer only measures temperature in one spot, so don’t trust it completely—it may give a false low reading. Probe in several different spots to confirm your turkey is properly cooked.
Take a look at the estimated cooking times below and begin paying attention to internal temp 30-60 minutes before the low end of the estimated time range. Double-check the temperature by either inserting the probe thermometer in several locations in the breast or by using another instant-read thermometer in addition to the probe thermometer.
Ignore The Pop-Up Timer
If your turkey comes with a pop-up timer, do not rely on it to determine doneness. These spring-loaded devices pop at 178-180°F. At this temperature the dark meat is thoroughly cooked, but the white meat is overcooked. You’re better off using a probe thermometer or an instant-read thermometer to check for doneness. You can leave the pop-up timer in the bird or remove it before cooking—it doesn’t matter.
Cooking Times & Temperatures
The biggest mistake people make when it comes to turkey is that they overcook it. In the old days, cookbooks told us to cook turkey to 185°F in the deepest part of the thigh. For many years, the USDA told us that that turkey should be cooked to 170°F in the breast and 180°F in the thigh. Unfortunately, these temps resulted in dry, overcooked turkey.
Nowadays:
- The USDA recommends 165°F in the thigh, wing, and thickest part of the breast.
- Cook’s Illustrated magazine says turkey should be cooked to 165°F in the breast and 170-175°F in the thigh.
- J. Kenji López-Alt, author of the award-winning book The Food Lab: Better Home Cooking Through Science, likes to butterfly a turkey and cook it to 145°F in the breast and 160-170°F in the thigh.
I like the texture and moisture level of turkey that’s barbecued to 160-165°F in the breast, 170-175°F in the thigh—and to the low end of those ranges, if possible. With a 20-30 minute rest after cooking, the internal temp of a 160°F turkey breast may rise about 5°F to 165°F. For a brined bird, you can cook the thigh up to 180°F without worrying about drying out the breast.
If 160°F doesn’t seem safe to you, remember that when it comes to food safe turkey, it’s all about temperature and time. Based on USDA data, turkey that’s cooked to 160°F and held at that temperature for at least 26 seconds will have a 7.0 log10 relative reduction in bacteria. In other words, only 1 in 10,000,000 Salmonella bacteria will survive at that cooking temperature and time. Even at López-Alt’s preferred breast temp of 145°F, a turkey only has to be held at that temperature for just under 11 minutes to achieve this same level of food safety.
The chart below provides approximate cooking times for turkey cooked at 325°F. Remember, every turkey is unique and may cook faster than expected. Start checking for doneness 30-60 minutes before the low end of the time range.
| Turkey Weight | Hours Cooked at 325°F |
| 10-12 lbs. | 2-1/2 to 3 hours |
| 12-14 lbs.* | 3 to 3-1/2 hours |
| 14-18 lbs. | 3-1/2 to 4 hours |
| 18-20 lbs. | 4 to 4-1/2 hours |
| 20-24 lbs. | 4-1/2 to 5 hours |
* 12-14 lbs. is preferred for use in the 18.5″ WSM.
- For a 12-14 pound turkey, figure about 15 minutes/pound at 325°F.
- Start checking for doneness at least 30 minutes before the low end of the time range.
- Allow more time and use more fuel on cold, windy days or at high altitude.
Resting Period After Cooking
After cooking, tip the turkey slightly to drain any juices from inside the cavity. Transfer to a rimmed baking sheet pan and let rest for 20-30 minutes before carving. Do not tent or cover the turkey with foil as this will make the skin soft.
During the resting period, residual heat will cause the internal temp of the turkey to rise 5-10°F, and juices driven to the surface and center of the meat will redistribute and reabsorb into the meat. If you skip the resting period, a lot of the juices will end up on the cutting board during carving and not in the meat.
Holding A Turkey At Temperature Before Carving
You can hold a finished turkey at temperature for 90-120 minutes by wrapping it tightly in several layers of wide, heavy duty aluminum foil and placing it breast-side down in an empty cooler. Of course, this will result in soft turkey skin.
Carving
This video demonstrates the process of carving turkey that is described below.
There are many methods for carving a turkey, some of which you can explore using the links at the end of this article. Here’s the method that works best for me:
- Remove the legs/thighs.
- Pull the leg away from the body and cut at the joint.
- Separate the drumstick from the thigh by cutting through the joint.
- Hold the drumstick at an angle and cut slices parallel to the bone.
- Slice meat from the thigh parallel to the bone.
- Remove the wings.
- Cut at the joint.
- Reserve for use as decoration on the serving platter.
- Remove the breast meat.
- Make a long, deep horizontal cut along the bottom of the breast, starting at the wing joint.
- Cut vertically down the side of the breast bone, keeping the knife close to the wishbone and ribcage to remove as much meat as possible. The breast will come off in a single, large piece.
- Slice the breast meat across the grain into 1/4″ slices.
I like to use an electric carving knife to neatly slice the breast meat after removing it from the carcass.
Solving Common Turkey Problems
Many of the challenges faced when smoking a turkey in the WSM are the same as when roasting a turkey in the oven, and the solutions are the same, too. Here are some tips for solving common turkey problems.
Turkey Is Still Frozen Solid
Keep turkey in its unopened packaging. Fully submerge in cold water in the kitchen sink or in a large container. Let sit 30 minutes, then drain and replace the water. Repeat until thawed, approximately 30 minutes per pound of turkey.
Turkey Is Thawed Outside, But Frozen In The Cavity
Rinse inside the neck and body cavity with warm water several times until thawed.
Dry, Overcooked Turkey
Sprinkle meat with hot chicken broth. Season the skin and meat generously with salt and pepper before serving. Have lots of piping-hot gravy and moist side dishes available, including mashed potatoes and cranberry sauce.
Undercooked/Bloody Thigh Joint
When cooking a whole turkey to 160-165°F in the breast, it’s common for the drumstick to reach 170-175°F, but not the thigh. If the thigh joint appears bloody or the meat undercooked, cut the drumsticks from the thighs and place the thighs in a baking dish. Bake at 450°F for 10-15 minutes or microwave at 100% for 1-3 minutes until no longer red.
Dark Skin
A flavor brine or rub containing sugar can cause skin to appear very dark, even burned, especially if cooked at 325-350°F. Rinse a sugar-brined turkey and use a sugarless rub.
Browning can be controlled by loosely tenting the breast and drumsticks with aluminum foil at either the beginning or end of the cooking process. Vinegar-soaked cheesecloth placed over the turkey also controls browning.
Soft, Rubbery Skin
This can happen when turkey is cooked in the “low & slow” 225-250°F range, especially if the turkey has been flavor brined. Cook at 325-350°F instead. Air-drying a brined turkey for a few hours in the refrigerator may also help. Follow the steps described in the All About Brining topic.
More Guests That You Were Expecting
Buy an extra boneless turkey breast, just in case. Roast in the oven for 45 minutes, slice, and serve with the rest of the turkey.
Is Pink Meat Safe To Eat?
Pink turkey meat is safe to eat as long as you check the internal meat temperature with an instant-read thermometer and it measures 160-165°F in the breast and 170-175°F in the thigh. Pinking can be the result of many factors:
- Chemical reactions between myoglobin in the meat and smoke and combustion gases in the cooker produce the pink “smoke ring” around the outside of cooked meat. Younger turkeys have thinner skin and less fat under the skin, permitting more smoke and gases to interact with the meat.
- Cytochrome c, a component of hemo-protein in turkey meat, does not lose its pink color until it reaches a temperature above 212°F.
- Nitrites in flavor brines and rubs produce pinking in meat, similar to cured ham. Morton Tender Quick is a common ingredient used in flavor brines that contains nitrites. Nitrates and nitrites can also occur naturally in the water and food supply of turkeys, leading to nitrite levels in the bird itself.
Collecting Pan Drippings For Gravy
There are three common ways to collect pan drippings when smoking a turkey:
- Cook the turkey in a shallow, disposable foil pan.
- Cook the turkey on the top cooking grate. Place an empty foil pan on the bottom grate to catch the drippings.
- Cook the turkey on the top cooking grate. Line the water pan with wide, heavy duty aluminum foil, but suspend the foil 1-1/2″ above the bottom of the pan so it does not touch. This prevents the drippings from burning.
Here’s an example of lining the water pan with foil and catching the drippings:
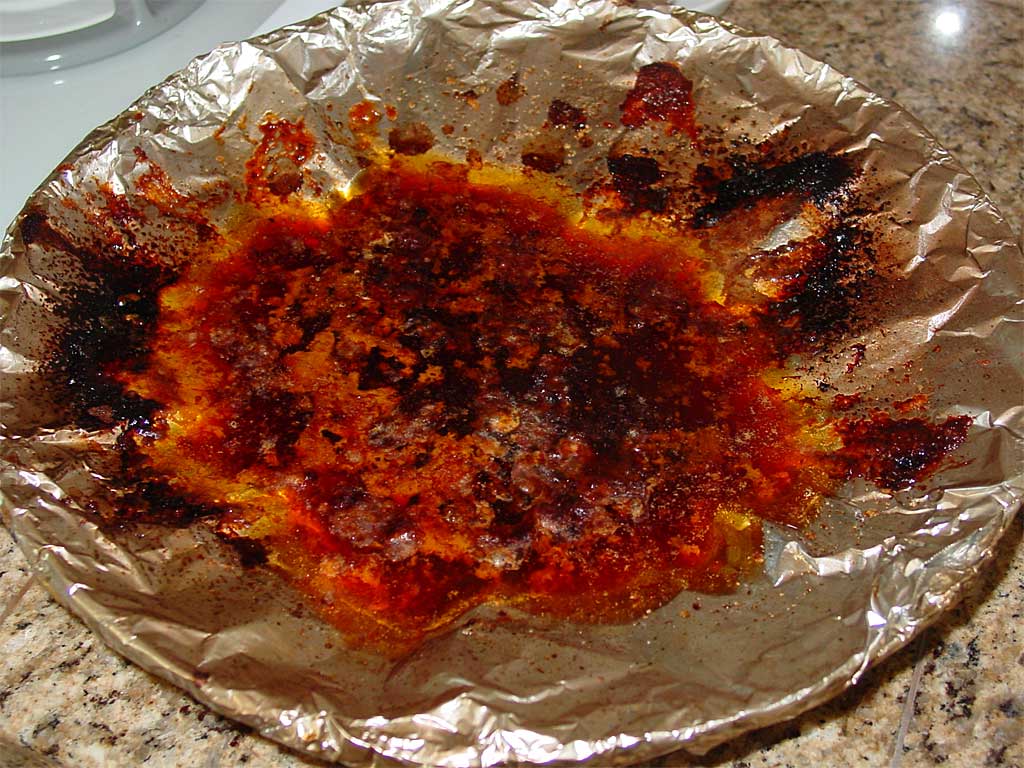 Assuming you don’t over-smoke the turkey, the drippings will be perfect for making gravy—in fact, they’re already seasoned by the salt applied to the turkey.
As you remove the turkey from the cooker, pour any accumulated juices inside the body cavity into the pan. You can also use the juices left in the bottom of a rimmed baking sheet pan after letting the turkey rest before carving.
You’ll typically end up with about 1-1/2 cups of drippings.
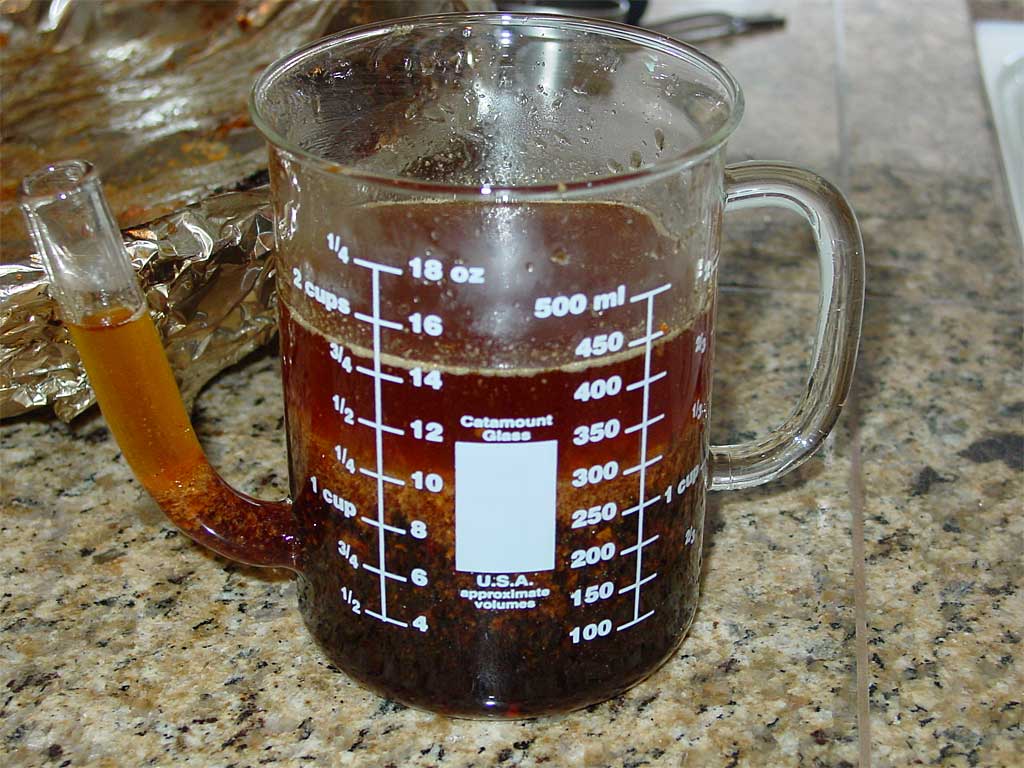
If you don’t have any drippings, make the delicious turkey giblet gravy described on The Virtual Weber Bulletin Board using the giblets, aromatic vegetables, chicken stock, white wine, and seasonings.
Storing Leftovers
Leftover turkey should be carved from the bone and refrigerated or frozen as soon as possible.
- If refrigerating, use shallow storage containers so the meat cools quickly. Refrigerated leftovers should be eaten within 3-4 days.
- If freezing, wrap in heavy-duty aluminum foil and place in a Ziploc freezer bag. Frozen leftovers are best if eaten within two months.
- For longer storage times, store leftovers using a FoodSaver vacuum sealer.
Nutrition
Here’s the skinny on a 3-ounce portion of cooked turkey:
| Calories | TotalFat | CalFromFat | SatFat | Cholesterol | Sodium | |
| White meat skinless |
. 134 |
. 3g |
. 27 |
. 1g |
. 59mg |
. 54mg |
| White meat with skin |
. 167 |
. 7g |
. 63 |
. 2g |
. 65mg |
. 54mg |
| Dark meat skinless |
. 159 |
. 6g |
. 54 |
. 2g |
. 72mg |
. 67mg |
| Dark meat with skin |
. 188 |
. 10g |
. 90 |
. 3g |
. 76mg |
. 65mg |
Source: San Bernardino County Department of Public Health Nutrition Program
Learn More About Turkey
Here are several websites you can visit to learn more about turkey:
- Butterball Turkey
- Diestel Turkey
- Foster Farms
- Honeysuckle White Turkey
- Norbest Turkey
- USA Poultry & Egg Export Council
- USDA Article: Let’s Talk Turkey – A Consumer Guide To Safely Roasting A Turkey
More Turkey Links On TVWB
-
- Whole Turkey – Self-Basting
- Whole Turkey – Basic Brine
- Whole Turkey – Brined Butterball Self-Basting
- Whole Turkey – Apple Brine
- Whole Turkey – Honey Brine
- Whole Turkey – Salted aka Dry Brined
- Butterflied Turkey – Salted
- Turkey Breast – Bone-In
- Turkey Breast – Boneless & Skinless
- Turkey Breast – Central Texas Style
- Giant Texas Turkey Legs: The Easy Way
- All About Brining
- All About Dry Brining (Salting) Meat
- Video: Turkey Carving Demo
- Transcript: Turkey Chat With TVWB & Weber’s Kevin Kolman – November 2013
- Countdown to Thanksgiving: 30 Tips For Your Best Thanksgiving Ever
- Turkey Talk Forum At The Virtual Weber Bulletin Board
- Turkey Recipes At The Virtual Weber Bulletin Board

