Summary
- Buy the small end (ribs 10-12) of a standing rib roast.
- Remove the fat cap and tie the roast at each bone.
- Apply Worcestershire sauce and Montreal Steak Rub, refrigerating overnight.
- Smoke at 225-250°F to an internal temperature of 125°F for medium rare.
- Move the roast to a preheated 500°F oven and sear exterior for 5 minutes.
- Cover loosely with foil and let rest 15 minutes before carving.
This standing rib roast was inspired by a recipe described by Mike Scrutchfield on The BBQ Forum in 1996. It has great flavor and uses just two simple ingredients that may already be in your pantry.
Here are some pictures I took when I prepared this recipe using the Weber Bullet on December 24, 2016. This recipe was first published in December 2002 based on an earlier cook on January 27, 2002.
Video: Standing Rib Roast – Montreal Steak Rub
Here’s a video in which I talk you through the process of making this standing rib roast. Click on the video to play.
Purchase & Prepare A Three-Rib, Small-End Standing Rib Roast
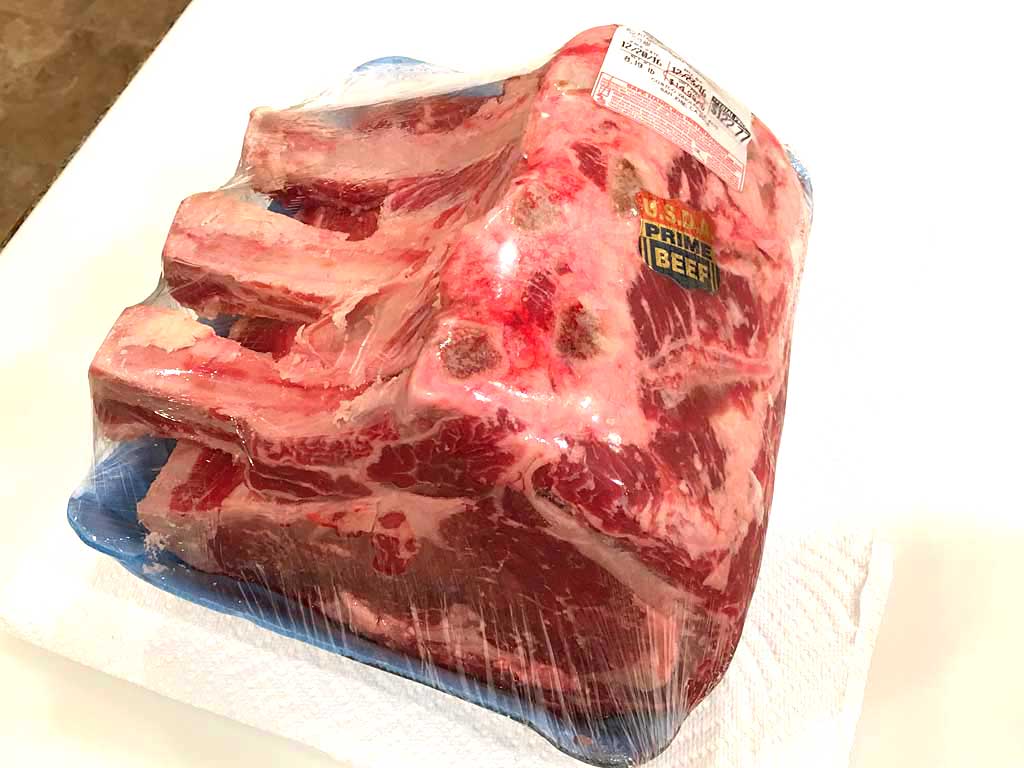
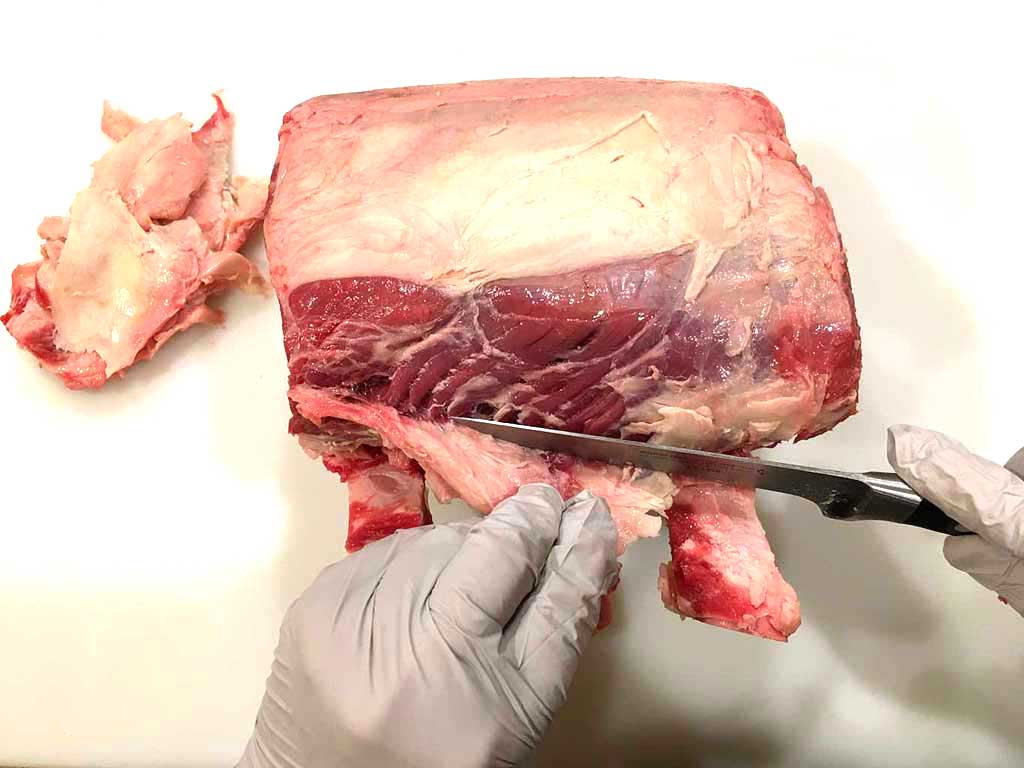
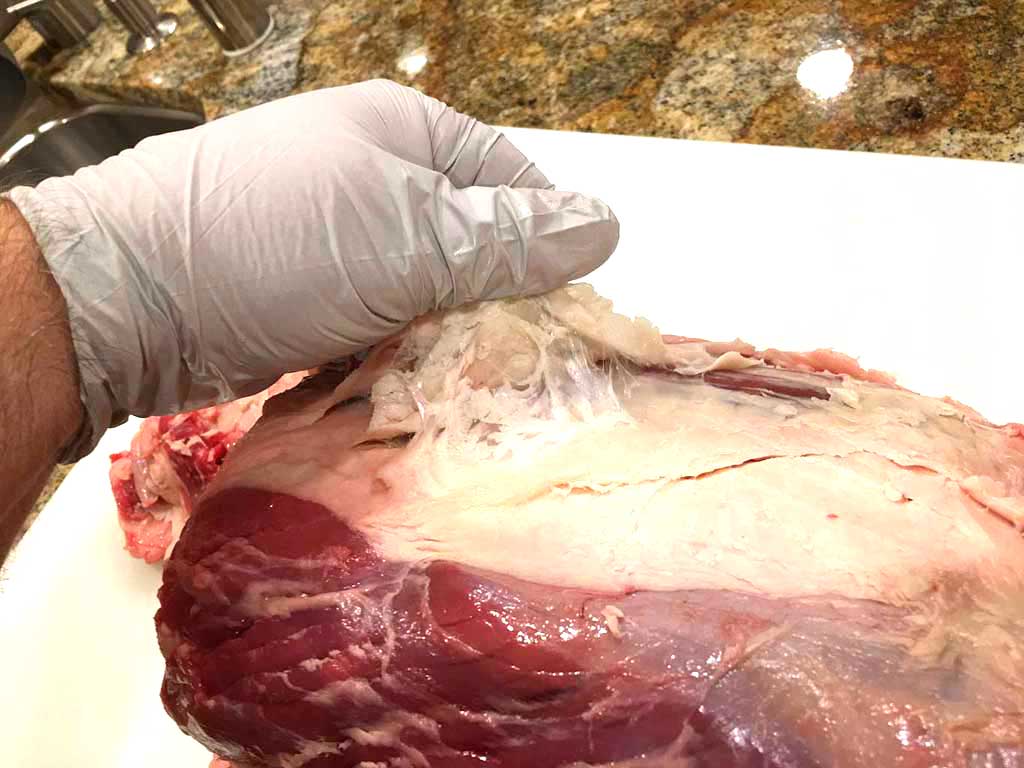
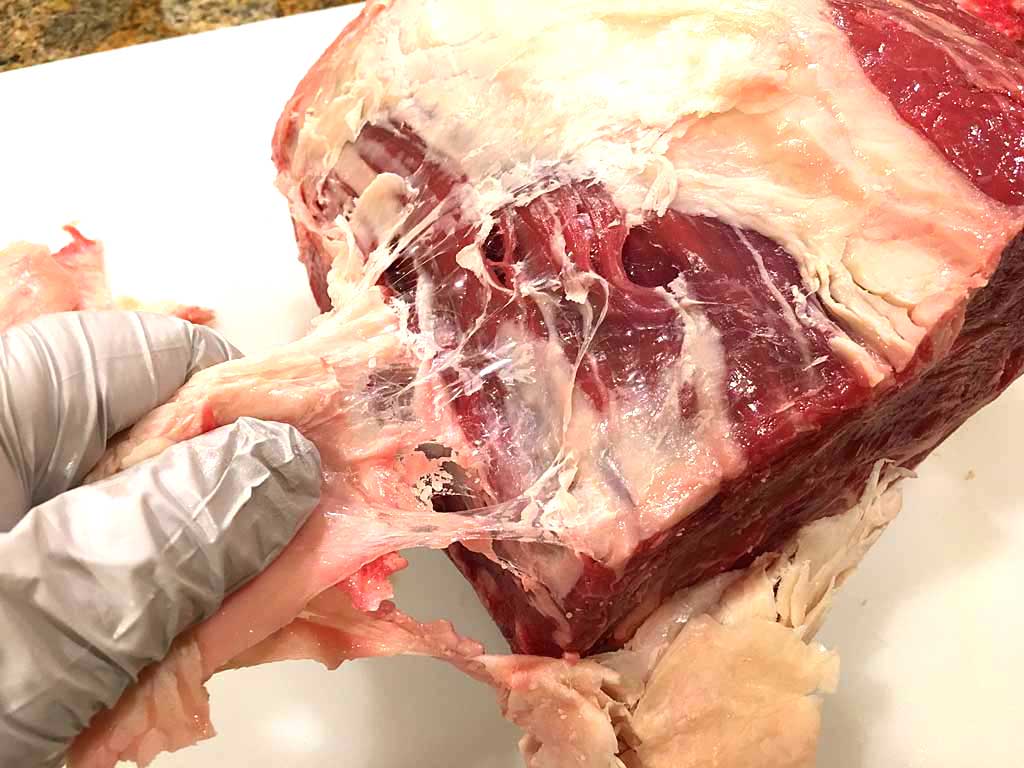
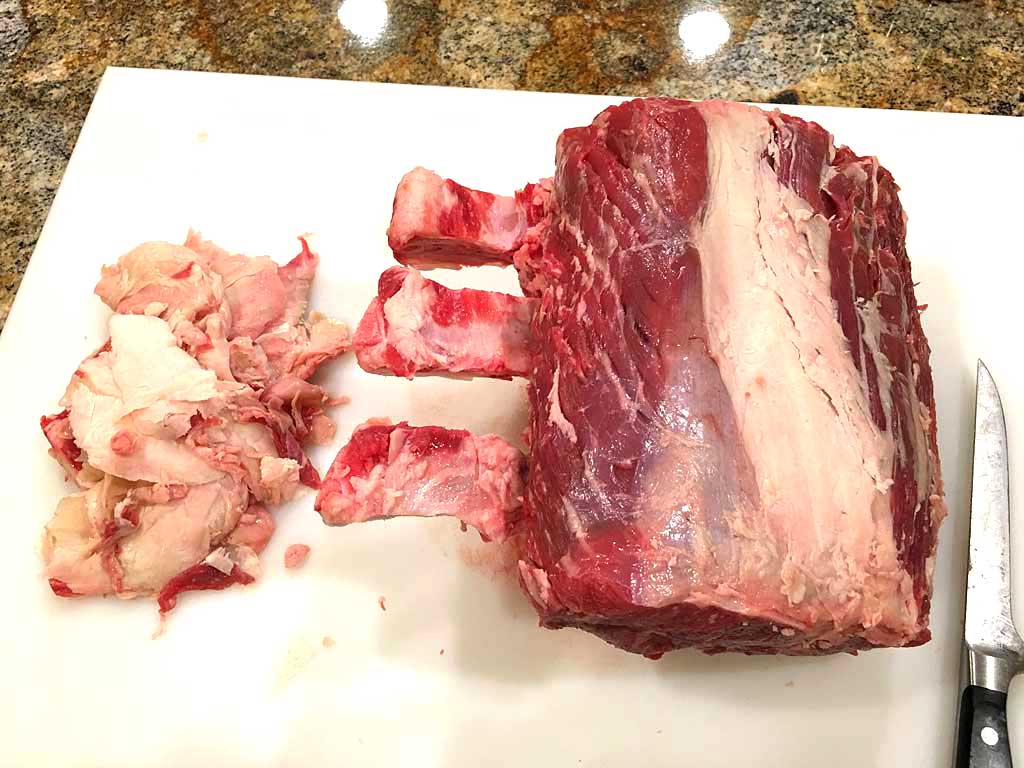
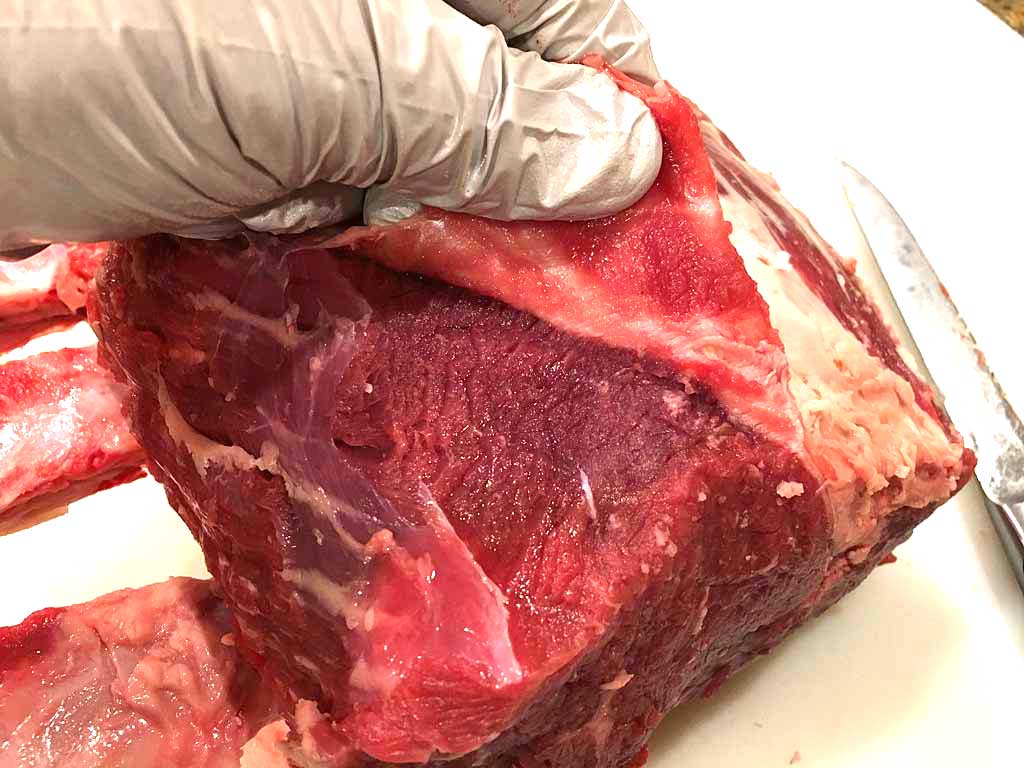
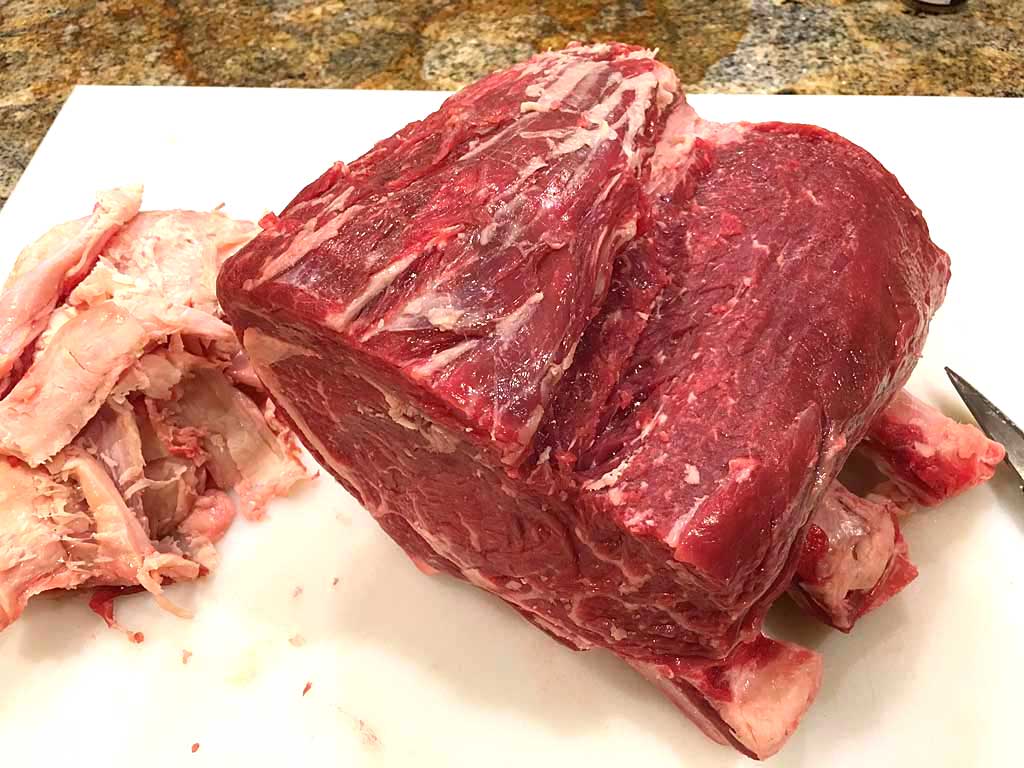
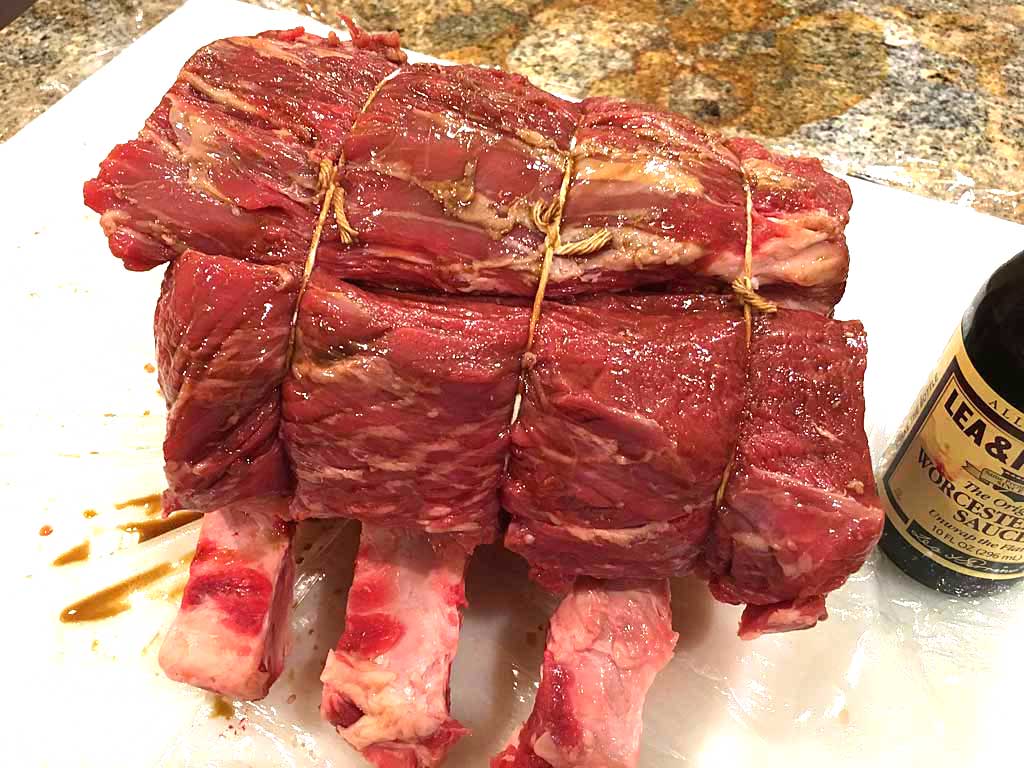
This is a three-bone USDA Prime standing rib roast cut from the small end (ribs 10-12) of a whole roast and weighing 8.19 pounds. You’ll notice the butcher did a half-hearted job at frenching the bones for a better presentation. The roast was sold with the fat cap is intact, which is typical, and many times I’ve cooked rib roasts with the fat cap intact. For this roast, I removed it because a) it doesn’t render well during cooking, b) I don’t enjoy eating it, and c) I’d rather have a nice, crusty, meaty outside edge that’s seasoned with rub.
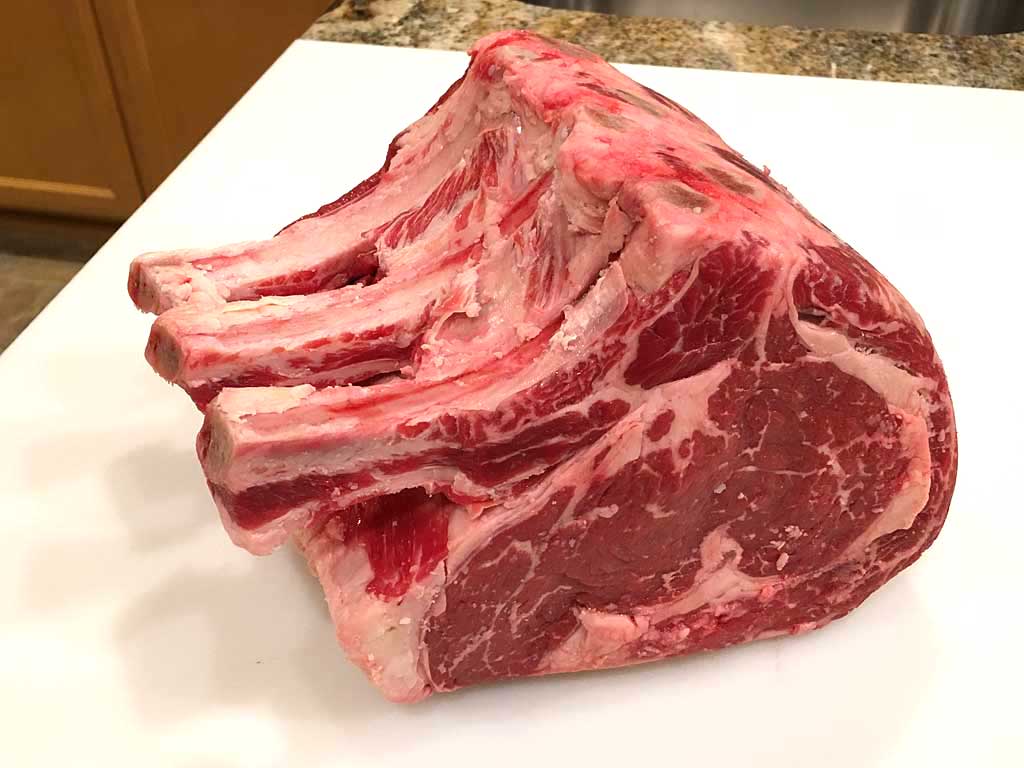
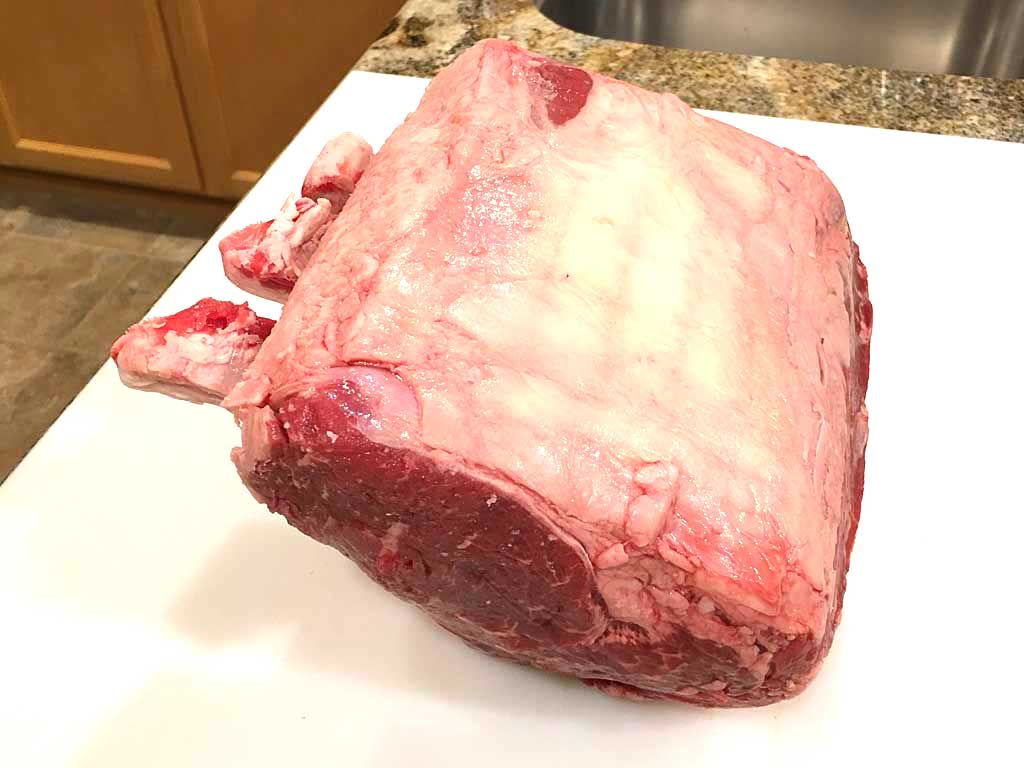
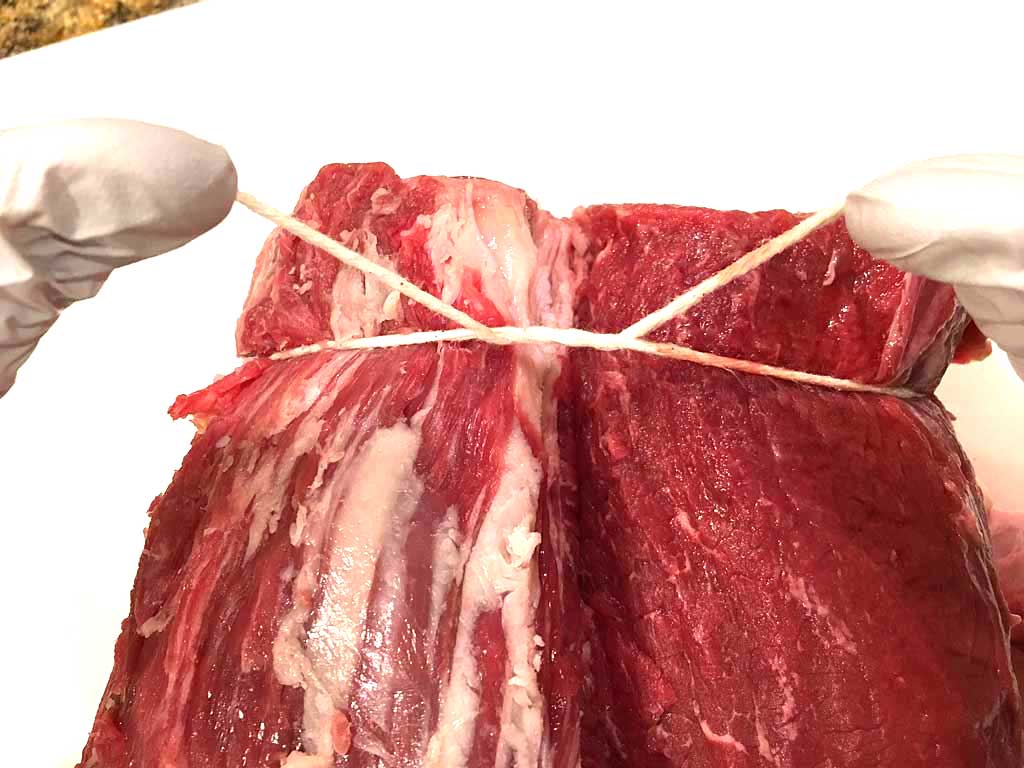
The photos above show how I trimmed and pulled the fat cap off the roast, then trimmed a vein of fat and sinew under the fat cap. Once trimmed, I tied the roast at each bone.
- When buying a bone-in rib roast, figure on 1 to 1-1/4 pounds pre-cooked weight per serving.
- Buy a roast with the rib bones attached. They provide better moisture retention and flavor, act as a natural roasting rack, and are good to eat.
- After trimming fat, tie the roast at each bone. This prevents the spinalis dorsi muscle, also known as the “rib eye cap”, from separating from the outer edge of the roast during cooking. Tying also keeps the roast in a round shape for more even cooking. Place the roast bone-side down. Cut a length of kitchen twine, loop it around the roast parallel to the first bone, bringing the two ends to the top of the roast. Pull snug and tie with whatever kind of knot you like, then repeat at each bone.
- Don’t bother cutting the ribs off and tying them back on before cooking. They’re easily removed once the roast is cooked.
To learn more about standing rib roasts, see the Standing Rib Roast Selection & Preparation article.
This video demonstrates how to tie a roast. Click on the video to play.
Season The Roast
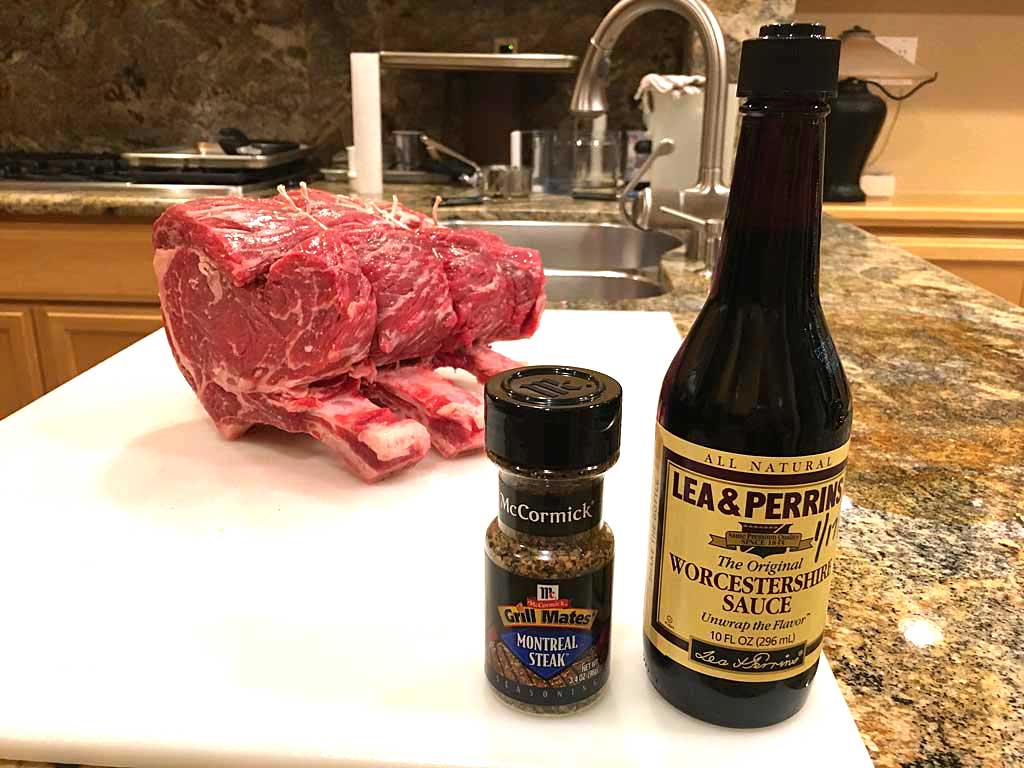
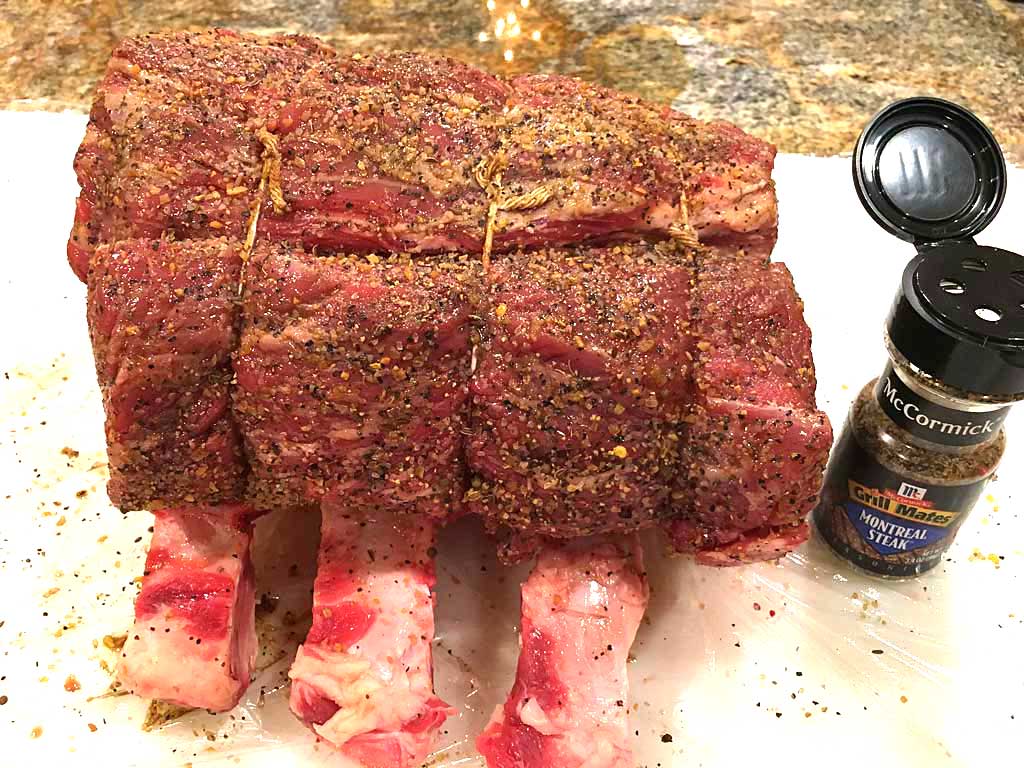
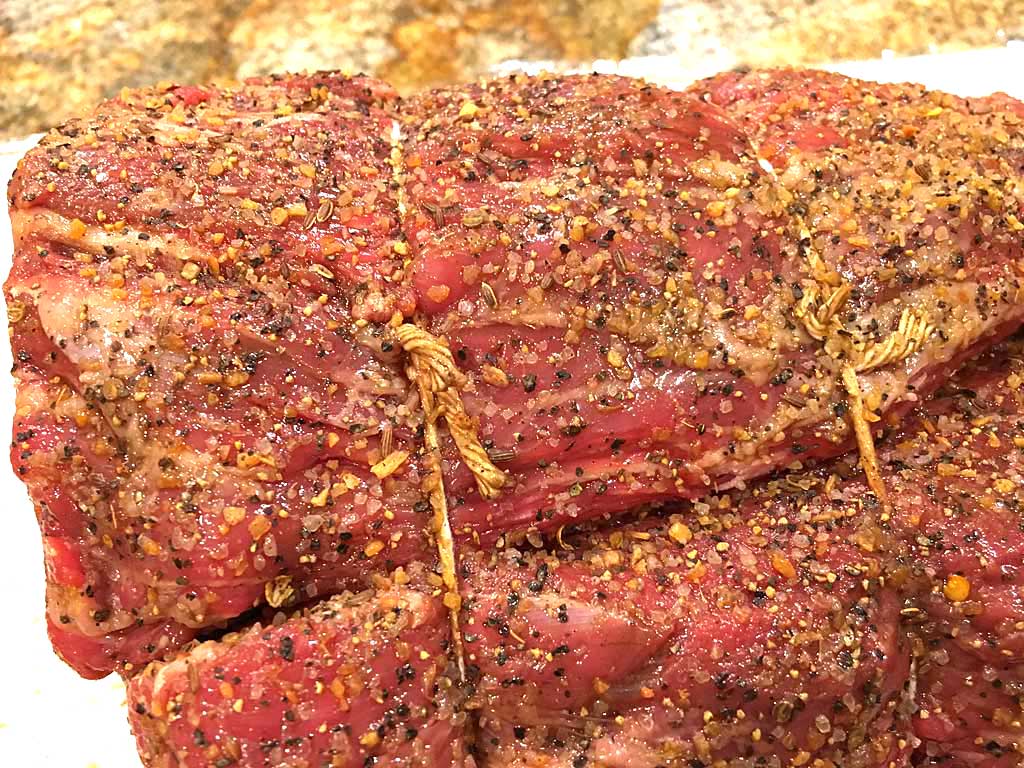
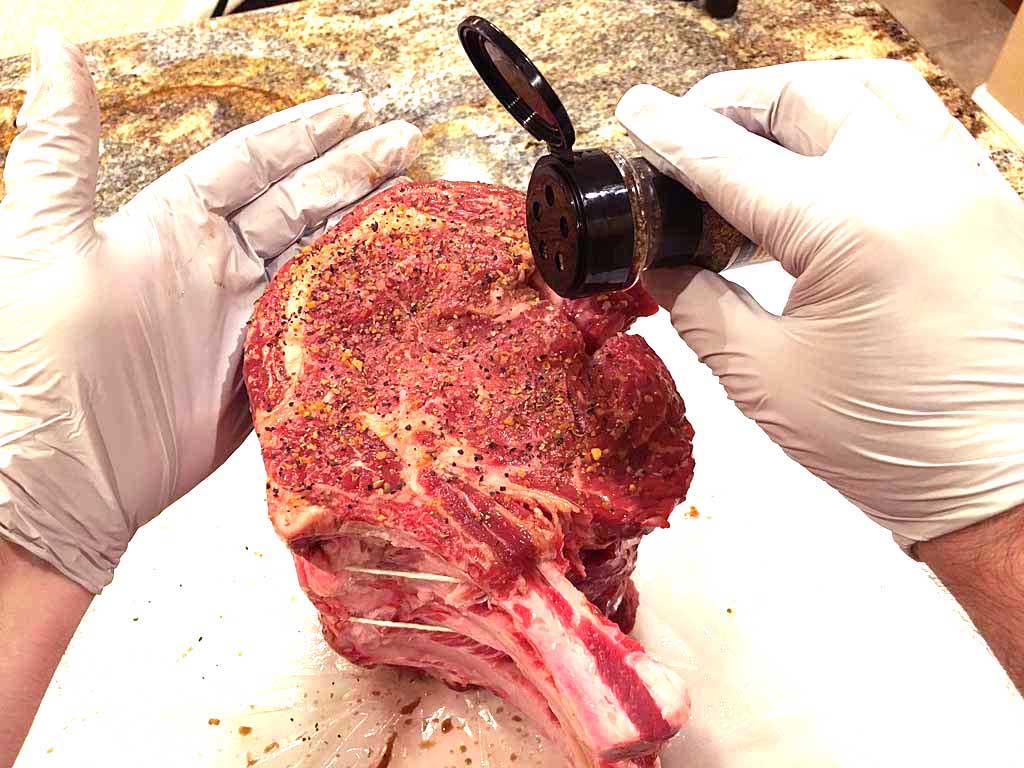
This recipe is simplicity itself and comes from a December 1996 post by Mike Scrutchfield on The BBQ Forum. Pat the meat dry with paper towels. Rub the meat with Worcestershire sauce, then apply a heavy sprinkling of McCormick Grill Mates Montreal Steak Seasoning. This rub consists of coarse salt, black pepper, dill seed, coriander seed, red pepper, garlic, and other seasonings. It’s available in the spice aisle at most supermarkets.
These photos show how the roast looked after applying the Worcestershire sauce, then how it looked after applying the seasoning.
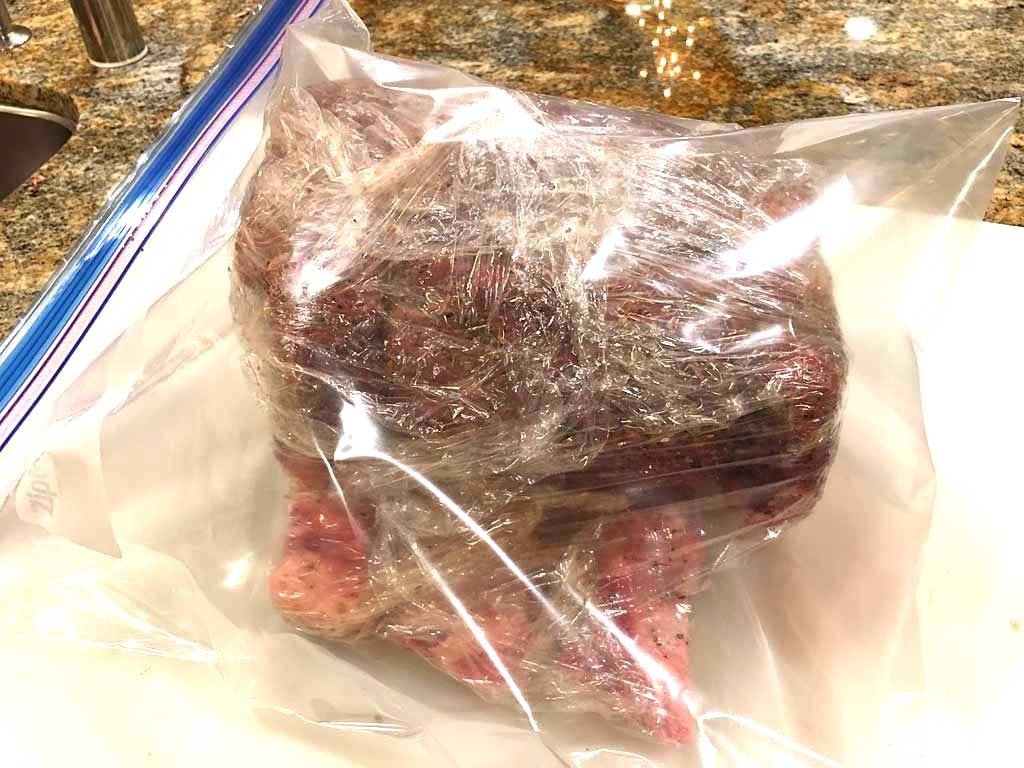
Wrap tightly in plastic wrap and/or place in a Ziploc bag and refrigerate overnight. The next day, remove the rib roast from the refrigerator and let sit at room temperature while you fire-up the cooker.
Select The Smoke Wood
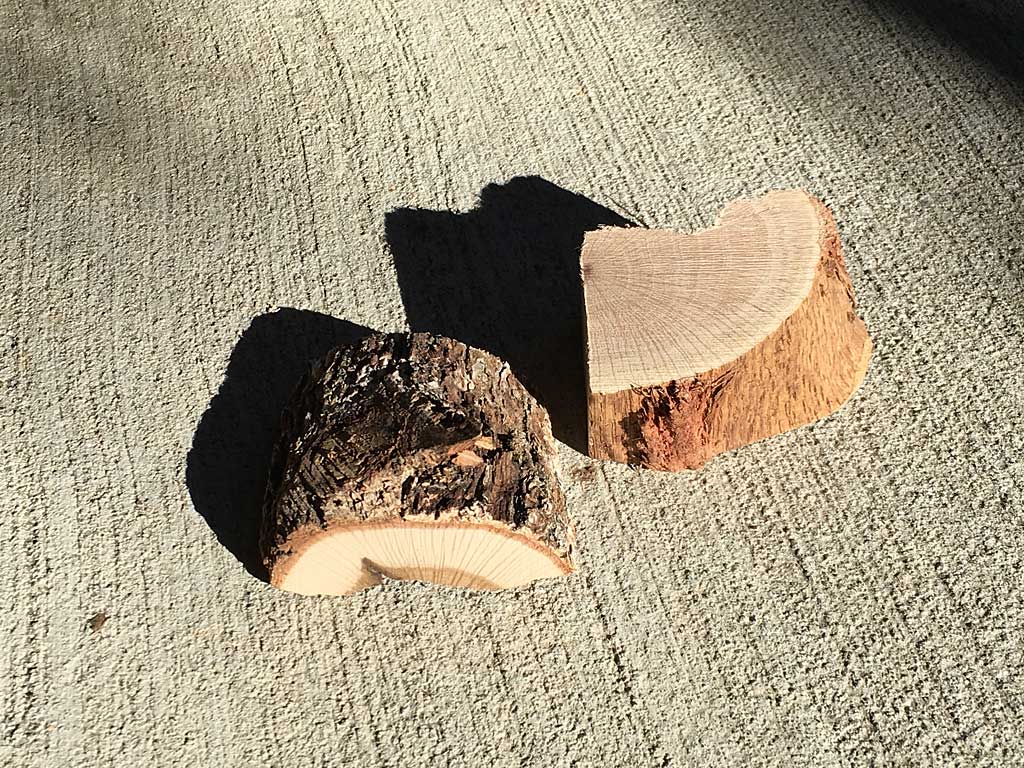
Use 2 chunks of dry oak wood. Each chunk should be about the size of your fist. Pecan, apple, or another mild fruit wood can be used if oak is not available.
There is no need to soak the wood or remove the bark before use.
Fire-Up The Cooker
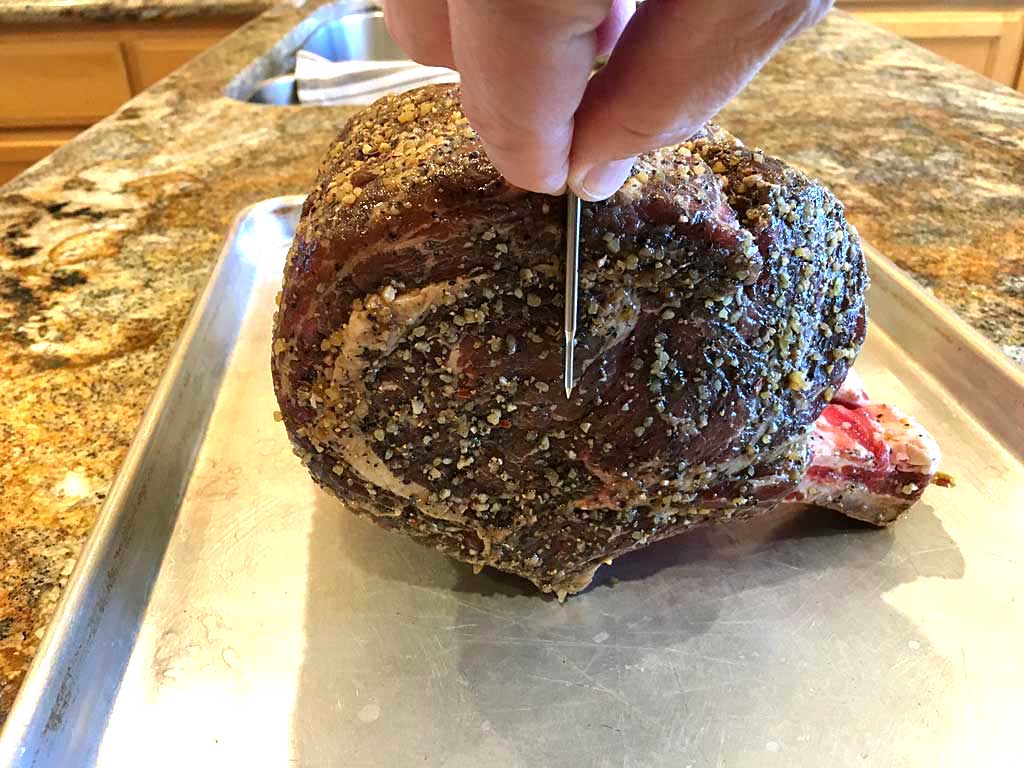
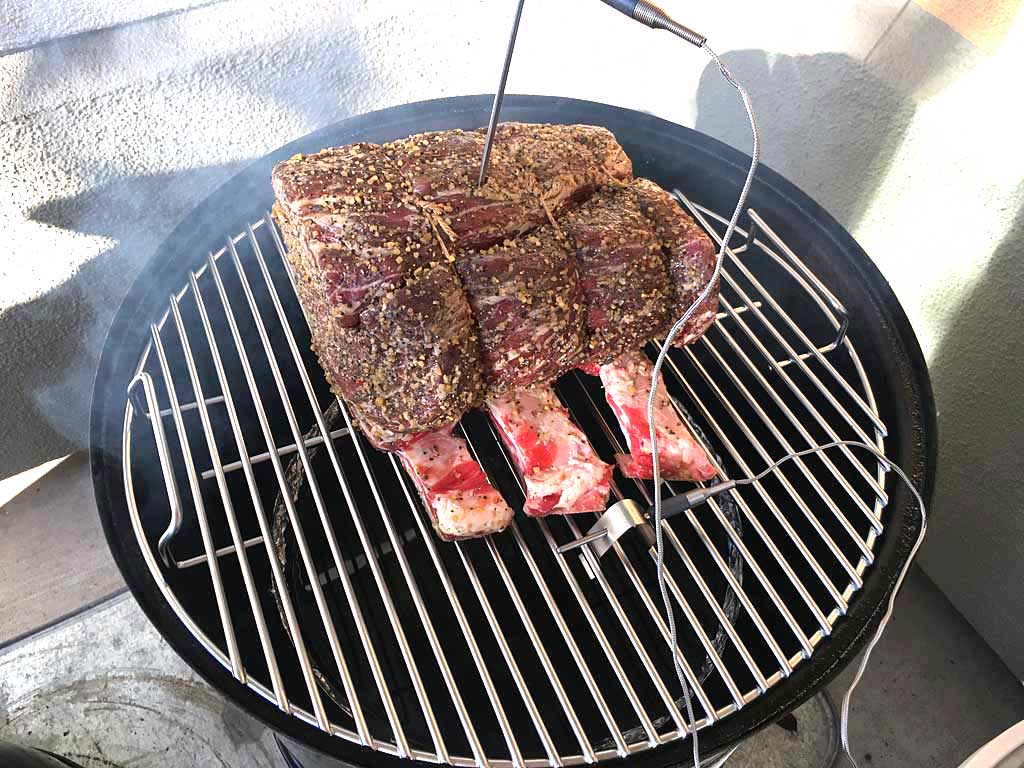
When you pull the rib roast out of the refrigerator, remove the plastic wrap and insert a probe thermometer into the center of the roast. The first photo above shows how I measured to the center of the roast with the probe, holding my fingers against the surface to mark the depth, then inserted the probe into the top center of the roast until my fingers touched the surface again.
Cover the outside of the water pan with wide, heavy duty aluminum foil and place it in the middle cooking section.
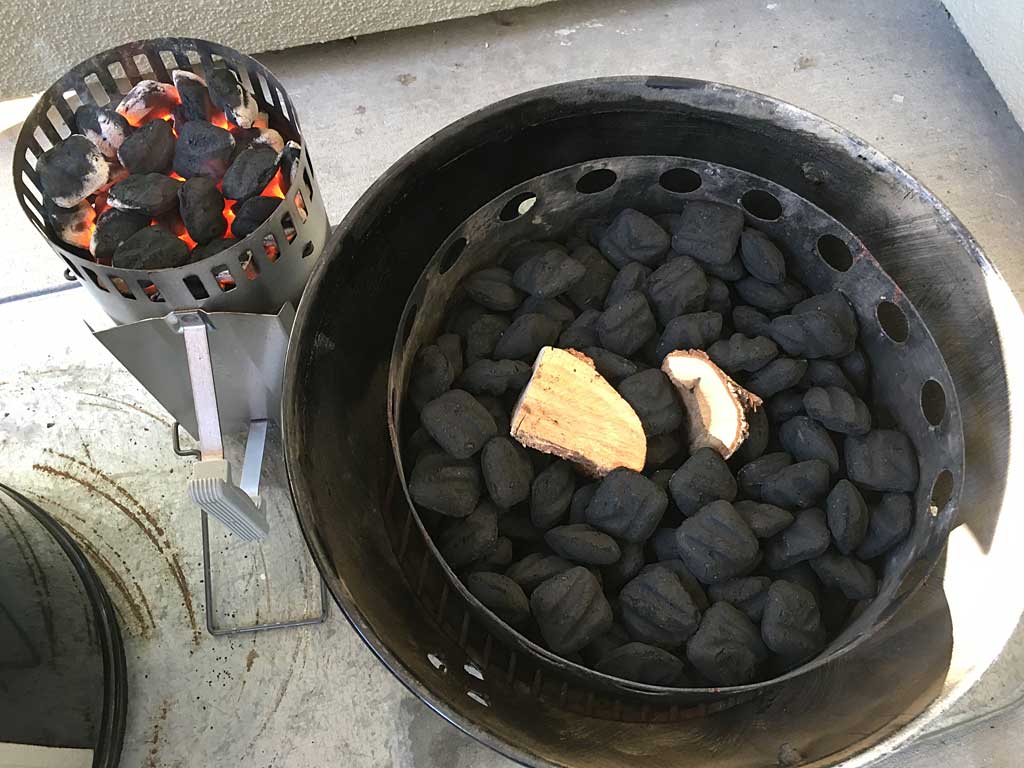
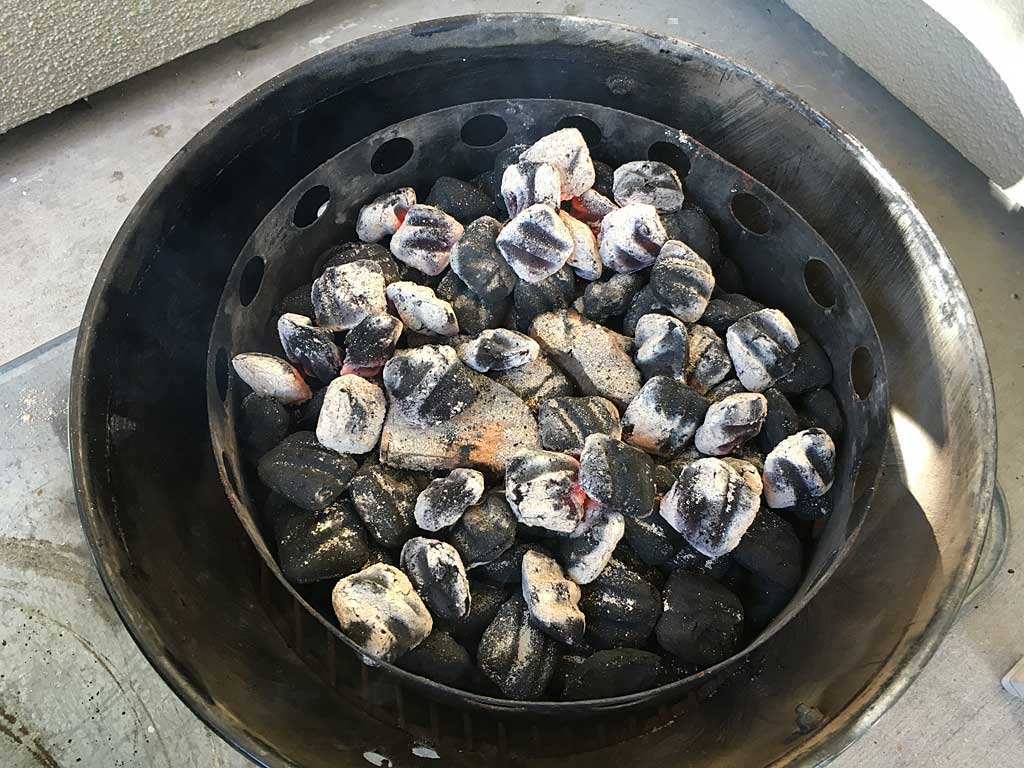
Fire-up the cooker using the Minion Method—fill the charcoal chamber about 1/2 full with unlit Kingsford Charcoal Briquets, nestle the smoke wood chunks into the charcoal, and use a Weber chimney starter to light 30 briquettes, spreading the hot coals over the unlit charcoal and wood.
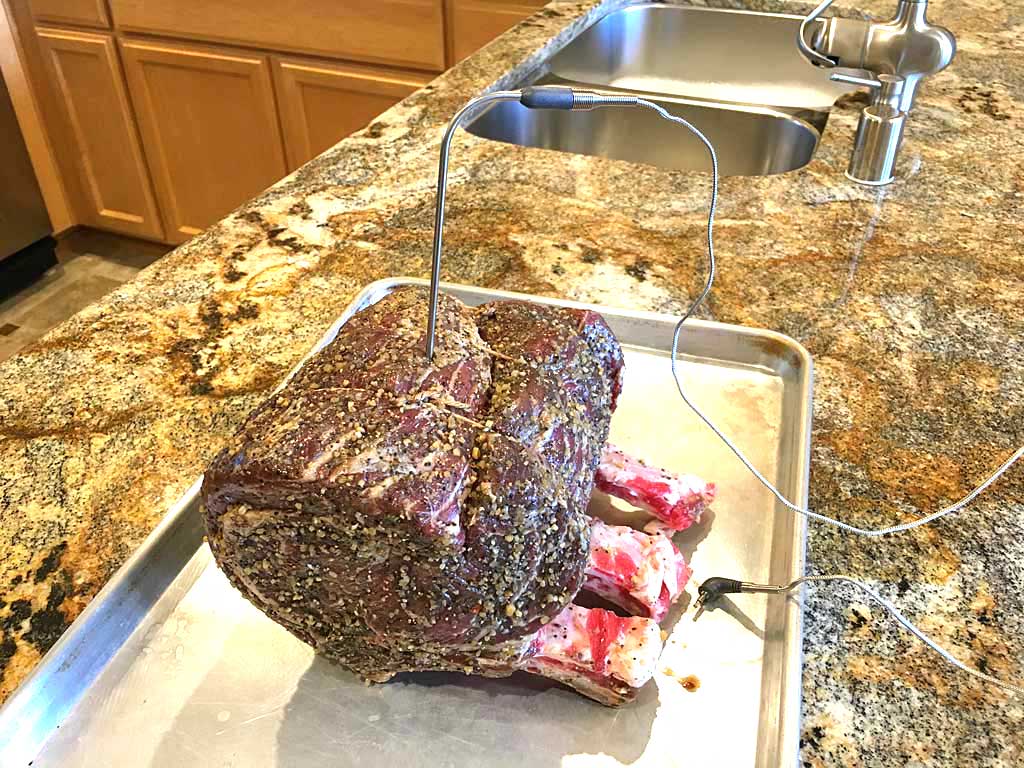
Insert the middle cooking section into the charcoal bowl and fill the water pan from above with hot tap water. Put the top cooking grate in place, then place the roast bone-side down on the grate. Place the lid on the cooker.
Smoke The Rib Roast, Then Sear In Oven
Set the top vent 100% open and leave it that way throughout the entire cooking session. Start with all three bottom vents 100% open. As the cooker approaches 200°F, begin to partially close all 3 bottom vents to maintain 225-250°F. Adjust the bottom vents as needed to maintain this temperature range throughout the cooking process.
Cook the rib roast at 225-250°F until the internal meat temperature is 10°F below the final internal temp you want to achieve. See Standing Rib Roast Selection & Preparation for a chart of doneness internal temps.
Move the roast to a rimmed baking sheet pan and place it in a preheated 500°F oven for 5 minutes to sear the exterior surface. Remove the roast from the oven, cover loosely with aluminum foil, and let the meat rest for 15 minutes before serving). Residual heat in the meat will cause the internal temp to rise 5-10°F during the rest and the juices will redistribute and stabilize within the roast.
Alternatively, after searing you can hold the roast at serving temperature for up to an hour by wrapping it tightly with two layers of foil and placing it in an empty cooler.
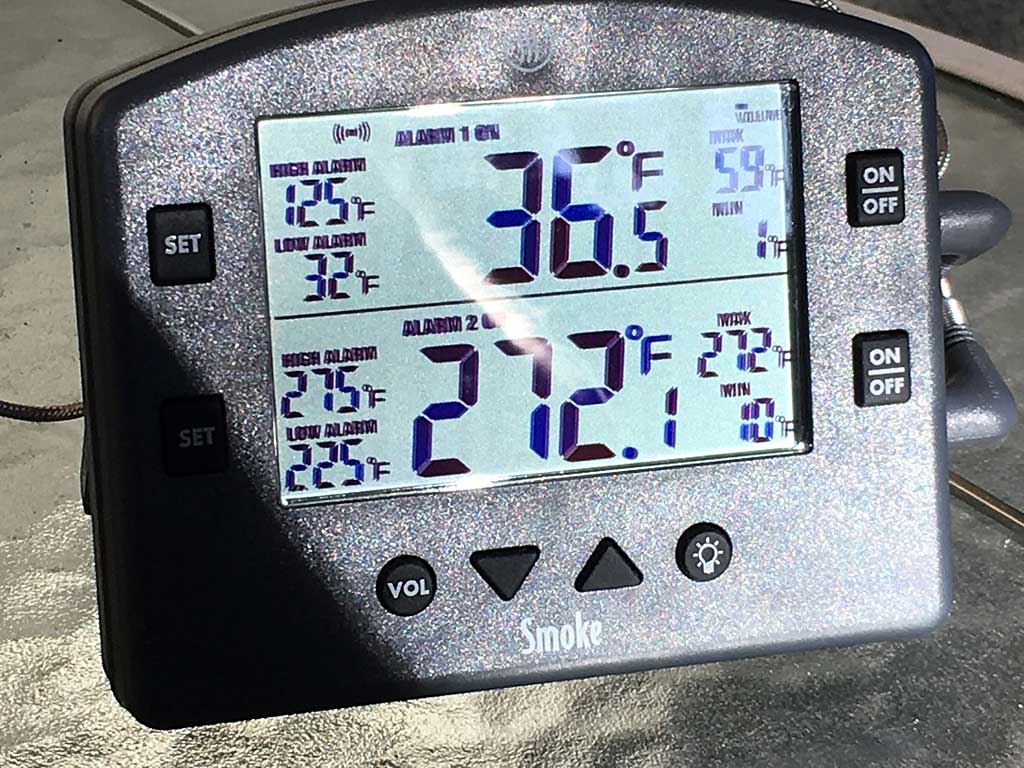
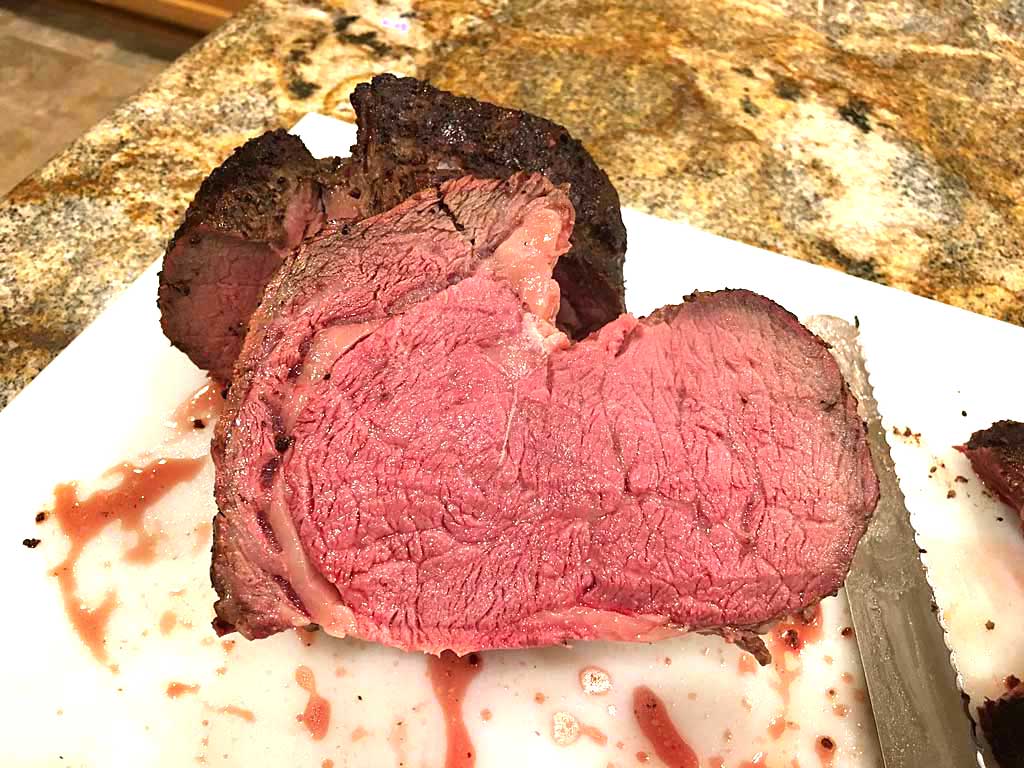
For this roast, I cooked the meat to an internal temp of 125°F for medium rare, then seared it for 5 minutes and rested it for 15 minutes before serving.
There’s no need to baste or turn the meat during cooking.
Estimated cooking time for a 3-bone standing roast is 30-40 minutes per pound.
Here’s how the cooker and internal meat temperatures went during the cooking process.
| Time | Lid Temp | Meat Temp | Vent 1 % | Vent 2 % | Vent 3 % |
| 2:00 pm | – | – | 100 | 100 | 100 |
| 2:30 pm | 285 | 37 | 50 | 50 | 50 |
| 2:45 pm | 275 | 40 | 50 | 50 | 50 |
| 3:00 pm | 275 | 43 | 25 | 25 | 25 |
| 3:15 pm | 267 | 49 | 25 | 0 | 0 |
| 3:30 pm | 250 | 56 | 25 | 0 | 0 |
| 3:45 pm | 231 | 69 | 25 | 0 | 0 |
| 4:00 pm | 226 | 77 | 25 | 0 | 0 |
| 4:15 pm | 220 | 88 | 25 | 0 | 0 |
| 4:22 pm | 213 | 93 | 100 | 25 | 0 |
| 4:30 pm | 230 | 98 | 100 | 25 | 0 |
| 4:45 pm | 243 | 108 | 50 | 25 | 0 |
| 5:00 pm | 235 | 112 | 50 | 25 | 0 |
| 5:15 pm | 227 | 118 | 50 | 25 | 0 |
| 5:30 pm | 237 | 123 | 50 | 25 | 0 |
| 5:37 pm | 237 | 125 | 50 | 25 | 0 |
Note that the vent percentages represent the way I set the vents at the time indicated.
Carve & Serve The Roast
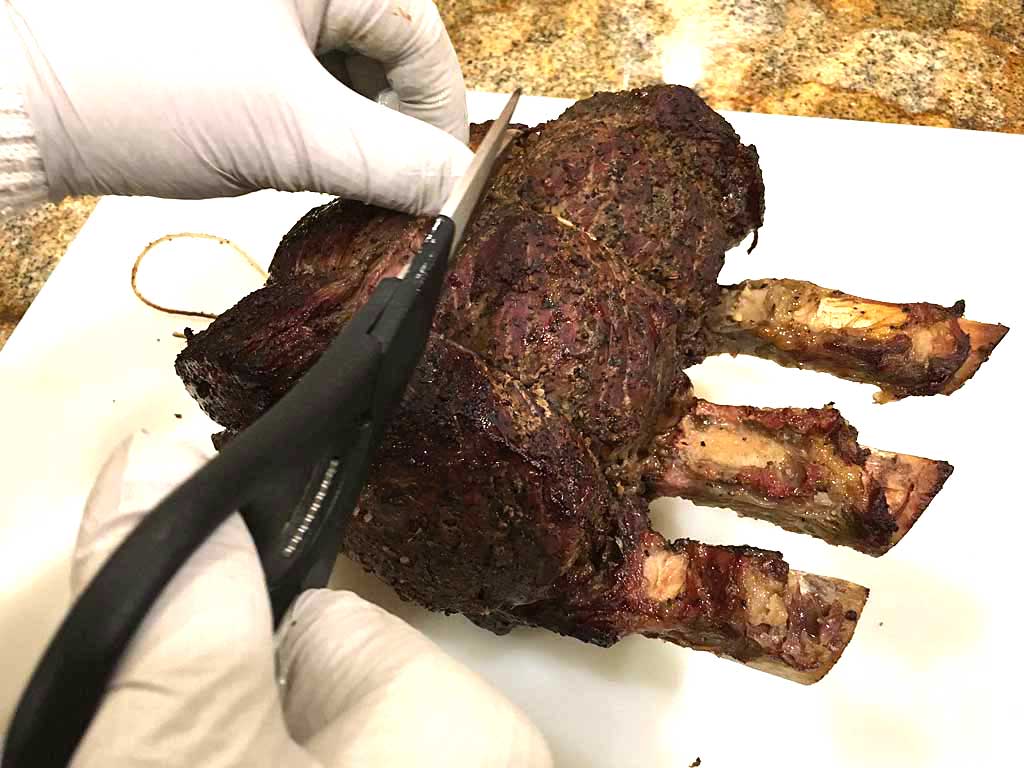
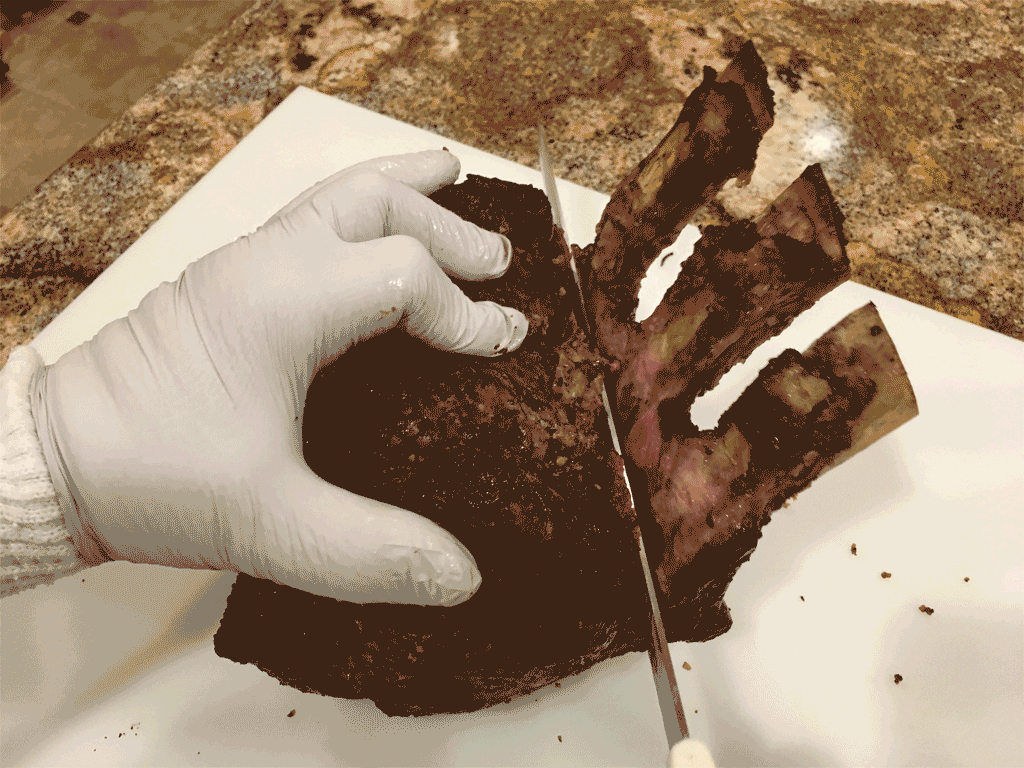
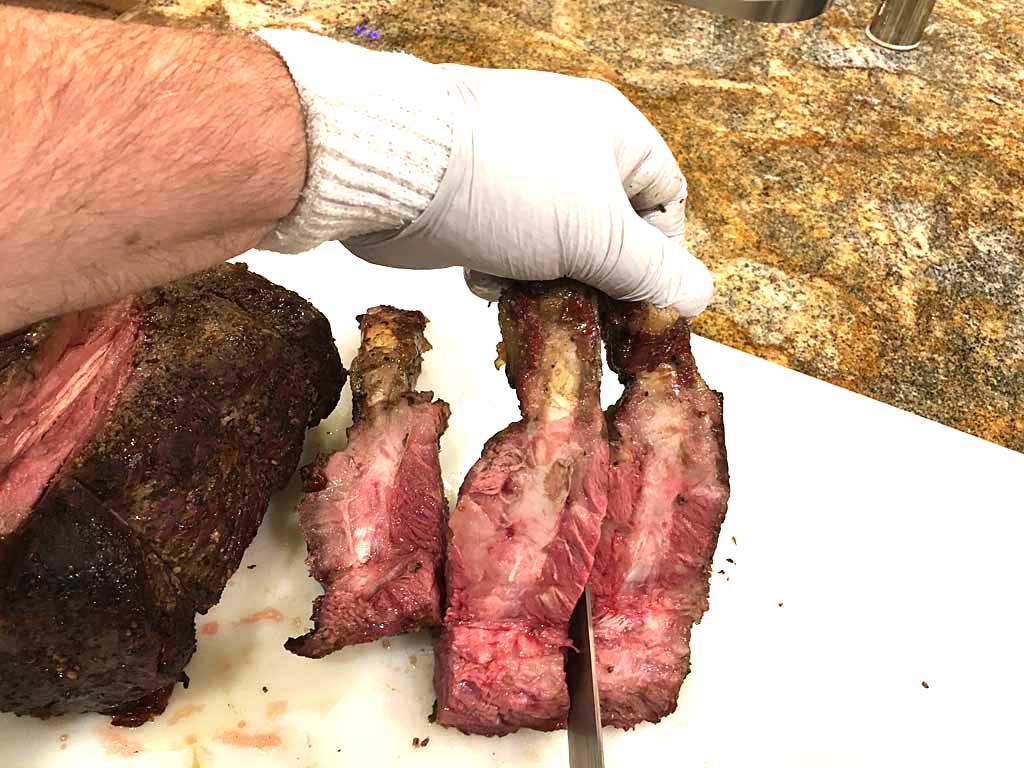

To carve, remove the twine and roll the roast onto its side so the bones are pointing straight up. Using the bones as a handle, cut downward close to the bones using a sharp boning knife or an electric carving knife to remove the bones. Click here to see the cutting process as a GIF.
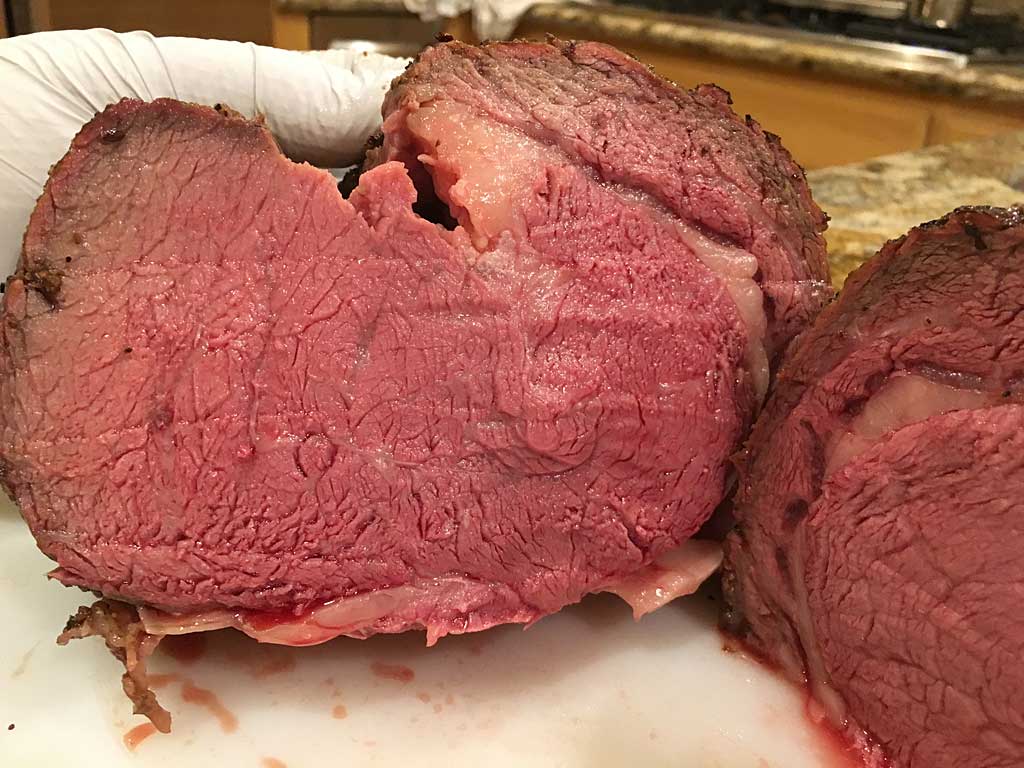
Next, place the roast flat on the cutting board and carve slices 1/2″ thick or to your liking. Cut the bones into individual pieces and serve them along with the roast…or save them for yourself!
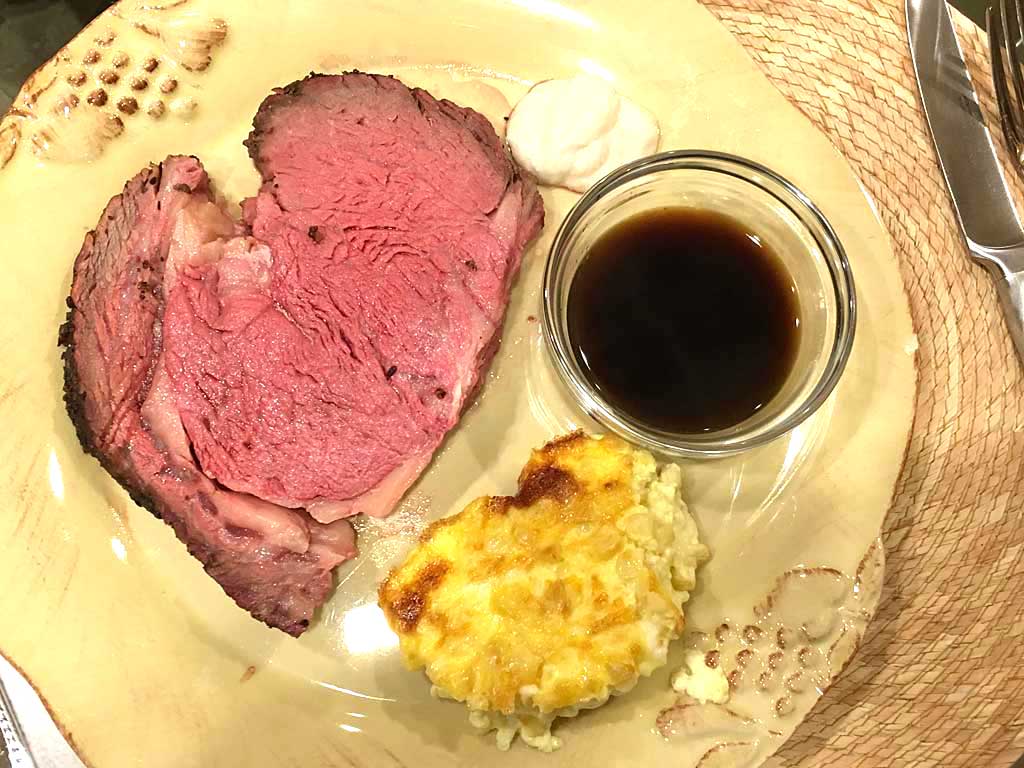
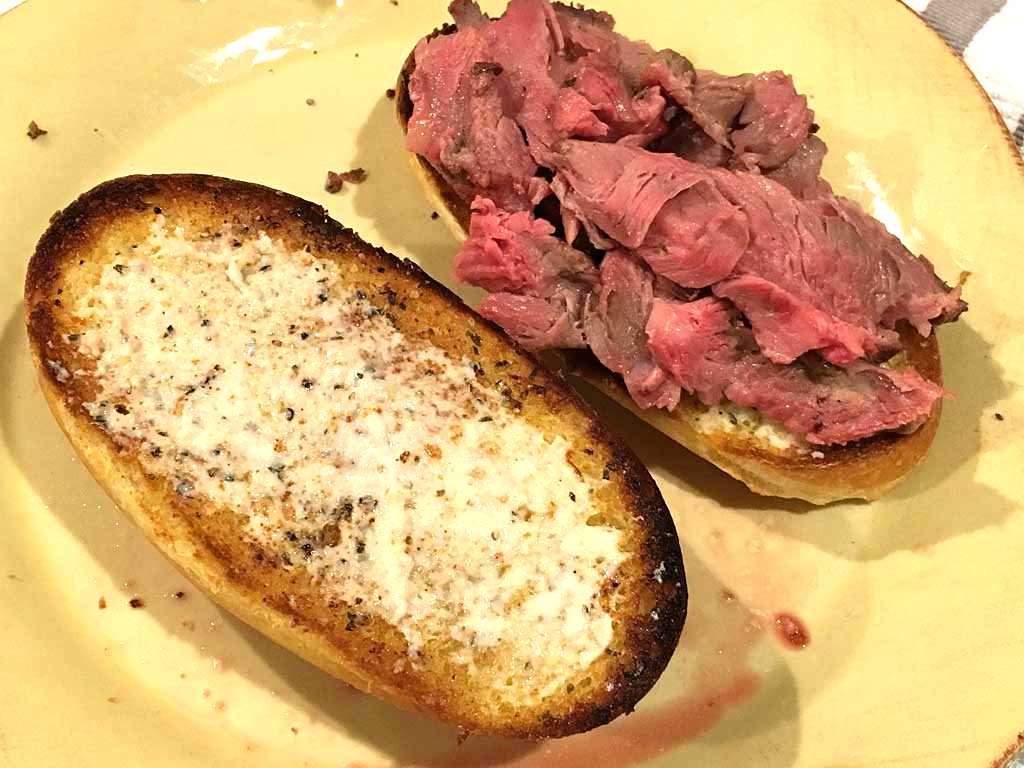
I served this prime rib with au jus and a side of corn pudding. The next day, it was thinly sliced prime rib on a toasted roll with garlic butter and creamy horseradish sauce.
Portion and Freeze Leftovers
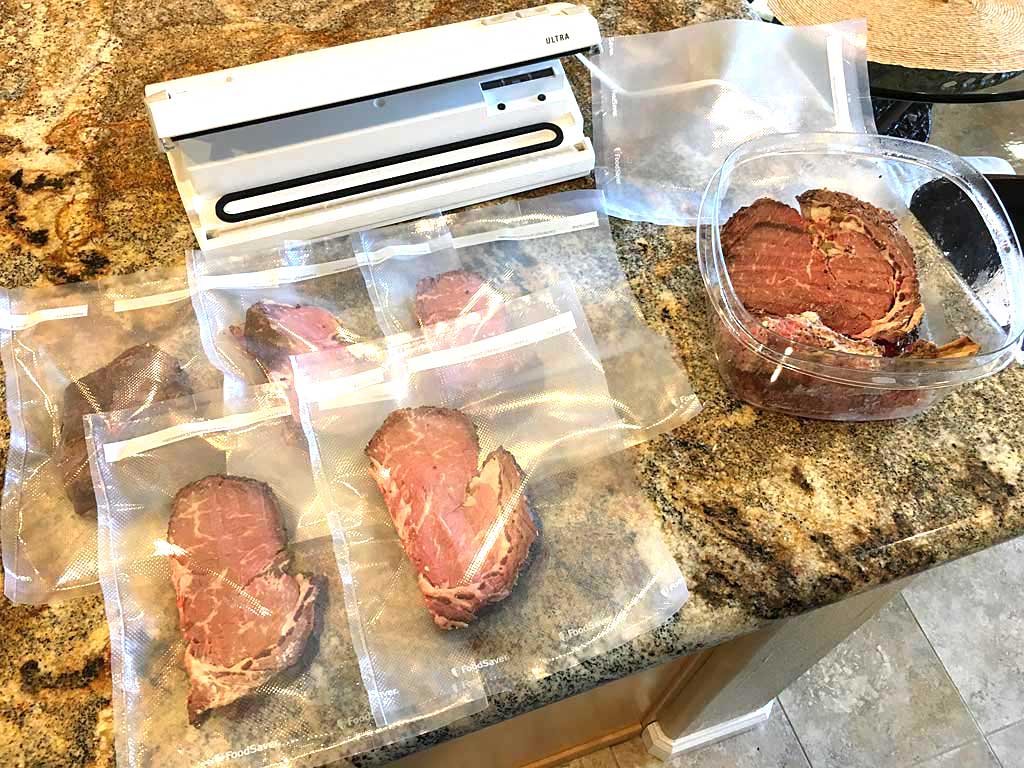
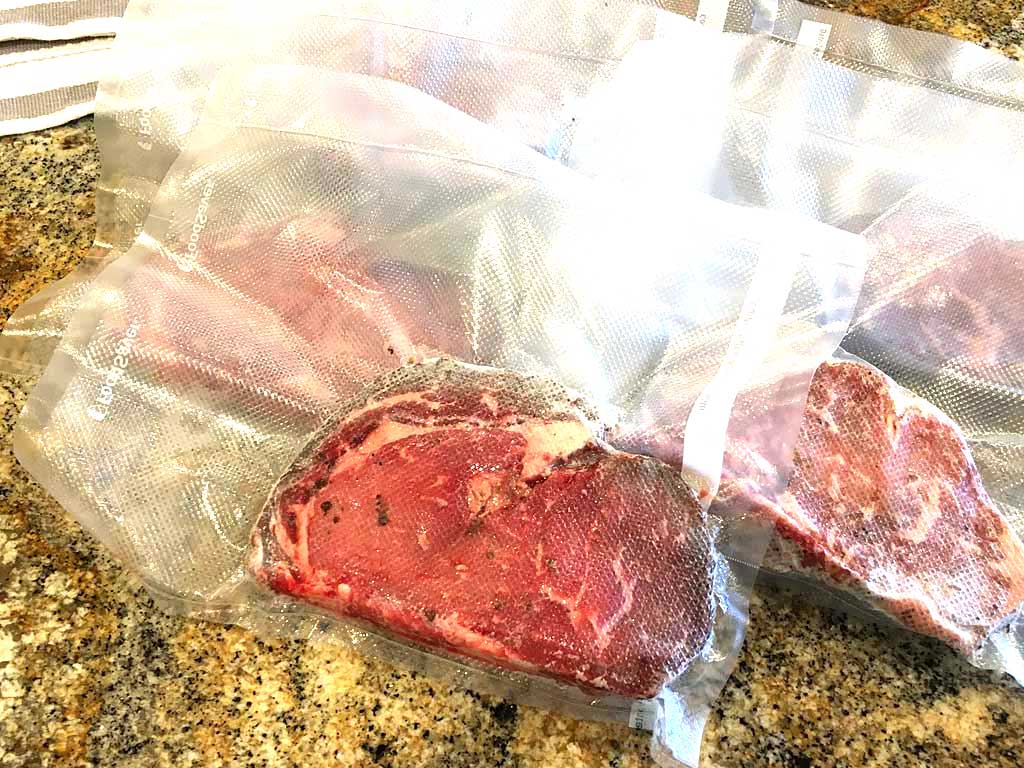
Even with a three-rib roast like this one, you’re likely to end up with leftovers. I like to slice the leftover roast into serving portions and vacuum pack each portion in FoodSaver bags. These can be frozen for months then thawed and reheated gently in boiling water right in the bag, or at 20% power in the microwave on a plate covered with plastic wrap. It tastes almost as good as the day you originally cooked it.
More Standing Rib Roast Links On TVWB
- Prime Rib – Herb Crusted
- Standing Rib Roast – Dry Aged
- Standing Rib Roast – Salt & Pepper
- Standing Rib Roast Selection & Preparation
 About Worcestershire Sauce
Here’s the history of Worcestershire sauce as told by Lea & Perrins, purveyor of the famous sauce.
In 1835, in the county of Worcester, England, a nobleman by the name of Lord Marcus Sandys* asked two chemists to duplicate a favorite sauce recipe he had acquired while traveling in India. The chemists, John Lea and William Perrins, whipped up a batch of sauce for Lord Sandys—and kept a few jars for themselves, too. Upon tasting it, they found it so disgusting that they just left it in the cellar of their shop, where it gathered dust for two years.
In 1837, they came across the forgotten jars and gave the sauce one more try. Apparently, it had aged quite well and was very tasty. Within a short period of time, Lea & Perrins were bottling Worcestershire sauce and selling it throughout Europe with great success. Today, the sauce is still aged two years before it is bottled and sold.
* Many versions of this history suggest that Lord Sandys was an ex-governor of Bengal, India. However, there is little evidence to support this claim, much less the fact that he ever went to India. Still, it makes for an interesting story.


