Summary
- Purchase boneless or bone-in pork butts.
- Trim excess fat.
- Apply half of the Southern Succor Rub and refrigerator overnight, then apply more rub just before cooking.
- Cook at 225-250°F to an internal temperature of 190°F.
- Baste with Southern Sop during cooking (optional).
- Wrap in aluminum foil and hold in an empty cooler until ready to serve.
- Pull meat and serve with barbecue sauce on the side.
“The Renowned Mr. Brown” recipe from the classic book Smoke & Spice by Cheryl Alters Jamison and Bill Jamison is one of my favorite recipes for pork butt. I think you’ll like it, too, especially if you like black pepper, because this recipes uses a lot of it!
What exactly is “Mr. Brown”? It’s slang for the dark, smoky, delicious outside portion of a barbecued pork butt or shoulder, also sometimes called the “bark”.
Here are some photos I took on May 27-28, 2005 when I prepared this recipe. This article was originally published based on a cooking session I did on October 3, 1999, and a few photos below are from that cooking session.
Select And Trim The Pork Butts
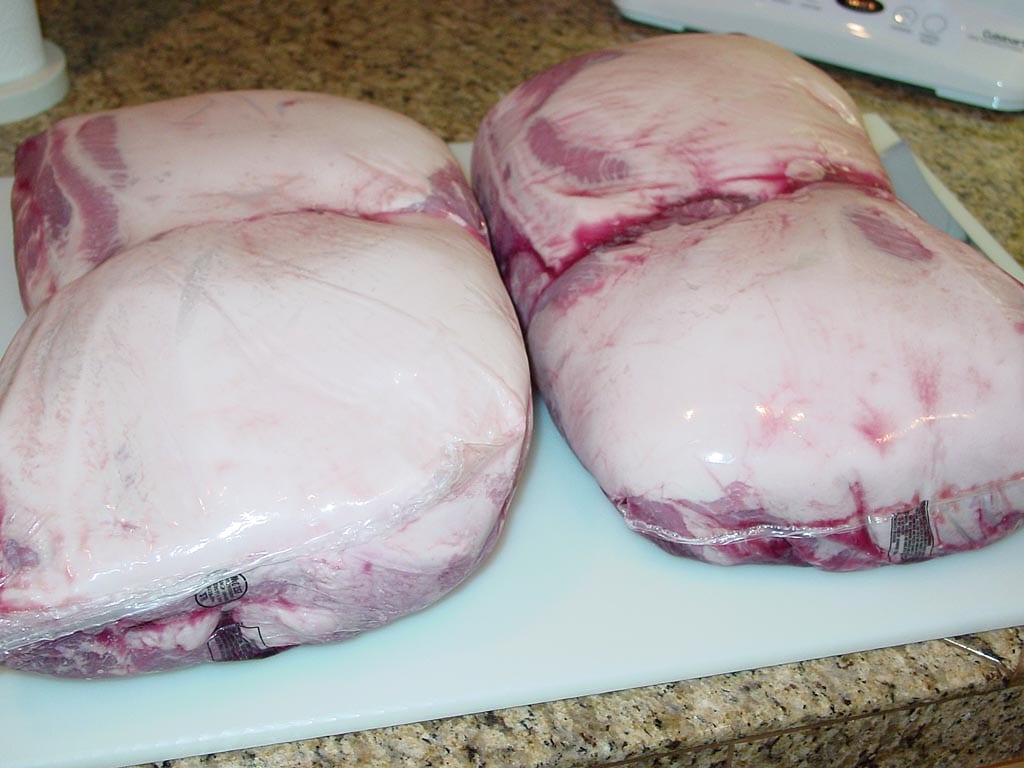
Purchase whole, untrimmed pork butts, either bone-in or boneless. To maximize “Mr. Brown” formation during barbecuing, trim off the fat cap, any false cap, and other large, easily removed pockets of fat from the roast. Don’t worry, there will be plenty of fat left in the meat to keep it moist during cooking. See Pork Butt Selection & Preparation for tips on buying and prepping pork butt.
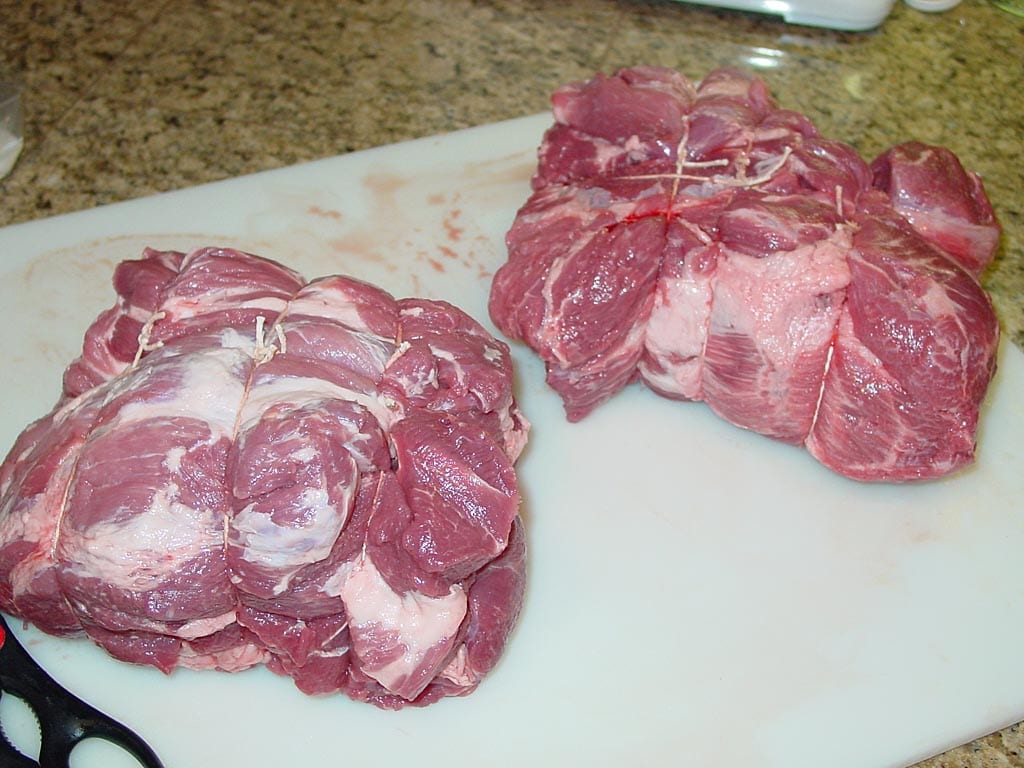
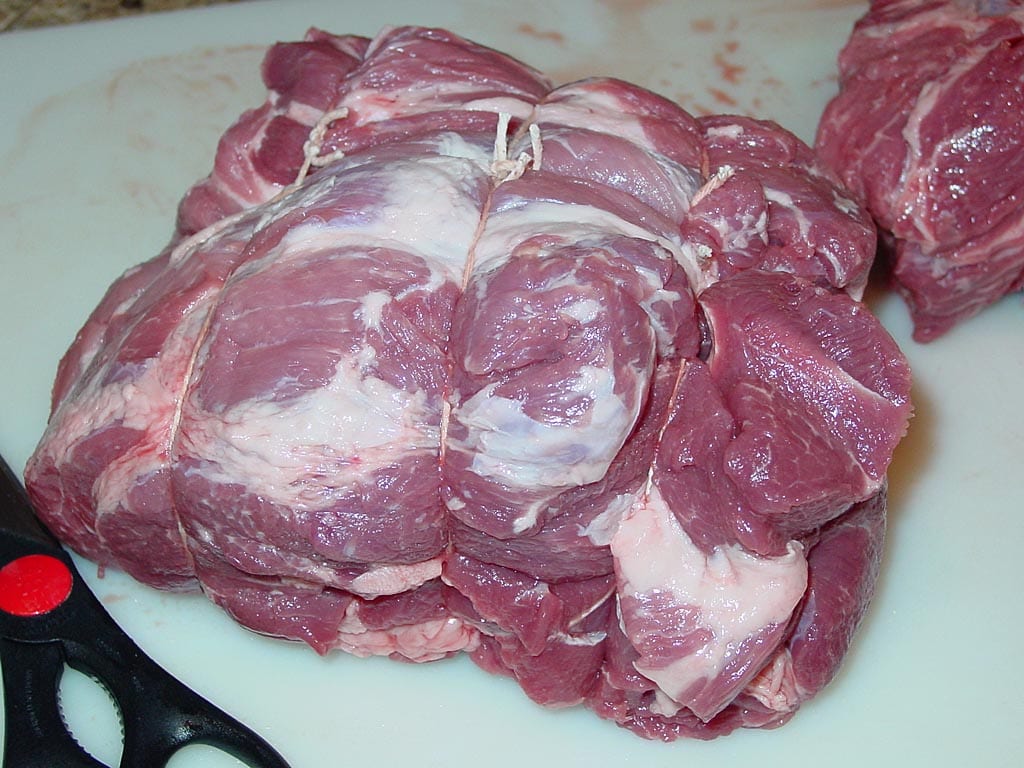
If using boneless roasts, you may wish to tie them up with kitchen twine so they retain a compact shape and cook more evenly. See the How To Tie A Roast video for details.
For this cook, I purchased four whole, untrimmed, boneless pork butts (two per Cryovac package) from my local warehouse store. One package weighed 16.13 pounds, the other 15.94 pounds, for a total of 32.07 pounds.
After trimming excess fat, removing false caps from each roast, and trimming away other unsightly bits, I was left with a total of 25.07 pounds of meat—a loss of 7 pounds (22%) of fat.
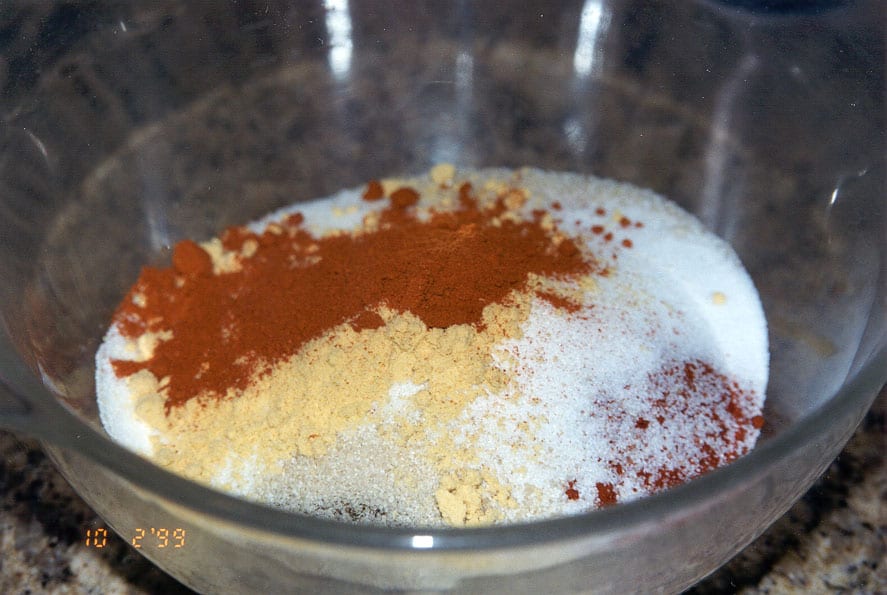
Prepare And Apply The Rub
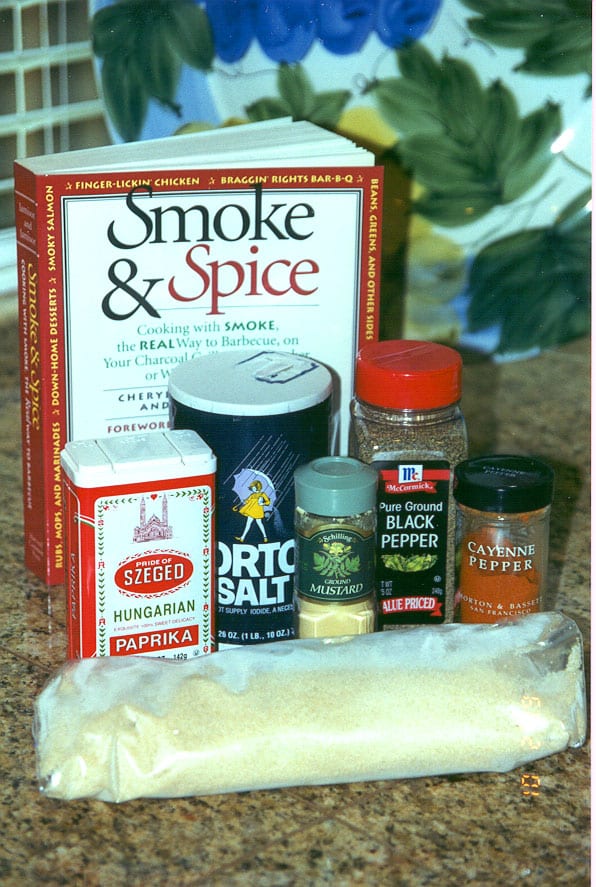 Here’s the rub recipe for one pork butt. It’s a lot of rub, but that’s what the recipe calls for.
Since I had four pork butts, I made four individual batches of rub. That way I could make sure each piece of meat got the correct amount of rub applied to it.
Southern Succor Rub
- 1/4 cup ground black pepper
- 1/4 cup paprika
- 1/4 cup Turbinado sugar
- 2 Tablespoons table salt
- 2 teaspoons dry mustard
- 1 teaspoon cayenne pepper
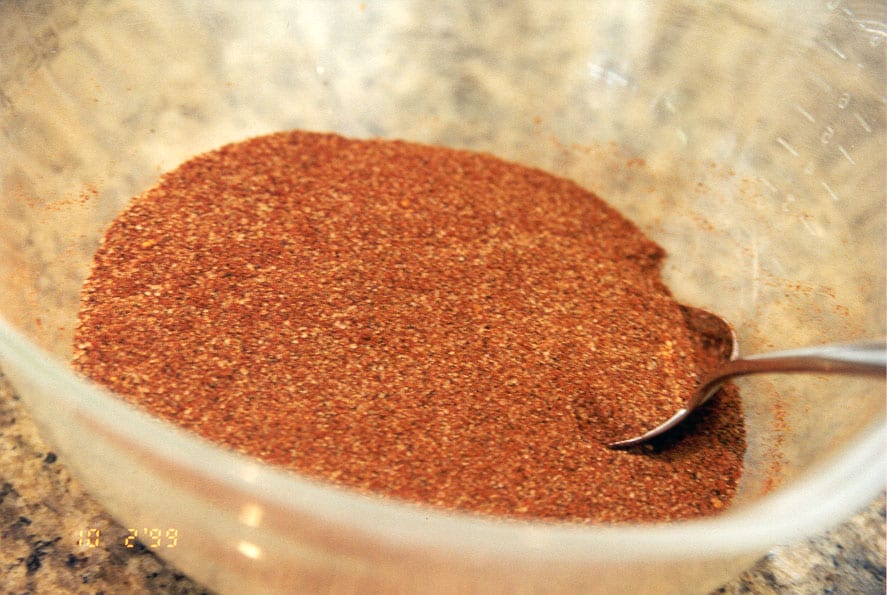
Mix ingredients thoroughly. Makes enough rub for one pork butt, with some leftover for use in the Southern Sop.
Turbinado sugar is a natural, unrefined sugar, tan in color, made from sugar cane. It is used in some barbecue rub recipes because it is thought that its large crystals do not burn as easily as white or brown sugars. It is sold under the brand name “Sugar In The Raw” and by other providers as “Demerara Sugar”, “Washed Raw Sugar”, “Organic Raw Sugar”, and “Organic Cane Sugar”. It can be found in the supermarket alongside white and brown sugars, or in the health food aisle or at health food stores.
Pat the pork butt dry with paper towels, then apply half of the rub to the butt. Place the rubbed meat in a Ziploc bag and refrigerate for 8-12 hours.
I rubbed the four pork butts at 10:00am in order to begin cooking them at 10:00pm that same day.
Reserve the leftover rub for use later in the cooking process.
Select The Smoke Wood
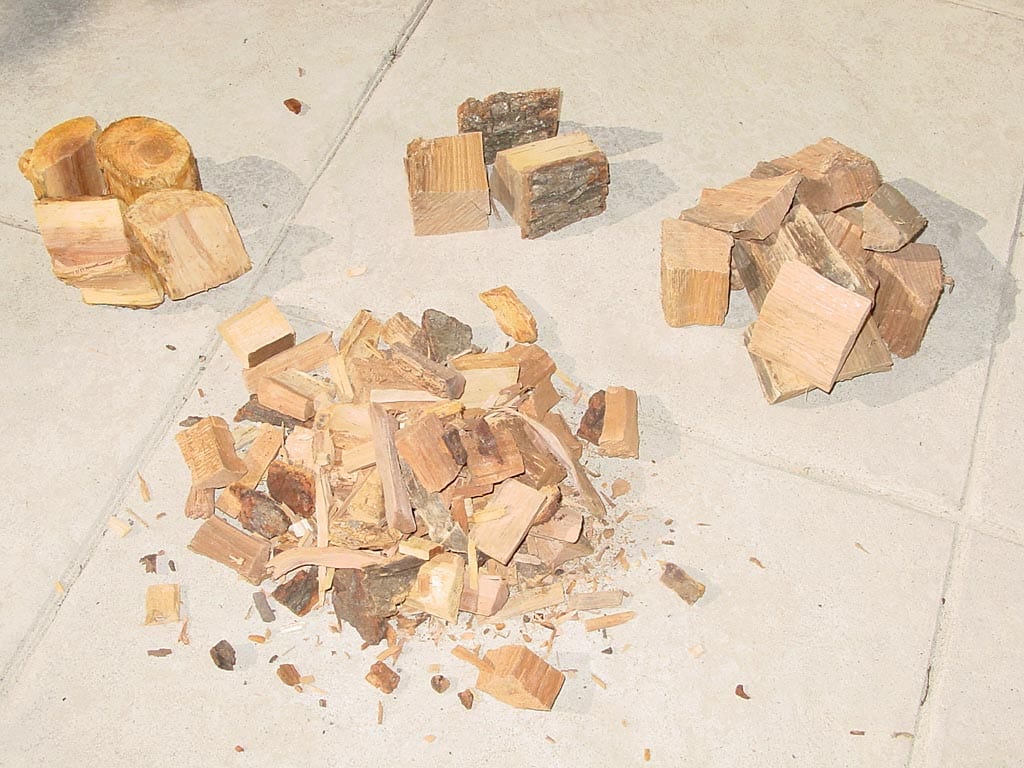
Oak, apple, or other fruitwoods compliment pork nicely, either alone or in combination. Hickory is a favorite, too, but can be quite strong if too much is used. In the past, I have used a 2:1 ratio of oak to hickory with good results.
For this cooking session I used a mix of apple, oak, and hickory chunks, plus some leftover apple wood chips from the bottom of the bag. I used the equivalent of about 3 fist-sized chunks of apple, 3 of oak, and 1 of hickory—so a 3:3:1 ratio.
This single application of smoke wood is all that’s necessary for the entire cooking process, and it will produce a nice smoky flavor without being overpowering.
I did not soak any of the wood before using it.
The photo above shows apple on the left, hickory in the center, oak on the right, and apple chips in the foreground.
Re-Rub The Butts
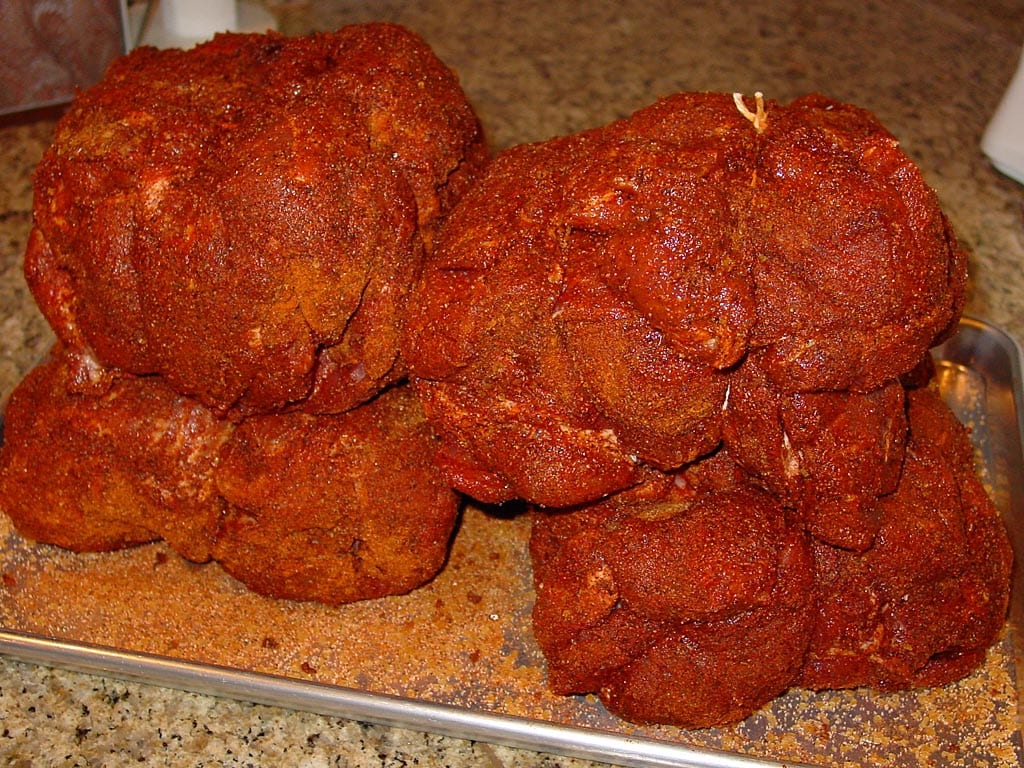
Just before you fire-up the cooker, remove the pork butt from the refrigerator and apply another generous coating of rub. Let the re-rubbed meat sit at room temperature while you fire up the cooker.
Reserve any leftover rub for use in the Southern Sop that’s applied later in the cooking session.
Fire-Up The Cooker
Light the cooker using the Minion Method. Fill the charcoal chamber almost to overflowing with unlit Kingsford Charcoal Briquets. Bury several chunks of dry smoke wood in the coals and place a few chunks of wood on top. This should be enough fuel to fire the cooker for 12-14 hours, maybe longer depending upon weather conditions and how much meat is being cooked.
Light 20-40 briquettes using a Weber chimney starter and spread them over the unlit briquettes and smoke wood chunks.
Assemble the cooker and fill the water pan from above immediately with hot tap water. Foil the water pan before use for easy cleanup.
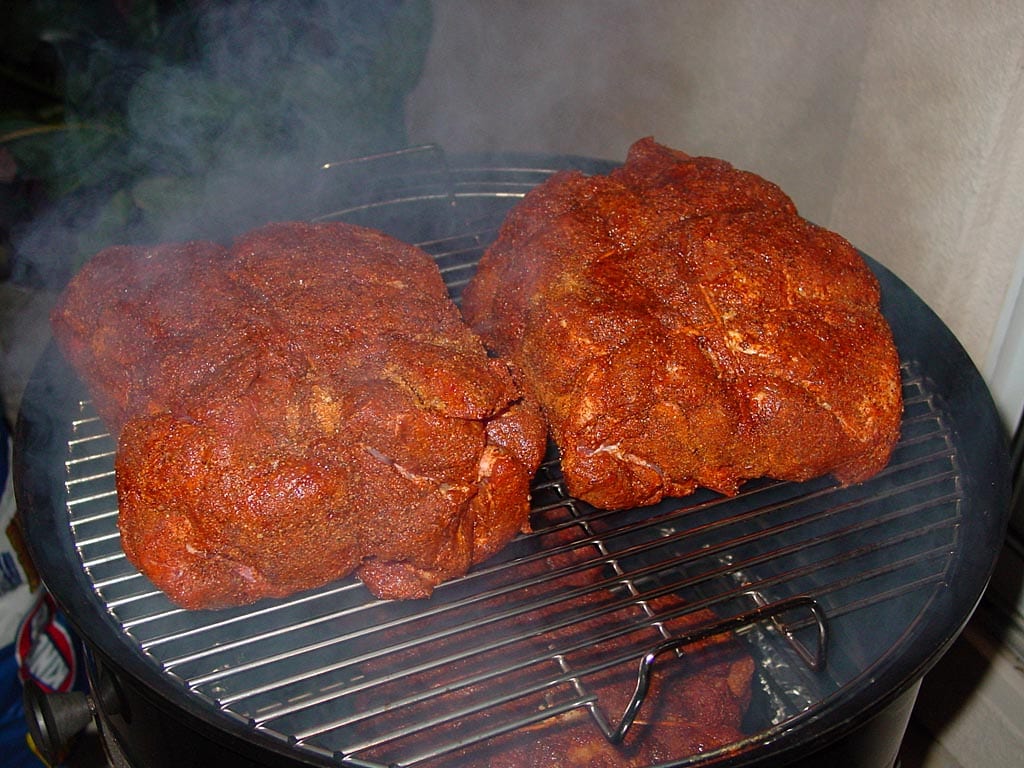
Put the re-rubbed pork butts into the cooker.
Set the top vent 100% open and leave it that way throughout the entire cooking session. Start with all three bottom vents 100% open. When the cooker temperature hits 200°F measured at the lid, set the three vents to 25% open. Allow the cooker to come up to 225-250°F, adjusting the bottom vents as necessary to maintain that temperature range.
For this cooking session, I filled the charcoal chamber halfway with briquettes, then distributed the apple wood chips, then filled the chamber almost to overflowing with more briquettes, then nestled the apple, oak, and hickory chunks into the unlit charcoal on top.
Since I was cooking four pork butts weighing a total of 25 pounds, which is a lot of cold meat, and I would be cooking overnight in cool nighttime temperatures, I started with 40 hot briquettes to get the cooker temperature up more quickly than if I had used only 20 briquettes.
Needless to say, the charcoal chamber was about to burst its seams with all that charcoal and smoke wood, but somehow it all managed to fit!
Barbecue The Pork Butts
Cook the pork butt at 225-250°F to an internal temperature of 190°F.
Turn the meat once after 8-12 hours of cooking. One turn should be sufficient for even cooking. If you prefer Paul Kirk’s method of turning meat at the “halftimes”, do it that way: Turn and baste the meat at the halfway point of the cooking process, then divide the remaining cooking time in half and turn and baste at that point, continuing until the meat is done. When you have an hour or less of cooking time remaining, stop turning and basting.
I turned these butts only one time, after 12 hours of cooking, and swapped the butts between the top and bottom grates.
For authentic “Mr. Brown”, baste several times using the Southern Sop described below. Baste for the first time when you turn the meat for the first time, then as often as you see fit, but not more than once an hour. If you want to baste with something simpler, use apple juice applied with a spray bottle—I like Martinelli’s Premium Apple Juice.
I basted these butts once when I turned the meat, then one more time after that a few hours later.
Replenish the water pan with hot tap water, as necessary.
Here’s how the temperature and vent settings went for the cooking session:
| Time | Lid Temp | Meat Temp | Vent 1 % | Vent 2 % | Vent 3 % |
| 9:55 pm | – | – | 25 | 25 | 25 |
| 10:20 pm | 140 | – | 25 | 25 | 25 |
| 10:45 pm | 150 | – | 25 | 25 | 25 |
| 11:15 pm | 159 | – | 25 | 25 | 25 |
| 11:45 pm | 160 | – | 50 | 50 | 50 |
| 12:30 am | 204 | – | 50 | 50 | 50 |
| 1:15 am | 240 | – | 50 | 50 | 50 |
| 2:15 am | 210 | – | 50 | 50 | 50 |
| 3:00 am | 225 | – | 50 | 50 | 50 |
| 5:00 am | 245 | – | 50 | 50 | 50 |
| 7:00 am | 226 | – | 50 | 50 | 50 |
| 8:45 am (s) | 210 | – | 50 | 50 | 50 |
| 9:00 am (t)(b)(s) | 212 | 170s | 100 | 25 | 25 |
| 10:00 am | 241 | – | 100 | 100 | 25 |
| 11:00 am | 235 | – | 100 | 100 | 25 |
| 11:15 am (b) | 235 | – | 100 | 100 | 25 |
| 11:30 am (a) | 232 | – | 50 | 50 | 50 |
| 12:00 pm | 260 | – | 50 | 50 | 50 |
| 1:00 pm | 242 | 180s | 100 | 100 | 100 |
| 2:00 pm | 247 | 2@190s | 100 | 100 | 100 |
| 3:00 pm | 235 | 2@190s | 100 | 100 | 100 |
(t) turned meat over and end-for-end
(b) basted meat
(s) stirred coals
(a) added 40 hot briquettes
Note that the vent percentages represent the way I set the vents at the time indicated.
Why were my cooker temperatures so low during the first few hours of cooking? Partly because there was 25 pounds of cold meat in the cooker, but mostly because I did not follow the good advice I gave to you early: Start with all the bottom vents 100% open, then reduce them to 25% open when the cooker hits 200°F. Twenty lashes with a wet noodle for me!
The cooker temperature dropped down to 210°F by 8:45am, so I tapped the legs of the charcoal bowl to dislodge some of the ashes around the hot coals, and stirred the coals gently at 9:00am to further refresh the coals.
Later in the morning, it became clear I needed to add a bit more fuel to the cooker, so I fired 40 briquettes in a chimney starter and added them at 11:30am. This extra fuel carried me through to the end.
At 9:00am, the internal temperature of the pork butts was in the 170°F range. At 1:00pm, they measured in the 180°F range. At 2:00pm, the two smaller butts measured in the 180s when probed in several spots, and 195-200°F in other spots, so I removed them from the cooker. The two larger butts reached similar temperatures by 3:00pm.
See Pork Butt Selection & Preparation for tips on measuring temperature in several locations of a pork butt.
Baste The Meat
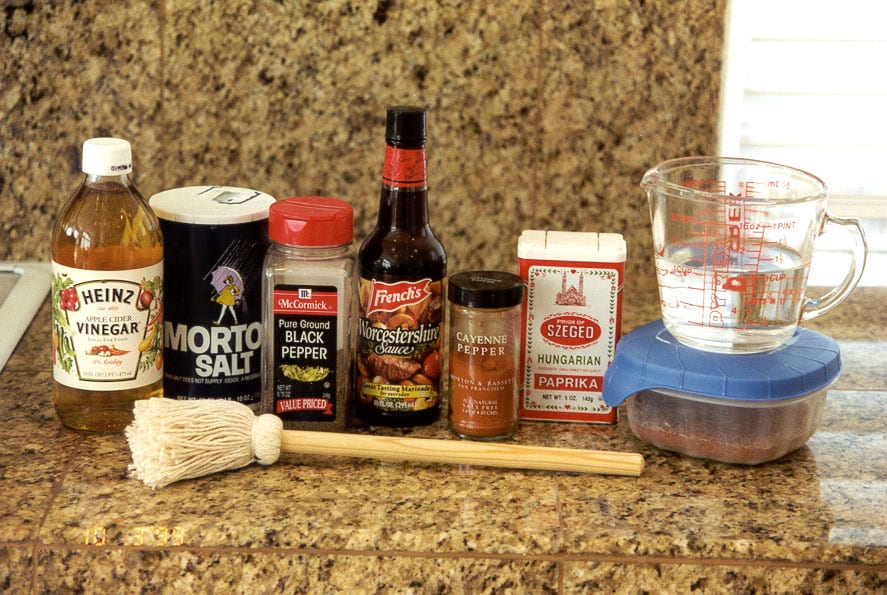
Here’s the recipe for the Southern Sop.
Southern Sop
- Remaining Southern Succor Rub (See note)
- 2 cups apple cider vinegar
- 1 cup water
- 3 Tablespoons ground black pepper
- 2 Tablespoons table salt
- 1 Tablespoon Worcestershire sauce
- 1 Tablespoon paprika
- 1 Tablespoon cayenne pepper
Warm ingredients over low heat, stirring occasionally.
Note: This recipe calls for using all of the remaining rub from one batch of Southern Succor Rub (maybe 3 Tablespoons of rub). In my experience, it makes enough sop to baste up to two butts 3-4 times during the cooking process. If you’re cooking three or four butts, a single batch will allow you to baste two times.
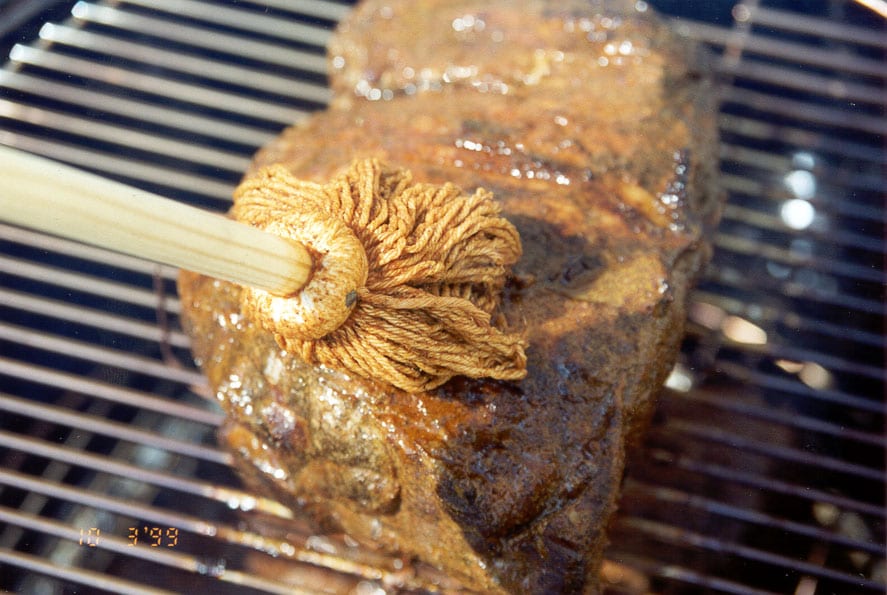
Apply the baste to the meat using a basting mop, a turkey baster, or as a last resort, a basting brush.
Hold The Meat For Serving
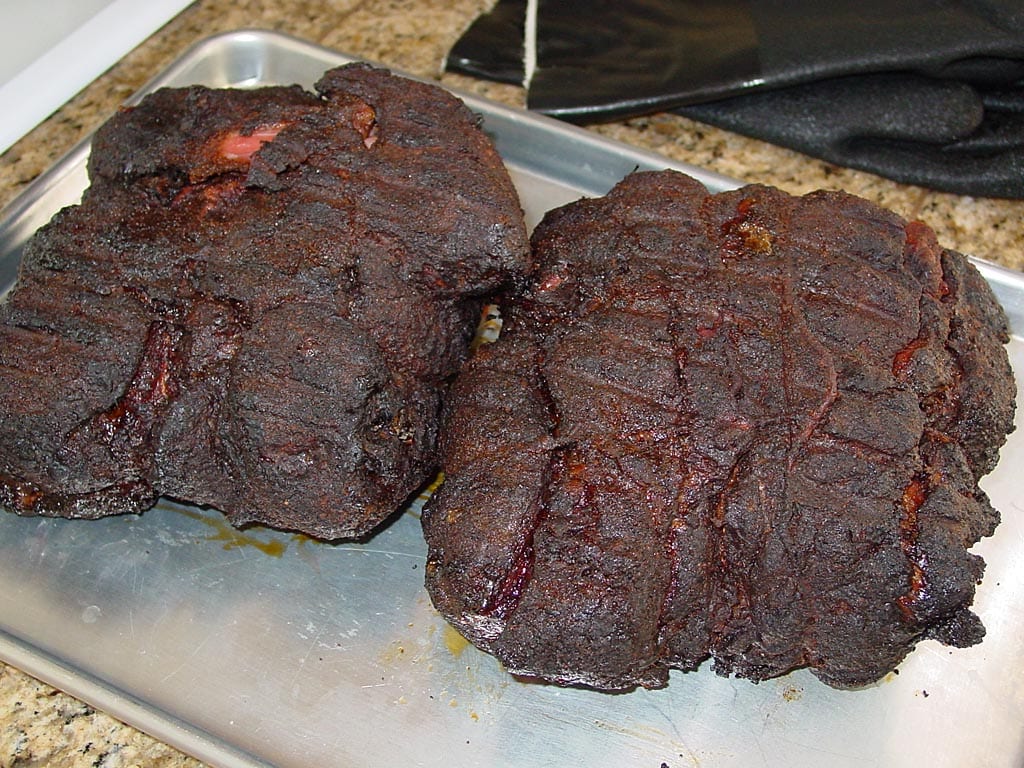
At a minimum, place the pork butt on a rimmed baking sheet pan, cover loosely with foil, and let rest 30 minutes before slicing or pulling.
For even better results, wrap the pork butt tightly with aluminum foil, place in an empty cooler, and hold until ready to serve. The meat will continue to cook for a little while because of carry-over heat, making the meat even more tender. More importantly, the extended rest results in moister meat, and the collected juices inside the foil will soften any tough crust on the exterior of the meat. The meat will remain safely above 140°F for 2-4 hours. See Holding, Storing & Reheating Barbecued Meats for more details.
This photo shows the two butts double-wrapped in wide, heavy-duty aluminum foil, resting on an old bath towel in the bottom of an empty cooler. The towel helps protect the bottom of the cooler from the heat of the meat.

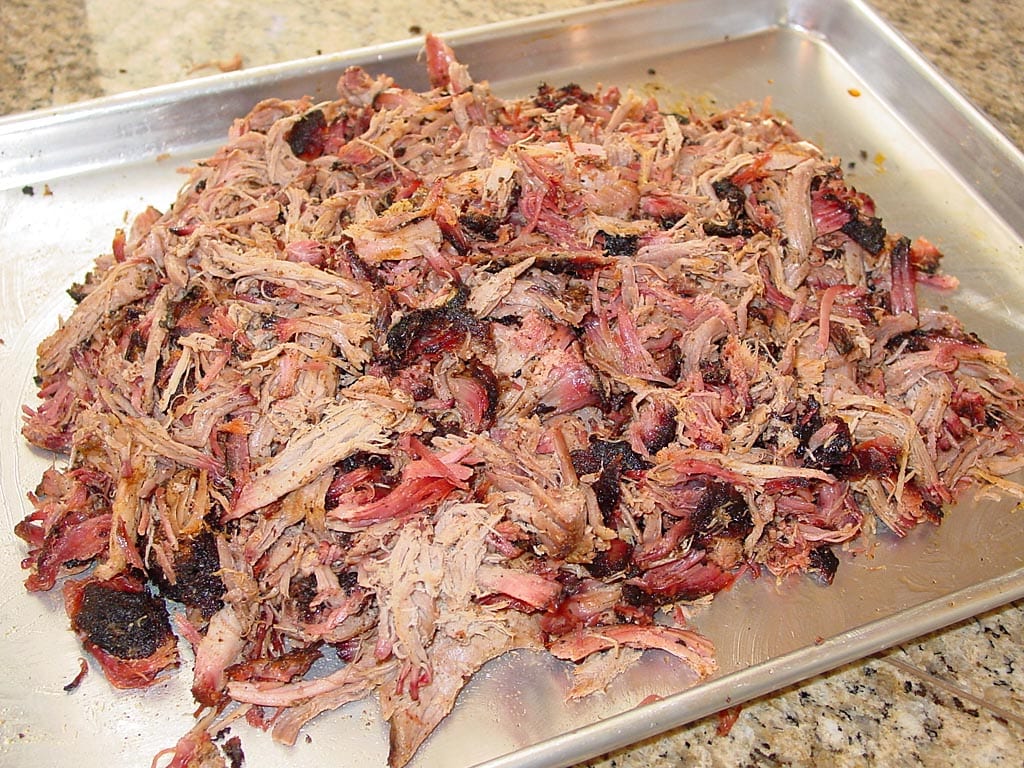
Pull The Pork
See Pork Butt Selection & Preparation for a description of how to pull pork.
After resting for two hours in an empty cooler, I pulled all four pork butts. The meat was still very hot, so to protect my hands I wore lightweight knit cotton gloves (from the hardware store) covered with disposable nitrile gloves.
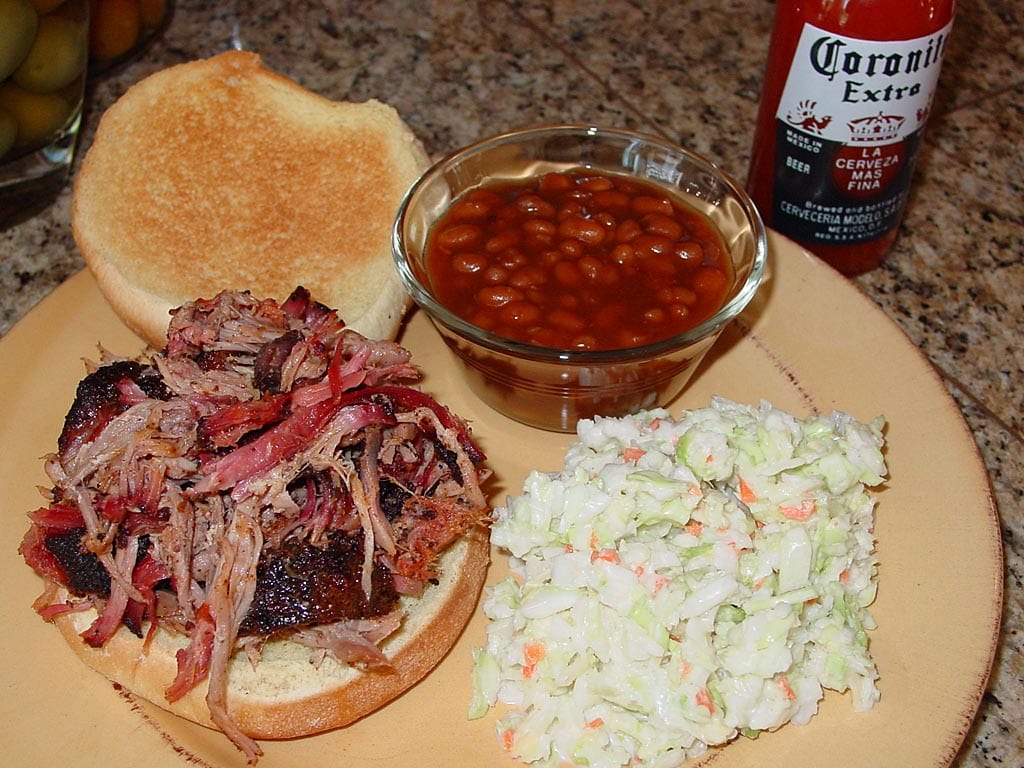
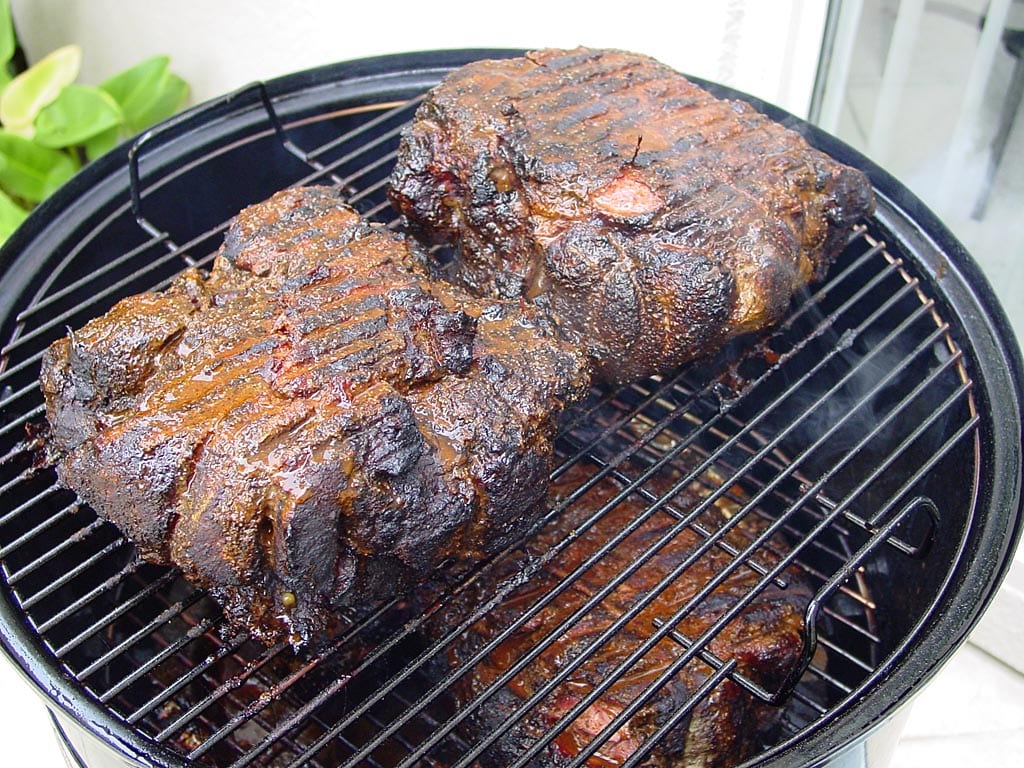
Make sure to mix the pulled pork so everyone gets some of that dark, peppery, “Mr. Brown” outside meat along with the light interior meat.
The meat was dark and crusty on the outside, with a very nice smoke ring. The pork pulled very easily, and most of the fat had rendered, leaving very little waste during pulling. The meat tasted smoky and very peppery! Like I said at the beginning of this article, you’ve got to like pepper to like The Renowned Mr. Brown!
This photos shows pulled pork on a soft, toasted potato bun, accompanied by Carolina Red sauce (in the Coronita bottle), coleslaw, and baked beans.
Here’s the recipe for Carolina Red, also from Smoke & Spice.
Carolina Red
- 1-1/2 cups apple cider vinegar
- 1/2 cup ketchup
- 1/2 teaspoon cayenne or red pepper flakes
- 1 Tablespoon sugar
- 1 teaspoon table salt
Stir together all ingredients, dissolving the sugar and salt. Serve at room temperature.
Earlier I said that I started with 32.07 pounds of meat. I weighed all the pulled pork, and ended up with 12.88 pounds of edible meat. That’s a 40% yield. I lost 22% to trimming before cooking, and 38% to fat and moisture rendered during cooking plus some fat and unsavory bits discarded during pulling.
Store The Leftovers
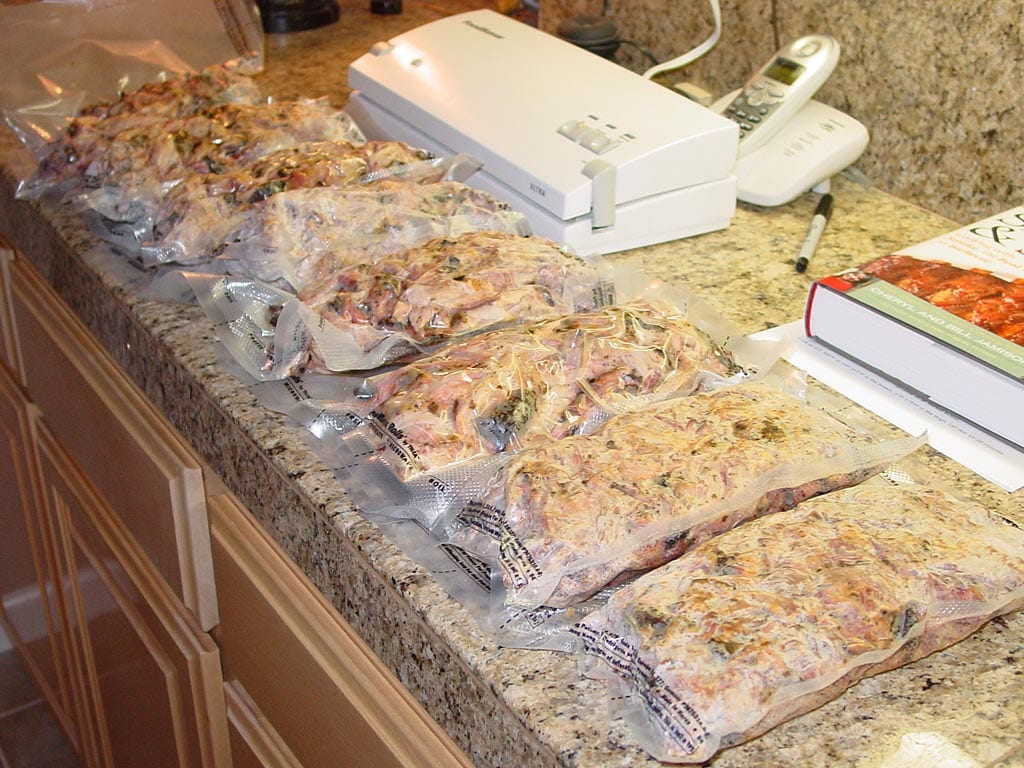
Needless to say, there was a lot of leftover Mr. Brown! I used my FoodSaver vacuum sealer to vacuum-pack the leftovers in portions and froze them to be enjoyed later or given as gifts to very special friends.
Vacuum packing prevents freezer burn, extends storage life, and makes for a very professional presentation when you share your barbecue with friends and family.
More Pork Butt Links On TVWB
-
- Pork Butt – Slathered With Mustard & Rub
- Pork Butt – Chris Lilly Big Bob Gibson Championship Injection
- Pork Butt – Harry Soo Slap Yo’ Daddy Injection
- Pork Butt – Untrimmed Direct Heat
- Pork Butt – Buckboard Bacon
- Pork Butts In Foil Pans
- Pulled Pork Butt Servings Calculator
- Pork Butt Selection & Preparation


