In This Topic
- Measuring Through The Lid
- Measuring Through The Middle Cooking Section
- Measuring At The Cooking Grate
- More Thermometer Installations
- Which Method Is Right For You?
- Temperature Differential Between Lid And Grate
- Check Your Thermometer For Accuracy
- More Thermometer & Temperature Links On TVWB
Controlling temperature is one of the keys to making great barbecue on a consistent basis. But in order to control temperature, you’ve got to be able to measure it.
Starting with the 2009 model year, all WSMs come with a built-in lid thermometer as standard equipment. Starting with the 2014 model year, all WSMs come with a silicone grommet as standard equipment for inserting a thermometer into the middle cooking section.
If you have a 2008 or earlier WSM, your cooker did not come with a thermometer or a silicone grommet, so you’ll want to consider one of the methods described in this article for measuring cooker temperature.
Video: Lid Thermometer vs Grate Thermometer In The Weber Smokey Mountain
In this video, I share my thoughts on measuring temperature at the lid vs. at the cooking grate after 25 years of WSM usage.
Options For Measuring Temperature
There are three primary methods for measuring temperature inside a Weber Smokey Mountain Cooker:
- Through the lid.
- Through the middle cooking section.
- At the cooking grate.
Measuring Through The Lid
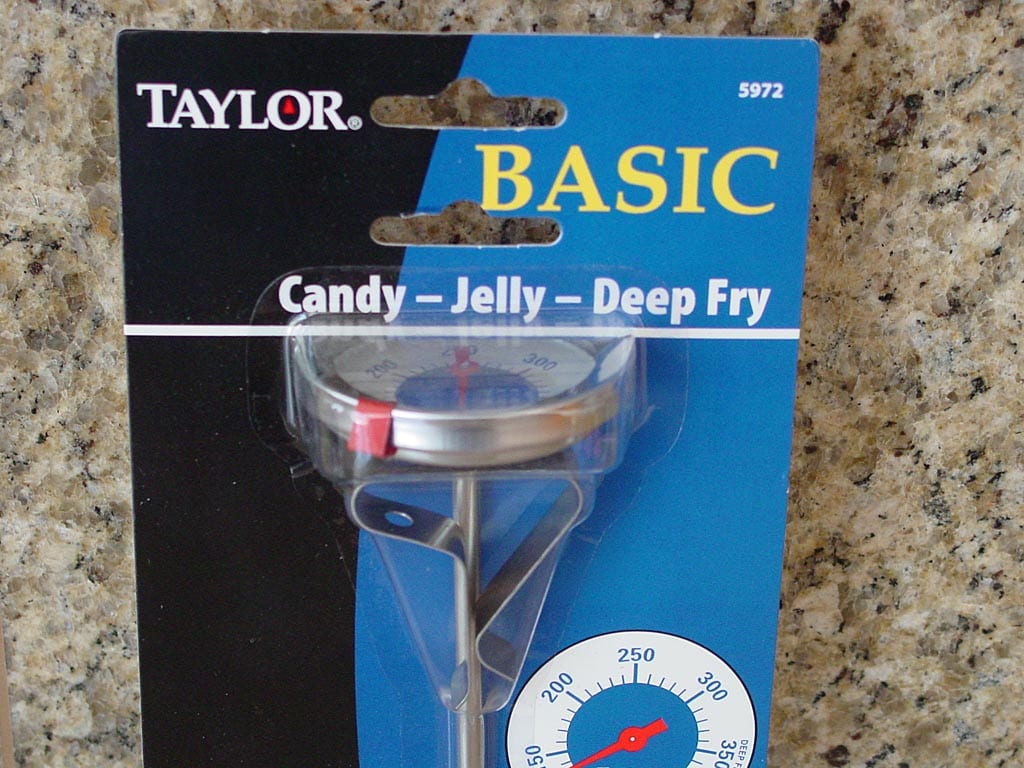
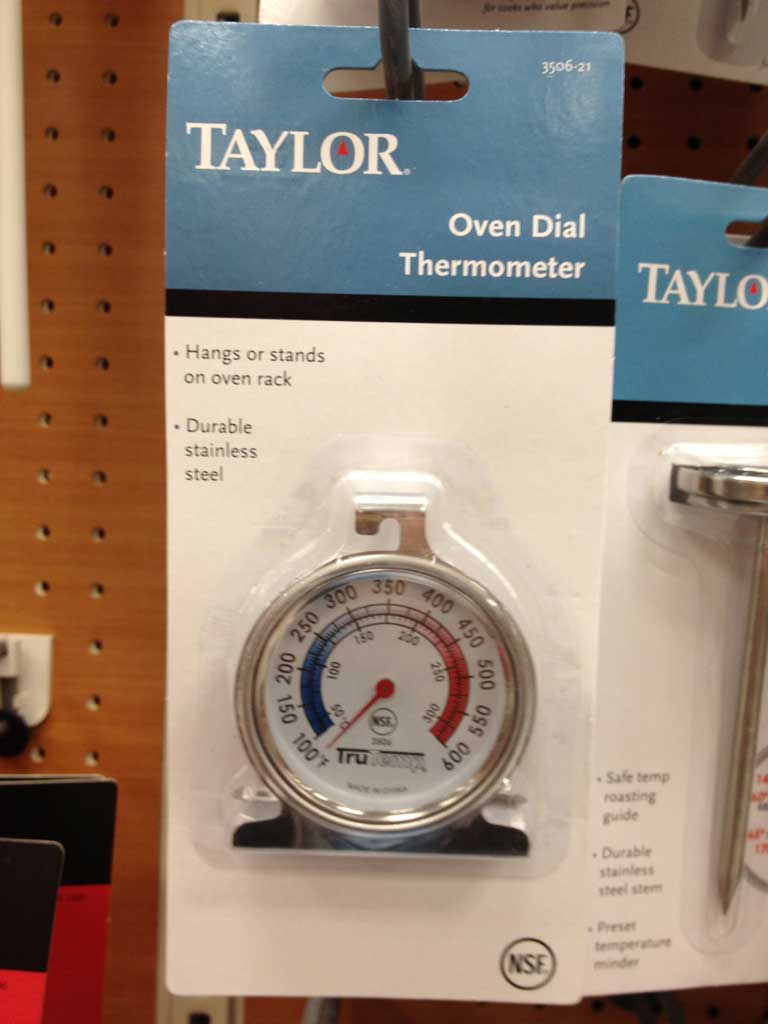
When I first started out with my WSM in 1997, I measured temperature using a basic kitchen thermometer inserted through the lid vent to measure temperature. These thermometers work great, cost $10-12, and can be found at hardware stores, cooking supply stores, and in mail-order catalogs.
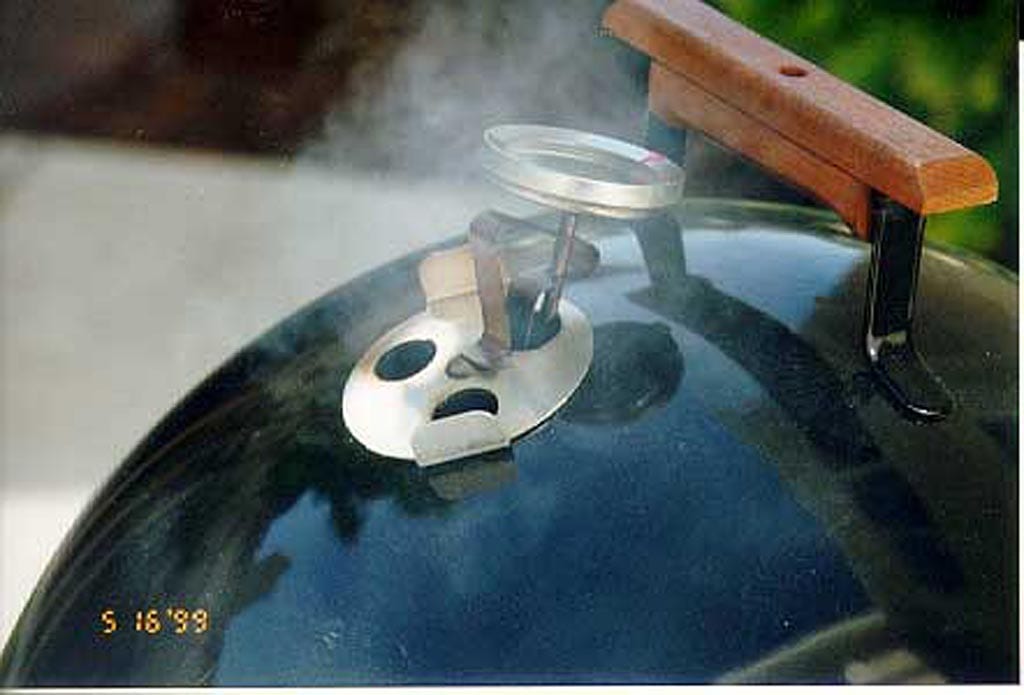
Taylor is a popular brand that you’ll find in many stores. These thermometers usually include a metal clip that is used to attach the thermometer to the edge of a pot, but the clip will also suspend the thermometer in the top-most vent hole.
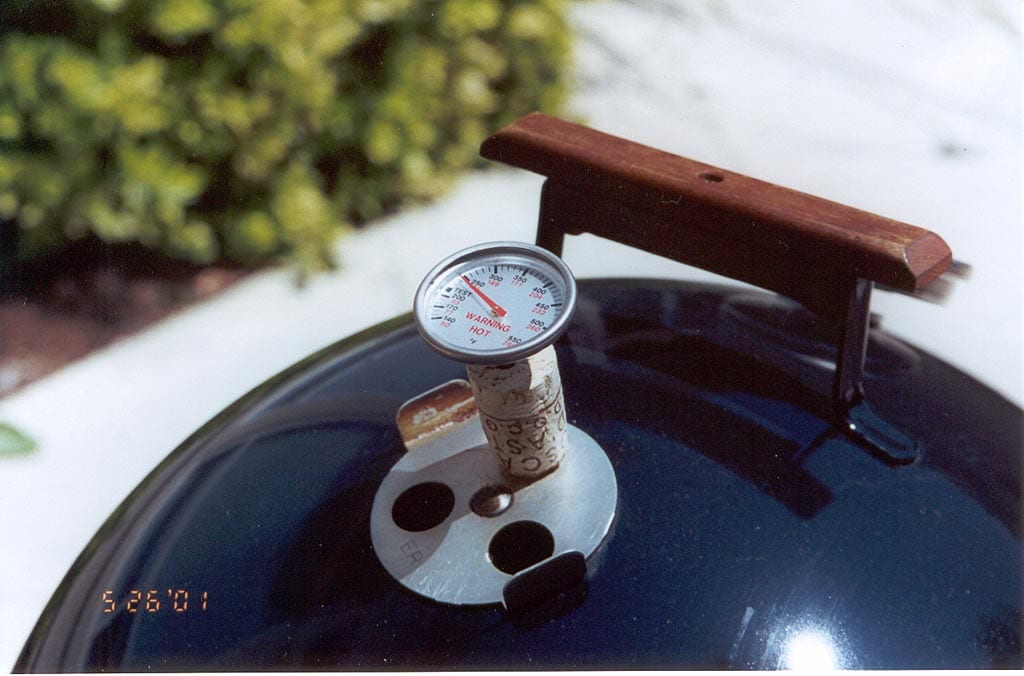
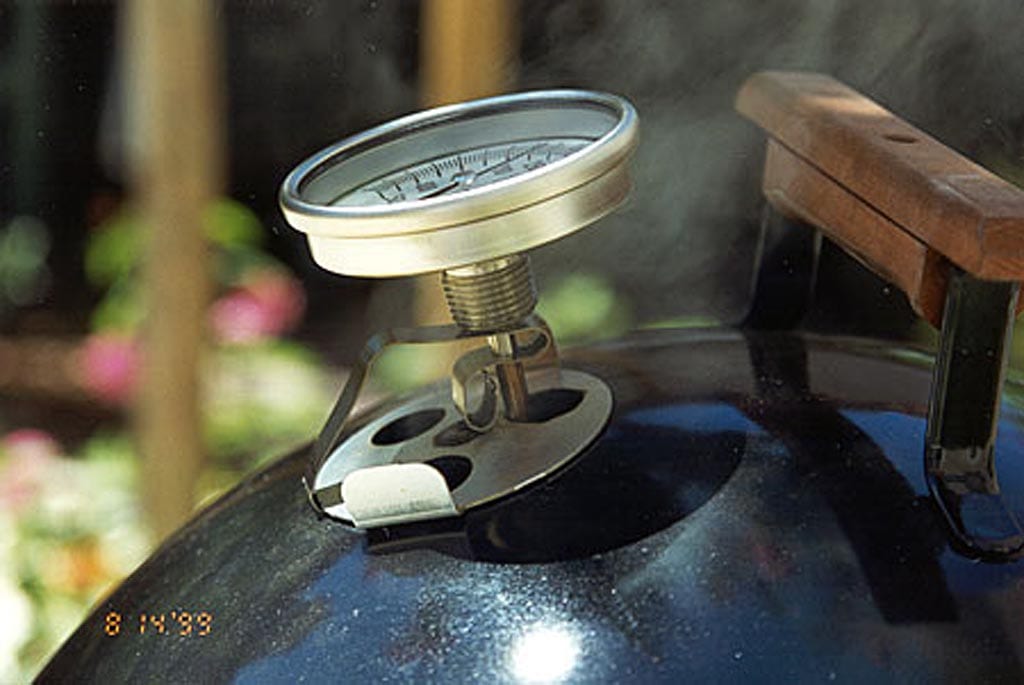
Another approach is to stick a thermometer through a cork that is inserted into one of the lid vents. Here’s a Weber 9815 Replacement Thermometer inserted in this fashion. It sells for around $15.
Several years later, I upgraded from a kitchen thermometer to an industrial-grade thermometer. These thermometers are available in a variety of stem lengths, dial sizes, and temperature ranges. They cost $40-50 and can be purchased from suppliers like Tel-Tru and Grainger. These are the thermometers you’ll see mounted in expensive cookers used at restaurants and barbecue competitions.
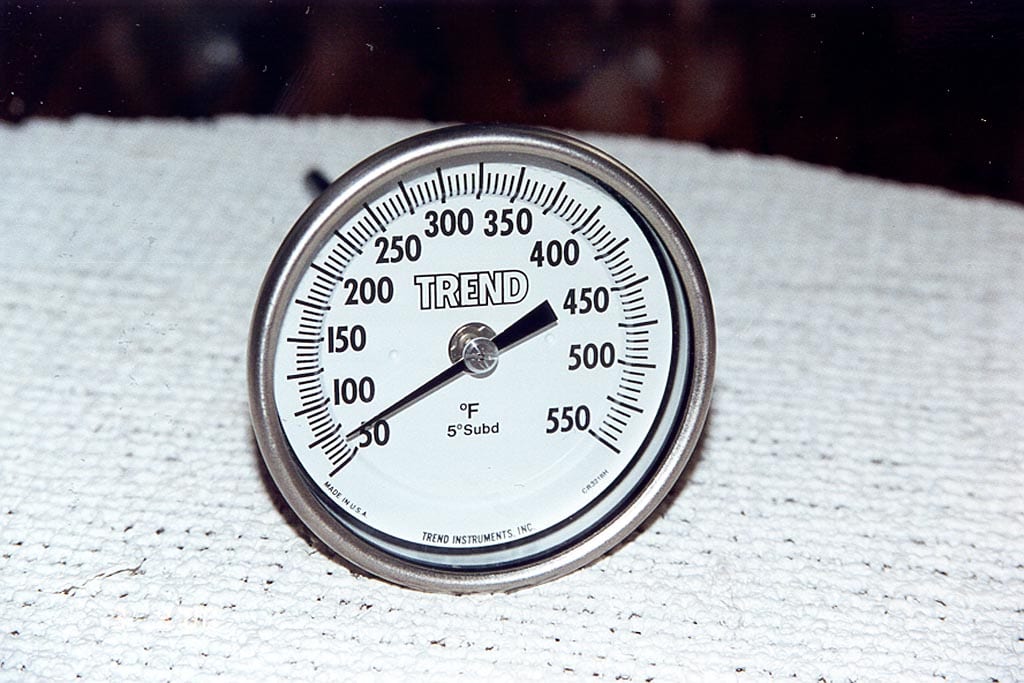
I initially chose the Trend Model 33 thermometer shown below. It has a range of 50-550°F, a 3″ dial face, and a 6″ stem. I drilled out the clip from my original Taylor kitchen thermometer to accommodate the Trend’s larger diameter stem and reshaped it so it clipped under the edge of the top vent.
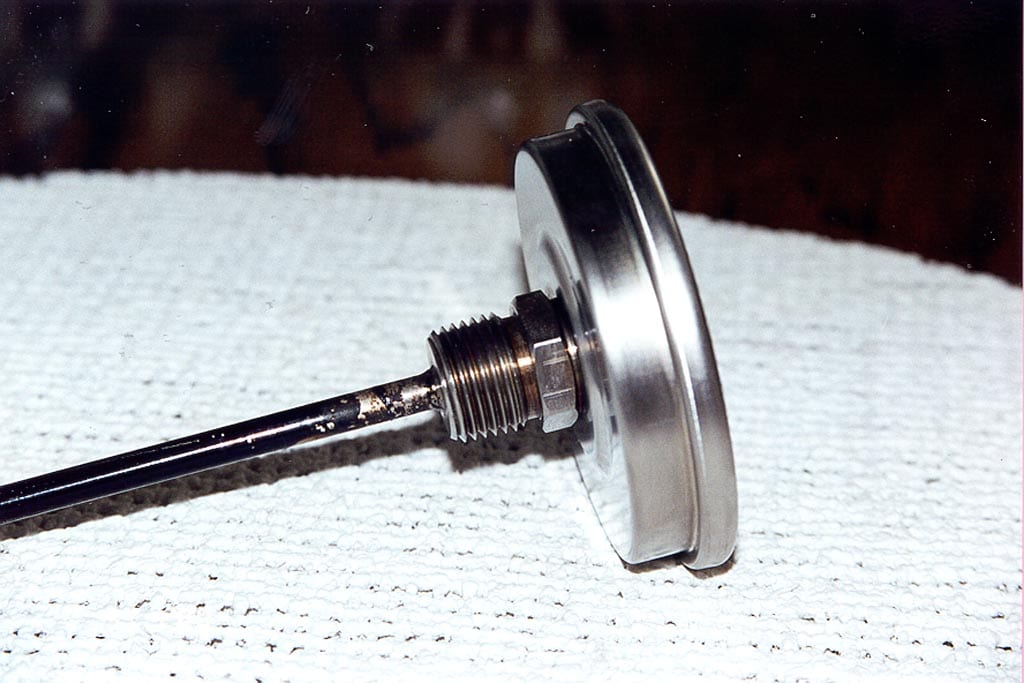
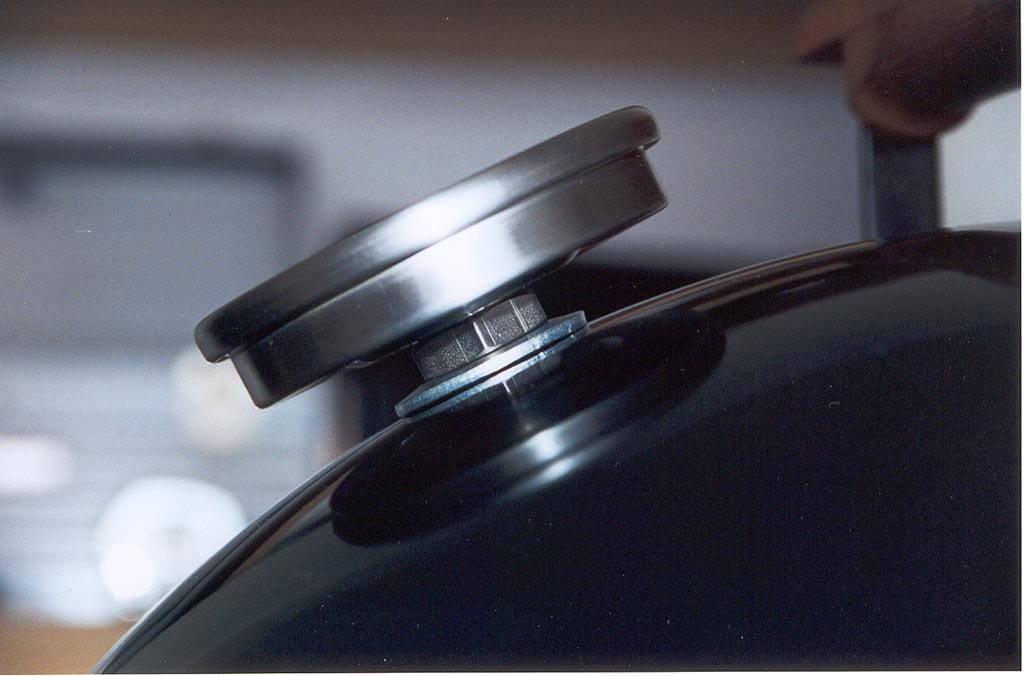
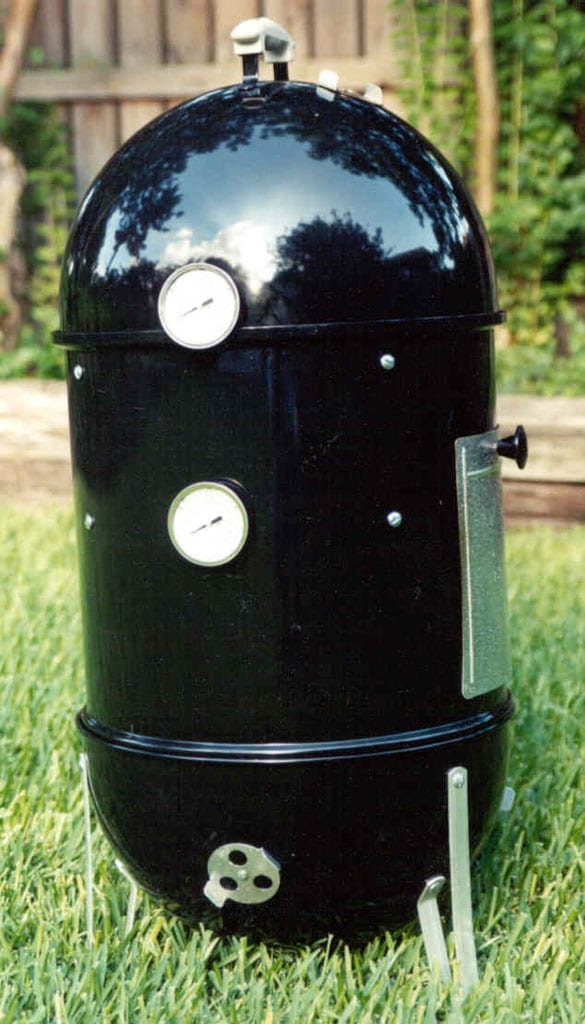
After a few more years, I took the plunge and drilled through the lid to mount a thermometer. The photo below shows how I mounted another Trend Model 33 thermometer with a shorter 4″ stem in the lid, on the opposite side of the vent. I switched to a 4″ stem so it would not touch meat placed on the top cooking grate. See Installing A Thermometer to see the steps that go into this type of installation.
Another method for measuring temperature through the lid is to hang a probe thermometer through the vent opening. Probe thermometers are described in greater detail later in this article.
Measuring Through The Middle Cooking Section
A less common approach to measuring temperature in the WSM is to insert a thermometer through a hole drilled in the middle cooking section or in the access door. Owners do this in an attempt to measure temperature at the bottom cooking grate. The process for drilling such a hole is the same as that discussed on the Installing A Thermometer page.
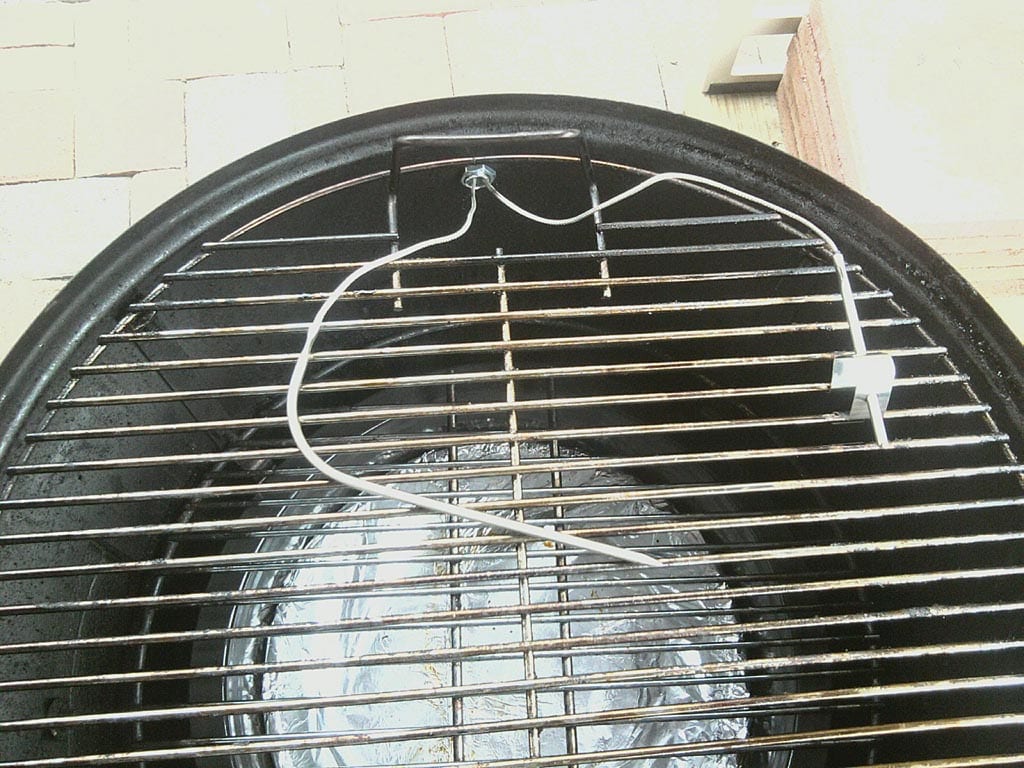
One creative approach that does not require drilling is to remove the top nut and bolt from one of the grill straps and insert a thermometer through the resulting hole.
One potential problem with these approaches is that the thermometer passes through the very hot area at the outside edge of the middle cooking section, where heat flows up and around the water pan. This can result in readings higher than those measured through the lid or at the cooking grate.
Measuring At The Cooking Grate
There are a number of ways to measure temperature at the cooking grate. Oven thermometers come in several styles and are very affordable. The Taylor oven dial thermometer is an example of this type of thermometer.
Unfortunately, oven thermometers are not very practical for use in your smoker because you have to open the lid to check the temperature, and every time you open the lid, you lose heat from the cooker. Oven thermometers also get covered with smoke and grease and become difficult to read.
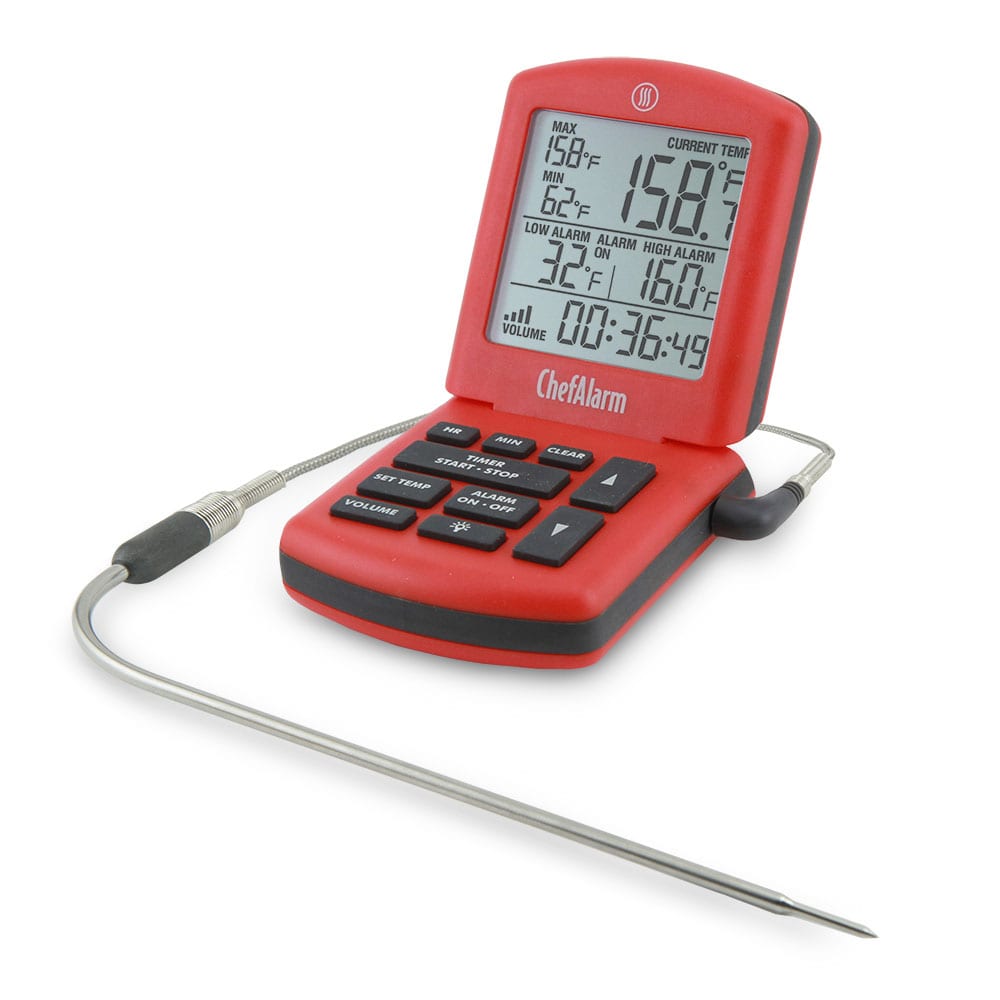
Many people use a probe thermometer to measure temperature at the cooking grate. The ThermoWorks ChefAlarm probe thermometer consists of a stainless steel probe attached by a long cable to a display unit that sits outside the cooker. The probe is held above the cooking surface using an optional spring-loaded grate clip.
If your probe thermometer doesn’t have such a clip, you can secure the probe by inserting it through a potato, through a block of wood or a wine cork, or by inserting it between the bones of a slab of ribs or through the corner of a brisket. (A wine cork can be whittled down and stuck into the cooking grate to hold the probe in place.)
The probe cable runs under the edge of the lid or through a slot cut in the edge of the middle cooking section or though the silicone grommet in the side of the middle cooking section. The lid will not damage the cable as long as you’re gentle when replacing the lid.
One common trick with a probe thermometer is to use two different probes with a single display unit. Insert one probe in the meat and place another probe on the cooking grate, then swap the plugs back and forth on the display unit to read each temperature.
Probe thermometers will sound an alarm when cooking time or desired temperature have been reached. Some models can be set to alarm at a low temperature reading, alerting you when the fire is dying out. They’re a neat gadget, sell for $30-60, and are quite popular among barbecue enthusiasts. Links to some great probe thermometers can be found on the BBQ Shopping page.
Remote probe thermometers are a more sophisticated version of probe thermometer. One of the most popular is the ThermoPro TP20 Wireless Thermometer. It features two probes—one for cooker temp, one for meat temp—that connect to a radio transmitter outside the cooker. The transmitter sends temperature readings up to 300 feet to a base unit located inside your house.

These two photos show meat and air probes in the WSM. Note that these are not ThermoPro TP20 probes.

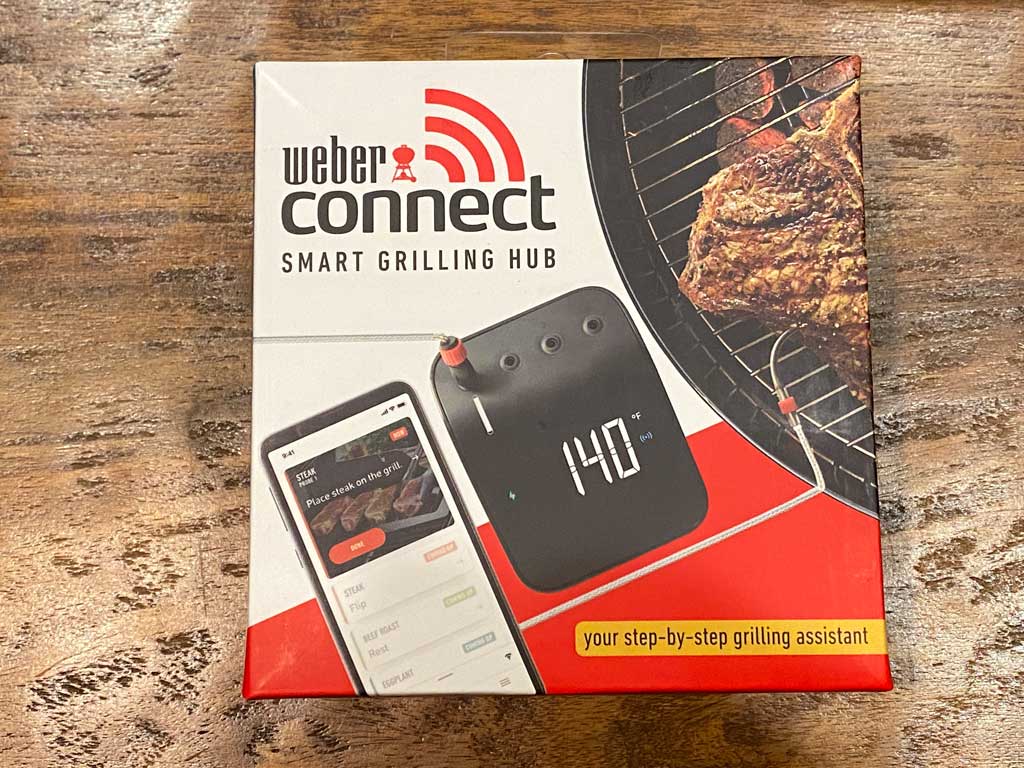
For the Weber fan, consider the Weber Connect Smart Grilling Hub. It supports 2-4 probes and transmits temperature readings to your smartphone via WiFi or Bluetooth.
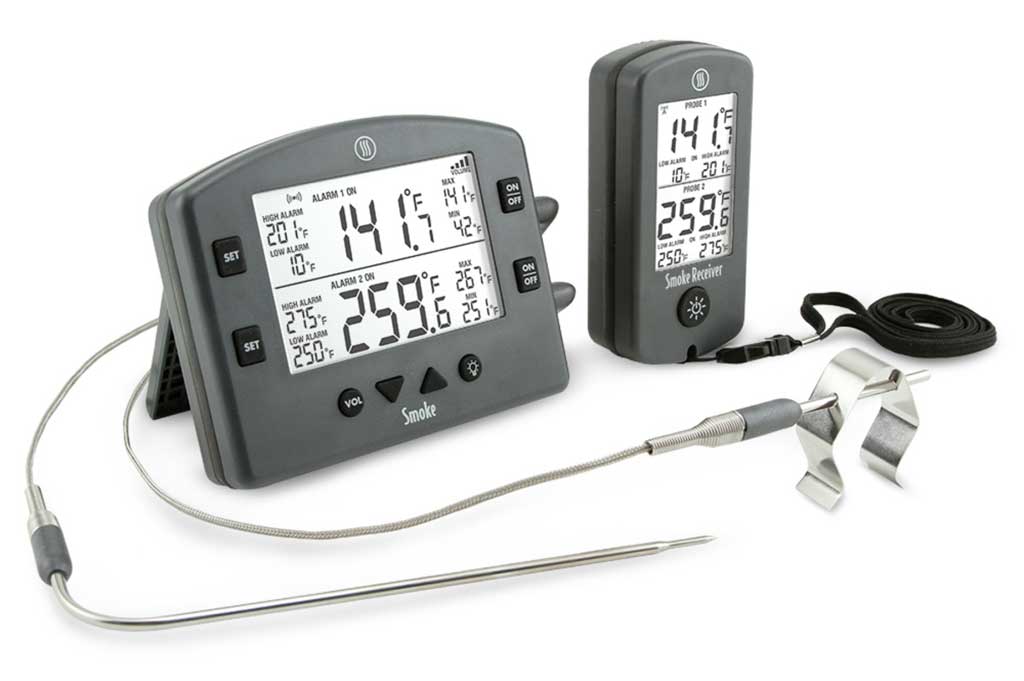
Another alternative is the ThermoWorks Smoke, a two-probe thermometer base unit that pairs to multiple wireless receivers and connects to a Wi-Fi gateway with smartphone app.
More Thermometer Installations
You can see more examples of how owners have installed thermometers in their Weber Smokey Mountain Cookers in the More Thermometer Installations article.
Which Method Is Right For You?
There are pros and cons to all the methods described above:
- Placing a thermometer through the lid vent is easy and inexpensive, but may not be the most accurate way to measure cooker temperature.
- Installing a thermometer permanently in the lid gives a professional appearance, but takes some effort to install.
- Measuring temperature at the cooking grate is probably the most accurate method, but is best done with a probe thermometer that requires running wires into the cooker, which can be inconvenient.
- Remote probe thermometers are handy, but expensive.
- All probe thermometers must be protected from rain and other liquids. They can be ruined if dropped or stepped on. Probes will burn-out and plastic parts will melt if exposed to very high temps. Probe wires will break if subjected to abuse or excessive use.
For several years I used a Taylor candy thermometer or a Trend industrial-grade thermometer inserted through the lid vent as the primary method for measuring temperature in my Weber Bullet. For me, this method had several advantages:
- The thermometer could be easily removed for cleaning, storage, and testing.
- I didn’t have to drill through the lid, possibly damaging the finish.
- I liked the look of the analog dial.
- There were no batteries to go dead.
- It was accurate enough for my purposes.
In early 2001, I decided to mount a Trend thermometer in the lid, knowing that I was trading off some of the advantages listed above for the clean, professional look of a mounted thermometer.
Most of the time, I use just the lid thermometer when cooking, but sometimes I also place a probe thermometer in the meat I’m cooking. If you do this, don’t be afraid to run the cable right under the edge of the lid. You will get a little bit of smoke leakage, but it’s no big deal and won’t affect the performance of the cooker.
Temperature Differential Between Lid And Grate
When measuring temperature through the lid, you must account for the fact that the reading will be higher than the temperature occurring at each cooking grate.
I’ve done some experiments on my Weber Bullet using my Trend thermometer through the lid and a Fluke Model 52 electronic thermometer with two k-type bead probes measuring temperature 1-3/4″ above each cooking grate. My tests showed that when the Weber Bullet reaches a stable temperature of 225-250°F measured through the lid, the lid temperature averages 12-15°F higher than the top grate temperature and the top grate averages 4-10°F higher than the bottom grate. These numbers assume the water pan is replenished every 90-120 minutes. So, if I’m targeting 225°F on the top grate, I’m looking for about 237-240°F on my thermometer through the lid.
When the cooker experiences a sudden temperature change (for example, when a build-up of ashes fall away from burning coals), the temperature differential between the lid and grates may fluctuate quickly and dramatically. In fact, just to confuse matters, I’ve documented cases where as the meat cooks the temperatures flip-flop—the top grate temperature exceeds the lid temperature! But as a general rule, the lid temp is usually higher than the top grate temperature.
It should be noted that the averages described above do not hold when the cooker is running at a higher temperature, say above 280° measured through the lid, or as the cooker temperature begins to taper off as the fuel supply is exhausted.
Please consider these temperature differentials as a starting point for your own experimentation. Your temperature differential between the lid and cooking grates may be different than mine, depending on a variety of factors, including the type and accuracy of thermometer used and whether water or other material is used in the water pan.
Here are two documents you can download if you’re interested in a sample of the temperature differences I’ve measured in the Weber Bullet, and you can read more about this subject in the WSM Temperature Tests article.
- Temperature Experiment 9/29/99 (Excel Spreadsheet | PDF)
- Temperatures Measured While Cooking 10/3/99 (Excel Spreadsheet | PDF)
Check Your Thermometer For Accuracy
Thermometers don’t maintain their accuracy forever. In fact, sometimes even brand-new thermometers right out of the package aren’t accurate. That’s why you should always test a new thermometer for accuracy before using it, and then retest it on an occasional basis. See Testing Thermometers For Accuracy for all the details.
More Thermometer & Temperature Links On TVWB
- Installing A Thermometer
- More Thermometer Installations
- Cutting A Probe Thermometer Slot
- Temperature Control Problems: Too Hot, Too Cool
- Cooking In The Wind, Rain & Cold
- Vent Damper Modifications
- WSM Temperature Tests
- Testing Thermometers For Accuracy: Ice Bath Test & Boiling Water Test
- Boiling Point Calculator
- WSM Modifications Forum on The Virtual Weber Bulletin Board
Photo of WSM with two thermometers mounted: 2000 by Gary Davis.
Photo of Maverick probes through grommet: 2013 by Bob Mann.
Photo of Maverick probes with meat: 2013 by Rolf Jacobsen
 12 O’Clock Thermometer
Here’s a trick that makes it easy to monitor the temperature of your lid thermometer from a distance. Rotate the thermometer dial so your target temperature is located at the 12 o’clock position. Now when you look at your thermometer from a distance, you can quickly see whether you’re above, below, or right at your target temperature.


