In This Topic
- Introducing “The Little Red Bullet”
- Inspired By A Little Motorcycle
- Stripping Down The Cooker
- Powder Coating The Cooker Parts
- Anodizing The Legs
- Adding A Wooden Lid Handle
- Mounting The Trend Thermometer
- Adding A Detachable Work Table
- Using Stainless Steel Inset Hex Head Damper Fasteners
- Marking The Access Door Knob
- Increasing Cooking Capacity
- Modifying The Charcoal Grate
- Wrap-Up
- Postscript
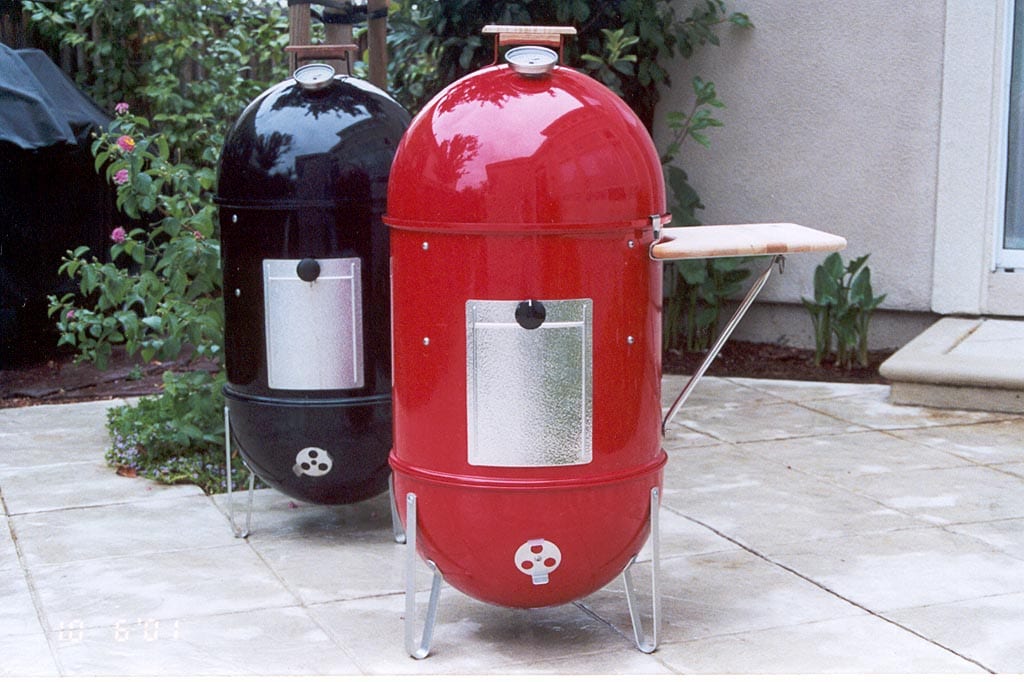
In early 2001, I started working on a project to create a customized Weber Smokey Mountain Cooker—I called it “The Little Red Bullet Project”.
In my mind’s eye, it would be a bright red cooker with a thermometer mounted in the lid and a detachable work table mounted on the side. It would also incorporate some modifications that I’ve documented on this website to improve the functionality of the cooker.
The idea behind this project was to have some fun working on it; to feature the finished product here so you could enjoy it and maybe be inspired to try a project like this yourself; and to donate the value of the cooker to a charitable cause.
After the tragic events of September 11, 2001, I worked quickly to finish the project so I could offer it for sale on eBay’s “Auction for America”, an effort to raise $100 million in 100 days for the victims and their families. The winning bid of $760 was submitted by Capt. Stephen R. Martin of Somerville, New Jersey. My employer at the time, Hewlett-Packard Company, matched this amount, so that a total of $1,520 was raised for the American Red Cross.
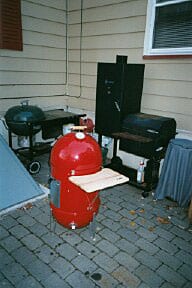
Here are some photos of this one-of-a-kind cooker and a description of the processes and modifications that went into it. I hope you like what you see!
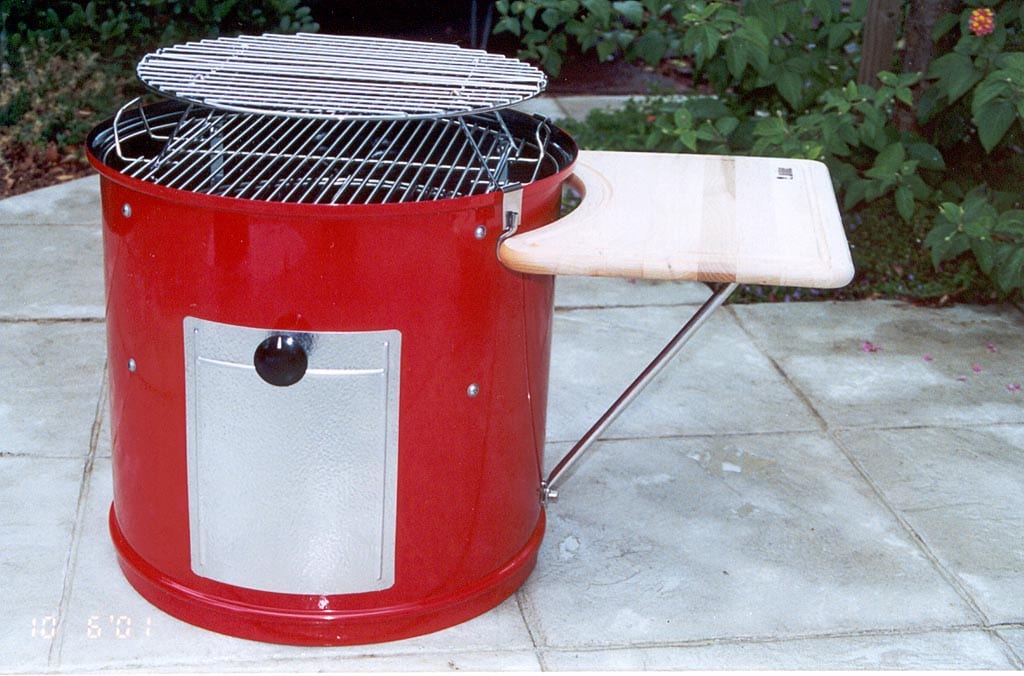
Introducing “The Little Red Bullet”

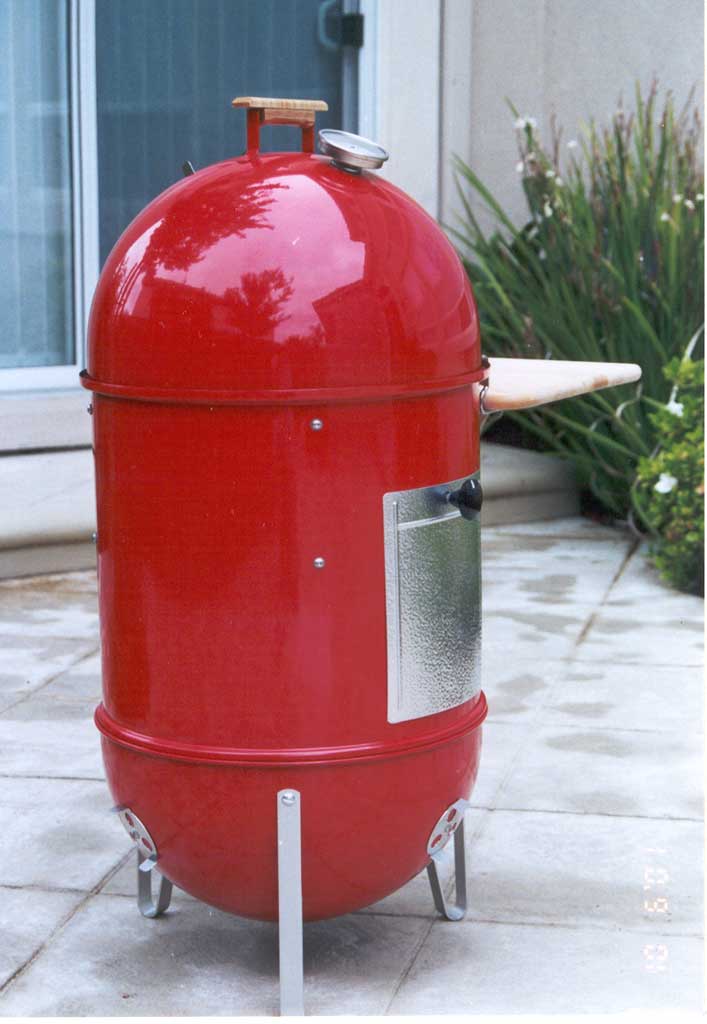
- A brand new Weber Smokey Mountain Cooker with a powder coated exterior finish. The color is called “Little Red Wagon.”
- Silver anodized aluminum legs.
- Natural-color wooden lid handle with spar urethane gloss finish.
- Trend Model 33 bi-metal thermometer with 4″ stem, mounted in the lid.
- Weber 1800 Work Table mounted on the middle cooking section.
- Stainless steel inset hex head damper fasteners.
- Marked access door knob.
- Four cooking surfaces.
- Modified charcoal grate and small secondary grate to prevent charcoal fall-through.
Inspired By A Little Motorcycle
My friend Kevin Kawahara was working on a Yamaha YSR50 motorcycle restoration project. As part of that effort, he had a powder coated finish applied to the motorcycle’s frame. I don’t remember whether it was his idea or my idea to put a powder coated finish on a Weber Bullet, but once I got this idea in my head I couldn’t shake it.
So in early 2001 I ordered a WSM from Amazon.com. The first thing I did was to assemble it and take many of the pictures you see in the WSM Product Information section. With that done, I prepared the cooker for the powder coating process and for the modifications that would follow.
Stripping Down The Cooker
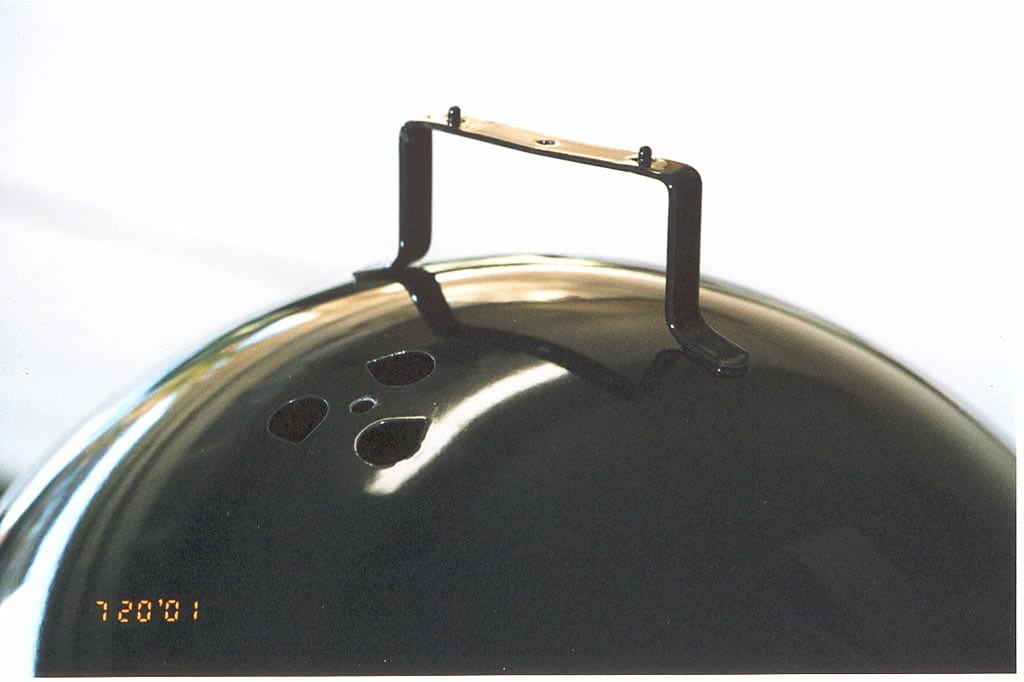
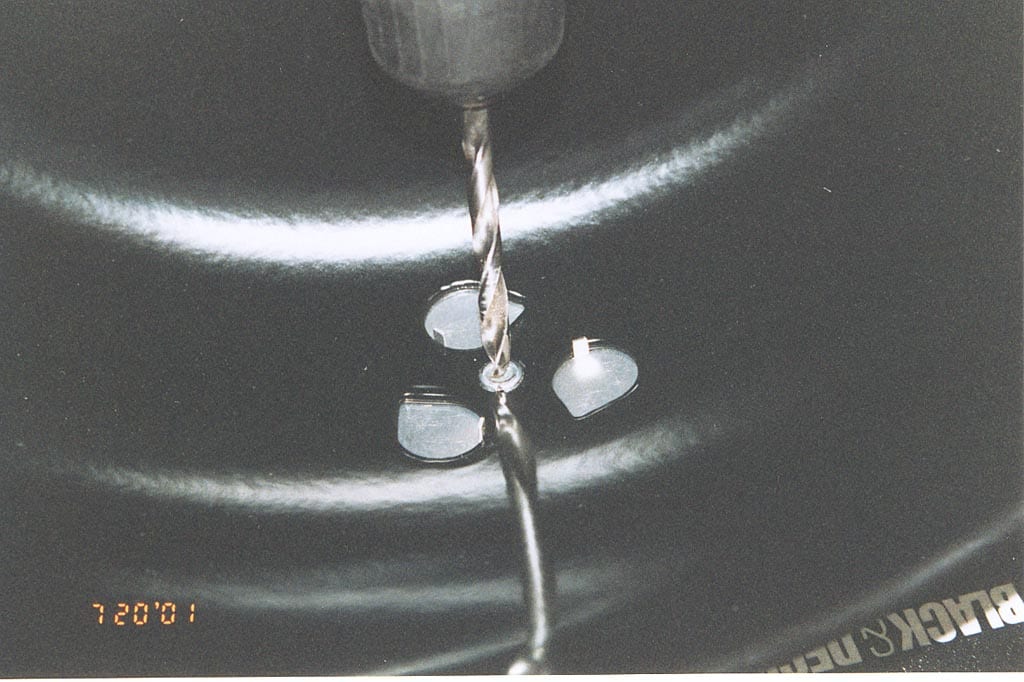
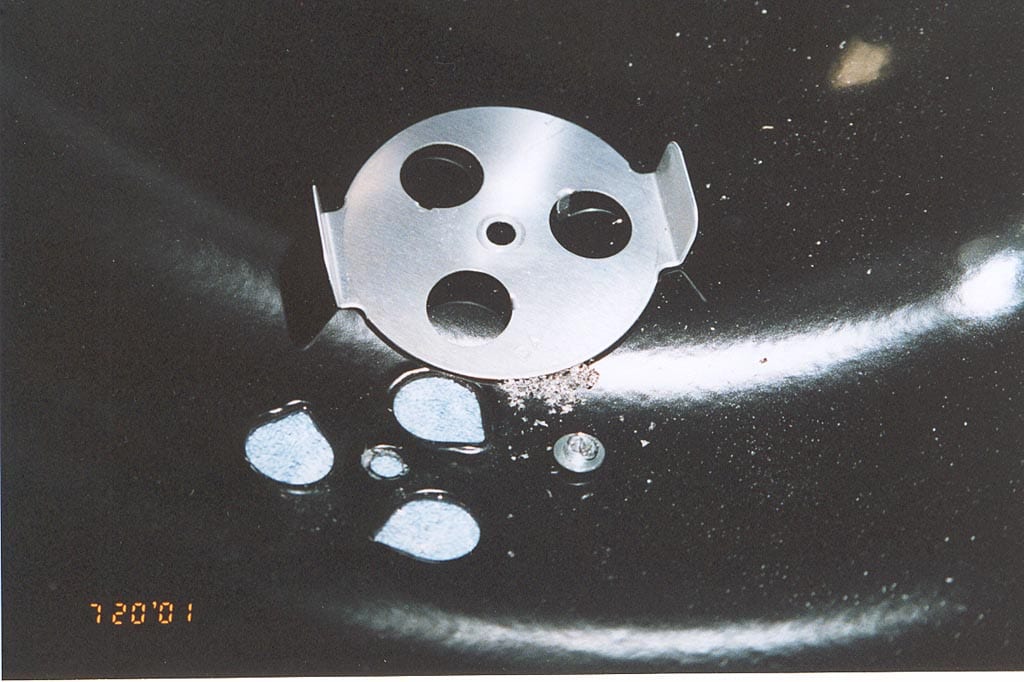
In order to powder coat the cooker, I had to remove the lid handle and the four vent dampers. Removing the handle was easy—I just unscrewed the one screw—but the dampers were a different story. To get those off, I used a 5/16″ drill bit to drill out the inside of the rivets to weaken them, then used a pair of pliers to crush each rivet and pop it out.
Next, I drilled a hole in the lid for the Trend thermometer and two small holes in the side of the cooking section for the work table mounting hardware. I drilled the lid using a Unibit #4 step drill bit and a standard metal drill bit for the holes for the table mounting hardware. You can read about how to drill holes in the WSM for thermometers, including an example using a Unibit, on the Installing A Thermometer page.
With these items completed, the cooker was ready for powder coating.
Cost: $39 for the Unibit step drill bit.
Powder Coating The Cooker Parts

Powder coating is a method of applying a protective finish to a wide range of materials and products that are used by both industries and consumers. The powder is a mixture of finely ground particles of pigment and resin that is sprayed onto the surface to be coated. The electrically charged powder adheres to the electrically grounded surface and is then heated and fused into a smooth coating in a curing oven. The result is a uniform, durable, high-quality and attractive finish.
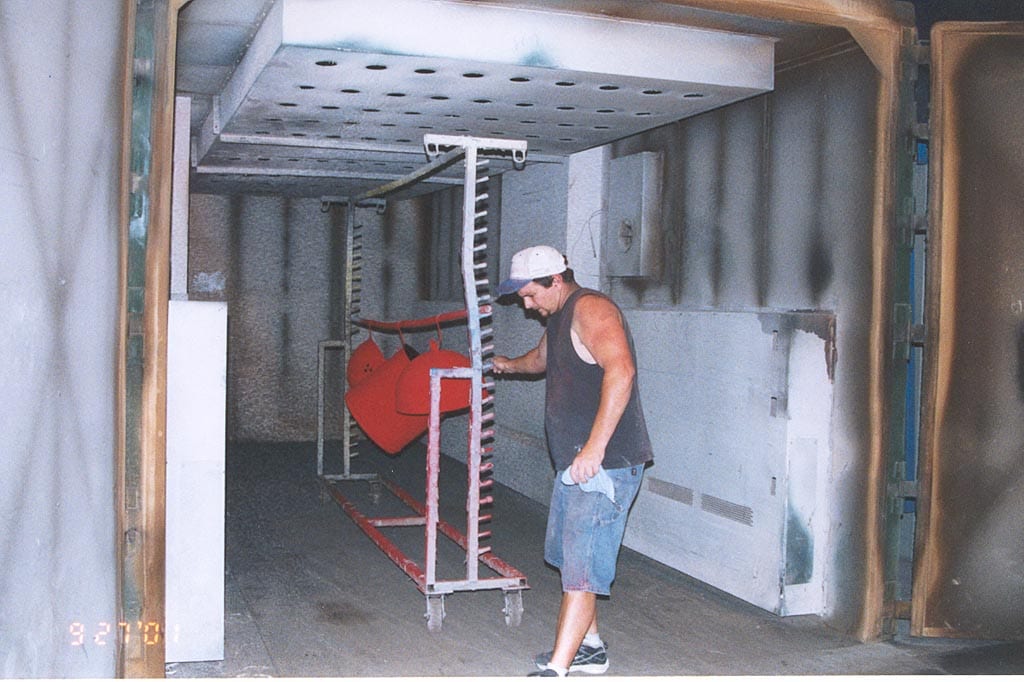
I had the three WSM pieces coated by Jeff Livingston of Superior Powder Coating in Santa Clara, California. I spent the afternoon in Jeff’s shop watching the entire process from start to finish.
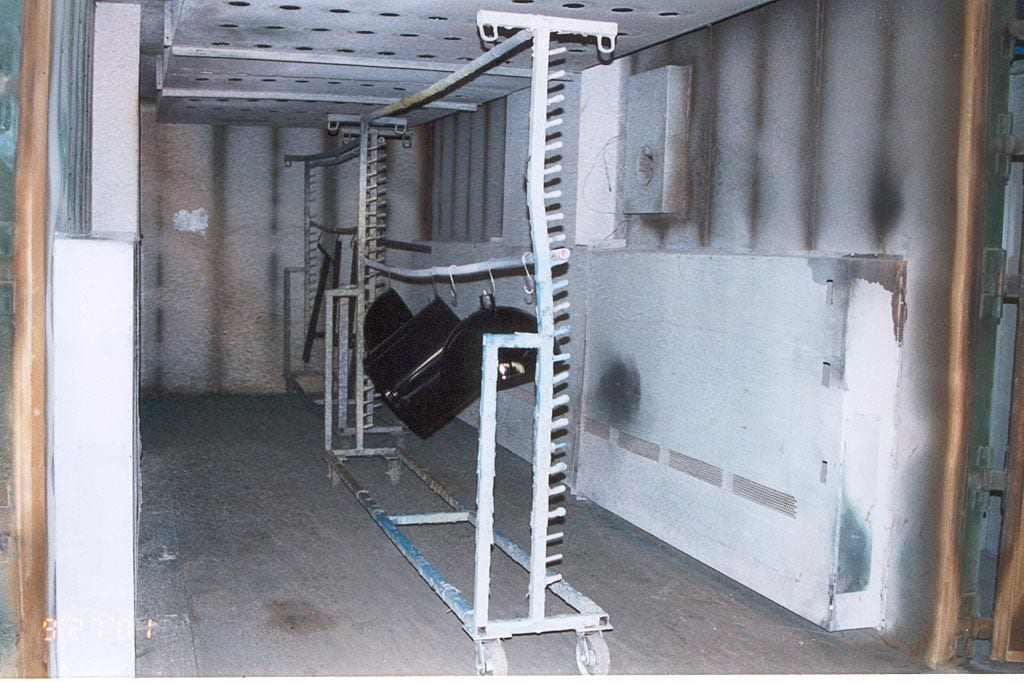
The process began with a hot detergent pressure wash and rinse of the three sections. Jeff hung the clean parts on a rolling rack and placed them into the 24′ long, 400°F curing oven to dry for 30 minutes.
Once the parts had cooled, a special masking tape was applied to the inside edges of each section. The idea was to coat only the outside surfaces of the cooker, leaving the standard porcelain finish on the inside. All holes and openings were also masked on the inside of each section.
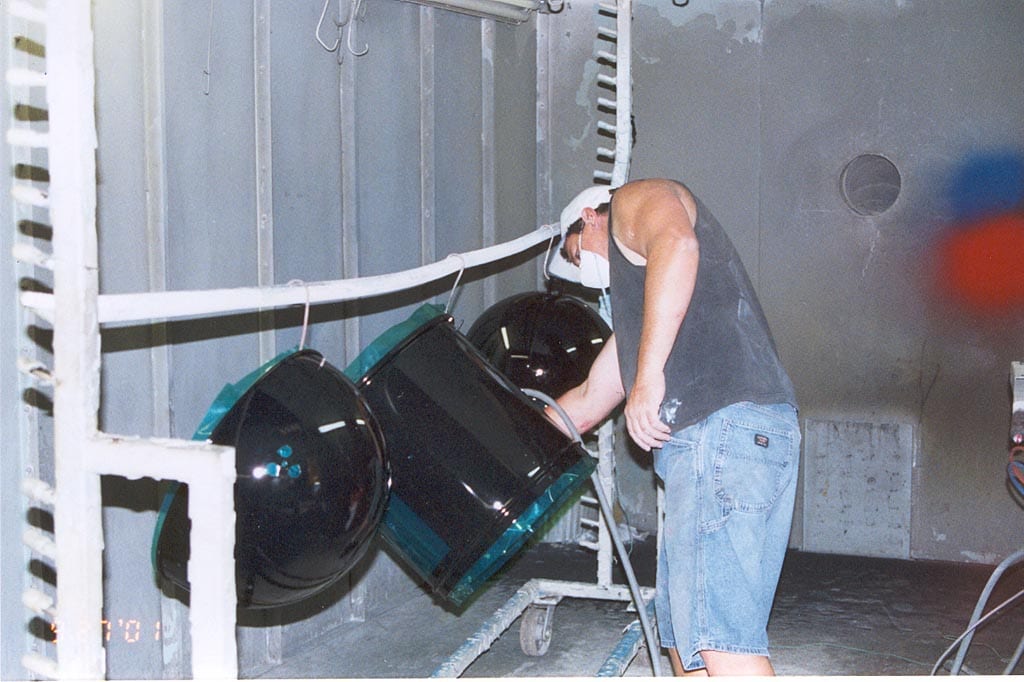
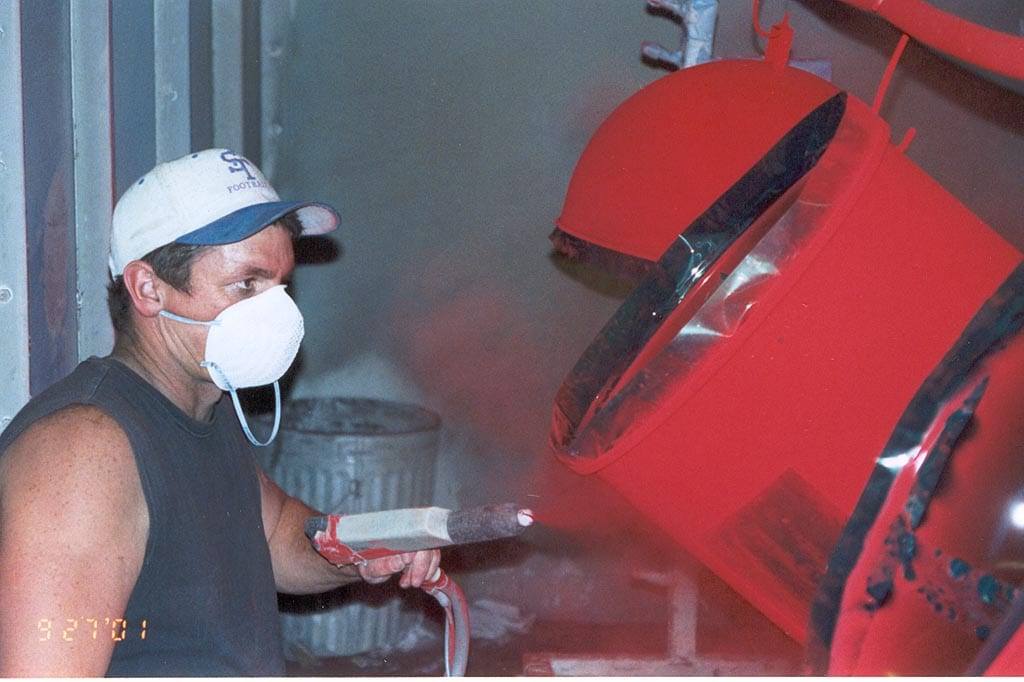
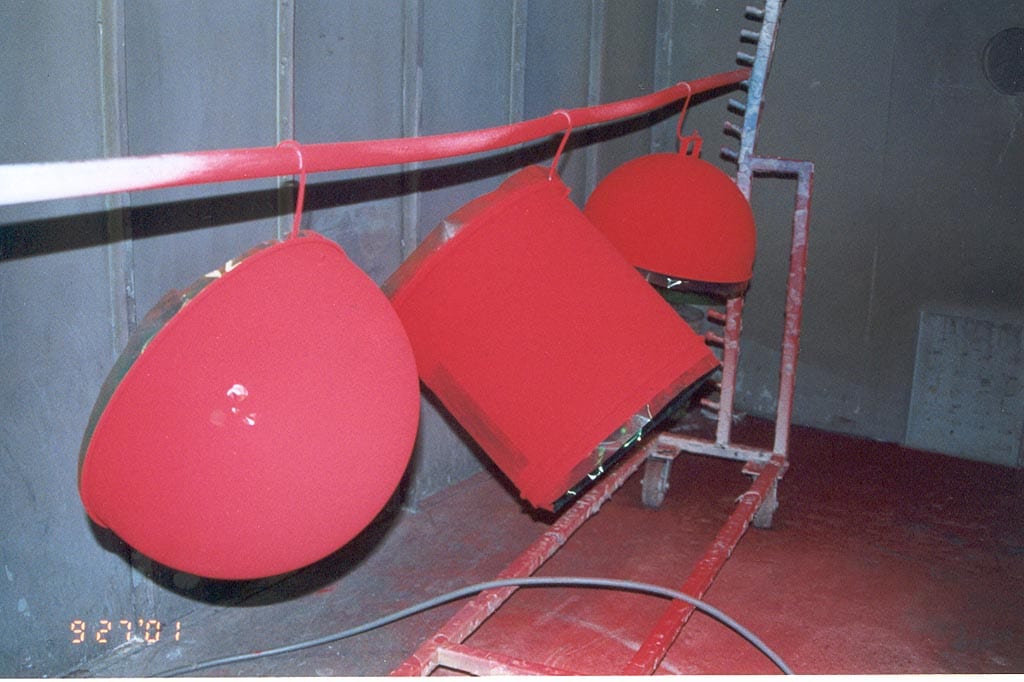
Jeff rolled the three masked parts into the spray booth. He used a blast of compressed air to make sure all the surfaces were dust-free, then he loaded up his sprayer with the DuPont “Little Red Wagon” powder.
A ground wire was attached to the rack from which the pieces were hanging, and Jeff started to apply the coating. The spraying machine put an electrical charge on the powder particles, causing them to stick to the pieces like a magnet. Jeff carefully sprayed each piece, making sure that all surfaces were coated completely and evenly.
Jeff removed the masking tape and used a damp cloth to wipe away any powder from the inside surfaces. He rolled the parts into the curing oven and baked them at 400°F for 30 minutes. The parts had to reach a temperature of 390°F and be held there for 10 minutes.
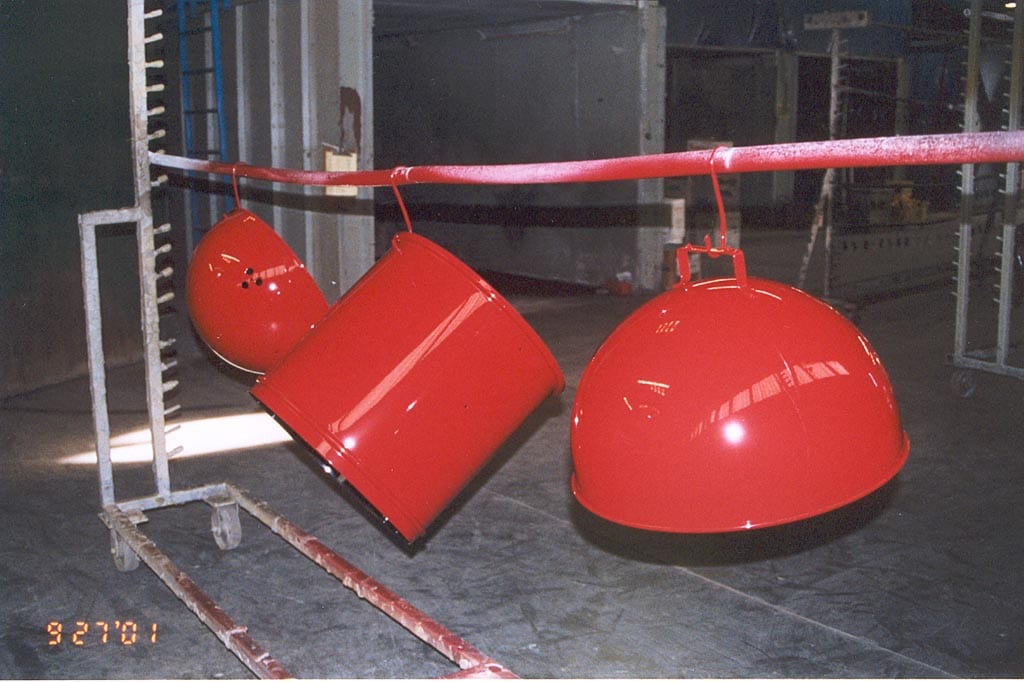
The bright, shiny red parts were removed from the oven and cooled before the trip back to my house.
While the powder coated finish on “The Little Red Bullet” is very durable, it is not as heat resistant as the underlying porcelain enamel finish. In fact, it will begin to blister and flake off at temperatures above 600°F.
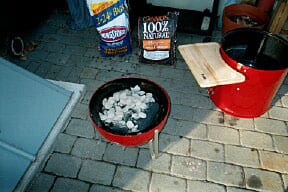
As part of this project, I used an infrared thermometer to take temperature readings of my own WSM while in use. I placed a full Weber chimney starter of hot Kingsford Charcoal Briquets into the charcoal chamber and added another chimney of unlit briquettes on top. With all the coals hot, the bottom of the charcoal bowl measured over 760°F. When I assembled the cooker, adjusted the bottom vents and brought the cooker down to a normal barbecuing temperature range of 200-250°F, no part of the cooker was higher than 450°F.
As a result, it’s important that this cooker always be brought up to temperature slowly using the Minion Method. It cannot be operated at very high temperatures and the burning coals must be kept on the charcoal grate and within the charcoal chamber. This cooker cannot be used for high temperature grilling or baking, and a fire should not be built directly on the inside surface of the charcoal bowl.
Anodizing The Legs
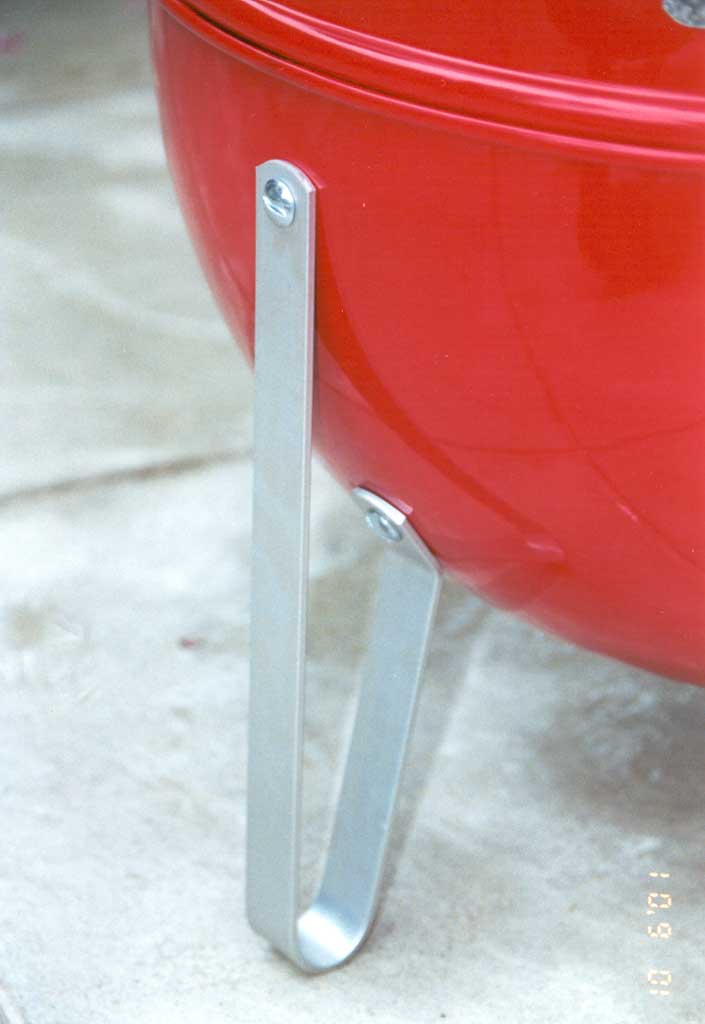
The three legs that came with this cooker didn’t look very good and I couldn’t bring myself to use them as-is. So I took them to Valley Plating in Santa Clara, California for the application of a silver anodized finish.
The legs were cleaned and then placed in an electrically-charged sulfuric acid solution. This caused oxidation—called “anodic film”—to form on the surface of the parts. This film can be colored using a variety of organic dyes, but I chose to leave the legs silver in color. The process was finished by sealing the pores of the anodic film using a hot water bath.
The anodizing process really improved the appearance of the legs. Since it’s an integral part of the aluminum, it will never flake off. It makes the surface much harder than normal, so the legs are scratch and corrosion resistant. Interestingly, it also renders them non-conductive to electricity.
Adding A Wooden Lid Handle
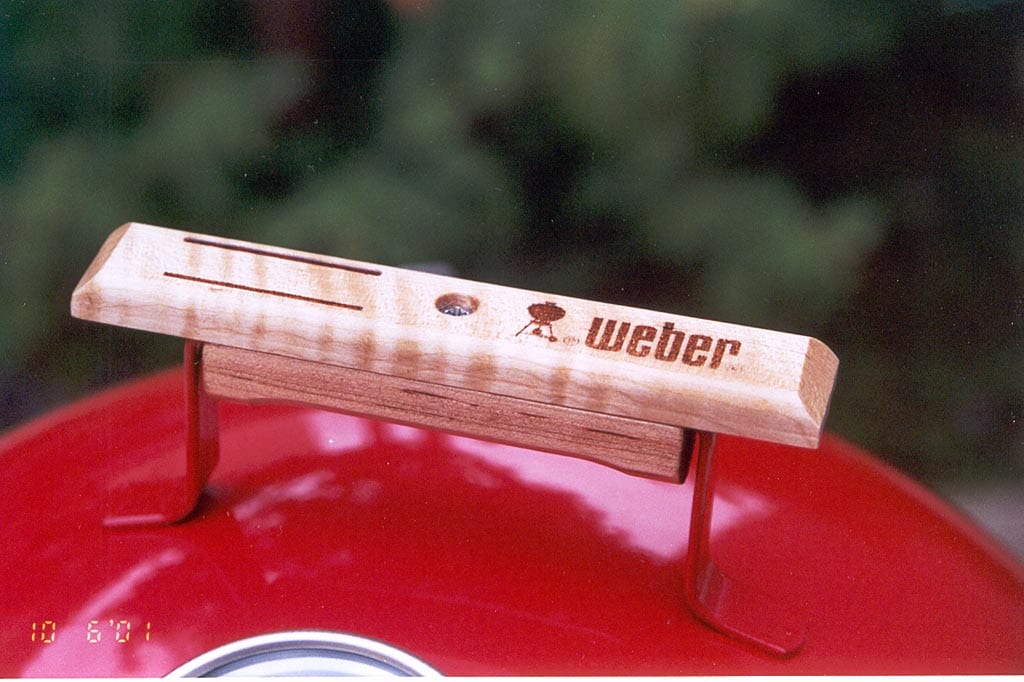
This Weber Bullet came with the standard nylon plastic lid handle. Functional…but we all like the old wooden handles better, right?
As luck would have it, I was able to get my hands on an unstained wooden lid handle. Here was my chance to put a spin on the classic handle…a little sanding, three coats of spar urethane clear gloss finish, and I ended up with a one-of-a-kind wooden handle that’s protected from the sun, rain, and temperature changes.
I think it’s beautiful, don’t you? It also matches the natural finish of the work table.
Cost: $0. The handle was provided by an anonymous donor and I already had the finishing materials around the house.
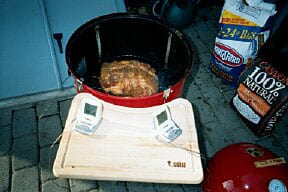
Mounting The Trend Thermometer

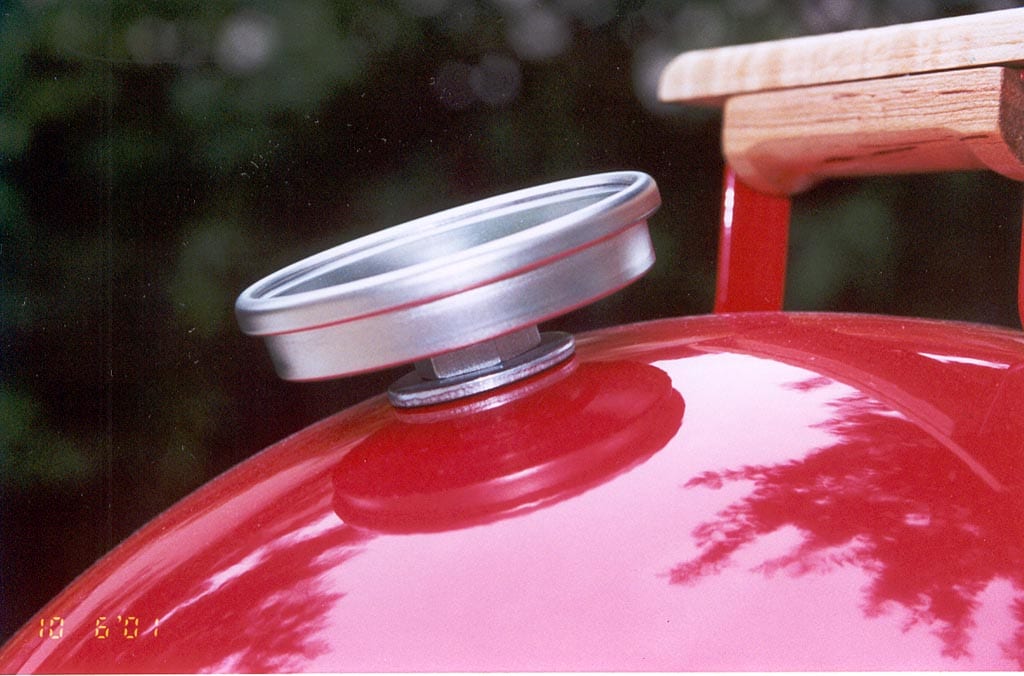
I used a Unibit #4 step drill bit to enlarge the hole in a large steel washer that acts as a spacer between the lid and the thermometer. I slide the washer over the thermometer mounting base, inserted the thermometer into the hole in the lid and fastened it with an electrical conduit lock nut.
Cost: $40 for the thermometer and connecting hardware.
Adding A Detachable Work Table
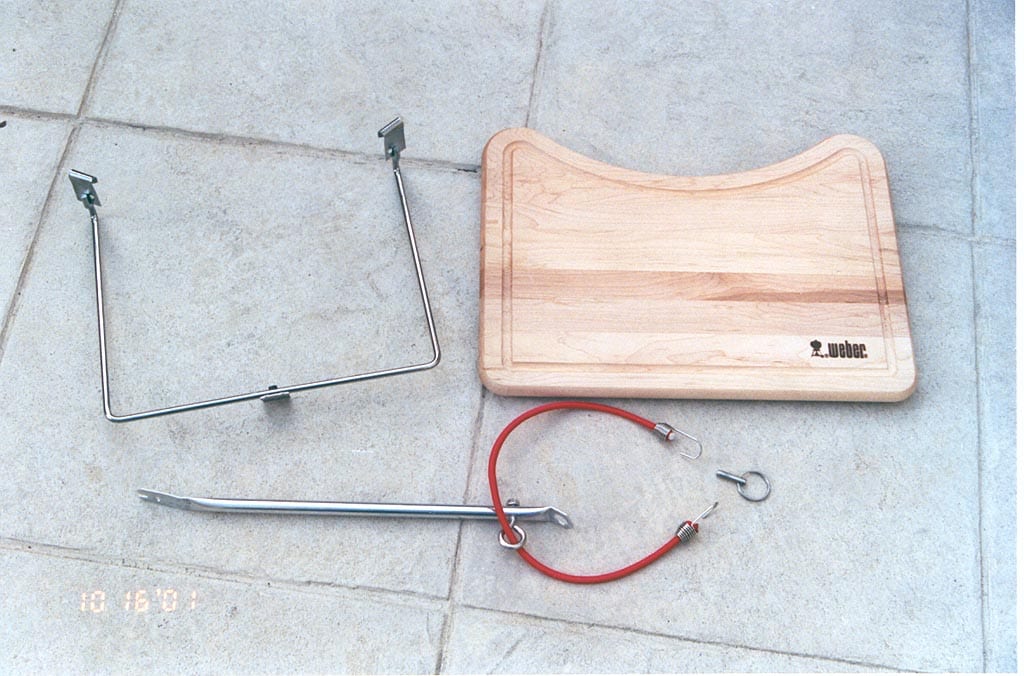
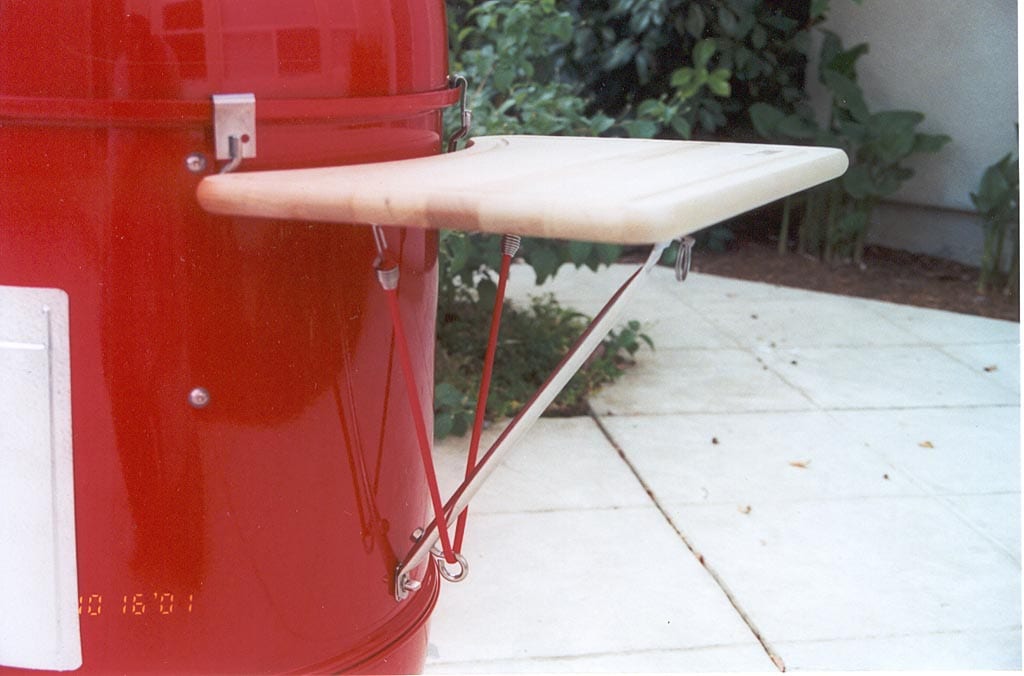
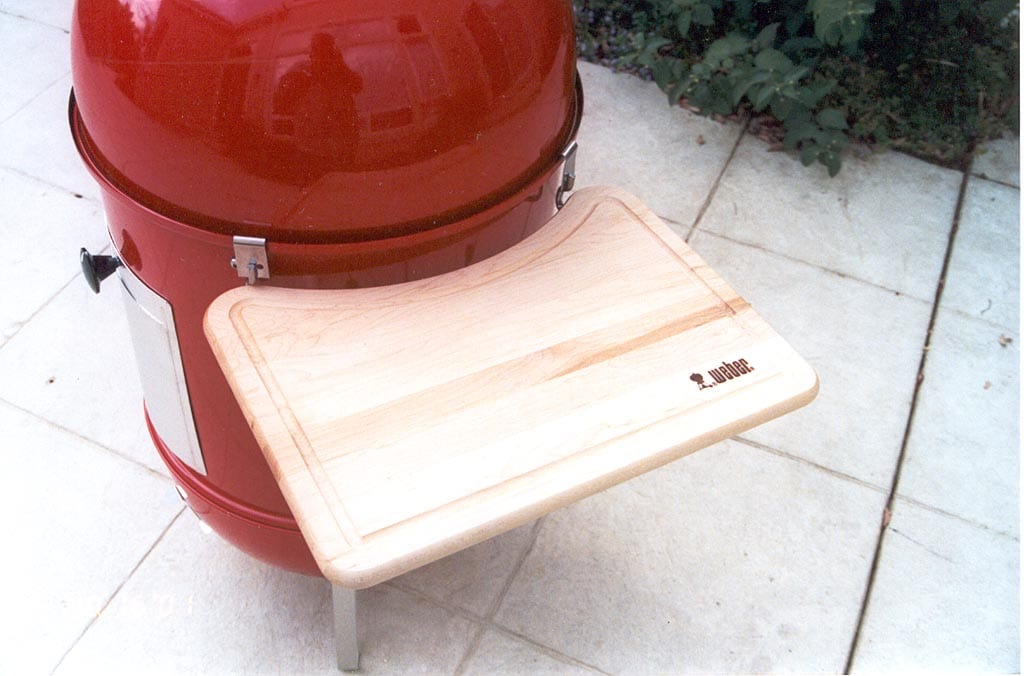


You may have read about this modification on the Work Tables page. The Weber 1800 Work Table is designed for use on the 18-1/2″ kettle grill, but with some changes it can be adapted to the WSM. It provides a light duty surface on which you can place tongs, gloves, or a probe thermometer.
The first step was to attach the mounting hardware to the holes I had drilled in the cooking section. The fastener I chose is called a turn button. It has a spring-loaded head that turns 90° to lock down whatever is placed over the head. You can find this fastener at most hardware and marine supply stores. The turn button was attached with two stainless steel screws, washers and nuts.
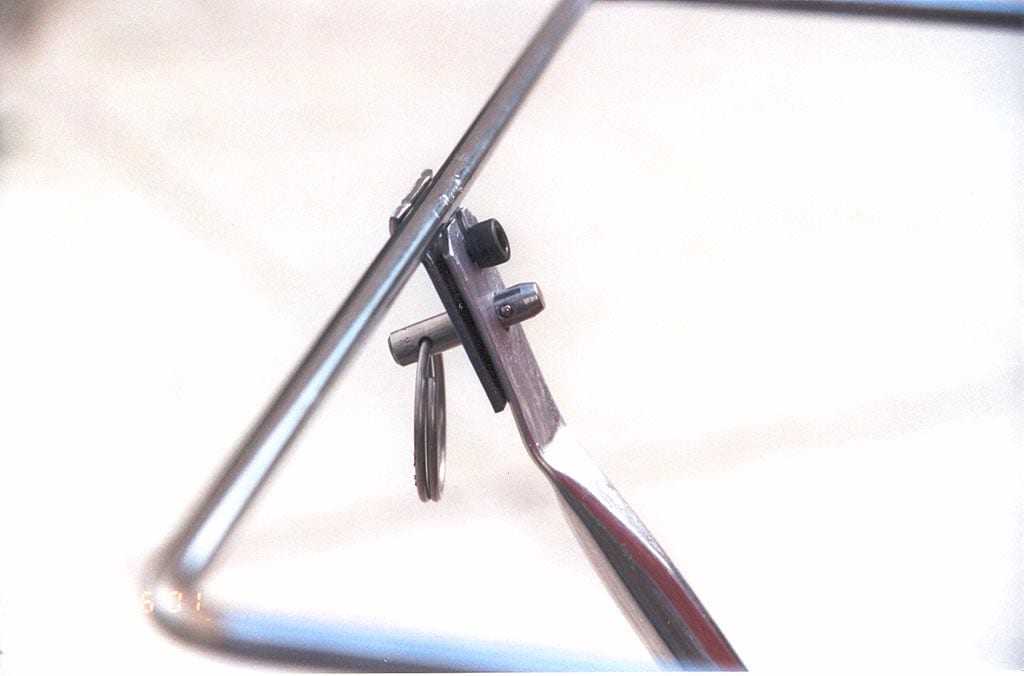
Next I had to modify the tubular brace and create a new type of connection between the brace and the support bracket. I shortened the brace and made an oval-shaped hole in one end to fit over the turn button. On the other end I created a fork and a hole. The fork slides under a screw in the flange, then a cotterless hitch pin is inserted through holes in each piece to lock them together.
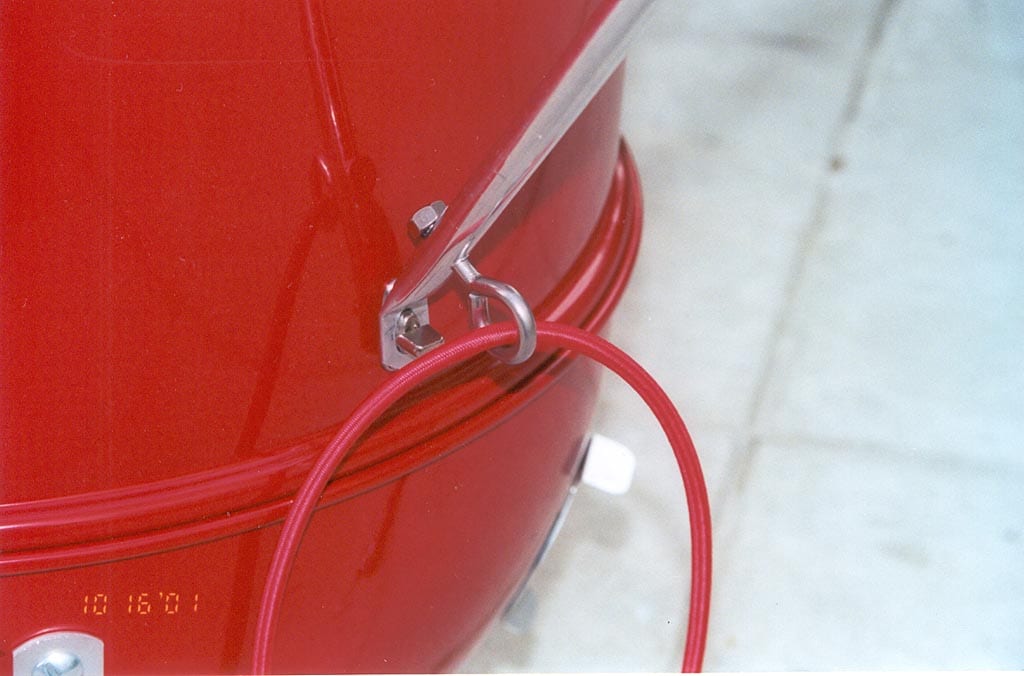
The last step was to add a shock cord to keep the cutting board and support bracket tightly connected to the cooker. I added an eye bolt to the bottom of the tubular brace and D-rings to the bottom side of the cutting board. A short red shock cord passes through the eye bolt and connects to the D-rings, helping to stabilize the whole assembly.
To attach the work table to the cooker, simply connect the brace to the support bracket using the hitch pin, hang the bracket from the edge of the cooking section and fasten the other end of the brace to the turn button. Put the cutting board in place and attach the shock cord to the D-rings. To remove the work table, just reverse these steps.
What’s nice about this modification is that you can remove the cooking section with the work table still attached. (The last photo above was taken before the shock cord was added.)
Cost: $50 for the work table accessory and connecting hardware.
Using Stainless Steel Inset Hex Head Damper Fasteners
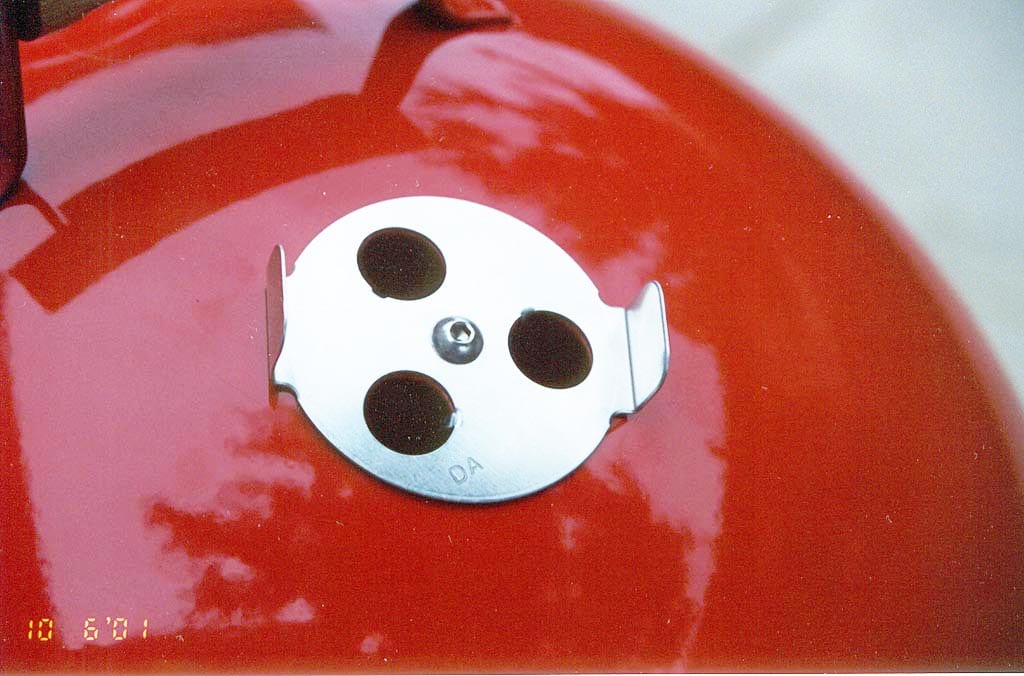
I knew early on that one of the keys to success for this project would be to reattach the four vent dampers in a way that would look good and work well. I quickly learned that I could not duplicate the original rivets used by Weber—they were industrial grade and unusual in size and construction. Even if I could acquire them, they required industrial fastening equipment that I didn’t have access to.
After investigating a lot of alternative fasteners, I settled on 1/4″ x 5/16″ stainless steel screws with an inset hex head and split lock washers and nuts. The head on these screws matched the head size and shape of the original rivets, and the inset hex added sort of a high-tech look.
The only glitch was that there was a little bit of play between the screws and the holes in the dampers, lid and charcoal bowl, allowing the damper to move a tiny bit off-center from the vent holes. This couldn’t happen with the original rivets because they expanded to fill the holes completely. I wrapped a long, thin strip of aluminum foil around the upper portion of each screw to eliminate this play, but I have no idea how well this will hold up with use.
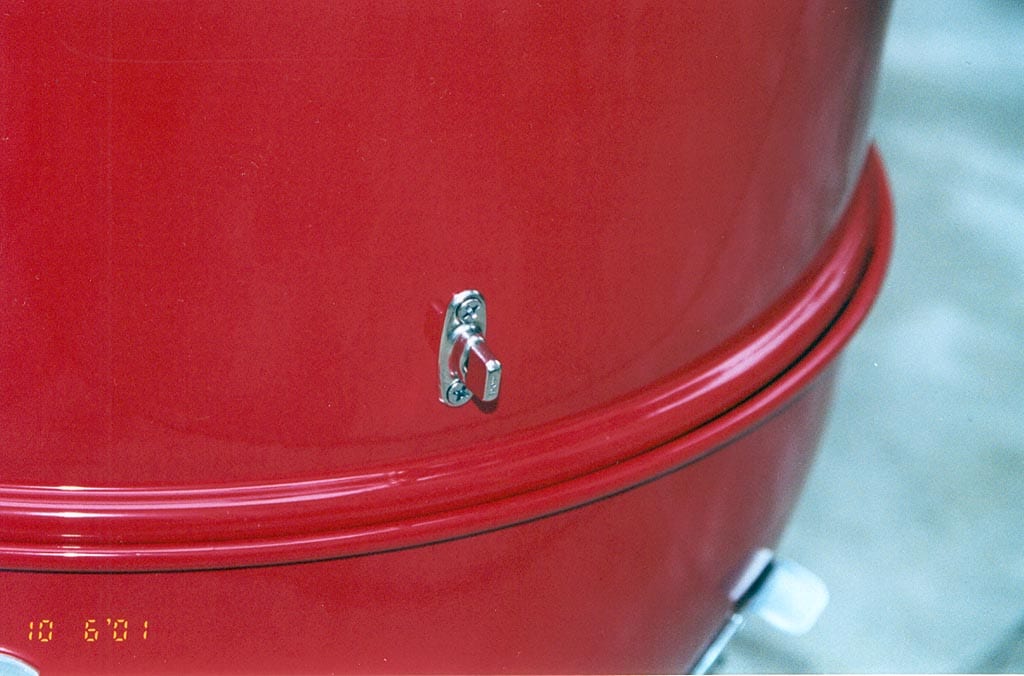
Marking The Access Door Knob
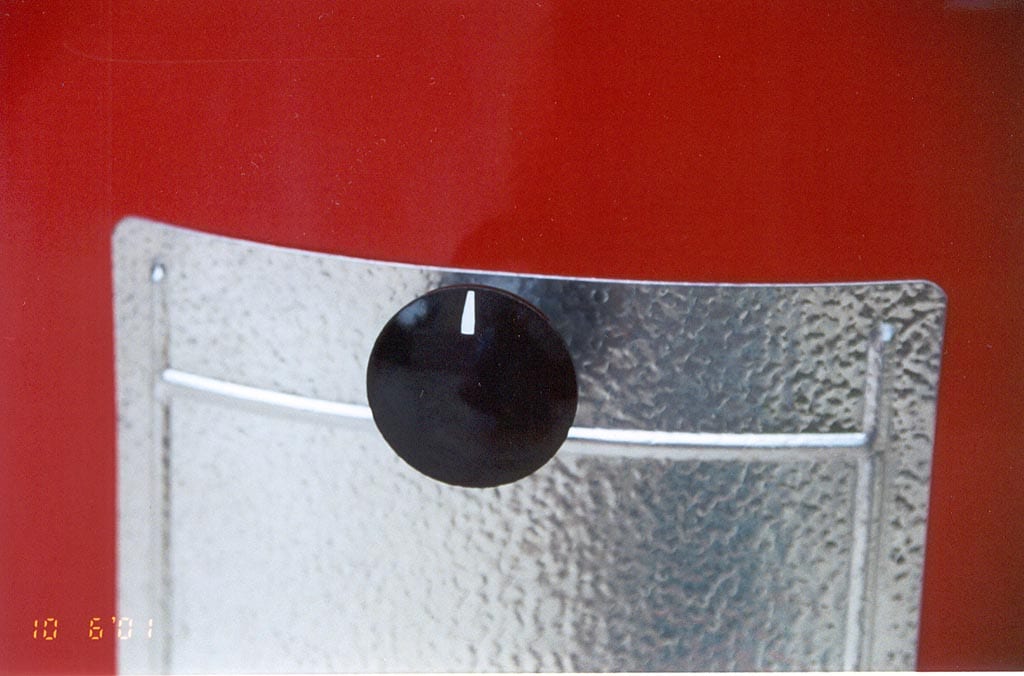
This is another item you may have read about on the Access Door Modifications page. One of my pet peeves is that you can’t always tell when the door is latched properly. My solution here was to buy a sheet of 1/2″ adhesive vinyl lettering at the office supply store and use the top portion of the “!” symbol turned upside down as an arrow.
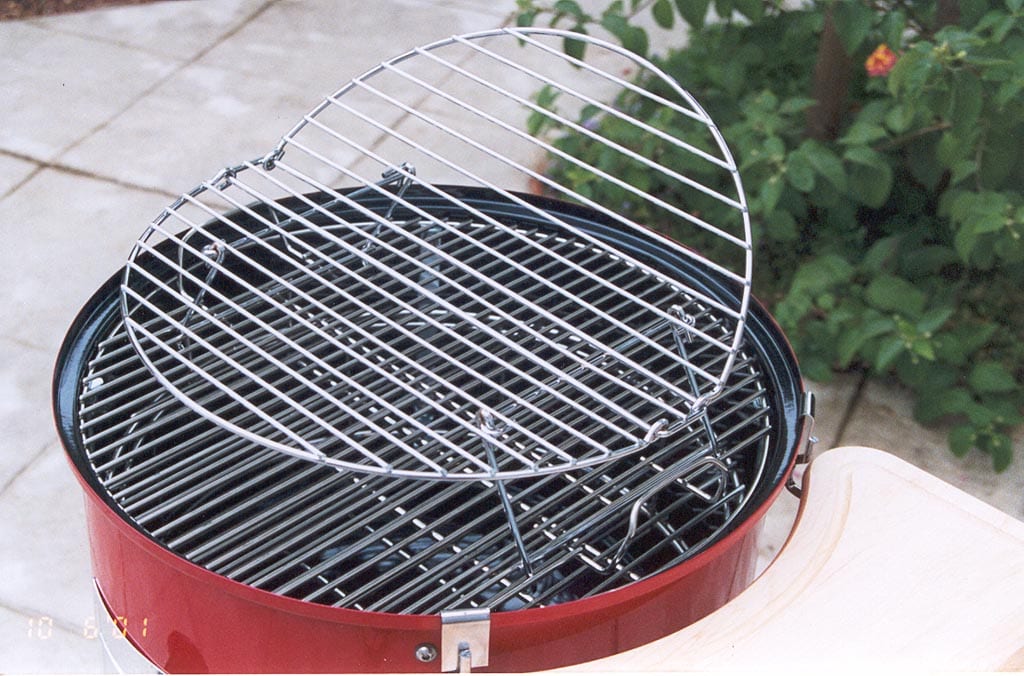
Increasing Cooking Capacity
At times we all long for increased cooking capacity in the WSM. I’ve documented some of the approaches people use on the Increasing Cooking Capacity page.
For this project, I wanted to have a total of four cooking surfaces: the standard upper and lower grates, plus optional surfaces that could be placed over the two standard grates.
Increasing capacity above the upper grate was easy—I bought a Big Green Egg grill extender. This 15-1/2″ cooking grate has two legs that attach to the WSM grate, and the grate surface swings up on both sides to access the grate below. The distance between the grid extender and the WSM grate is 3-3/4″. The grid extender costs about $20.
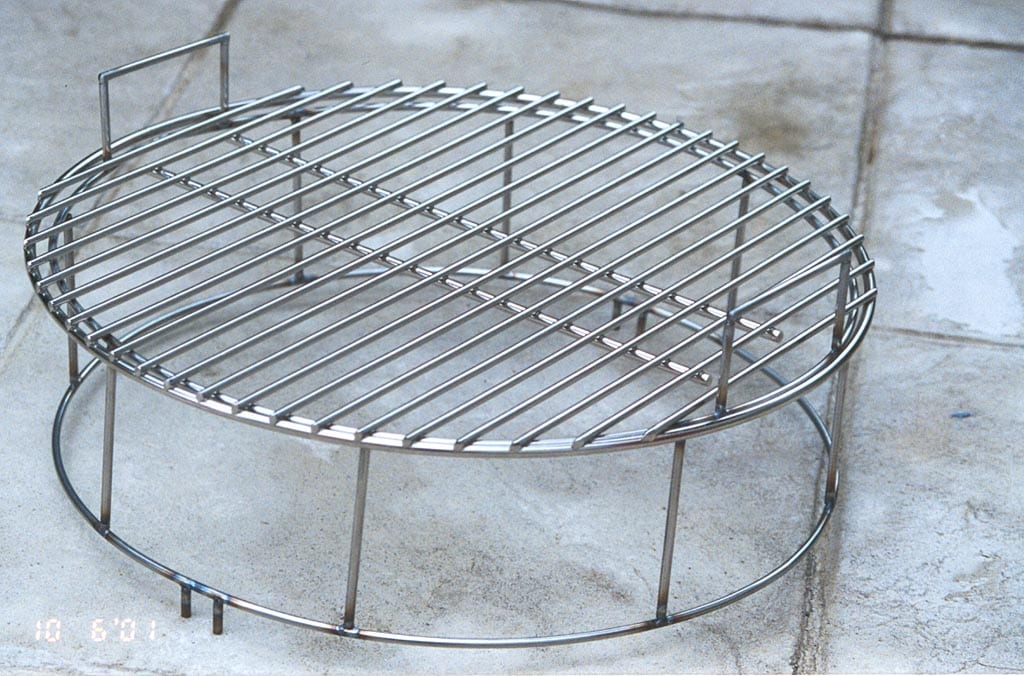
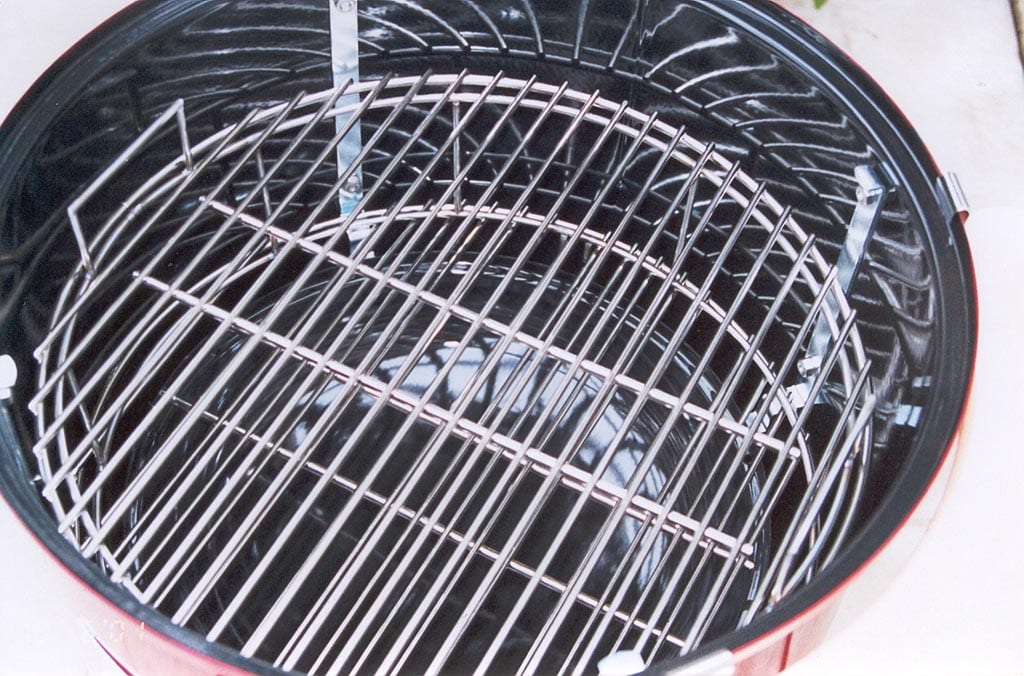
To increase the capacity above the lower grate, I bought an additional lower grate from Weber and took the two grates to Applied Welding Technology in Mountain View, California. They fabricated a stainless steel stand that holds the second grate 4″ above the regular one. It consists of two hoops slightly smaller in diameter than the cooking grates and a series of vertical pieces connecting the hoops. The stand sits on the regular grate and has a series of guides that lock it in place. The additional grate is placed on top of the stand. Two small handles on the stand stick up through the grate, allowing the grate and stand to be lifted off as a single unit.
As I put the additional grate and stand in and out of the cooker several times, I noticed that it would catch on the bolts that attach the grate brackets to the inside of the cooking section. Replacing the standard screws with more of the shorter stainless steel inset hex head screws solved the problem.
Cost: $28 for the BGE grid extender including tax & shipping; $9 for the additional lower cooking grate; $65 for the custom welded stand.
Modifying The Charcoal Grate
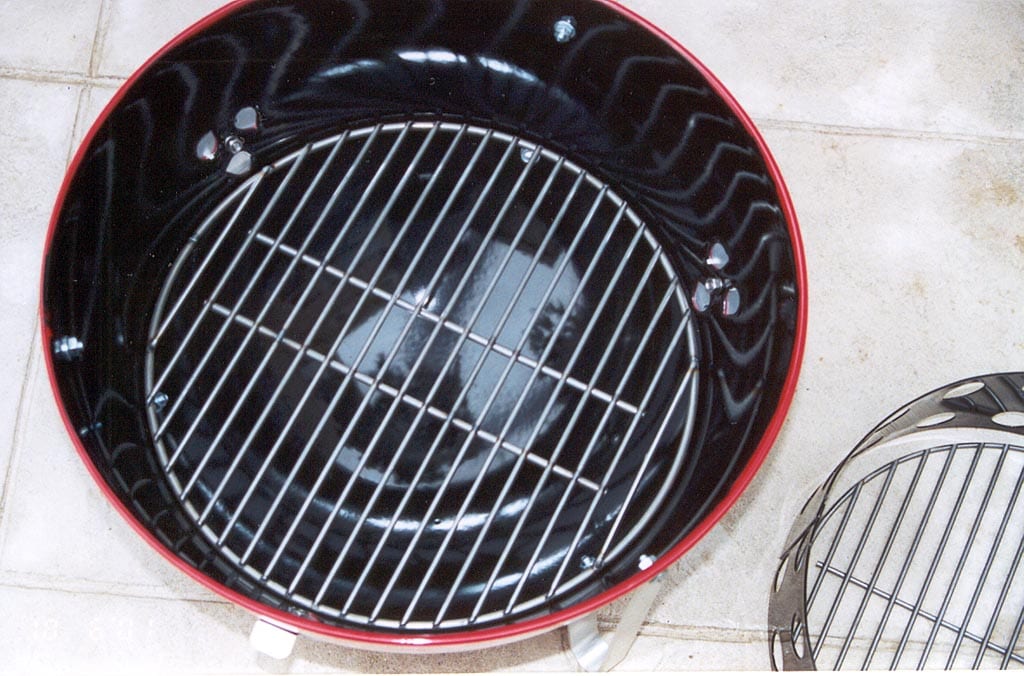
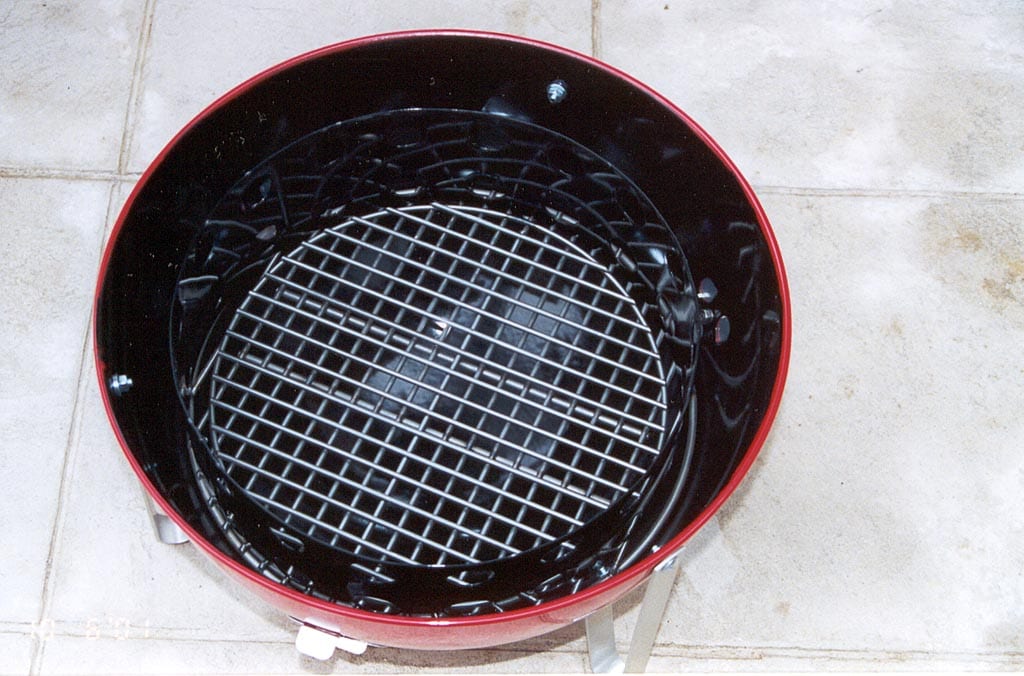
Since the charcoal grate is manufactured with openings on either side that allow charcoal to fall through, I had the welder close these gaps. An additional grate rod was added to the left and right of the two parallel braces running across the grate.
I also bought a Weber #72501 charcoal grate that sits inside the charcoal chamber at a 90° angle to the original grate. This 13-1/2″ grate prevents small pieces of briquette or lump charcoal from falling through.
I’m hoping that these modifications will help protect the powder coated finish on the charcoal bowl…only time and use will tell.
Cost: Modifying the charcoal grate was included in the welding charge for the cooking grate stand; $9 for the secondary charcoal grate.
Wrap-Up
Total Project Cost: $670.
The total elapsed project time was six months, but most of the work was completed in the last two weeks of the project when I really got motivated to finish it so I could put it up for auction.
Other than the temperature concerns mentioned above, there’s no special care required for the powder coated finish. It can be cleaned with a soft damp cloth and water, dishwashing liquid or Windex. Abrasive cleaners, harsh chemical cleaners and acetone (e.g. finger nail polish remover) should be avoided. Minor surface scratches can be polished out using a very mild automotive car cleaner/wax like Maguire’s—but make sure to test on an inconspicuous spot first.
Postscript

In February 2002, I received an e-mail from Capt. Martin that included a number of photos of The Little Red Bullet in action. Note that it really stands out from the rest of the pack!
Photographs of The Little Red Bullet in use: 2002 by Capt. Stephen R. Martin.


