In this topic:
Page 1
Page 2
- The Minion Method
- Fire-Up Variations
- Adding Smoke Wood To The Fire
- Using Lump Charcoal
- Using Leftover Charcoal
- Using Wood Chunks Or Logs Instead Of Charcoal
There are many ways to build a fire in the Weber Smokey Mountain Cooker. The good news is that there’s no wrong way to do it. If you have a method that works for you, that’s great—keep doing what you’re doing.
The WSM Owner’s Manual describes a method in which you light 35-150 briquettes, depending on the size of your WSM and the type and weight of meat you’re cooking. Heap the briquettes into a pile, add 4-5 paraffin starter cubes, and light. The charcoal is ready when you see gray ash on the top coals in the pile. Spread the coals evenly on the charcoal grate and you’re ready to add smoke wood to the fire, water to the pan, and meat to the cooking grate.
The Owner’s Manual method is not a bad starting point, but there are two other methods used by WSM owners that you may want to consider. One is what I call the Standard Method—good for shorter, high-heat cooks—and the other called the Minion Method—good for longer, low-heat cooks.
The Standard Method
Pros
- Good for cooking sessions lasting 4-6 hours.
- Best when cooking in the 325-350°F range.
- No need to add fuel during the cooking process.
- Appeals to those who prefer all briquettes to be fully lit during cooking.
Cons
- Can be difficult to bring down the cooker temperature if it’s running too hot.
Using this method, you fire-up enough charcoal at the beginning to last the entire cooking session. All briquettes are hot and covered with a light coat of gray ash before you start cooking.
This is my preferred method when I want to roast meats like turkey or standing rib roast at 325-350°F.
Light A Chimney Full Of Charcoal
For most cooking sessions, you’ll need at least one chimney full of hot coals. Fill a Weber chimney starter to the top with charcoal briquettes and light.

You can learn more about using chimney starters in the How To Use A Chimney Starter article.
Dump The Hot Coals
It will take 10-20 minutes for the coals to light, depending on wind conditions, how much charcoal is in the chimney, and the type of charcoal being used.
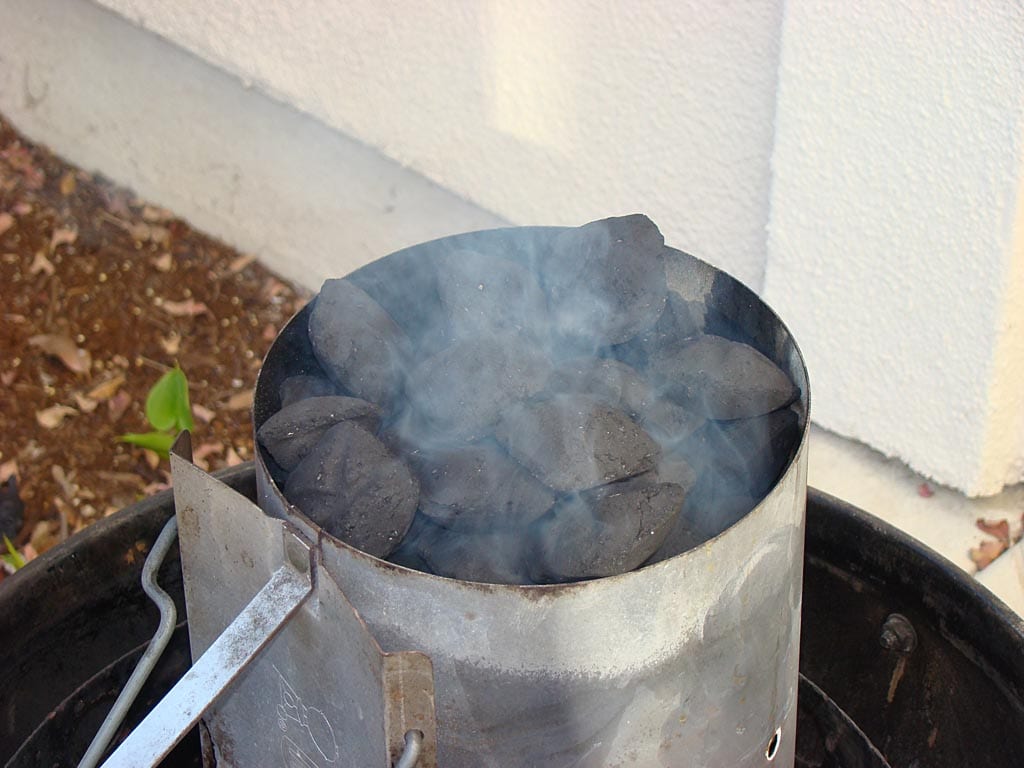
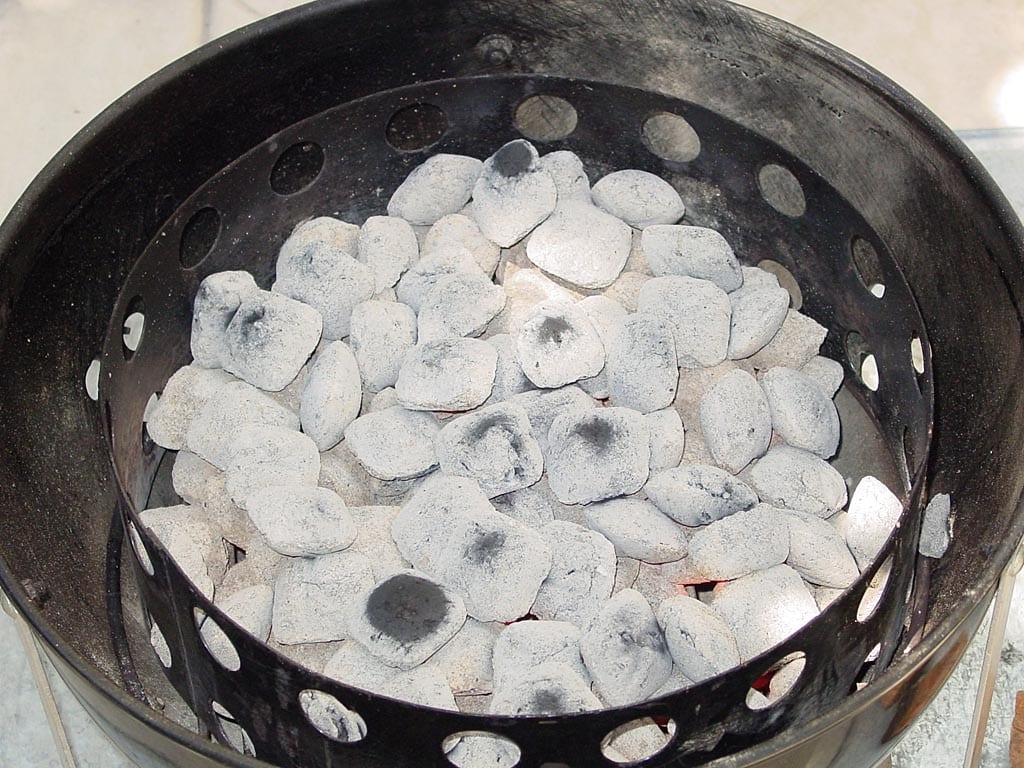
The charcoal is ready when you see flames licking at the coals in the top of the chimney and gray ash just starting to form.
If you wait longer for the top coals to be fully ashed-over, much of the charcoal in the bottom of the chimney will be spent, so go ahead and dump the charcoal into your cooker when it looks as shown in the photo above.
Wearing heat-resistant gloves, pick up the chimney and pour the hot coals into the charcoal chamber. Spread the coals evenly over the grate using tongs.
Add More Charcoal
It takes some experience to learn how much charcoal to use for the various types of barbecue you cook in your WSM. Make sure to use a cooking log to keep track of fuel usage from one cooking session to the next.
Using a Weber chimney starter as a charcoal measuring cup, I might use:
- 1 heaping chimney of hot Kingsford Charcoal Briquets to cook a single chicken at 325°F for 1 hour.
- 2 chimneys to cook a 12-pound turkey at 325°F for 3 hours.
The amount you use will depend on several factors:
- Type/brand of charcoal used, especially how hot and how long it burns.
- Amount of food to be cooked.
- Length of the cooking session.
- Weather conditions.
If you need more than a single chimney of hot coals, spread the additional unlit briquettes evenly on top of the lit ones. It will take 10-20 minutes to get these briquettes going.
Of course, if you have two chimney starters, you can shortcut this process by lighting all of the charcoal at one time in the previous step.
Assemble The Cooker
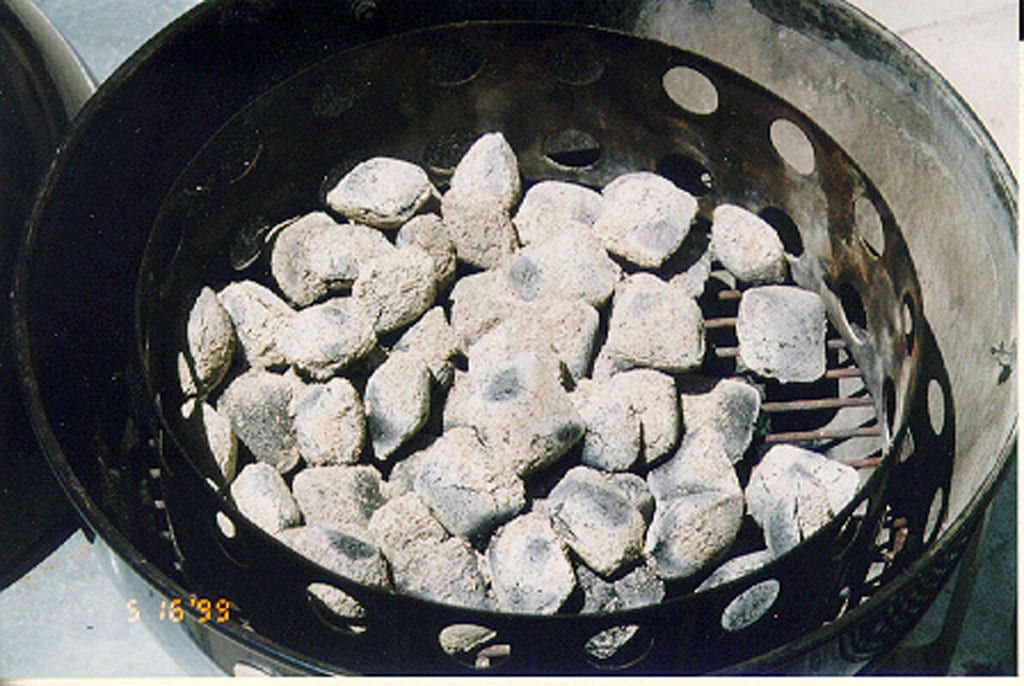
When the coals look like this, with a nice coating of gray ash, you’re ready to cook.
For 225-250° cooking
- Assemble the cooker, add cool water to the water pan, and put the lid in place.
- Close all three bottom vents. Leave the top vent fully open for ventilation throughout the entire cooking process.
- Keep an eye on the thermometer. The initial temperature may be 400°F or higher depending on the type and amount of fuel you’re using, but within a short time it will begin to drop.
- If you’re loading up the cooker with a lot of meat, add the meat and smoke wood when the temp comes down to about 350°; if cooking smaller quantities, wait until about 300°F. The temperature will drop quickly into the 225-250°F range once the meat goes on.
For 325-350° cooking
- Assemble the cooker, put the empty water pan in place, and put the lid in place. Line the water pan with wide aluminum foil for easy cleanup.
- Adjust all three bottoms vents to 50% open. Leave the top vent fully open for ventilation throughout the entire cooking process.
- Add the meat and smoke wood to the cooker immediately. The temperature will drop quickly into the 325-350°F range once the meat goes on.
As the cooking session proceeds, adjust the bottom vents to regulate the temperature.
- If the temperature begins to fall, open the bottom vents slightly to allow more air into the cooker. If the temp begins to rise, close the bottom vents a bit.
- Try to keep all three bottom vents open equally to promote an even burn inside the cooker. However, you can manage cooker temperature using only one vent, if necessary. For example, in windy conditions, close the two upwind vents and adjust cooker temp using the remaining downwind vent.
- Don’t worry about small temperature fluctuations. Remember, barbecue is not an exact science. As long as you’re fairly close to your target temperature, everything will turn out fine.
It takes the Weber Bullet a little time to react to changes in vent settings. The trick is to anticipate the direction the cooker temperature is heading and adjust accordingly. With a little practice, you’ll be controlling WSM temps like a pro!
Avoid Overheating The Cooker
As mentioned above, one problem with this method is that it can be hard to bring down the cooker temperature if it’s running much hotter than you want. This happens for several reasons:
Starting with too much fuel for the amount of food being cooked
If you’re cooking a single slab of ribs, don’t fill the charcoal chamber to the top with red-hot coals.
Solution: Close all three bottom vents and close the top vent 50% until the temp drops. Next time, use less fuel.
Windy conditions
Wind can blow through the bottom vents into the charcoal bowl and feed the fire.
Solution: Move the cooker to a different location, install a wind break, or close the two upwind vents and manage the fire using the remaining downwind vent. See Cooking In The Wind, Rain & Cold for more information.
The cooker has a problem with air infiltration
If you’ve closed all three bottom vents and still can’t get the temperature to drop, air infiltration is the probable cause. This usually occurs between the charcoal bowl and the middle cooking section, or around the access door.
Solution: Read Parts Troubleshooting for a fix.
You’re peeking
Every time you open the cooker to gaze upon your barbecue masterpiece, you let in an uncontrolled volume of air that whips the coals into a frenzy.
Solution: Stop peaking!
If all else fails, use tongs and heat-resistant gloves to remove some fuel from the cooker through the access door. If you’re feeling lucky, lift the middle cooking section off the charcoal bowl with the lid, meat, and water pan intact to access the fuel. This can be dangerous and messy, especially if you dump the contents of your cooker on the ground or into the hot coals. Remove the cooking section at your own risk. Weber warns that you should never move a hot cooker and you should never operate it unless all parts are in place.
Learn more about temperature troubles by visiting the Temperature Control Problems: Too Hot, Too Cool page.


