Summary
- Prepare 2 whole chickens weighing 3-1/2 to 4 pounds each and 2 12-ounce beer cans.
- Apply rub to chickens and mount them on the beer cans.
- Cook at 225-250°F for 2 hours, rotate 180°, and baste with apple juice.
- Cook for another 1-1/2 to 2 hours until 160-165°F in the breast, 170-175°F in the thigh.
- Carefully remove from the WSM and let cool for 5 minutes before serving.
Beer can chicken is known by many colorful names, including “Beer Butt Chicken”, “Beer In The Rear Chicken”, and the noble-sounding “Chicken On A Throne”. A partially-filled beer can is inserted into the cavity of the chicken to create a disposable, vertical roasting stand. The bird is barbecued while supposedly steamed from the inside to keep the meat moist.
Beer can chicken certainly has the “wow factor” going for it—it’s an entertaining way to prepare chicken for friends and family. Personally, I’m not convinced that cooking chicken vertically has much benefit, other than to increase cooker capacity. Nor do I believe the steam from the beer can does much to keep the meat moist. The top of the can seals tightly inside the body cavity, and most of the steam goes right out through the neck cavity. Something like the Weber 6731 Poultry Roaster might actually steam the inside of a chicken, but then you’ve lost the “wow factor” of the beer can.
Anyway, it’s a lot of fun to do and it’s an easy way to prepare chicken. Variations on this method are described at the end of this article.
Here are some photos I took on August 26, 2007 when I cooked two beer can chickens using “Wild Willy’s Number One-derful Rub” from the famous barbecue book Smoke & Spice.
Select And Prep The Chickens
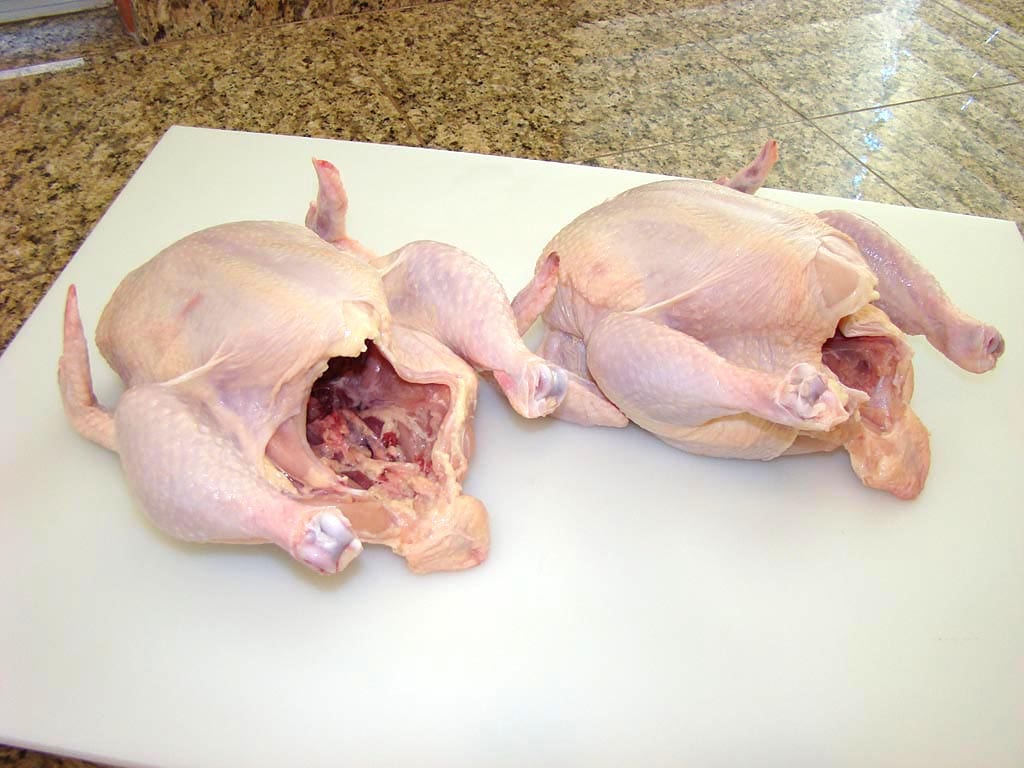
Purchase two whole chickens weighing 3-1/2 to 4 pounds each. Remove the neck and giblets from the body cavity and pat dry inside and out with paper towels. Trim any excess fat from around the body cavity opening. Fold the wing tips back under the chicken to keep them from burning.
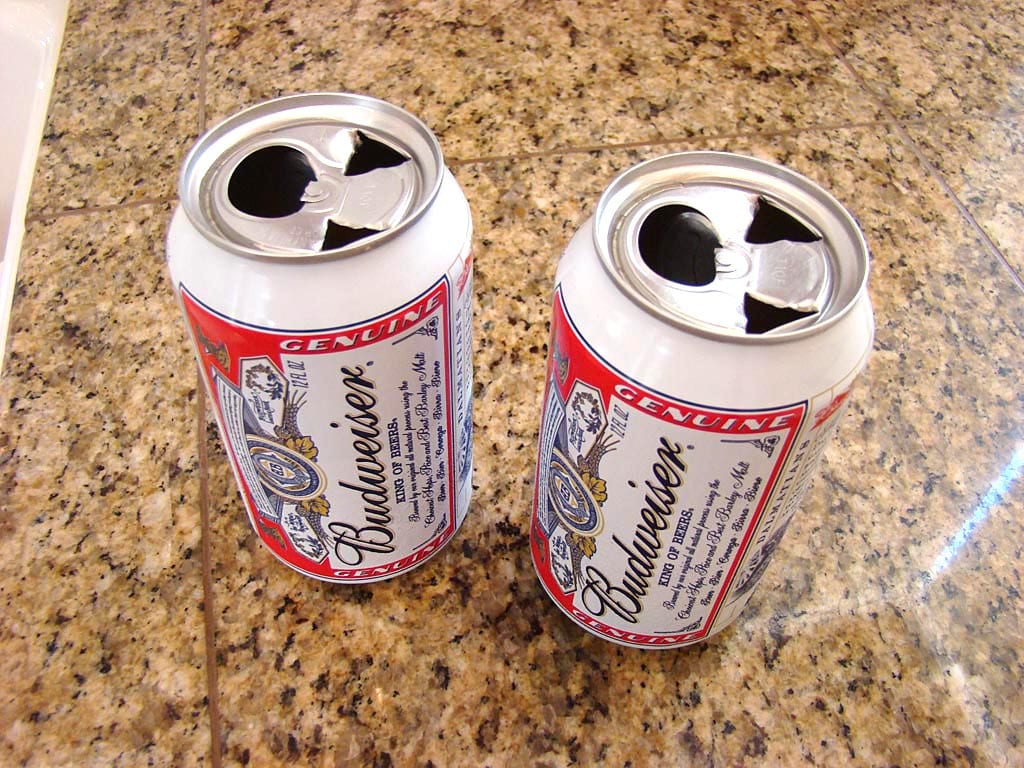
Prepare The Beer Cans And Apply The Rub
Wash 2 12-ounce beer cans with soapy water and rinse well. Open the cans and drink half the beer in each. Use a church key-style can opener to make two additional holes in the lid.
Now prepare a batch of the rub.
Wild Willy’s Number One-derful Rub
- 6 Tablespoons paprika
- 2 Tablespoons ground black pepper
- 2 Tablespoons salt
- 2 Tablespoons sugar
- 1 Tablespoon chili powder
- 1 Tablespoon granulated garlic powder
- 1 Tablespoon onion powder
- 1 teaspoon cayenne
Combine all ingredients and mix thoroughly.
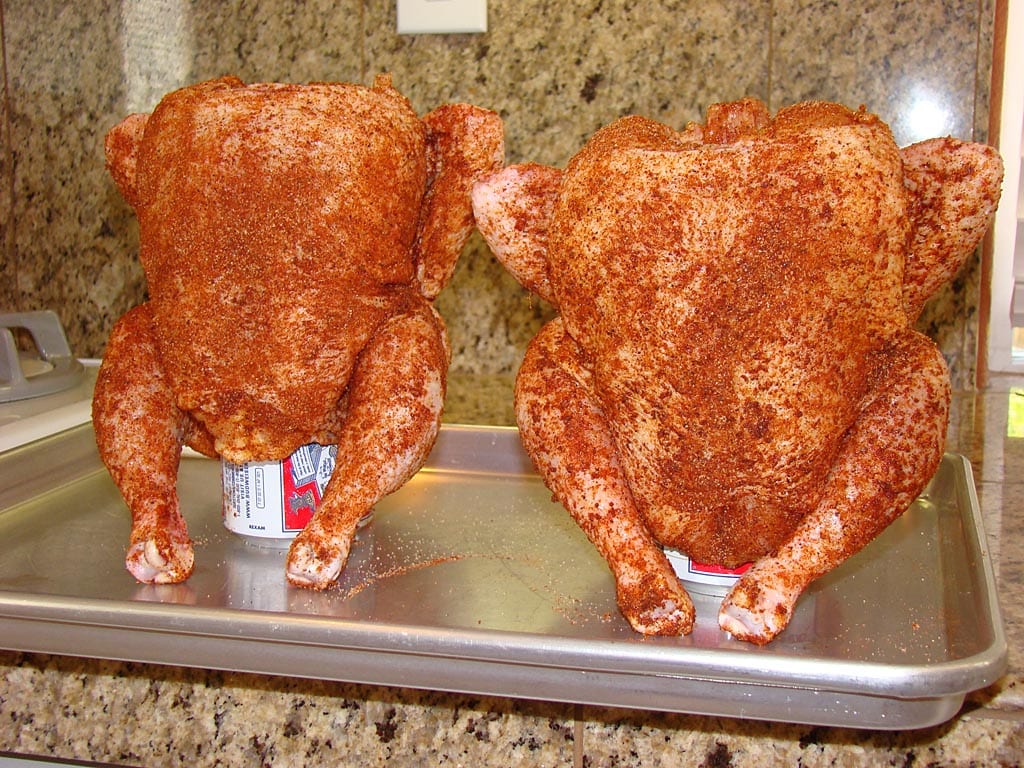
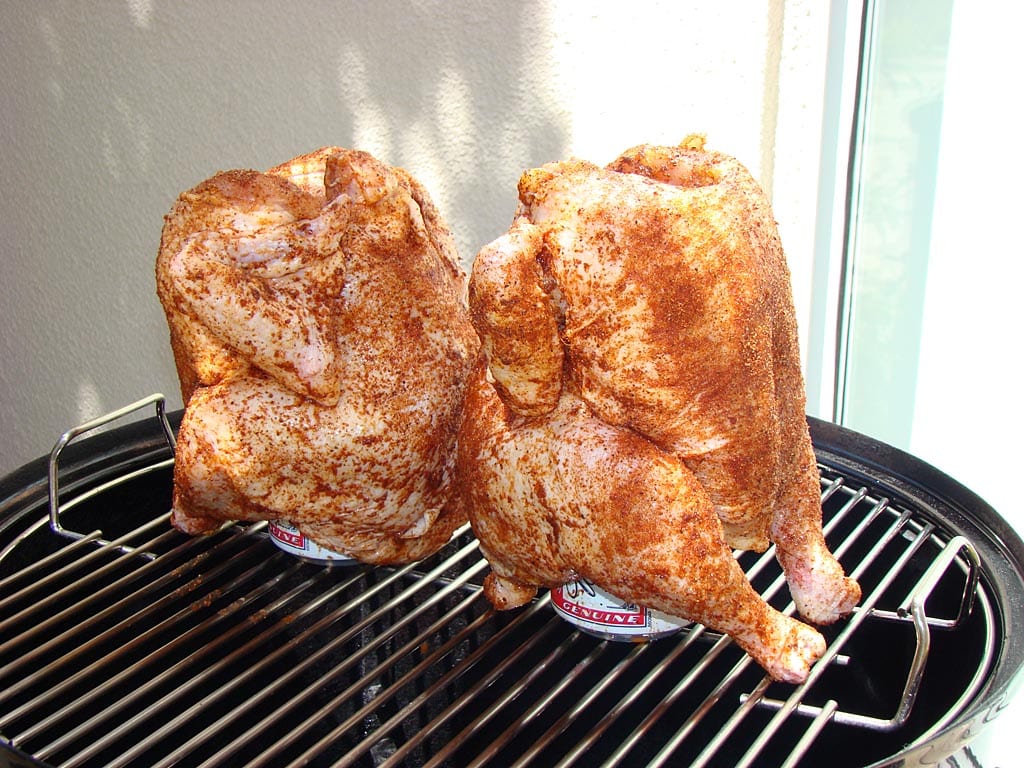
Sprinkle the rub liberally inside the body cavity and the neck cavity, then all over the outside of the chicken. If you want, sprinkle some rub under the skin over the breasts and work it around with your fingers.
Place the chicken over the beer can, making sure it’s firmly seated inside the cavity as far as possible. Position the legs forward to form a tripod, keeping the chicken balanced.
Let the chickens sit at room temperature as you fire-up your Weber Bullet.
Select The Smoke Wood
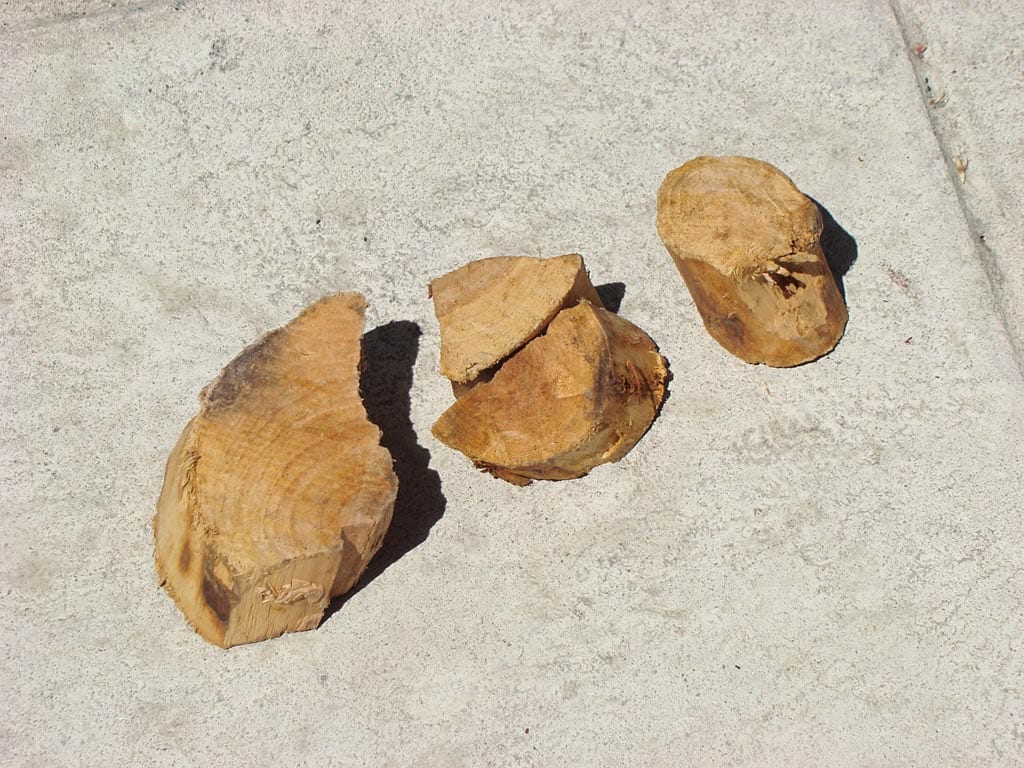 Use 3 chunks of apple smoke wood. Each chunk should be small, for example 3″ x 2″ x 2″ or similar. Cherry, oak, or other mild fruit wood can be used if apple is not available.
There is no need to soak the wood or remove the bark before use.
Fire-Up The WSM
Fire-up the cooker using the Minion Method. Fill the charcoal chamber 1/2 full with unlit Kingsford Charcoal Briquets. Light 20-40 briquettes using a Weber chimney starter and spread them over the unlit charcoal.
Put the water pan in the cooker and fill it with cold tap water to help with temperature control.
Barbecue The Chicken
Assemble the cooker, add the smoke wood chunks, and put the chickens back-to-back on the top cooking grate.
Set the 3 bottom vents to 100% open. Open the top vent fully and leave it that way throughout the entire cook.
When the cooker reaches about 225°F, set the 3 bottom vents to 25% open so the cooker settles in at 225-250°F measured at the lid. Adjust the 3 bottom vents as necessary to maintain this temperature range throughout the cooking session.
Cook for 2 hours, then baste the chickens with apple juice using a spray bottle. To make sure the chickens are cooking evenly, rotate them by carefully turning the grate 180°.
Cook for another hour, then baste again with apple juice.
Cook for another 30 minutes to 1 hour, then check the internal meat temperature using an instant-read thermometer. The chicken is done when the breast meat registers 160-165°F and the thigh registers 170-175°F.
There should be no need to add water to the pan during the cooking session.
Here’s how the cooker temperatures and vent settings went during my cook:
| Time | Lid Temp | Vent 1 % | Vent 2 % | Vent 3 % |
| 1:00 pm | – | 100 | 100 | 100 |
| 1:15 pm | 220 | 25 | 25 | 25 |
| 1:30 pm | 215 | 25 | 25 | 25 |
| 1:45 pm | 220 | 25 | 25 | 25 |
| 2:00 pm | 229 | 25 | 25 | 25 |
| 2:15 pm | 236 | 15 | 15 | 15 |
| 2:30 pm | 235 | 15 | 15 | 15 |
| 3:00 pm (r)(b) | 235 | 15 | 15 | 15 |
| 3:30 pm | 230 | 15 | 15 | 15 |
| 4:00 pm (b) | 235 | 15 | 15 | 15 |
| 4:30 pm | 242 | 10 | 10 | 10 |
| 5:00 pm | 232 | 10 | 10 | 10 |
(r) rotated meat
(b) basted with premium apple juice
Note that the vent percentages represent the way I set the vents at the time indicated.
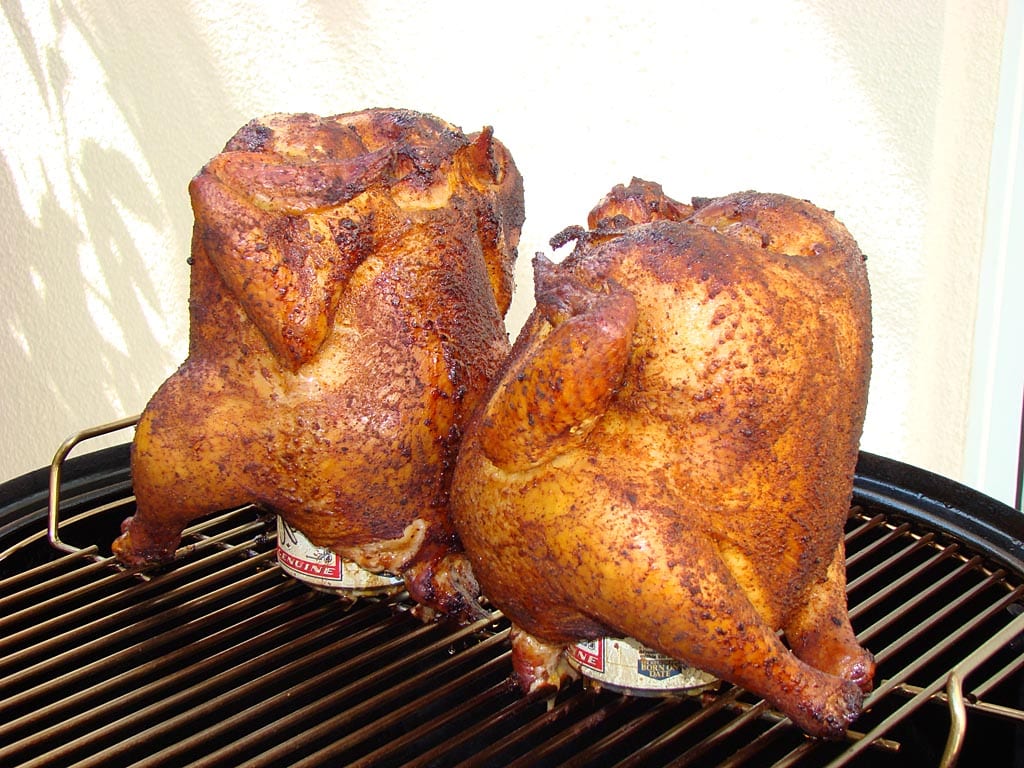
The Finished Product
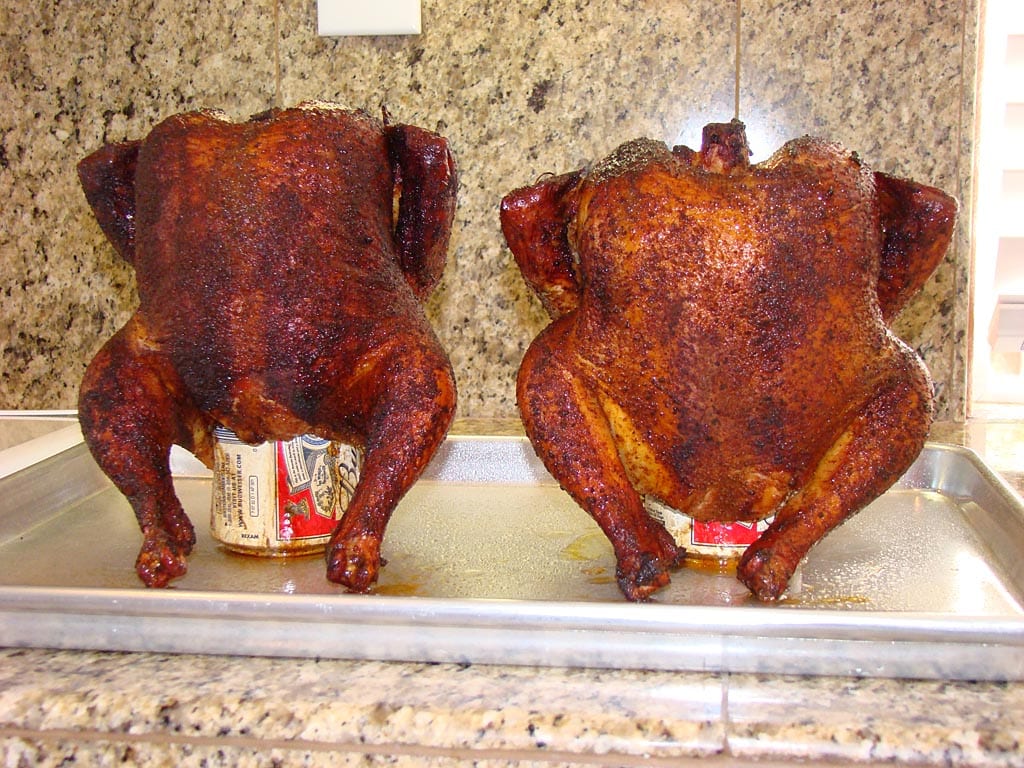
Using heat-resistant gloves, remove the chickens carefully from the cooker and let cool for 5 minutes before serving.
Since the beer in the can will be very hot, make sure to support the can as you lift the chicken off the grate. You can do this with your gloved hand, or you can grasp the can with tongs to support the chicken from below while using your other gloved hand to steady the chicken.
To remove the can, hold the chicken at a slight angle in the palm of one gloved hand, grasp the can with your other gloved hand, twist the can back and forth to loosen it, and pull it out carefully. Do this over the sink or a rimmed baking sheet pan to catch any spills.
Variations On A Theme
There are many ways you can customize or adapt the beer can chicken method:
Vary the type of beer: Lager, pilsner, ale, wheat, stout, etc. If the beer comes in a bottle, funnel it into a clean beer or soda can.
Use soda instead of beer: Coke, Dr. Pepper, root beer, etc. I have a friend that loves making Fresca chicken.
Make flavorful additions to the can: Rub, chopped onions, garlic cloves, vinegar, etc.
Vary the type of rub: Any rub can be used, whether it’s store bought or your favorite homemade recipe.
Rub earlier: For more intense flavor, apply the rub to the chicken 2 hours, 4 hours, or the night before cooking.
Baste with beer: For more beer goodness, baste with beer using a spray bottle starting halfway through the cooking process.
Inject or mop the chicken: Some recipes like “Chicken On A Throne” from Smoke & Spice call for injecting the bird with a flavorful mixture the night before cooking, and mopping with a flavorful liquid during cooking. You’ll find plenty of injection and mop recipes on the Internet. This is an opportunity to add more beer flavor to the chicken, if desired.
Cook at a higher temperature: Roast at 325-350°F instead of “low and slow” 225-250°F.
Use a vertical chicken roasting stand instead of a can: If you don’t like the thought of a beer can stuffed inside your bird, a variety of vertical poultry racks can be purchased at barbecue and kitchen specialty stores, or online from Amazon.com. The Weber 6731 Poultry Roaster is one example.
Use different sized cans for different sized birds: Use a small juice can for a game hen, a 16-ounce “tall boy” beer can for a roasting chicken, or a 32-ounce Foster’s lager beer can for a turkey.
More Chicken Links On TVWB
- Basic Barbecued Chicken
- Basic Marinated Chicken
- Hot & Fast Chicken
- Cornell Chicken
- Cornish Game Hens – Peach Glaze
- Pulled Chicken Sandwiches
- Alabama-Style Chicken Sandwiches With White Sauce
- Boneless Skinless Chicken Breasts
- Buffalo Wings – Smoked & Deep Fried
- Chicken Selection & Preparation
- How To Butterfly A Chicken


