Summary
- Buy a 5-6 pound whole beef tenderloin.
- Carefully remove most of the fat, the “chain”, and all membrane and silverskin.
- Fold under 2″ of the thin end for even thickness, then tie the roast in 7-8 locations.
- Sprinkle with kosher salt, wrap in plastic wrap, and let sit at room temperature for 1 hour.
- Just before cooking, apply a thin coat of olive oil and sprinkle with freshly cracked black pepper.
- Smoke at 225-250°F until 120-125°F for rare/medium-rare or 130-135°F for medium-rare/medium, approximately 55-65 minutes.
- Place cooking grate directly over hot coals. Sear tenderloin on all four sides, approximately 2 minutes per side.
- Cover loosely with foil and let rest for 10 minutes before slicing.
 The whole beef tenderloin roast is sometimes called a “whole filet”, a “filet mignon roast”, or a “tenderloin tip roast”. It is a long, tapered muscle located on the inside of the short loin, extending from the 13th rib to the pelvis.
A whole tenderloin has three distinct areas:
- The large end, called the butt end. It actually resides in the sirloin section.
- The small end, called the tail.
- The center section, called the heart.
The tail is usually folded under the center section and tied to create even thickness for even cooking.
Beef tenderloin is the most expensive and most tender cut of beef, but it also has a reputation for mild taste because it does not contain a lot of intramuscular fat. Fortunately, with some careful trimming and a little bit of salt, pepper, and smoke, you can transform this cut into something really special for the holidays or any day!
Here’s a description and photos of how I cooked a whole beef tenderloin on November 19, 2005. Be sure to check-out the accompanying video for a quick overview of how to prep the meat for cooking.
Select And Prepare The Tenderloin
Choose a 5-6 pound, USDA Choice whole beef tenderloin. This cut of meat will cost a ton of money if you buy it from a good butcher fully trimmed and tied. If you want to save up to 50% and are willing to spend 20-30 minutes trimming and tying the meat yourself, then buy a whole tenderloin in Cryovac packaging at a wholesale warehouse store.
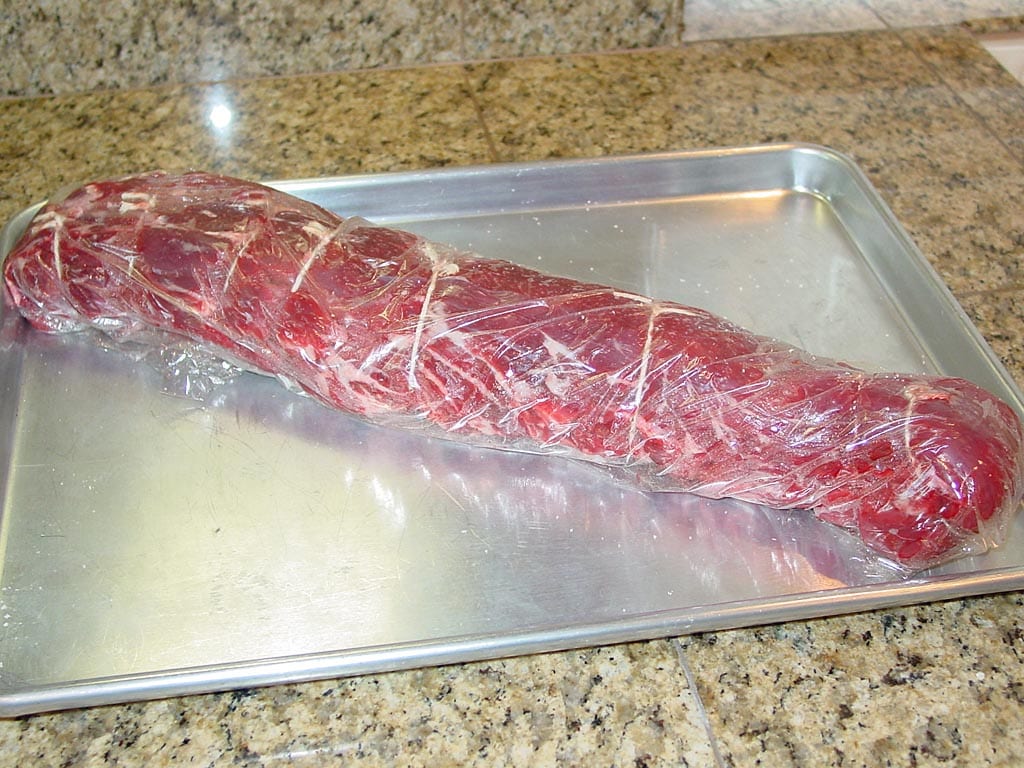
I bought the USDA Choice whole tenderloin pictured here at Costco. The photo above shows the tenderloin after I trimmed and tied it. It weighed 5.60 pounds before trimming.
If you want to try your hand at trimming and tying a whole tenderloin, I would suggest that you do it the night before. This gives you plenty of time to work with the meat without feeling rushed.
You will need the following tools:
- A very sharp boning knife
- Kitchen twine
Here are the steps for trimming the roast. Take your time—remember, this is an expensive cut of meat, and you want to remove the waste without losing much of the valuable meat.
- Remove the meat from the Cryovac packaging and pat dry with paper towels.
- Using your fingers, pull off as much loose fat and membrane as possible from both sides of the roast.
- Remove the side strap or chain, a length of sinewy muscle and fat attached to one side of the tenderloin. It will come off in a single piece and can be pulled off by hand, but don’t be afraid to use a knife, if necessary. Pull off or trim any areas of fat or membrane exposed as a result of removing the chain.
- On the butt end, carefully remove the pockets of fat in the two crevices on either side of the tenderloin. Make shallow cuts to remove as little meat as possible in the process.
- Remove the silver skin. This is a length of white/silver fibrous connective tissue running from the butt end toward the tail. It’s tough eating and needs to be removed. Starting somewhere in the middle, shimmy the tip of the knife under the edge of the silver skin 1/2″ to 1″, then push the knife tip up through the skin. Angle the blade up slightly and use a sawing motion to cut to the end of the skin. Angling the blade up helps you to remove the skin without losing much meat. Next, grasp the loose end of the silver skin and cut to the opposite end using the same blade angle and sawing motion. Remove all the silver skin using this technique.
- Flip over the tenderloin and trim any areas of fat.
- Give both side of the meat a final visual inspection and clean up any remaining areas of fat, membrane, or silver skin.
Here are the steps for tying the roast. Tying is done to create even thickness for even cooking and to secure any floppy bits of meat. For a lesson in tying knots, watch the How To Tie A Roast video.
- Pre-cut 7-8 pieces of kitchen twine, each about 18″ long.
- Fold about 2″ of the tail under the center section to create an even diameter. Tie in two spots to secure.
- Tie the butt end in 3-4 spots to secure the meat.
- Tie the center section in 2-3 spots.
- Trim the loose ends of the twine.
Wrap the tied tenderloin in plastic wrap and refrigerate overnight.
The next day, remove the tenderloin from the refrigerator one hour before cooking it. Pat dry with paper towels.
Sprinkle all sides with 1-1/2 Tablespoons of kosher salt. Wrap in plastic wrap and let sit at room temperature for one hour. This step allows the salt to penetrate the meat and will help it cook more evenly.
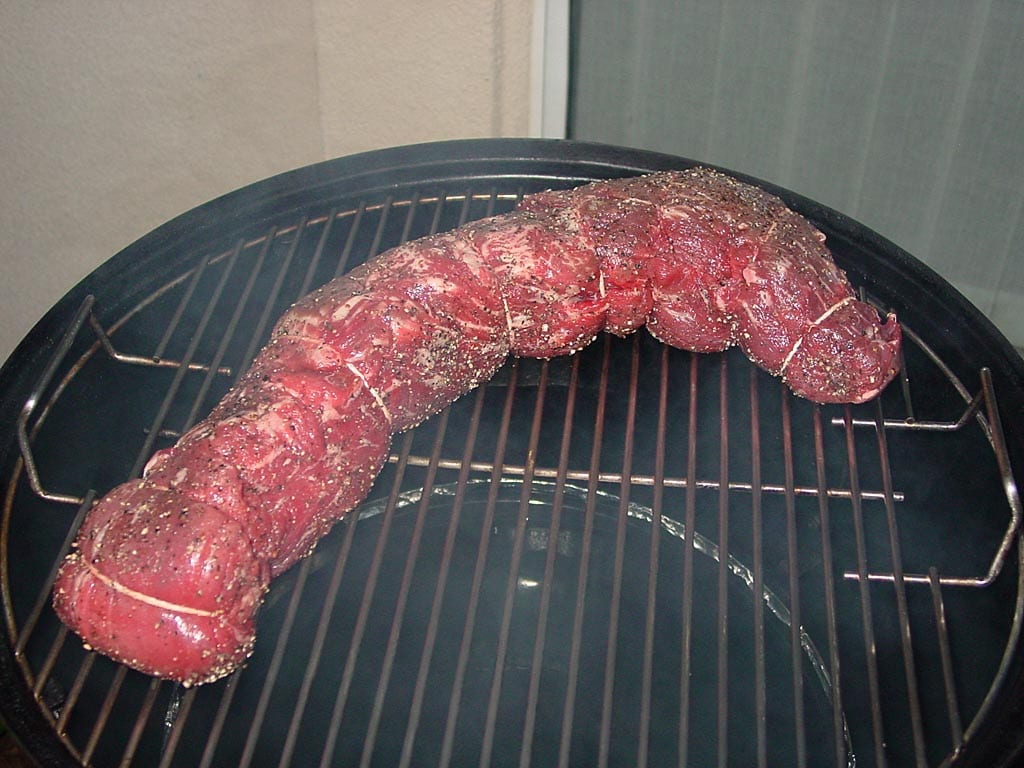
Just before cooking, apply a thin coat of olive oil and sprinkle with a good amount of freshly cracked black pepper.
Video: Preparing A Whole Beef Tenderloin
This video demonstrates the process of preparing a whole beef tenderloin for cooking. Click on the video to play.
Fire The WSM
Fire-up the cooker using the Minion Method. Fill the charcoal chamber 1/2 to 3/4 full with unlit Kingsford Charcoal Briquets, then light 20-40 briquettes using a Weber chimney starter and place them on top of the unlit ones.
Put the water pan in the cooker and fill it with water to help with temperature control.
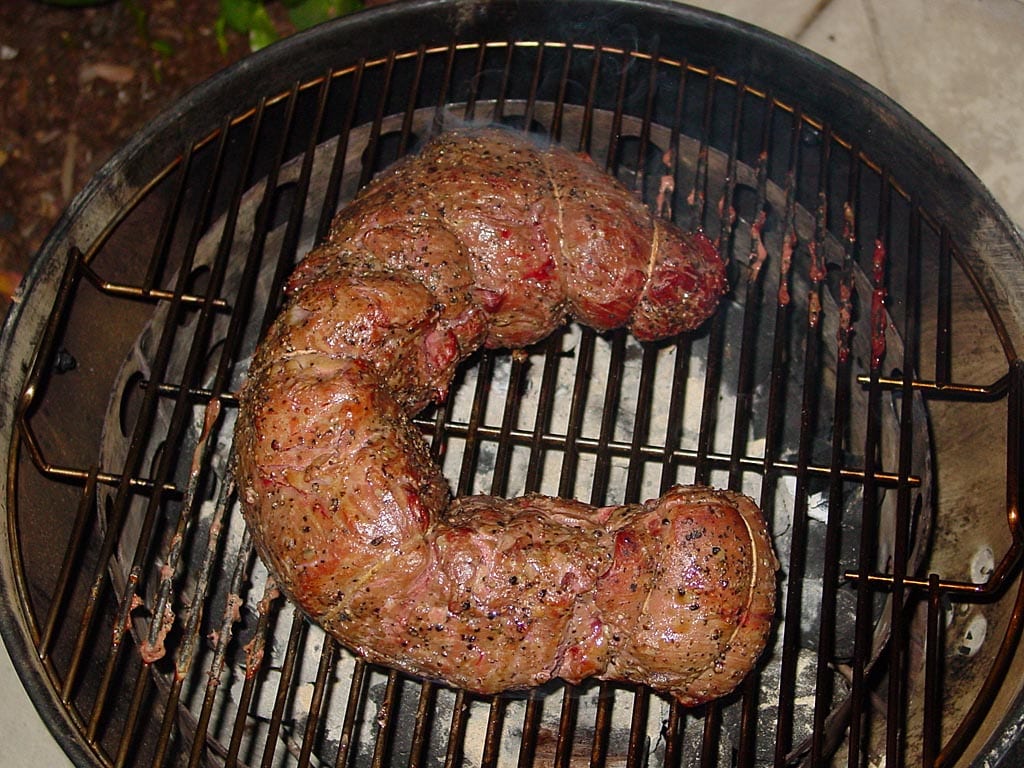
Smoke The Tenderloin
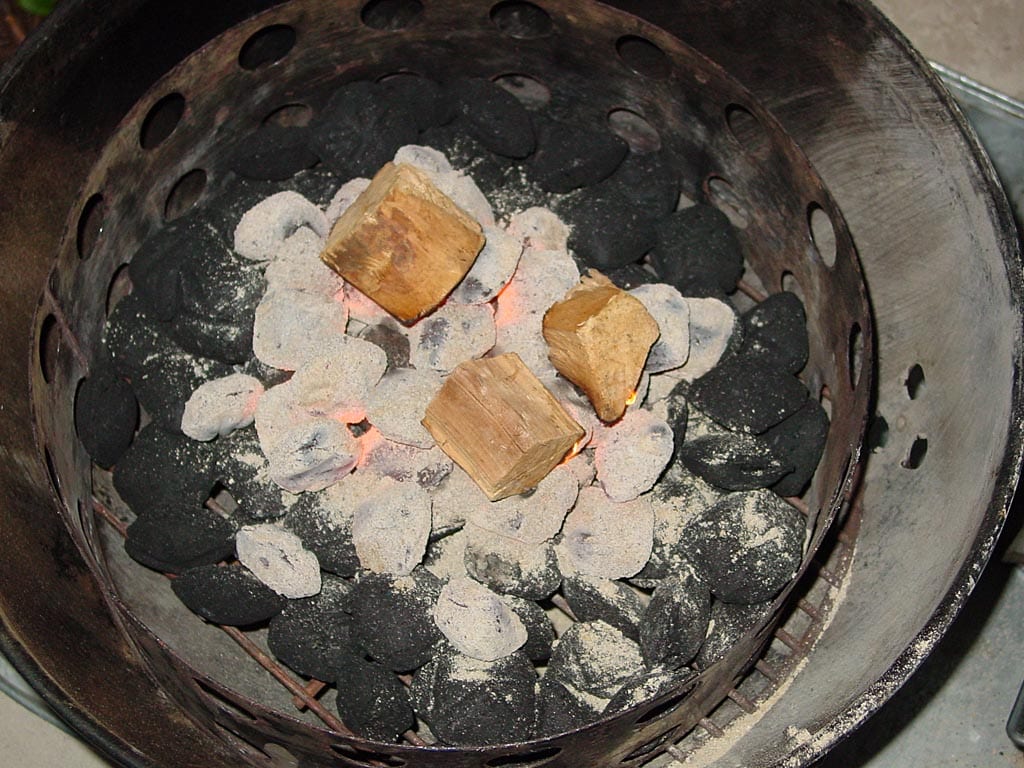
Place 2-3 small chunks of dry smoke wood on the coals. Use a mild wood, and don’t use much of it. I used three small chunks of apple wood, maybe equivalent to a single fist-sized chunk.
Assemble the cooker and place the tenderloin on the top grate. Set the three bottom vents to 100% open. Open the top vent fully and leave it that way throughout the entire cook.
When the cooker reaches about 225°F, set the three bottom vents to 25% open so the cooker settles in at 225-250°F measured at the lid. Adjust the three bottom vents as necessary to maintain this temperature.
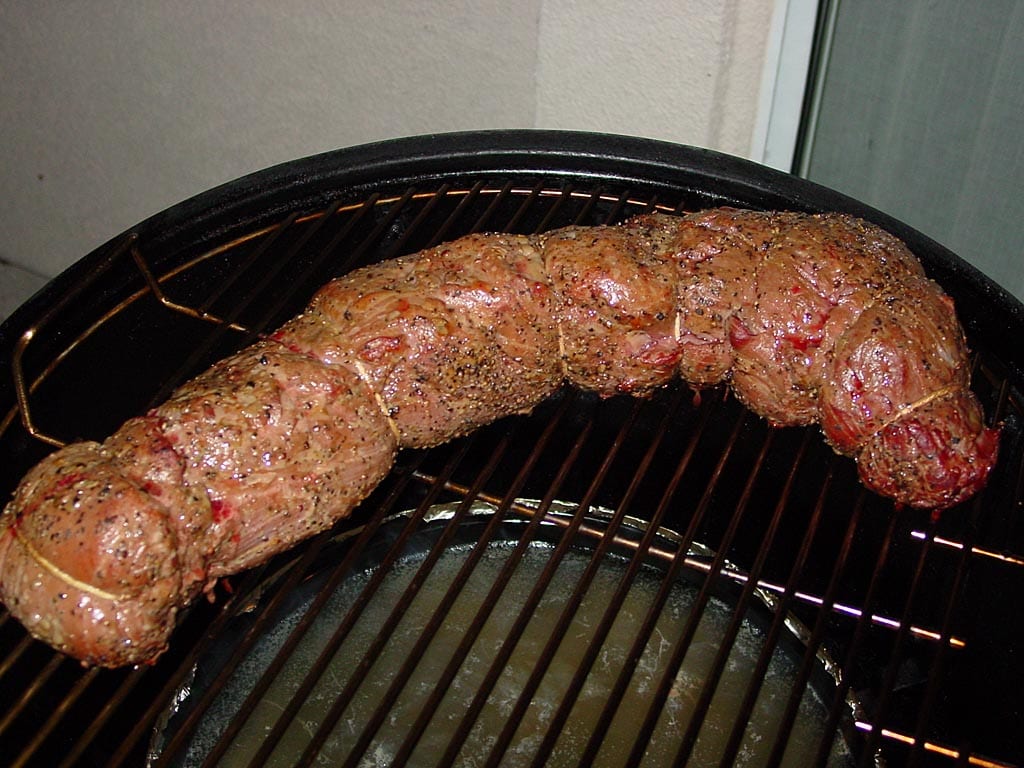
Cook the tenderloin to an internal temperature of 120-125°F for rare/medium-rare or 130-135°F for medium-rare/medium, approximately 55-65 minutes.
There’s no need to baste or rotate the tenderloin during the cooking process.
Here’s how the cooker temperatures and vent settings went during my cook:
| Time | Lid Temp | Meat Temp | Vent 1 % | Vent 2 % | Vent 3 % |
| 5:05 pm | – | – | 100 | 100 | 100 |
| 5:15 pm | 192 | – | 100 | 100 | 100 |
| 5:20 pm | 200 | – | 100 | 100 | 100 |
| 5:30 pm | 212 | – | 100 | 100 | 100 |
| 5:45 pm | 240 | – | 25 | 25 | 25 |
| 6:00 pm | 235 | – | 25 | 25 | 25 |
| 6:05 pm | 235 | 127-133 | 25 | 25 | 25 |
| 6:10 pm | 235 | 130-135 | 25 | 25 | 25 |
Note that the vent percentages represent the way I set the vents at the time indicated.
Reverse Sear The Tenderloin
Many recipes call for searing a roast at high temperature at the beginning of the cooking process, then reducing the heat and cooking until done. However, for the most even doneness inside a roast, you want to do the opposite—cook the meat at low temperature until almost done to your liking, then sear it quickly at high temperature at the end. This is known as a reverse sear.
Don’t skip this searing step, because it creates lots of great flavor on the surface of the meat.
Remove the top cooking grate from the cooker and set it aside. Carefully lift off the middle cooking section (making sure not to spill any water) and set it aside. Use tongs to evenly spread out the hot coals in the charcoal chamber, if necessary.
Place the cooking grate directly on top of the charcoal chamber. Sear the tenderloin on all four sides, approximately 2 minutes per side or until browned to your liking.
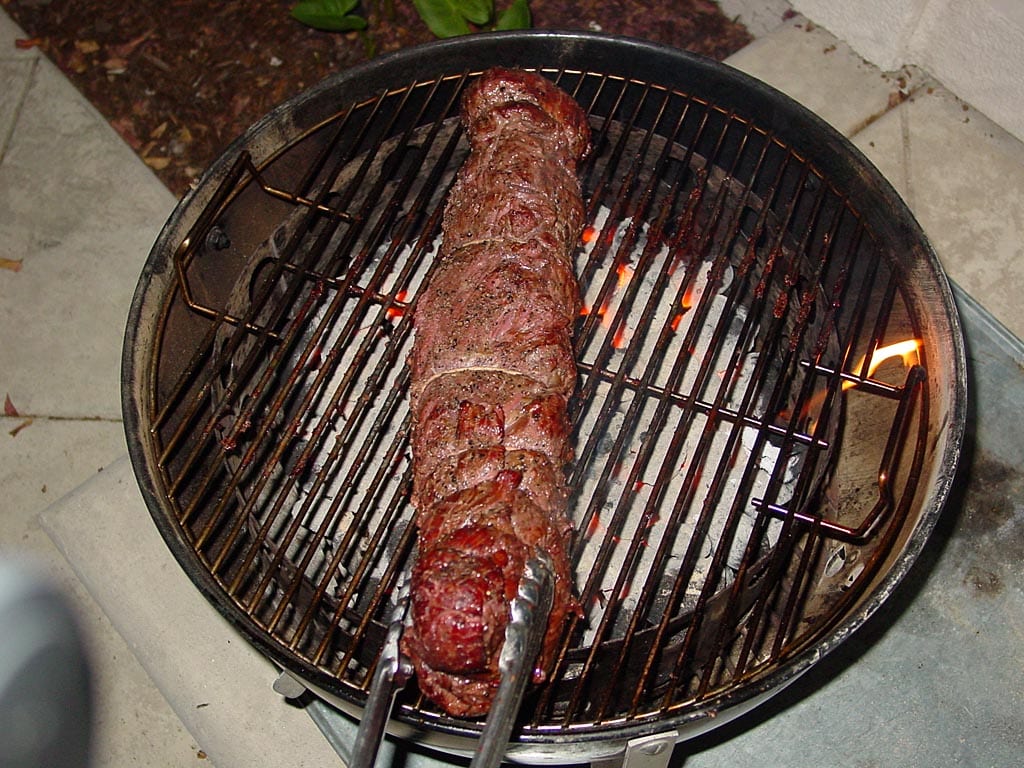 I seared this tenderloin on two sides by curling it into a c-shape, then seared the other two sides by holding the meat on edge with tongs.
Rest Then Slice The Tenderloin
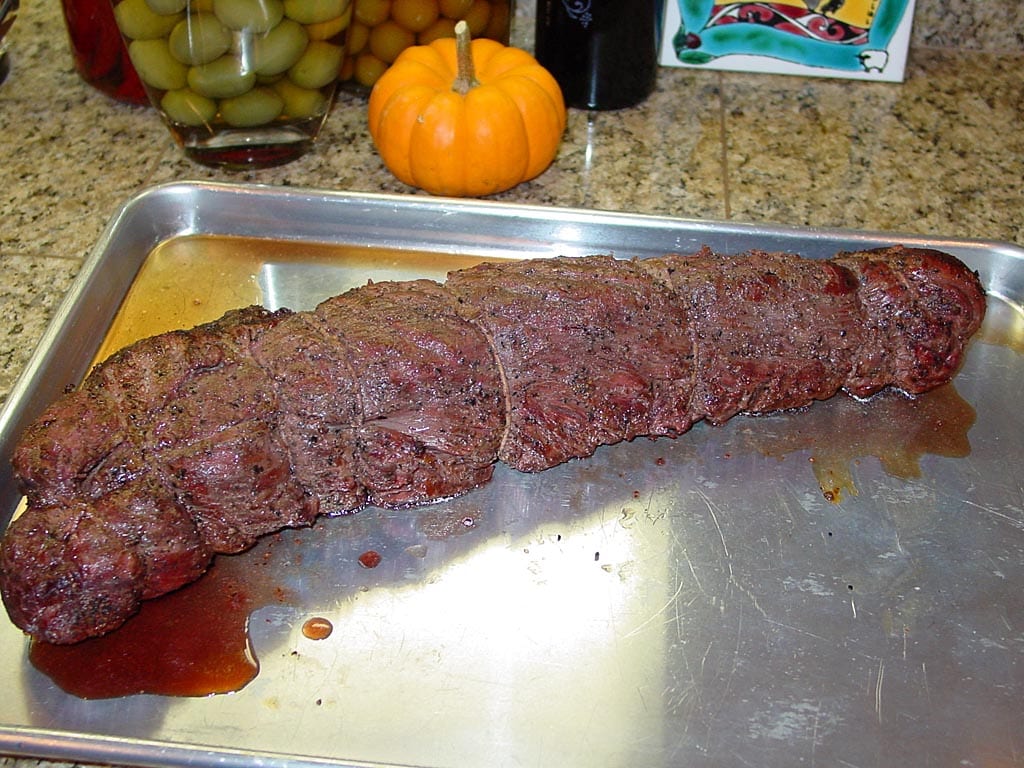
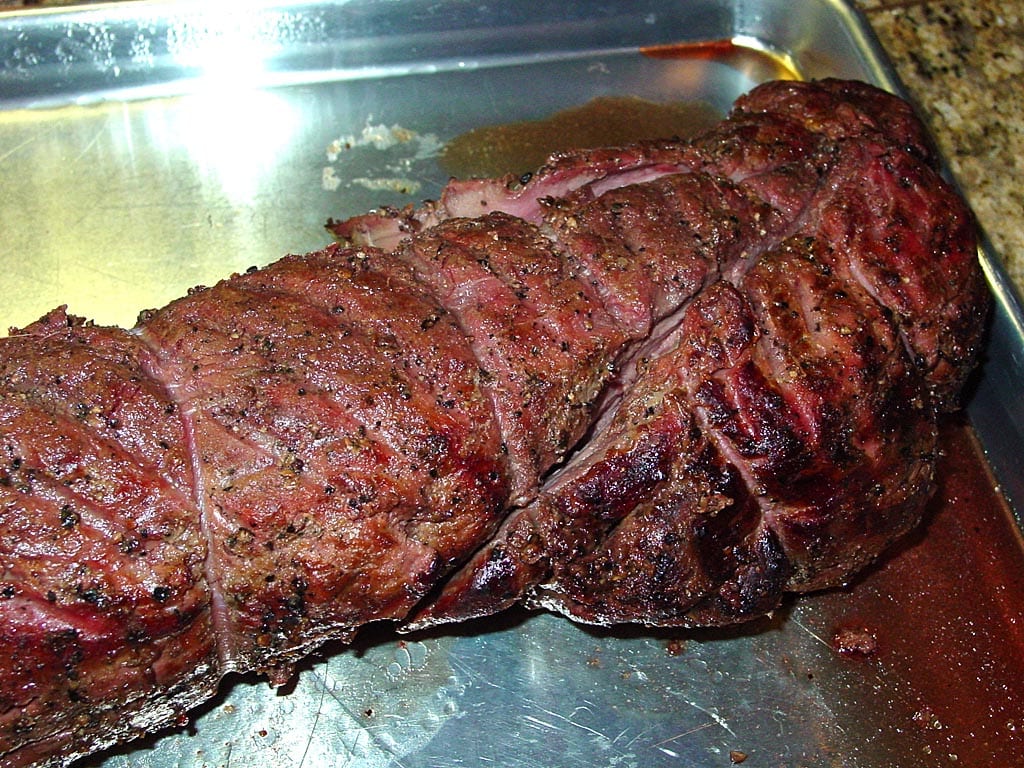
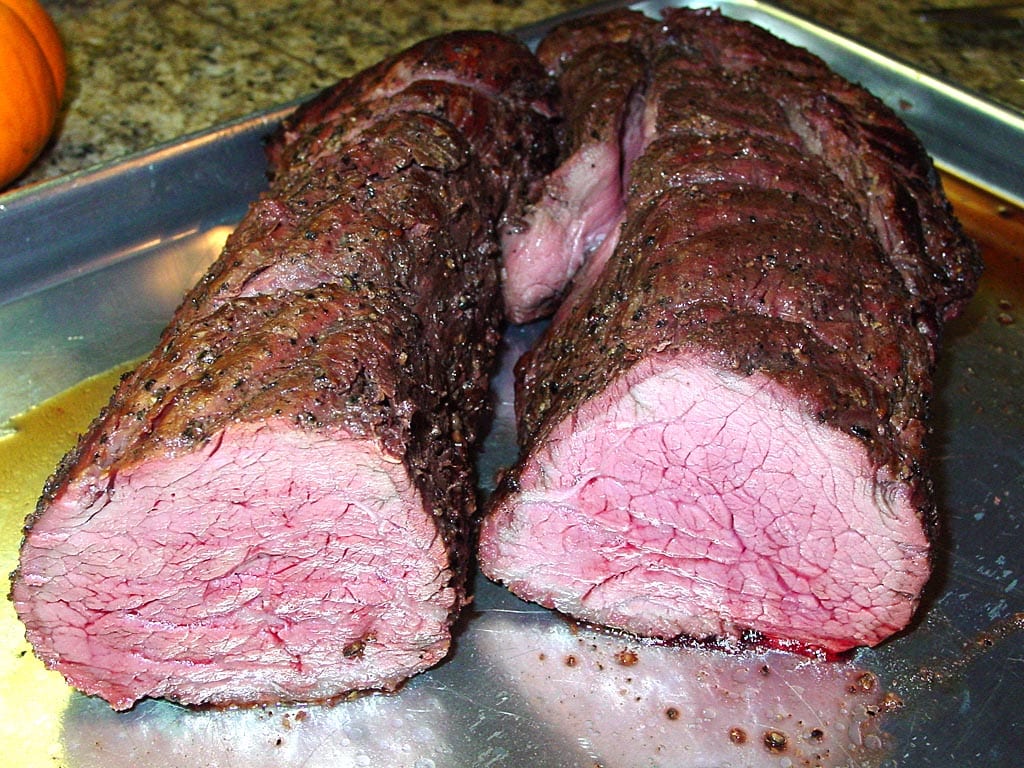
Remove the tenderloin from the cooker. Cover loosely with foil and let rest for 10 minutes before slicing.
Snip the kitchen twine and remove it. Slice the meat into 1/4″ to 3/8″ slices across the grain.
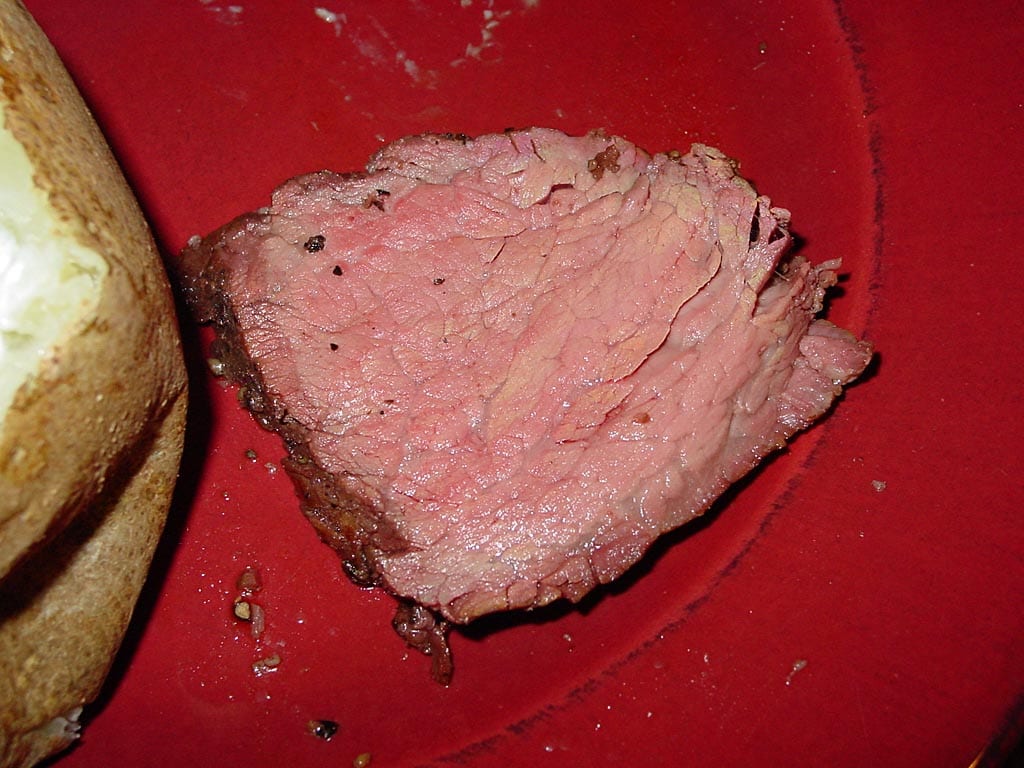
The photos above show the seared tenderloin after a 10 minute rest and the consistent doneness inside the roast. The meat is evenly pink across almost its entire diameter, which is achieved by using the reverse sear cooking process.
Here’s how I described this tenderloin in my cooking log:
- “Fork tender”
- “Good moisture”
- “Fabulous flavor”
- “No one at Christmas dinner would be disappointed!”
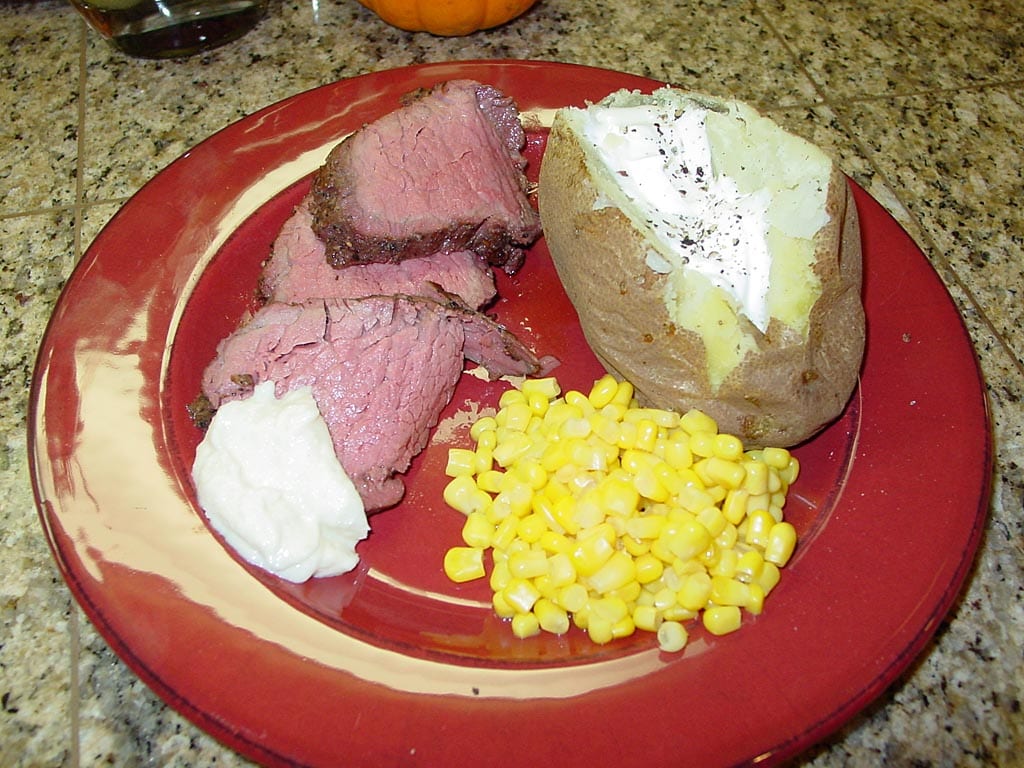
Sauces For Beef Tenderloin
Beef tenderloin has a mild flavor, so it is often served with a sauce on the side. Your smoked tenderloin will have more flavor than most, and you may find that a sauce is not necessary.
I like a creamy horseradish sauce with beef, and I’m quite satisfied with the ones I find at the supermarket, especially Beaver Cream Style Horseradish.
If you’d like to try your hand at making a sauce, here are some recipes to get you started.
Horseradish Cream Sauce
From Cook’s Illustrated magazine
- 1/2 cup heavy cream
- 1/2 cup prepared horseradish
- 1 teaspoon table salt
- 1/8 teaspoon ground black pepper
Whisk the heavy cream for 1-2 minutes until thickened but not yet holding soft peaks. Fold in horseradish, salt, and pepper. Transfer to a serving bowl and refrigerate 30-60 minutes before serving.
Sour Cream Horseradish Sauce #1
From Cook’s Country magazine
- 1/2 cup sour cream
- 1/2 cup prepared horseradish
- 1-1/2 teaspoons kosher salt
- 1/2 teaspoon ground black pepper
Whisk together all ingredients. Cover and refrigerate until ready to serve.
Sour Cream Horseradish Sauce #2
- 1 cup sour cream
- 2 Tablespoons prepared horseradish
- 1 teaspoon lemon zest
- 1/2 teaspoon Worcestershire sauce
- 1/4 teaspoon hot pepper sauce
- 1/4 teaspoon salt
Whisk together all ingredients. Cover and refrigerate until ready to serve.
Mustard Horseradish Cream Sauce
From Sheila Lukins, Parade Magazine
- 1/3 cup Dijon mustard
- 1/2 cup sour cream
- 1/4 cup prepared mayonnaise
- 1/4 cup well-drained prepared white horseradish
Whisk together all ingredients. Cover and refrigerate until ready to serve.
Whipped Cream Horseradish Sauce
- 1 cup heavy cream, whipped to soft peaks
- Juice of 1/2 lemon
- 1 heaping Tablespoon freshly grated horseradish or 3 Tablespoons prepared horseradish
- Kosher salt and freshly ground black pepper
Stir horseradish and lemon juice into whipped cream. Add salt and pepper to taste.
Gorgonzola Cream Sauce
- 4 cups heavy cream
- 3-4 ounces crumbly Gorgonzola cheese (not creamy or “dolce”)
- 3 Tablespoons freshly grated Parmesan cheese
- 3 Tablespoons minced fresh flat-leaf parsley
- 3/4 teaspoon salt
- 3/4 teaspoon freshly ground black pepper
In a saucepan over medium-high heat, bring cream to a full boil. Boil rapidly 45-50 minutes until thickened like a white sauce, stirring occasionally. Remove saucepan from heat, add all ingredients. Whisk rapidly until cheeses melt.
To reheat, warm the sauce over low heat until melted, then whisk rapidly until sauce comes together.


