Summary
- Buy a 5-8 pound USDA Choice top sirloin roast.
- Remove fat and silverskin.
- Cut into large chunks, apply dry rub and refrigerate overnight.
- Cook at 225-250°F to an internal temperature of 100-110°F.
- Spritz with water, apply more rub, and sear over hot coals for a good crust.
- Finish at 120-125°F for medium rare.
- Rest for a few minutes before slicing and serving.
Man has been barbecuing meat over holes in the ground ever since he discovered fire and harnessed it for cooking. There are many pit barbecue traditions in America, some dating back to Colonial times, and Native Americans were undoubtedly doing it long before the first European settlers arrived in North America.
Here in California where I live, Santa Maria-style barbecued tri-tip is a form of pit beef that traces its roots back to Spanish rancheros in the mid-19th century. In Texas and northern Mexico, it was common to cook chunks of beef and beef heads in pits in the ground. In the South, whole hog was the pit barbecue tradition of choice.
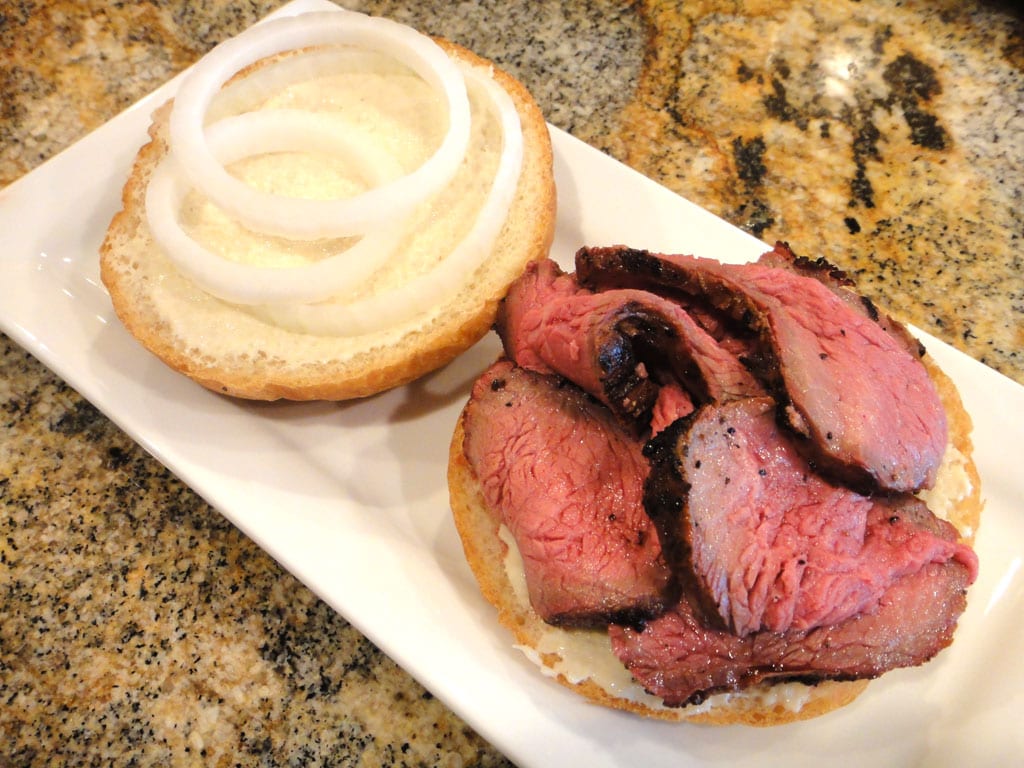
But today we’re making Baltimore pit beef, part of the East Coast tradition of pit barbecue. Big pieces of top round, bottom round, or top sirloin are seasoned with dry rub and grilled over high heat. The meat is served rare or medium rare, sliced thin so it’s tender and piled high on a kaiser roll or rye bread or even white sandwich bread. The traditional toppings are a strong horseradish sauce and raw white onion, but a tomato-based barbecue sauce is sometimes used instead.
So here’s a version of Baltimore pit beef that’s adapted to the Weber Smokey Mountain Cooker. We’ll take a large top sirloin roast, cut it into chunks, cook it “low & slow” without smoke wood (relying only on the charcoal for smoke flavor) and then reverse sear it to get a nice crust on each chunk. And at the end of this article I’ll show you a trick for slicing pit beef thin without an expensive meat slicer!
Here’s a description and photos of how I cooked pit beef on May 23, 2015 as part of my WSM Smoke Day 11 celebration.
Select & Trim The Roast
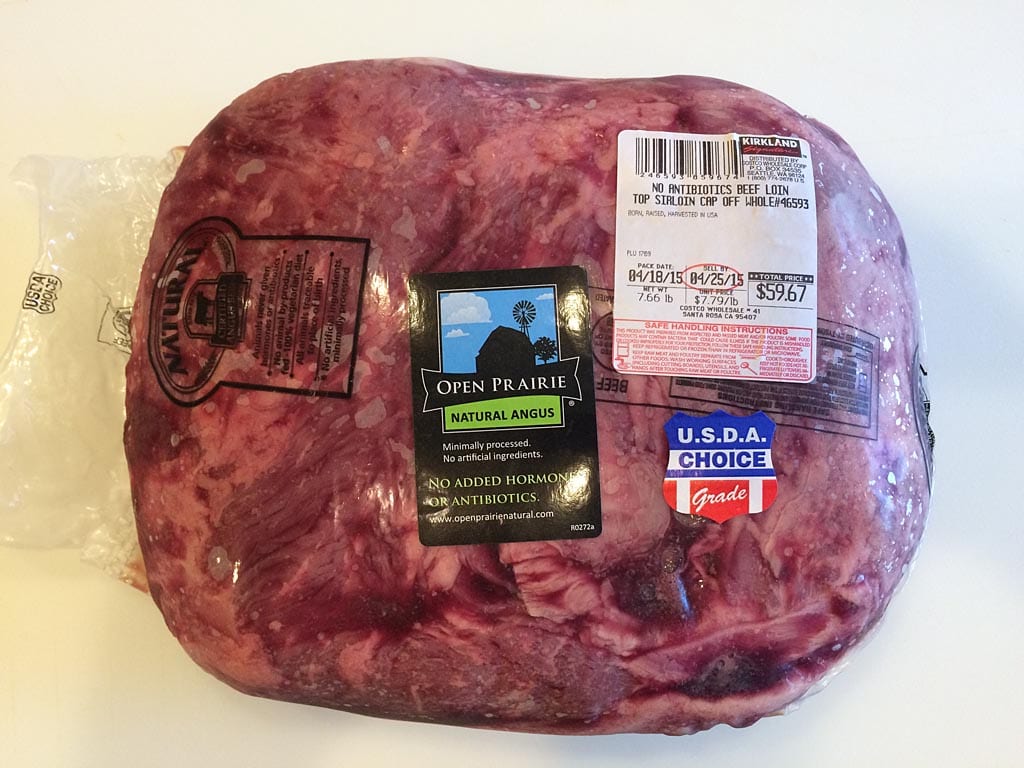

Choose a 5-8 pound top sirloin, top round or bottom round beef roast. I prefer top sirloin because it has more fat marbling than round and because round can have a livery taste.
The roast shown above is a USDA Choice Certified Angus Beef (CAB) top sirloin roast weighing 7.66 pounds that I purchased at a membership warehouse store.
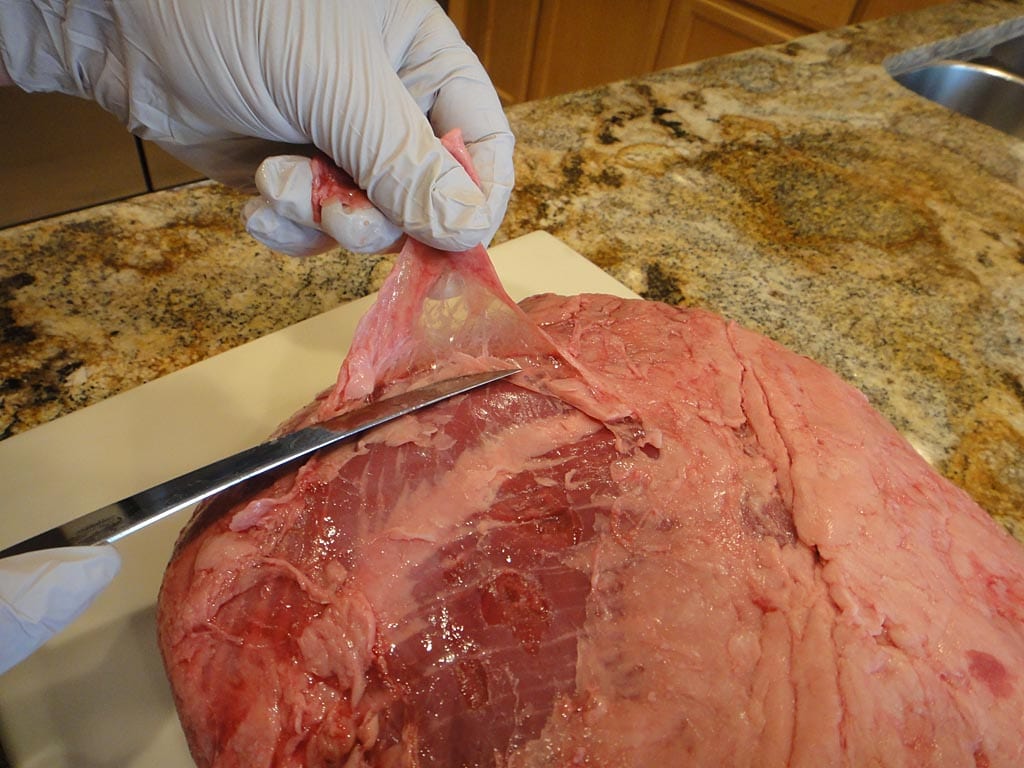
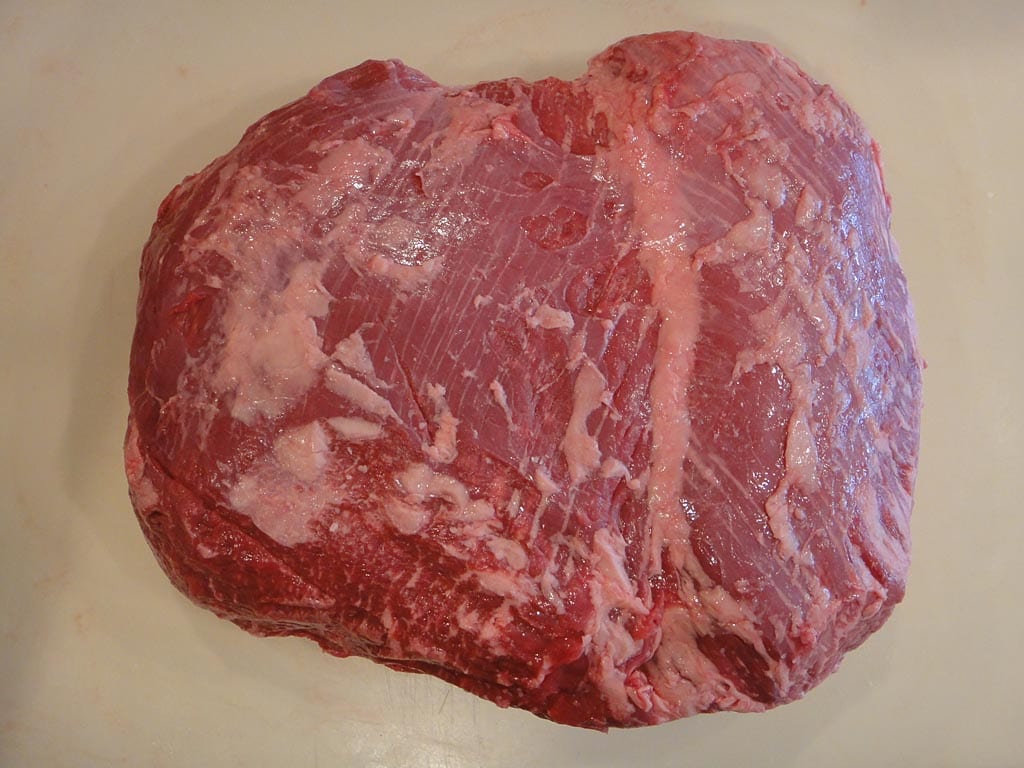
The second photo shows the roast out of the Cryovac packaging. It had a thin layer of fat on one side which I trimmed off. The lean side had some silverskin and miscellaneous fat that I also removed. The trimmed roast is shown in the last photo.
Rub The Roast & Refrigerate Overnight
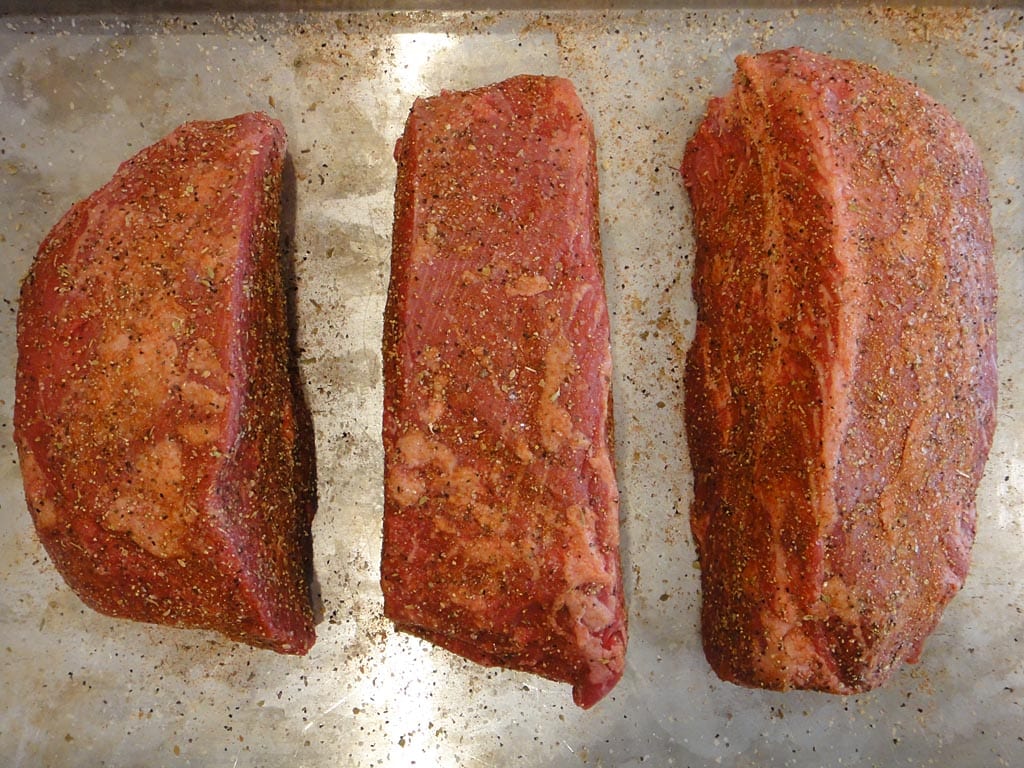
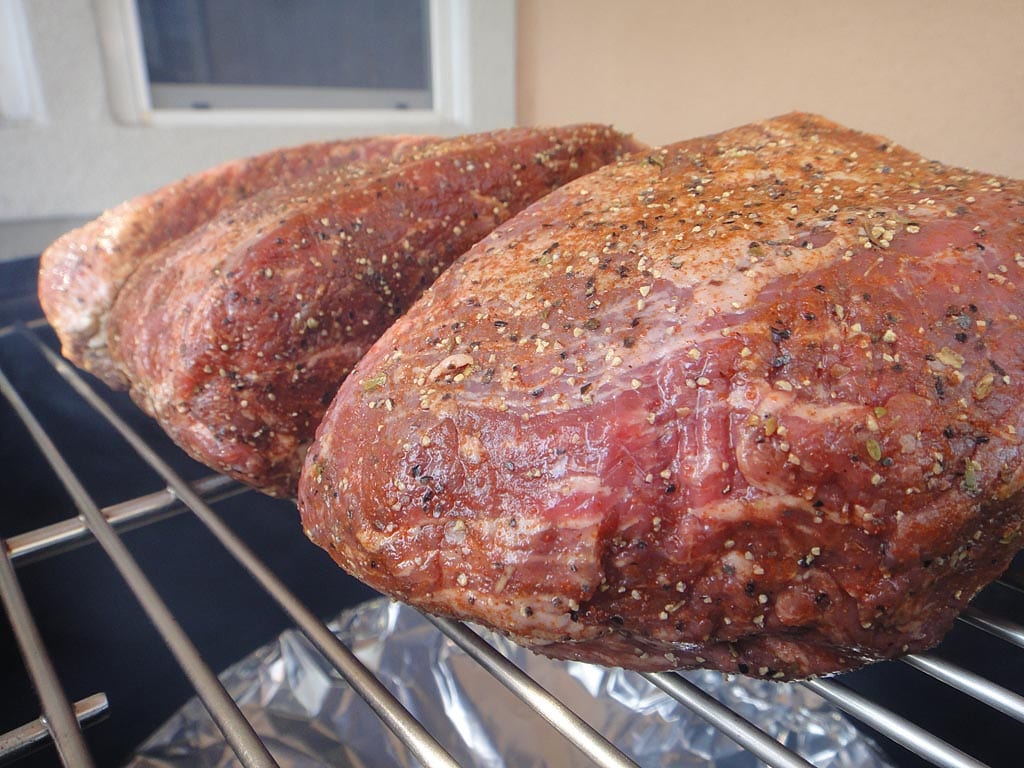
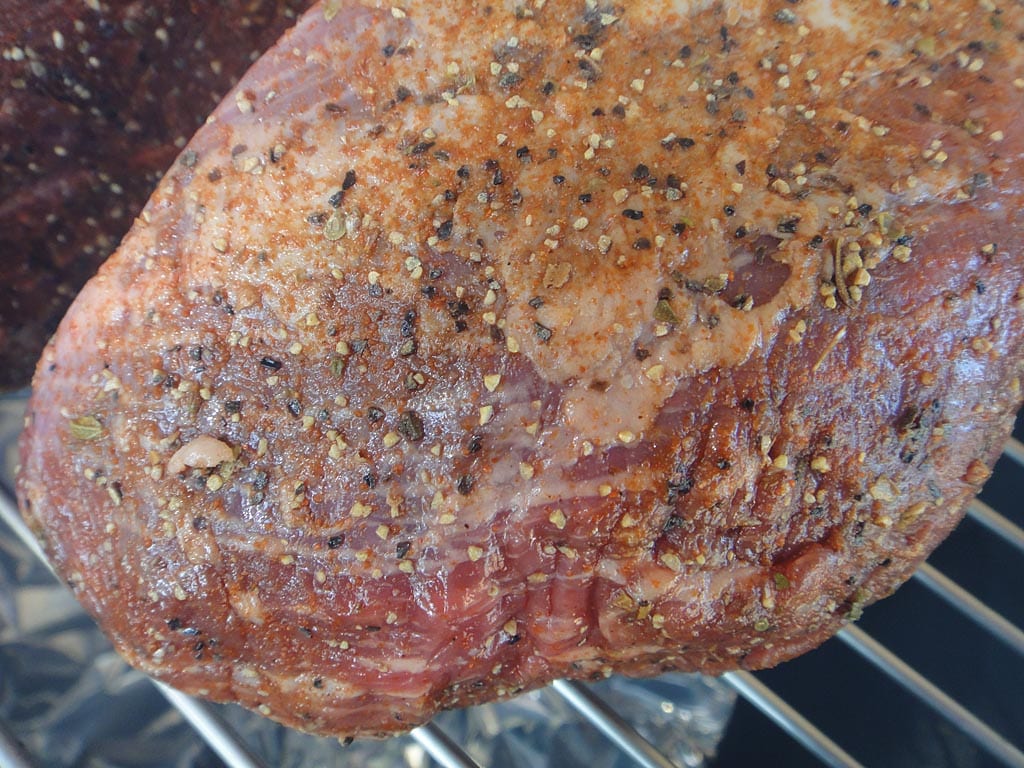
After trimming the roast, pat dry with paper towels and cut it into several large chunks. This allows the meat to cook faster and more evenly than it would as a single piece, and creates more surface area for the application of rub and the formation of crust when the meat is reverse seared at the end of the cooking process.
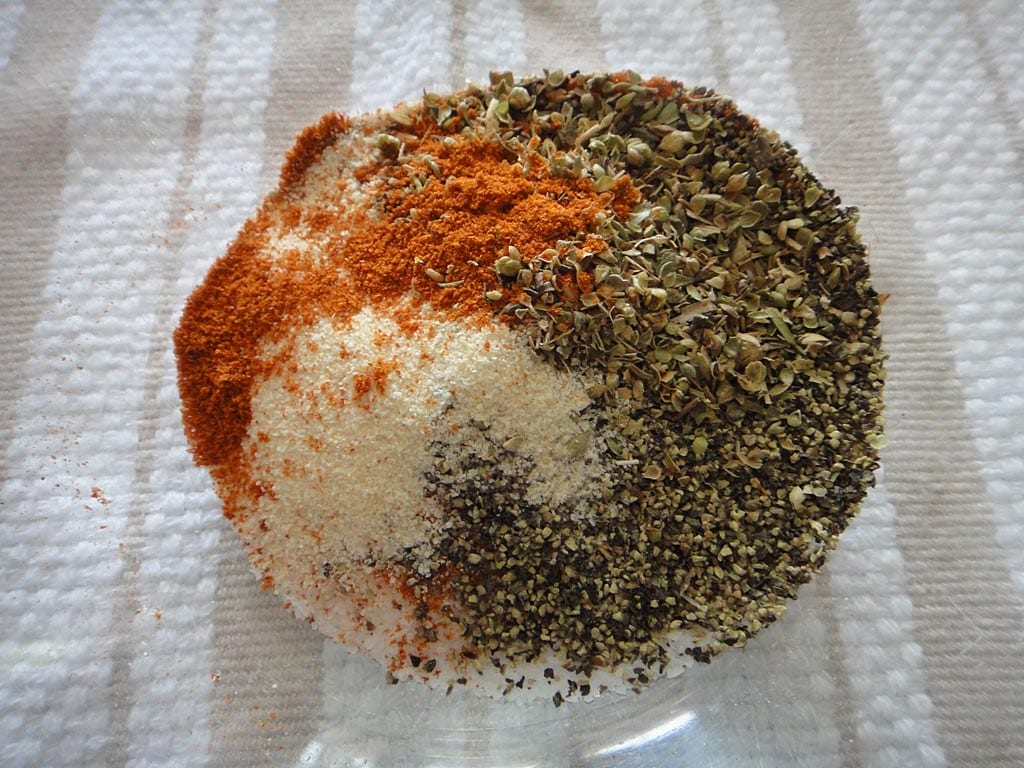
Mix-up a batch of a traditional Baltimore pit beef dry rub and apply it generously to all sides of the meat. Make sure to reserve a couple of tablespoons of the rub to sprinkle on the meat later in the cooking process.
Here’s the rub I used from America’s Test Kitchen.
Baltimore Pit Beef Rub
- 2 Tablespoons + 2 teaspoons kosher salt
- 2 Tablespoons paprika
- 2 Tablespoons coarse ground black pepper
- 2 teaspoons dry oregano
- 2 teaspoons granulated garlic powder
- 1/2 teaspoon cayenne
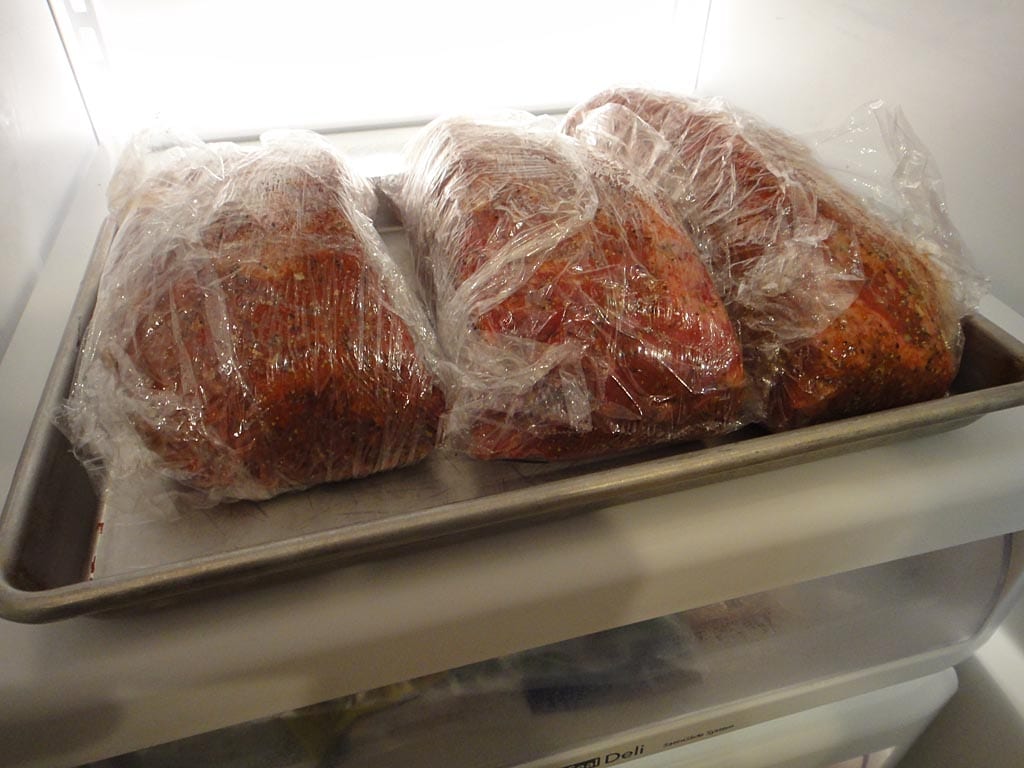
Wrap the rubbed chunks in plastic wrap and refrigerate overnight or up to 24 hours before cooking.
Fire The WSM
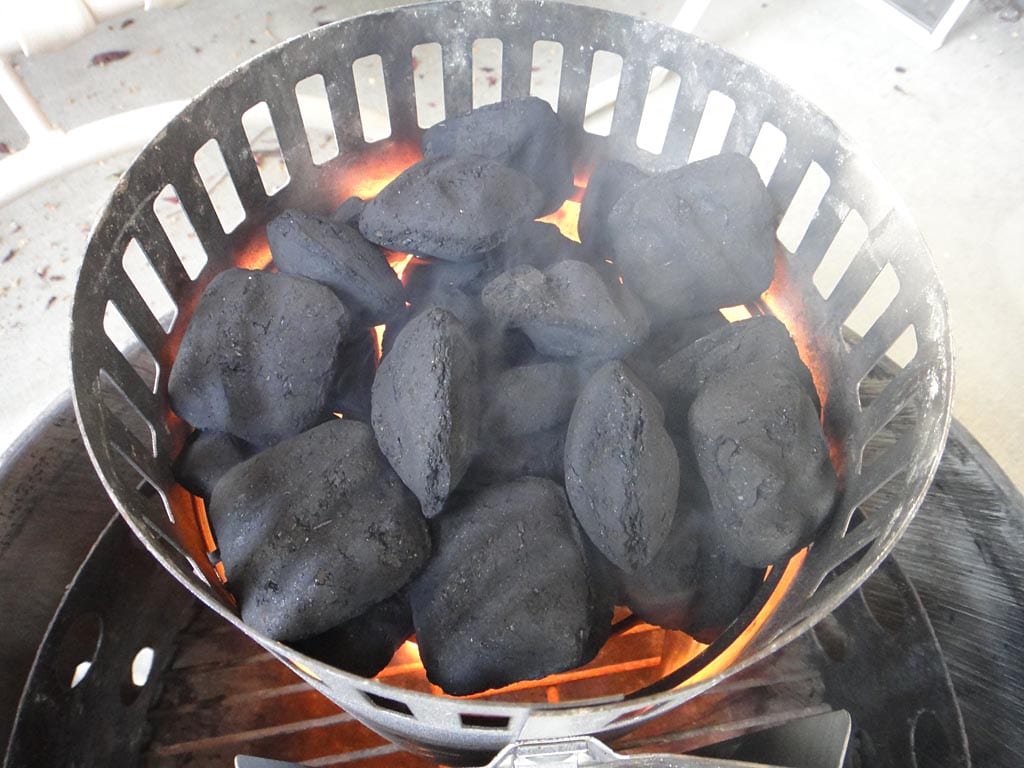 Fire-up the Weber Bullet using the Minion Method—fill the charcoal chamber about 1/2 full with unlit Kingsford Charcoal Briquets. Spread 20-30 hot coals over the unlit ones. I used an upside-down Weber chimney starter to light the briquettes shown in Photo 8.
I did not use any wood chunks for this cook, relying only on the charcoal for mild smoke flavor. You can tuck a chunk or two of dry smoke wood into the unlit briquettes if you wish.
Line the water pan with aluminum foil suspended about 1″ above the bottom of pan. The air gap will prevent the meat drippings from burning during the cook. Do not add water to the pan.
Cook The Roast Low & Slow To Rare Doneness
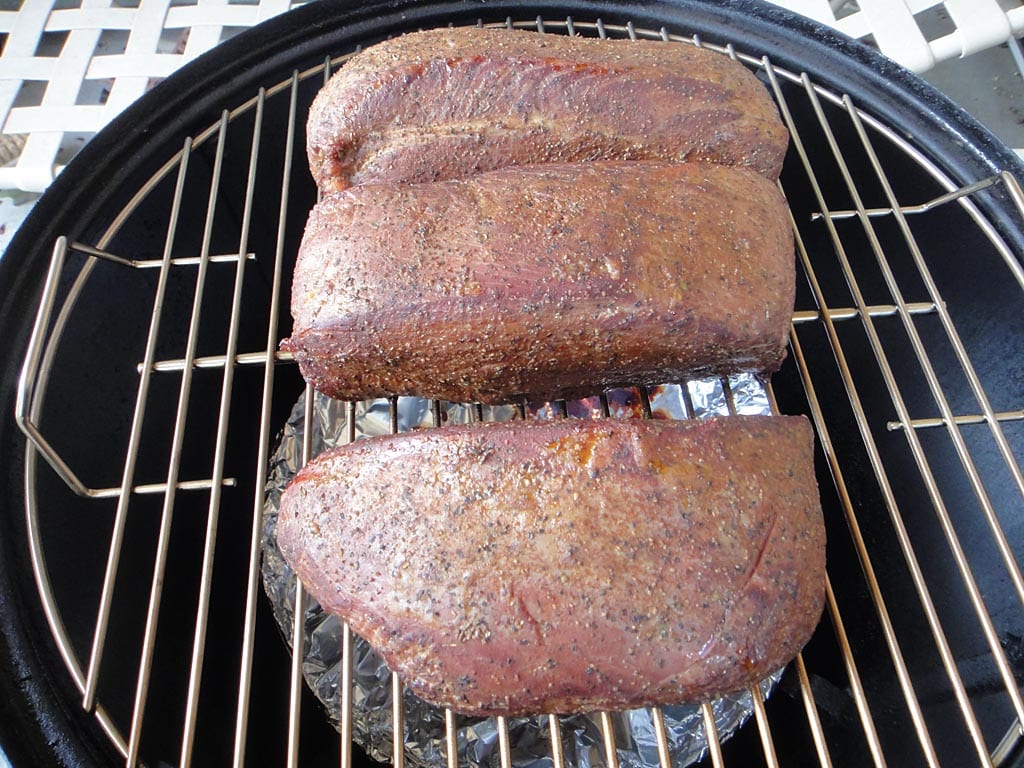
Assemble the cooker with the empty, foiled water pan in place. Put the roast on the top cooking grate.
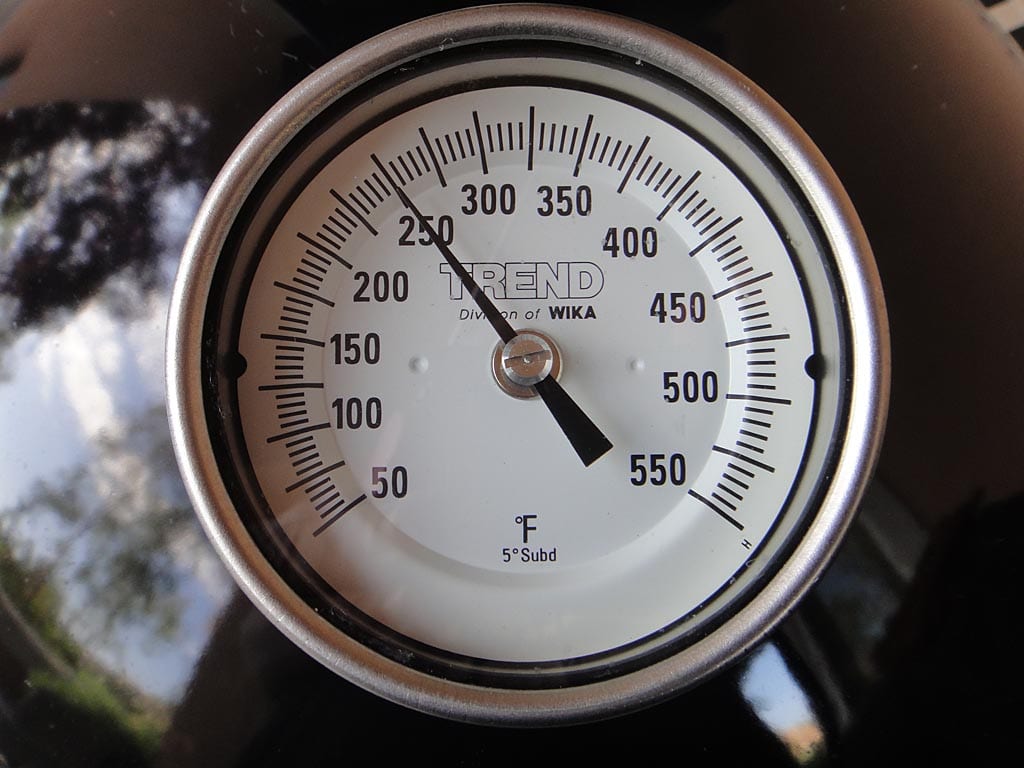
Set the top vent to 100% open and leave it that way throughout the entire cooking process. Start with all 3 bottom vents 100% open. As the cooker approaches 200°F, begin to partially close all 3 bottom vents to maintain 225-250°F. Adjust the bottom vents as needed to maintain this temperature range throughout the cooking process.
Cook the roast until it reaches 100-110°F internal temperature. Check the temp by inserting an instant-read thermometer into the thickest part of each chunk. It only took 65 minutes for my roast chunks to reach 110°F.
Here’s how the temperature and vent settings went during this short cook:
| Time | Lid Temp | Meat Temp | Vent 1 % | Vent 2 % | Vent 3 % |
| 4:55 pm | – | – | 100 | 100 | 100 |
| 5:05 pm | 245 | – | 25 | 25 | 25 |
| 5:20 pm | 245 | – | 25 | 25 | 25 |
| 5:30 pm | 250 | – | 25 | 25 | 0 |
| 5:45 pm | 250 | 83 | 25 | 25 | 0 |
| 6:00 pm | 250 | 110 | 25 | 25 | 0 |
Note that the vent percentages represent the way I set the vents at the time indicated.
Re-Rub The Meat & Sear Over Hot Coals To Medium Rare
 When the meat reaches 100-110°F internal temperature, remove it from the cooker, spray it lightly with water to moisten the surface and sprinkle all sides with some of the reserved rub. This will refresh the rub flavor before searing.
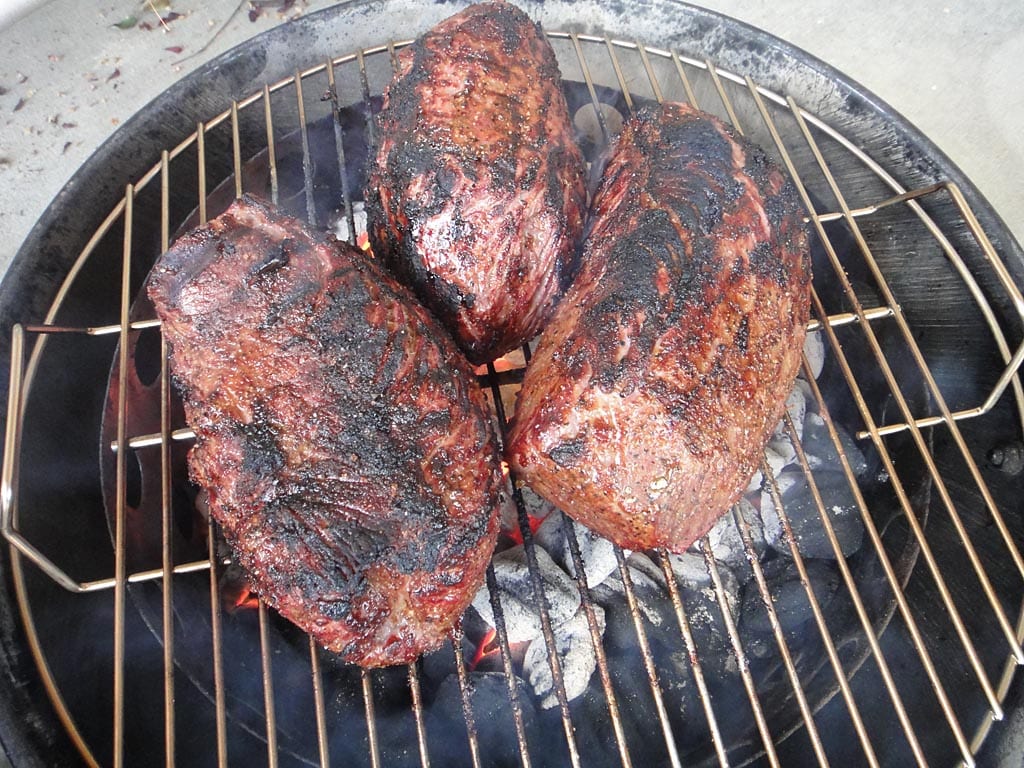
Now carefully remove the middle cooking section and set it aside. Place the cooking grate directly on top of the charcoal chamber and put the meat on the grate. Sear the meat on all sides to get a good crust, using tongs to turn every 2 minutes or so. If the charcoal flares up, move the meat to another spot on the grate until the flames die down.
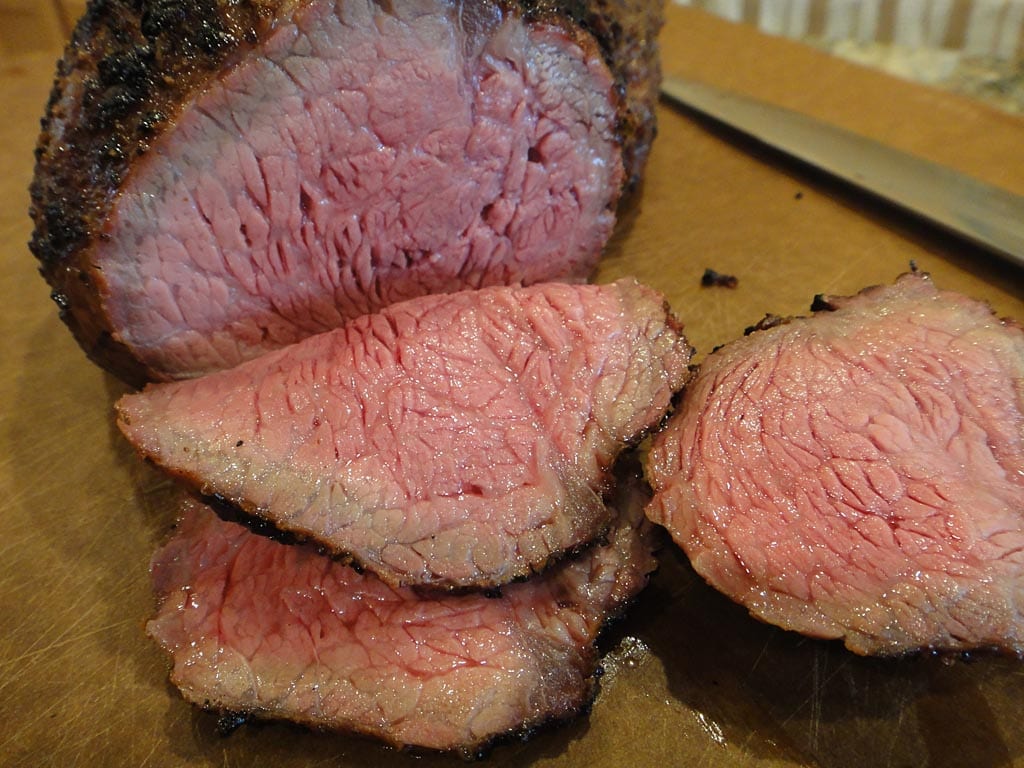
With a nice crust on all sides, remove the meat from the cooker and let rest for a few minutes before slicing and serving. It should register 120-125°F for medium rare.
Slice Meat & Serve
Place thinly sliced meat on a kaiser roll and top with horseradish sauce and raw white onion. In the photo above, I spread the horseradish sauce on each half of the roll so you could focus on the gorgeous pit beef! In real life, you’ll just drizzle the sauce over the meat. I happened to have some Beaver Brand Cream Horseradish Sauce left over from the last time I made smoked prime rib, so I used that. In some parts of Baltimore, they serve pit beef with a tomato-based barbecue sauce and other condiments, so if that’s your preference you can do that instead.
There are many recipes for pit beef horseradish sauce on the Web. They’re sometimes referred to as “Tiger Sauce” but should not be confused with the sauce sold in supermarkets under the same name, which is a red pepper-based condiment. Most recipes are simply prepared grated horseradish mixed with mayonnaise and a few other ingredients. Here’s a representative recipe from America’s Test Kitchen that’s easy to make.
Tiger Sauce For Baltimore Pit Beef
- 1/2 cup prepared grated horseradish
- 1/2 cup mayonnaise
- 1 clove garlic, pressed
- 1 teaspoon lemon juice
- Salt & pepper to taste
Use a prepared horseradish similar to Beaver Brand Extra Hot Horseradish. Make sure to use a garlic press rather than crush or mince the garlic as it provides a smoother texture when mixed into the sauce. Mix all ingredients thoroughly, then add salt and pepper to taste.
Use A Mandoline To Slice Meat
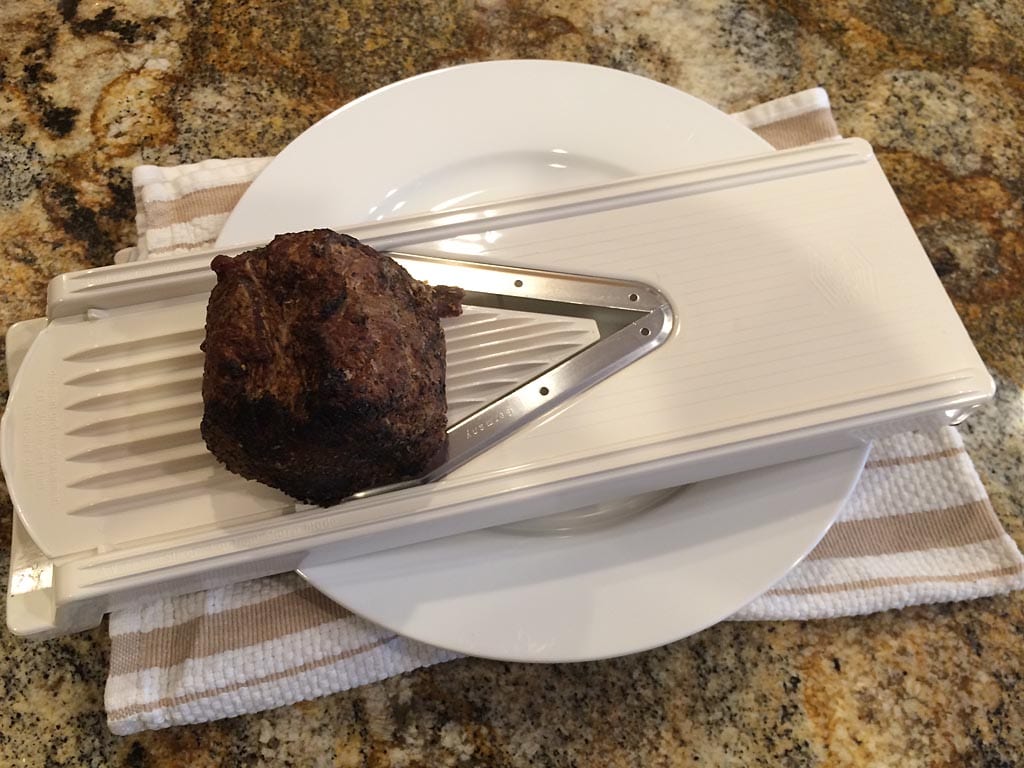
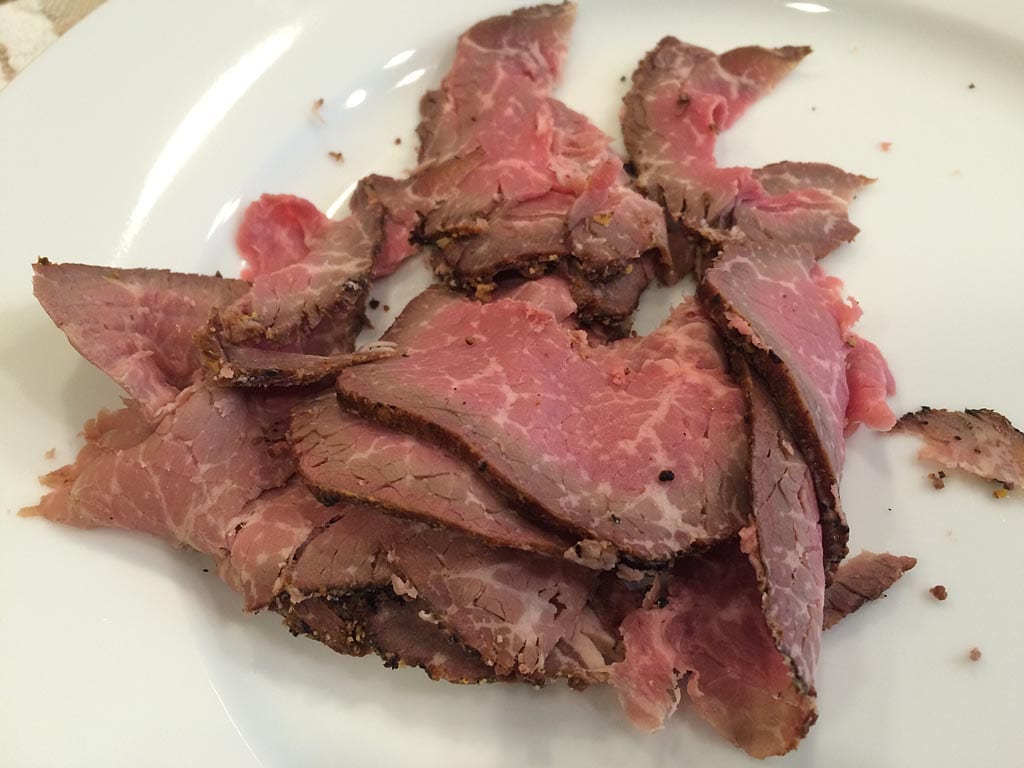
After making this Baltimore pit beef during the 2015 Memorial Day holiday, I posted some photos of the finished sandwich online and got some constructive criticism that I needed to slice the meat more thinly. I don’t own a fancy meat slicer, but a good sharp mandoline slicer does the job nicely. I’ve used it in the past to slice pastrami and it worked just as well on pit beef. It will work on a warm chunk of meat or cold leftovers. Make sure to use the guard so you don’t cut yourself on the sharp blade…you’ve been warned!
If you’ve got a mandoline, give it a try. As long as it’s sharp, I think you’ll be pleased with the results.


