Here are some ideas that Weber Smokey Mountain Cooker owners have come up with to hold the lid when it’s not on top of the cooker.
Unknown WSM Stainless Steel Lid Hinge
The good folks at UnknownBBQ.com sell a WSM Stainless Steel Lid Hinge that fits both 18.5″ and 22.5″ Weber Smokey Mountain Cookers. It features a quick-release pin that can tighten or loosen the “play” of the hinge and allows you to remove the lid entirely.
This video by David Halpin demonstrates how to install the WSM Stainless Steel Lid Hinge on your cooker.
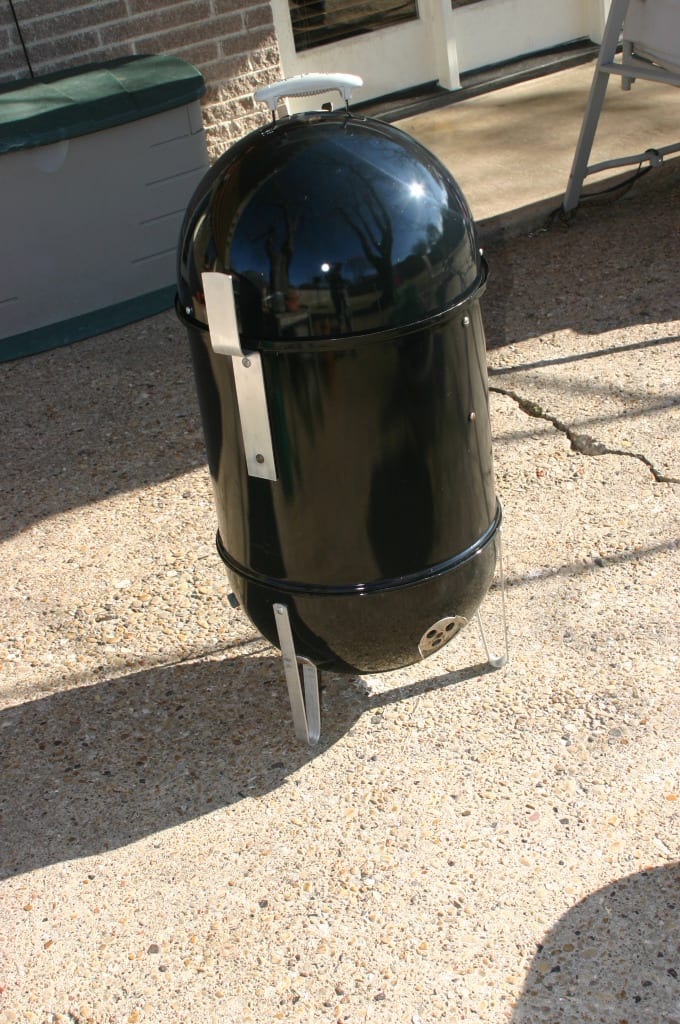
Hunsaker Hinge
Hunsaker Smokers sells this stainless steel hinge for both the 18.5″ and 22.5″ Weber Smokey Mountain Cooker. Described as a “floating hinge”, it allows for opening and closing the lid, and removal of the lid without having to pull a pin.
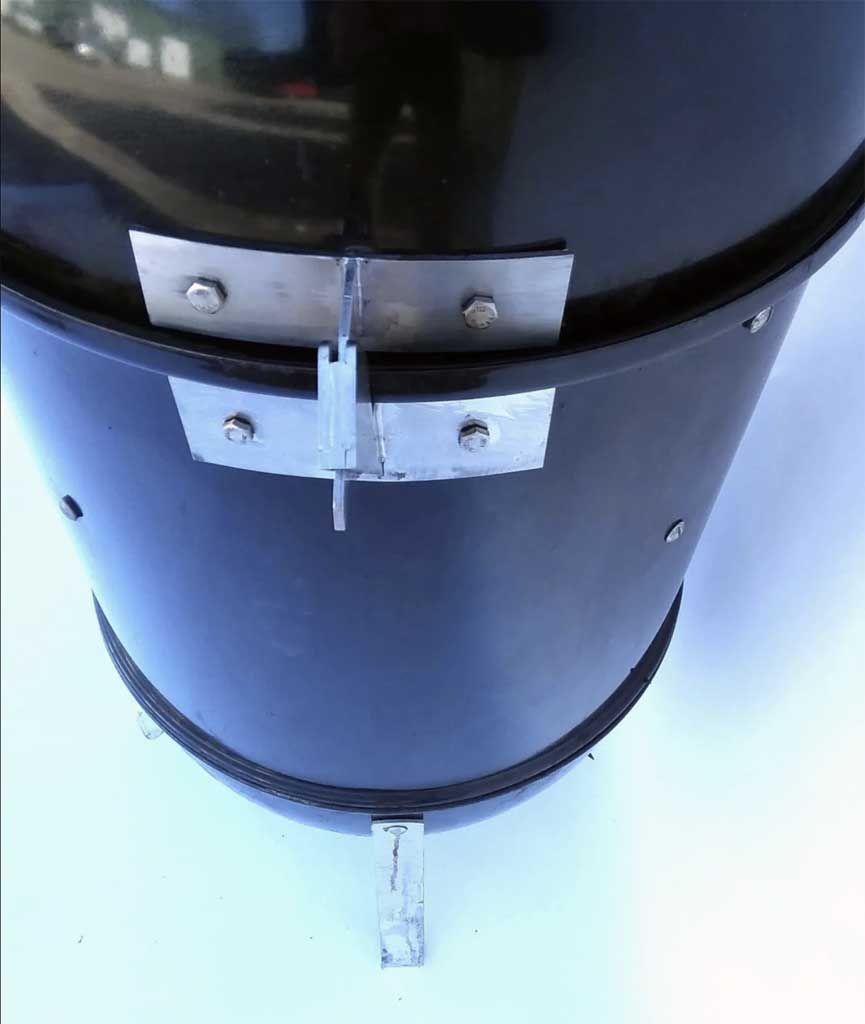
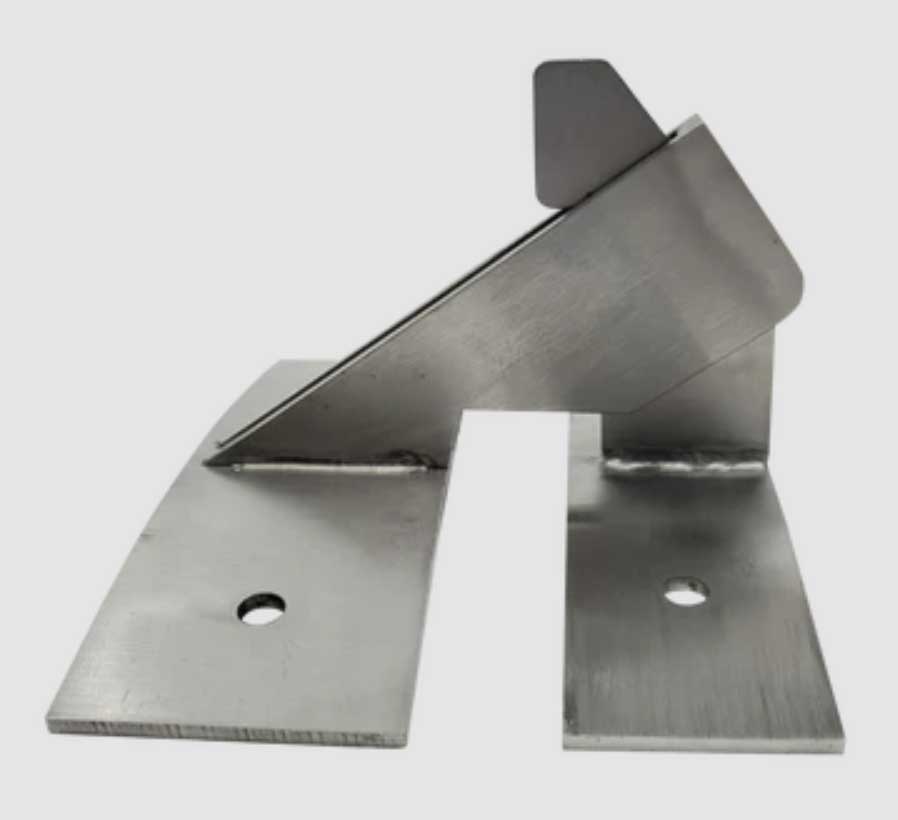
Acorn Hinge

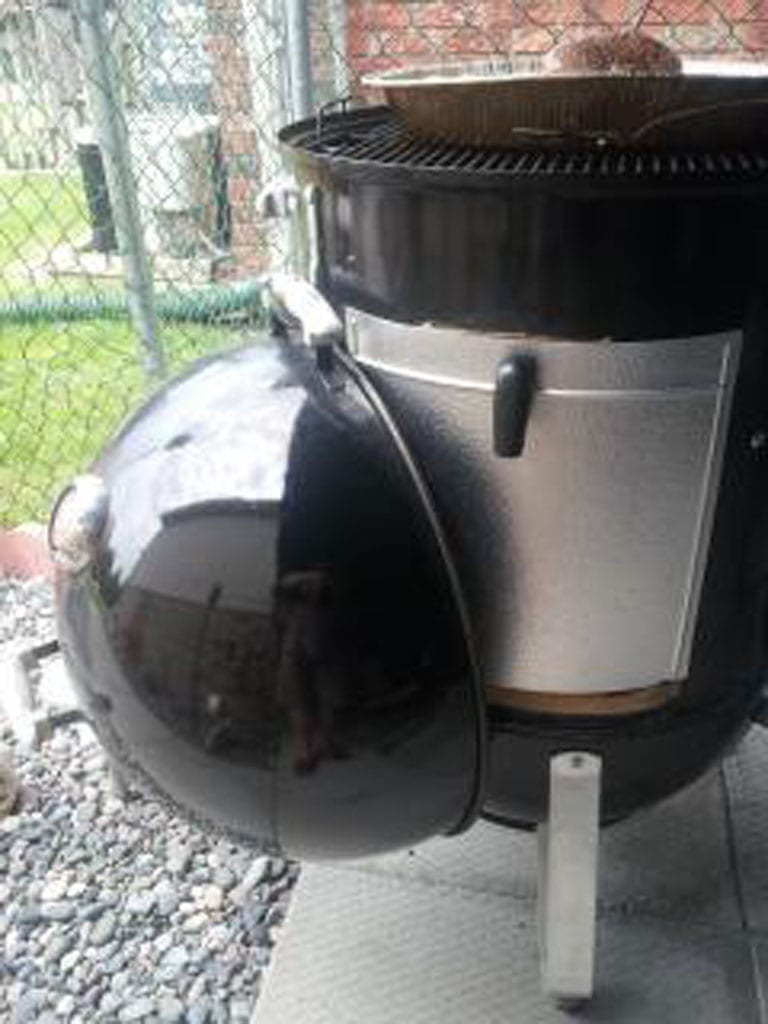
There are several members of The Virtual Weber Bulletin Board that have adapted the Char-Griller Akorn Lid Hinge to the Weber Bullet. You’ll find discussion threads on the subject here:
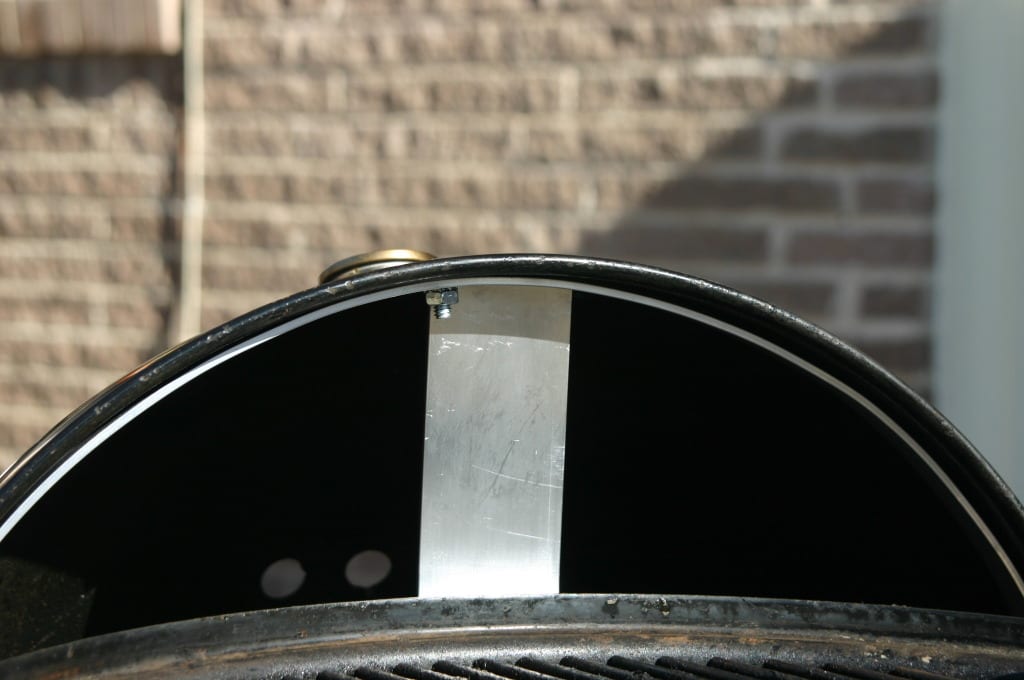
There is a mini version that can be used for the 14.5″ WSM and a regular version that can be used for the 18.5″ WSM. It’s unclear if the regular hinge hinge can be used with the 22.5″ WSM.
The photo above was taken by forum member Joe Anshien of his hinge installation on an 18.5″ WSM. Joe replaced the stock nut/bolt connectors with a removable pin so he can easily detach the lid when needed.
Some people have reported issues with the hinge not closing completely if mounted too low on the middle cooking section—the top half of the hinge hits the lip of cooking section. The solution is to cut a notch in the hinge to provide adequate clearance.
Under-Car Oil Drip Pan

A large-sized automobile oil drip pan—the kind you place on the garage floor to catch oil drips under your car—is my preferred method for holding the WSM lid when it’s not on the cooker. It protects my patio from drips from the cooker and gives me a place to set the lid. The one shown here measures 47″ x 25″ and cost about $20 at an auto parts store.
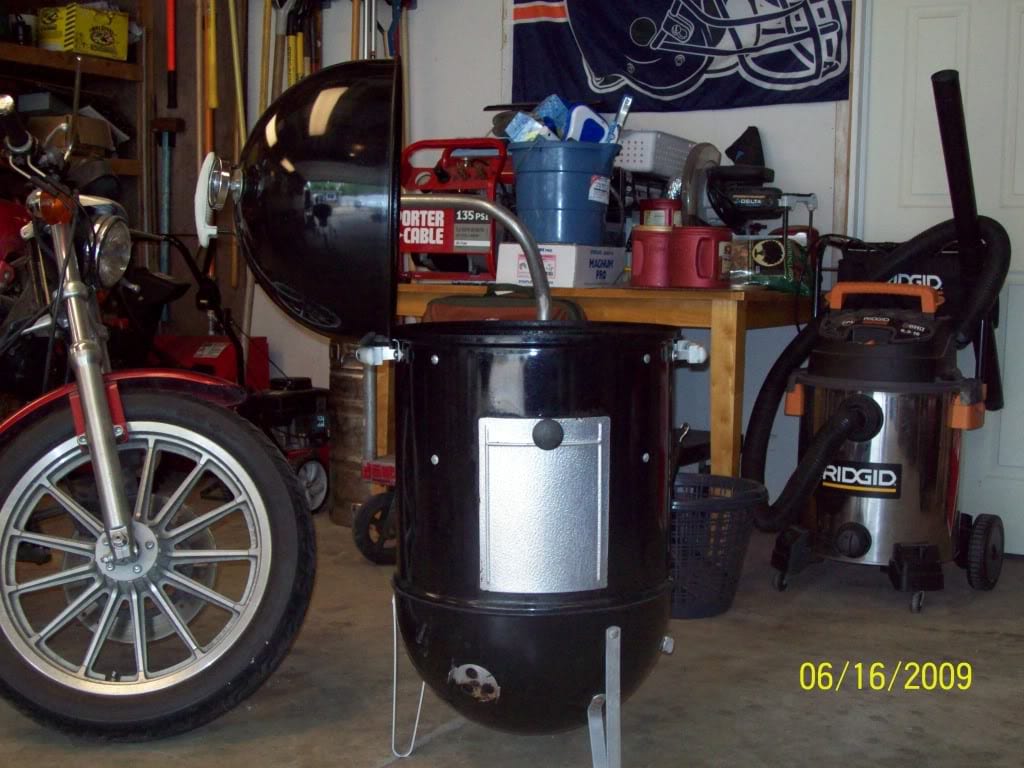
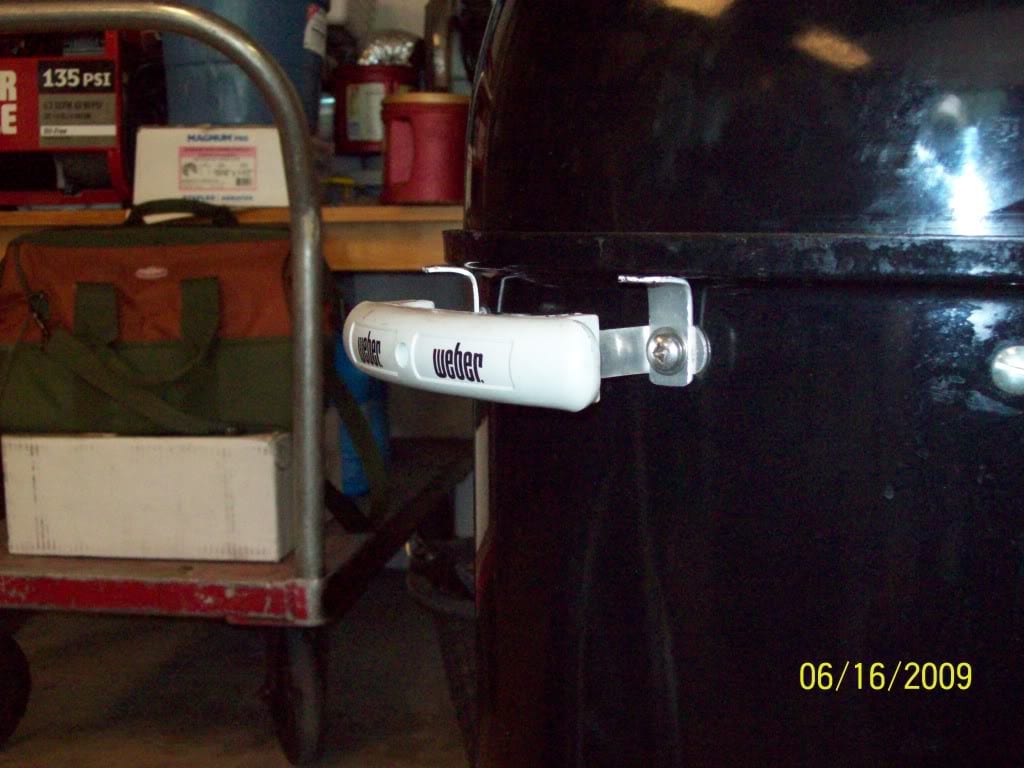
Hanging Lid By The Handle
E. Mann from Lee’s Summit, MO hangs the lid on the edge of the middle cooking section using the end of the handle. Weber has changed its handle design several times over the years, so this solution may or may not work for you depending on your handle.
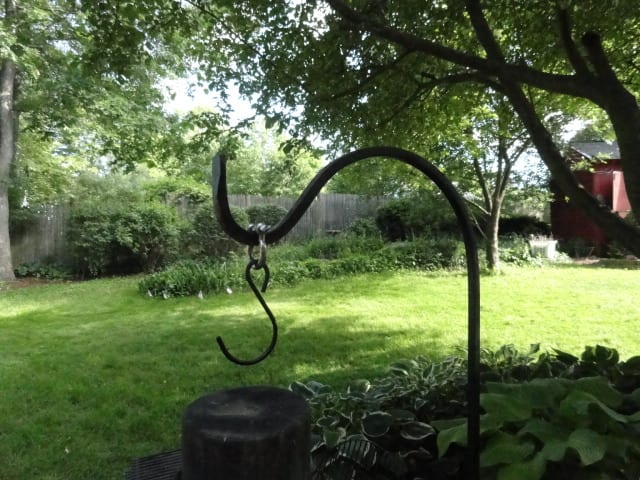
Shepherd’s Hook
Clark Hodgson from Wyocena, WI used scrap material to fashion a swiveling shepherd’s hook. The hook swings from side to side so the lid can be moved out of the way. The vertical pipe is bolted to the table on which the cookers sit.
Jeff Padell from Walpole, MA uses a stationary shepherd’s hook. You can find these at home & garden centers.
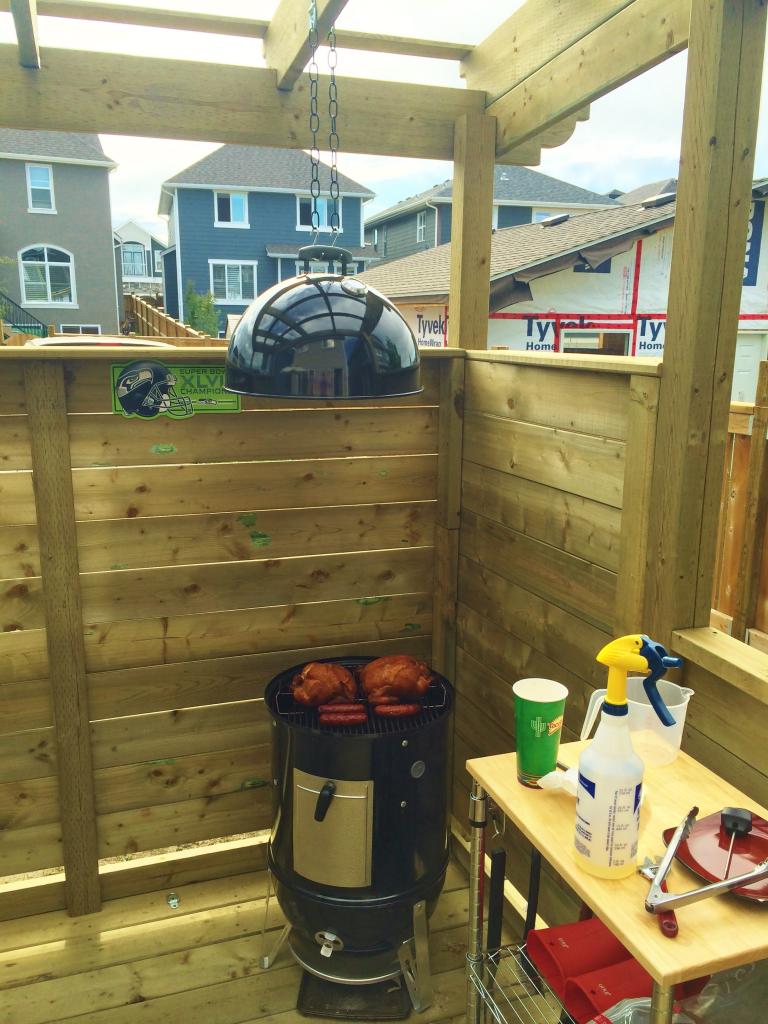
Portable Lid & Grate Holder
Neil Aldridge from Pomona, CA created this portable lid and grate holder for his WSM.
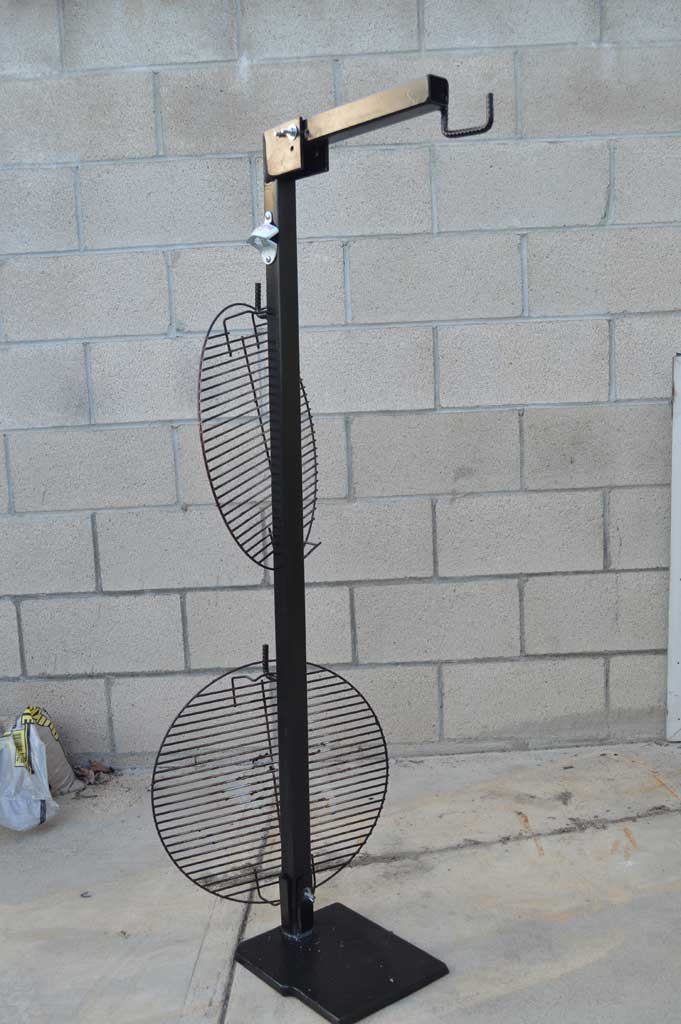
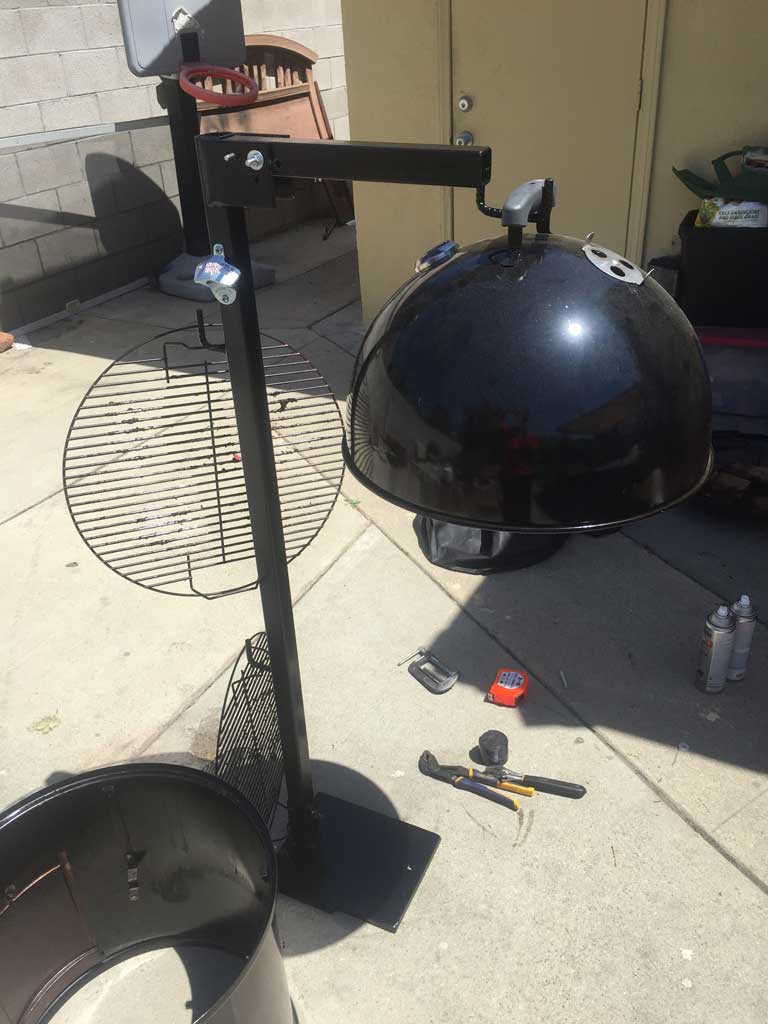
It consists of a heavy base with a vertical post and horizontal arm. Two hooks on the vertical post allow for hanging cooking grates, and a hook at the end of the arm holds the lid. Neil even mounted a bottle cap opener on the side of the post for convenient beer opening! And the whole thing can be broken down for easy storage or transport to barbecue competitions.
Overhead Hooks
Gary B from Alberta, Canada fashioned overhead hooks using inexpensive chain, two brackets, and two S-hooks. “Cheap and keeps it outta the way,” says Gary.
Middle Cooking Section Hook
Dave Smith from Kingsville, Ontario, Canada owns a 22.5″ Weber smoker, and this cooker comes with a handle on the edge of the lid. Dave fastened a hook to the middle cooking section using one of the grill strap screw holes and hangs the lid from it.
Lid Clips
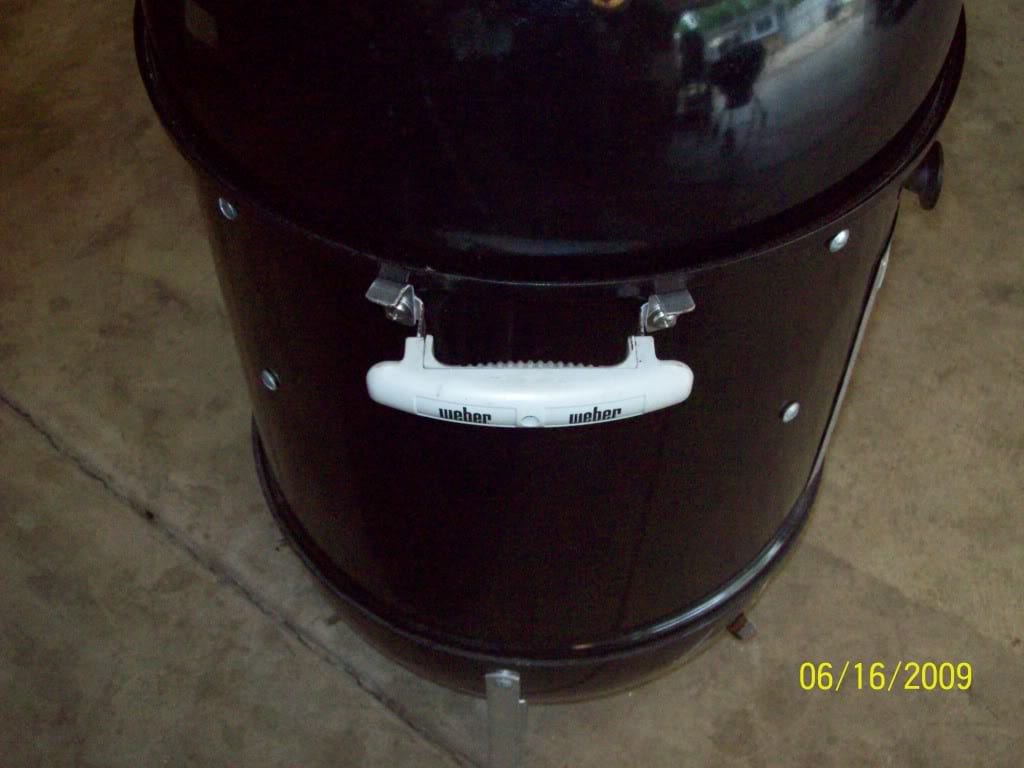
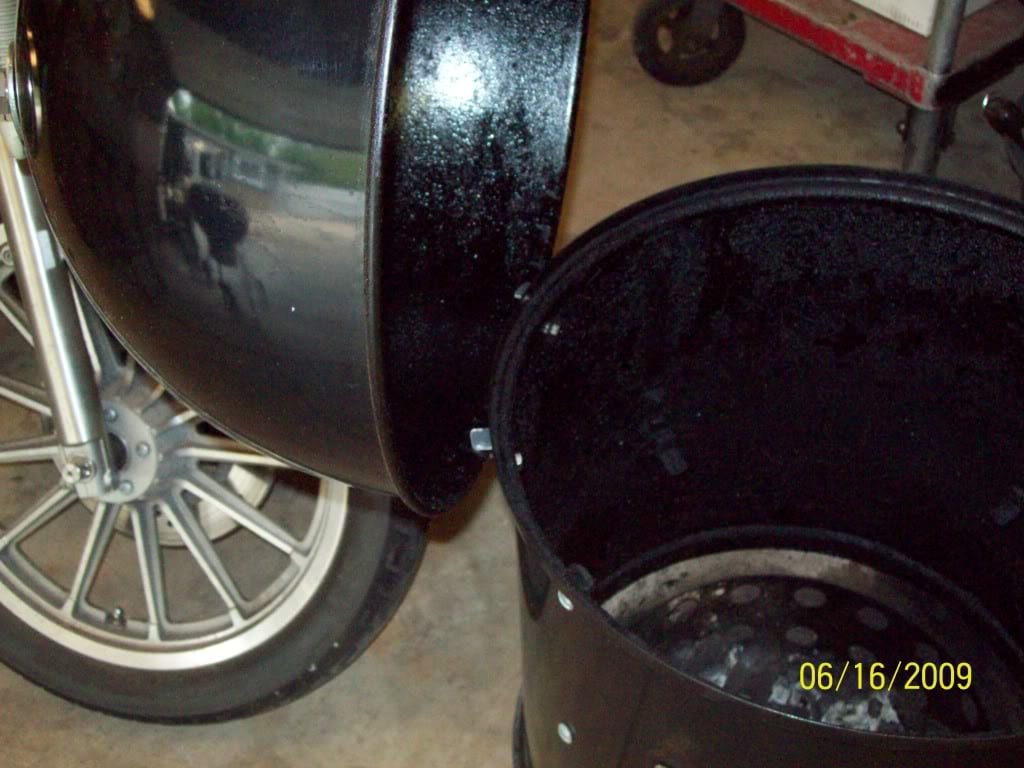
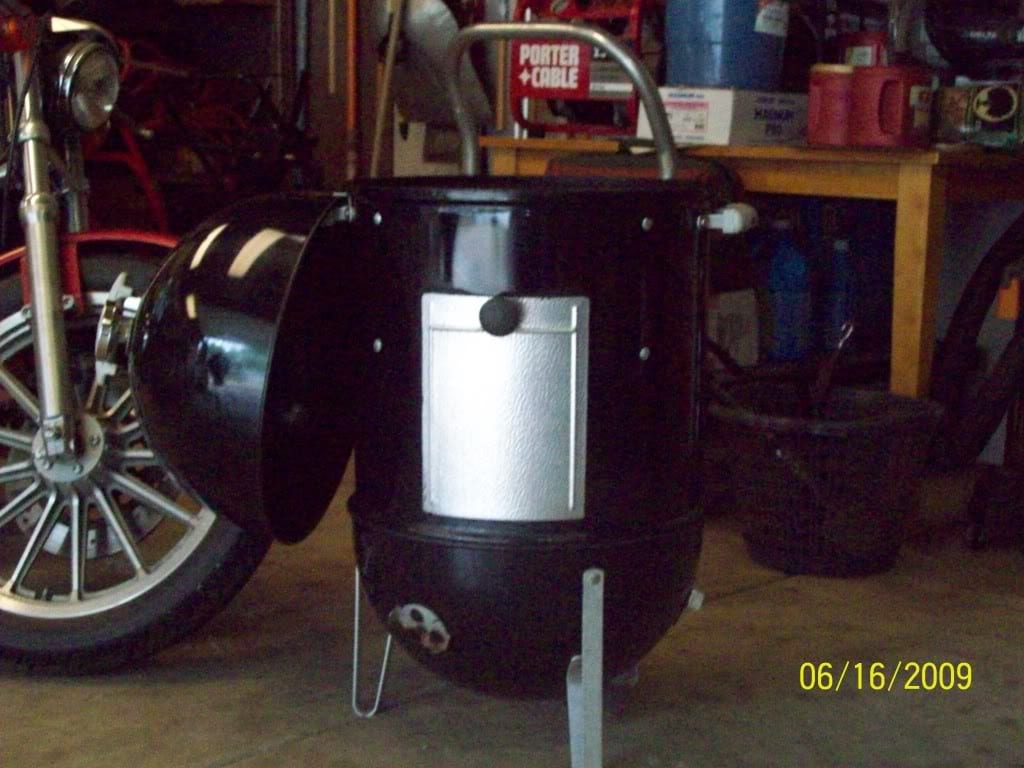
Tim Stork from Montgomery, IL noticed that his electric roasting pan had a lid holder design that could be adapted to the Weber Bullet. He installed a Weber lid handle on the side of the middle cooking section and added two L-shaped metal clips. This design allows the lid to be held in an open position or to hang down alongside the cooker.
Note that for stability, Tim aligns the lid hanger with one of the legs on the charcoal bowl.
Lid Hanger & Retaining Ring
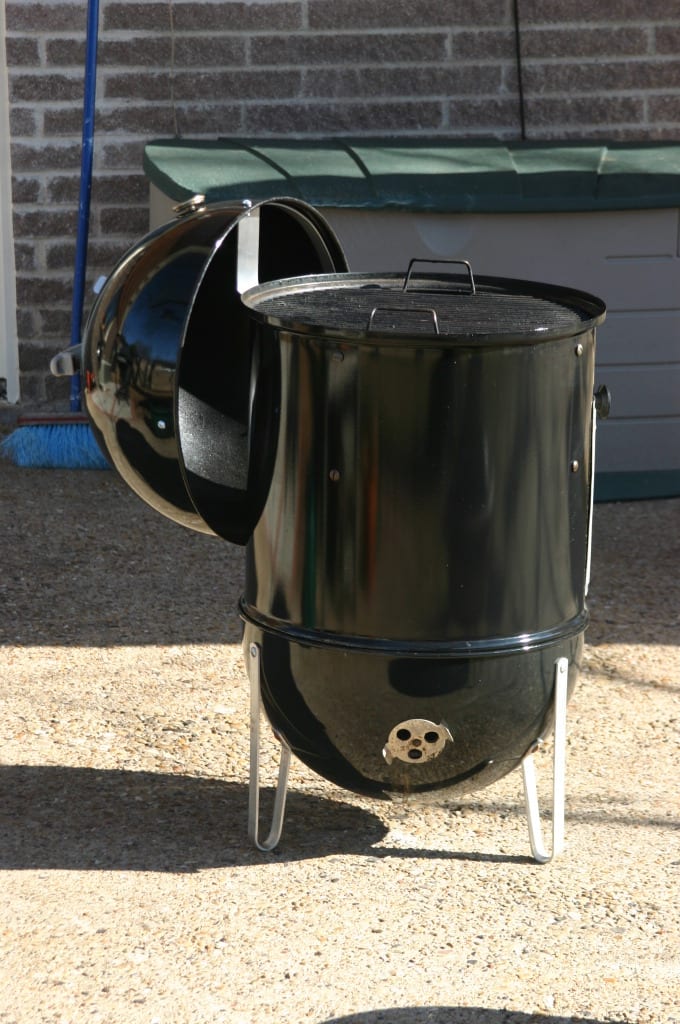

Russ Turner designed this modification that allows him to hang the lid behind the cooker. It consists of a lid hanger and a retaining ring made from aluminum, which is strong but easy to work with.
Here is the materials list for this project, available from The Home Depot for under $20:
- 1/8″ thick, 2″ wide, 36″ long aluminum flat stock (1 piece)
- 1/8″ thick, 3/4″ wide, 36″ long aluminum flat stock (1 piece)
- 1/4″ x 5/8″ screw with nut (4 each)
- 1/4″ lock washer (4 each)
- 1/4″ fiber washer (4 each)
Fabricate The Lid Hanger
This modification uses the holes from one of the grill straps to hold the lid hanger, so pick one of the grill straps on the backside of the middle cooking section and remove it.
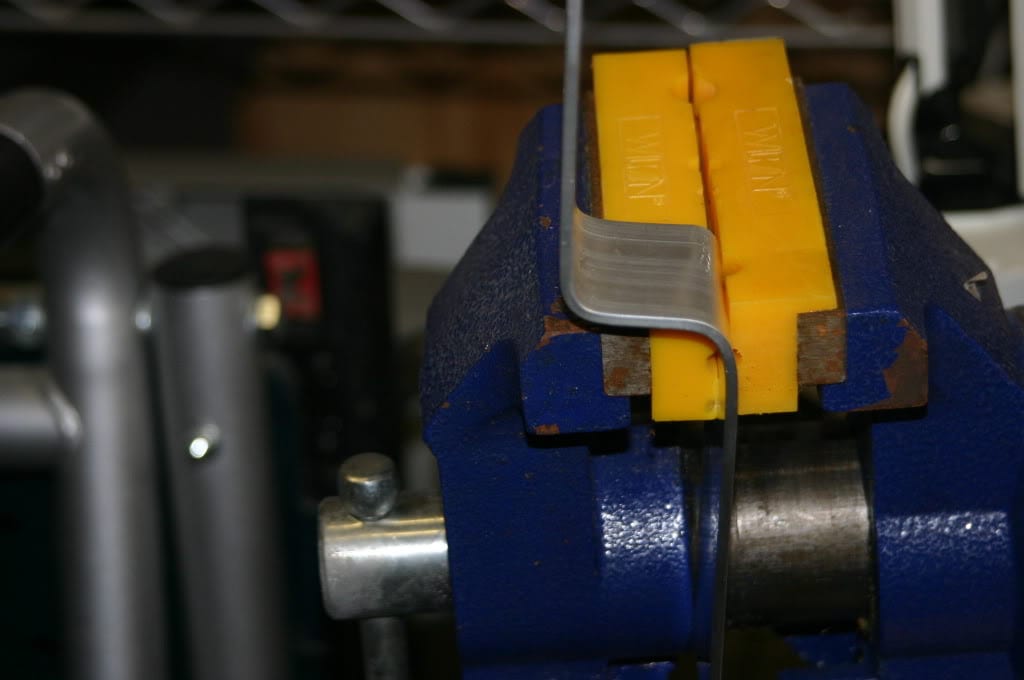
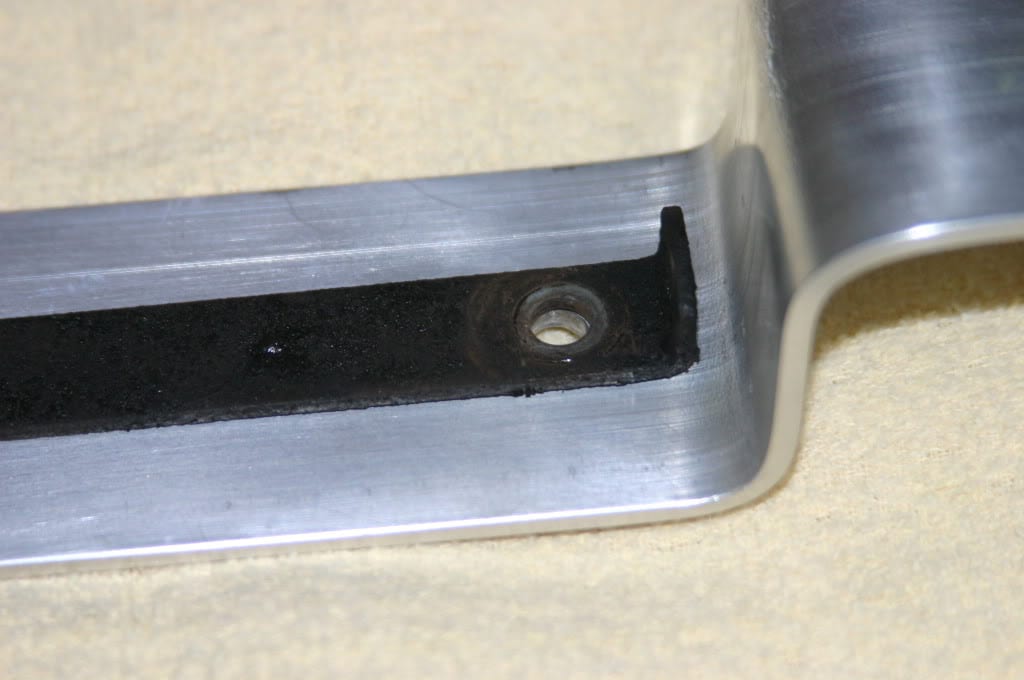
Take the 2″ wide aluminum stock and starting from one end, measure and mark at 8-1/4″ (first bend), at 9-1/4″ (second bend), and at 14″ (top end). The two bends will route the aluminum around the lip of the middle cooking section (Photo 4).
Do not cut the 2″ wide stock to length until after you have marked and bent it! You can use that 36″ length for leverage when making the bends.
Put the 2″ stock into a bench vise and make the bends (Photo 5). Take your time…no hammering is required, just a little muscle.
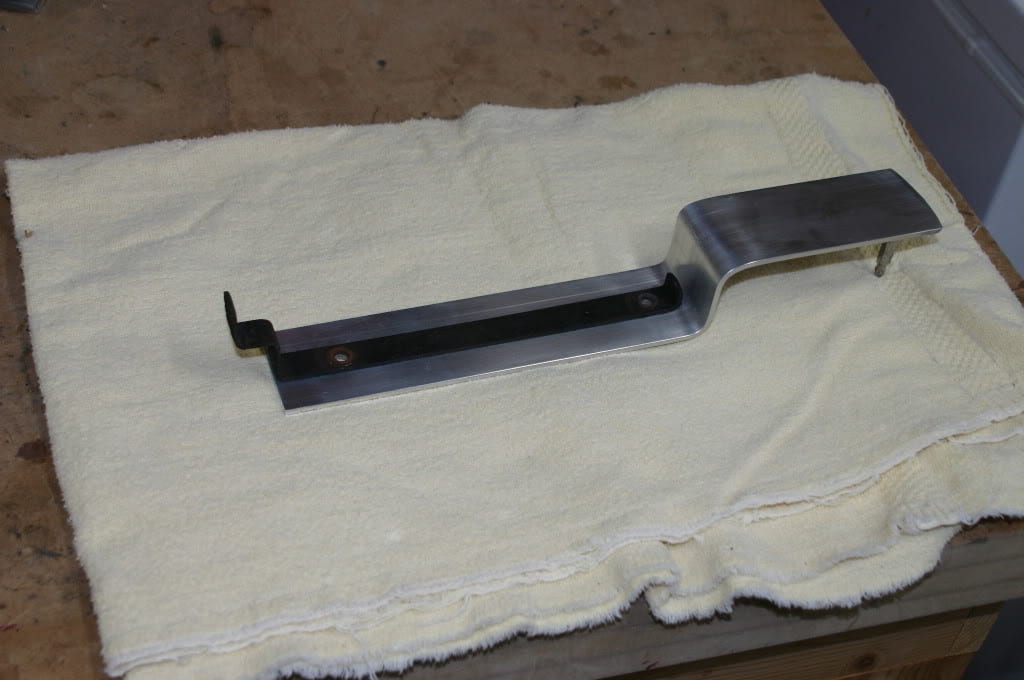
To create a slight curve on the top end of the lid hanger, place it on a flat surface and put the WSM lid over the hanger at the 14″ mark (the bent portion underneath the lid). Use a marking pen to trace the shape of the lid onto the hanger (Photo 6). Use a hack saw or electric saw with metal blade to cut the curved shape along the traced line. Use a metal file or fine sandpaper to smooth the cut edge and also the corners of the square end.
Take a few moments to hold the lid hanger up to your WSM to reassure yourself that it looks and fits right against the middle cooking section.
To make the fastening holes in the lid hanger, place it on your work surface with the long portion facing down (Photo 7). Place the grill strap on top of the long portion and push the top end of the strap tight up against the bend and center it from side to side (Photo 8). Use a marking pen to mark each hole and punch each spot with a center punch, if you have one.
Remove the grill strap—or use it as a drilling guide, if needed—and drill each hole using a 1/4″ bit. Take a moment to compare the drilled lid hanger with the grill strap to ensure the holes are where they should be.
For aesthetics, use some fine steel wool to buff the lid hanger to remove any scratches and give the aluminum a flat stock look.
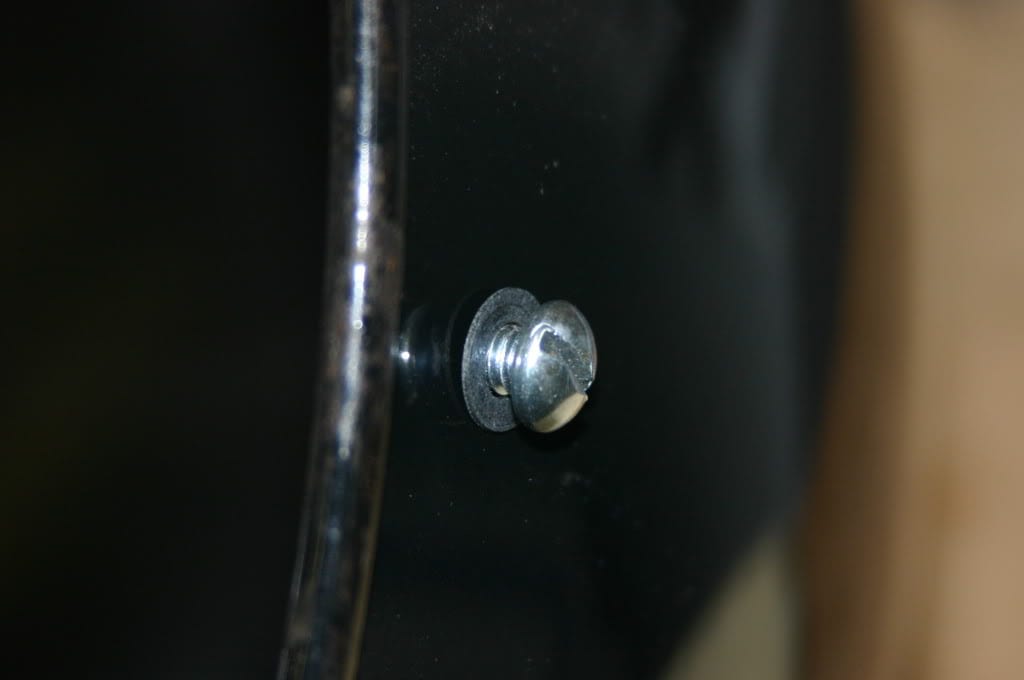
To install the lid hanger, place the grill strap screws through the hanger, then place the fiber washers on the screws, then push the screws through the middle cooking section. Place the grill strap over the screws and fasten using the grill strap nuts. The key is to make sure the fiber washer is between the lid hanger and the outside of the middle cooking section.
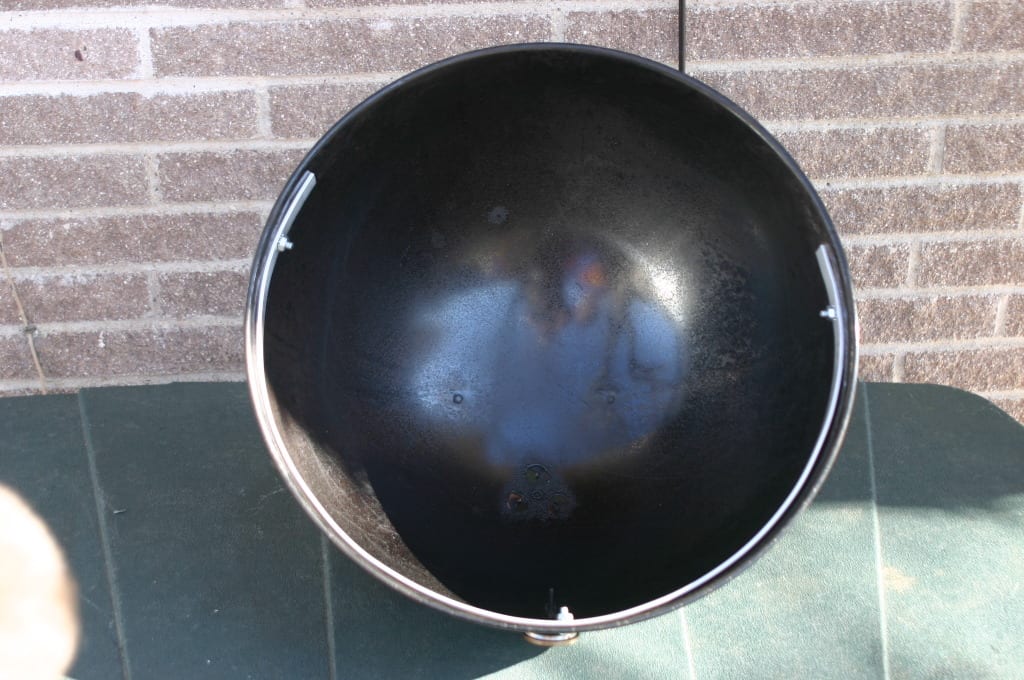
Fabricate The Retaining Ring
Take the 3/4″ wide aluminum stock and drill a 1/4″ hole in the center and 1/4″ holes 2″ in from each end—3 holes total. Using your hands or a vise, start bending and curving the piece so that it matches the shape of the inside of the lid. Keep bending and tweaking the shape until you have it just right.
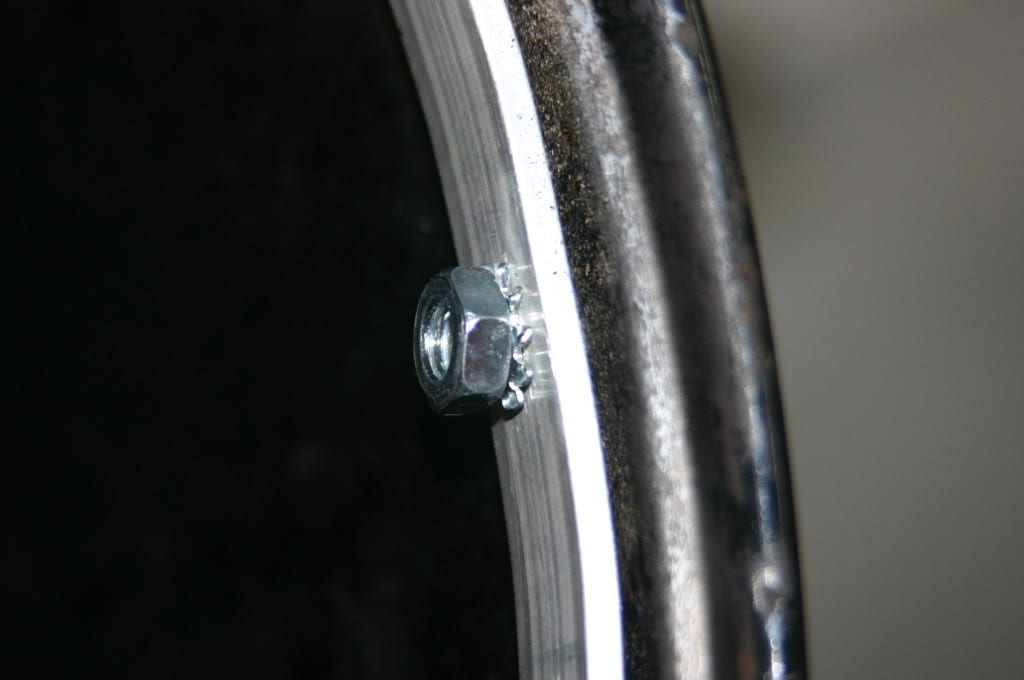
Clamp the bent retaining ring inside the lid, about 3/4″ above the lip, centered on either the vent side or the thermometer side of the lid. Hold the lid firmly on your work surface and drill through the center ring hole into the lid using a 1/4″ bit. Place a fiber washer on one of the screws, insert it through the lid hole from the outside (Photo 9), then through the center hole in the retaining ring. Fasten with a lock washer and nut (Photo 10).
Repeat this process at each end of the retaining ring. Use clamps to hold the ring tightly in place and take your time while drilling the holes.
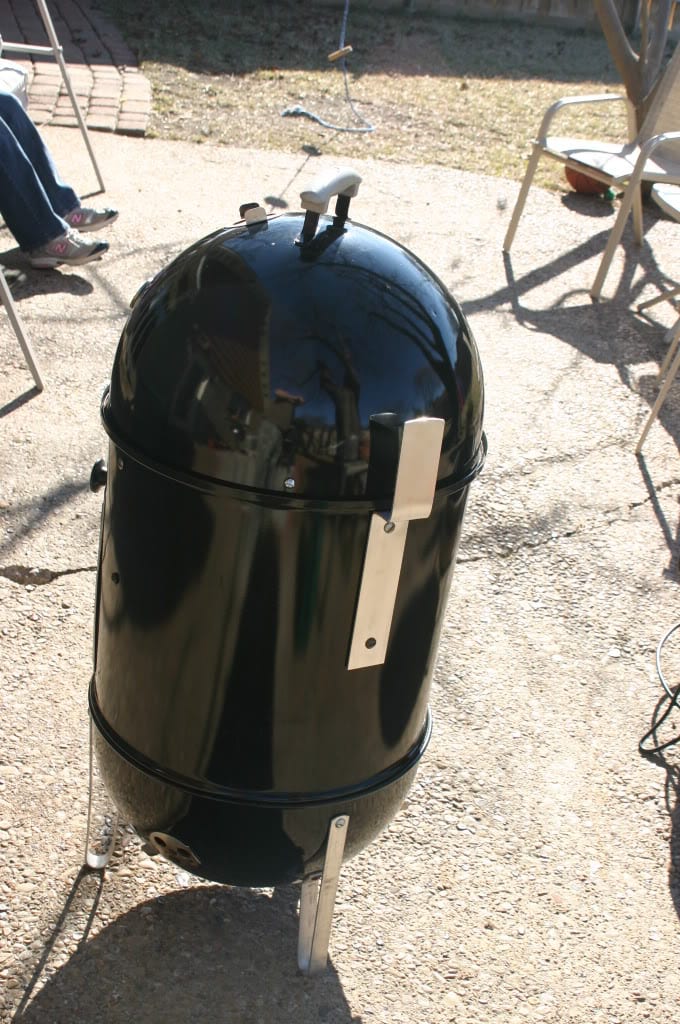
Your lid holder is now ready to use! For maximum stability, align the lid hanger with one of the legs on the charcoal bowl (Photo 11). Note that this design fits neatly inside the Weber Bullet’s vinyl cover.
Photos of Unknown WSM Hinge: 2015 by Unknown BBQ
Photos of Hunsaker WSM Hinge: 2023 by Hunsaker Smokers
Photo of Acorn Lid Hinge: 2023 by Joe Anshien
Photo of hanging lid by handle: 2014 by E. Mann
Photo of swiveling shepherd’s hook: 2009 by Clark Hodgson
Photo of stationary shepherd’s hood: 2014 by Jeff Padell
Photos of portable lid & grate holder: 2015 by Neil Aldridge
Photo of overhead hooks: 2014 by Gary B
Photo of middle cooking section hood: 2014 by Dave Smith
Photos of lid clips: 2009 by Tim Stork
Photos of lid holder: 2009 by Russ Turner


