Ever wanted a place to set your tongs, gloves, and probe thermometer while barbecuing on the Weber Smokey Mountain Cooker? Here are some DIY projects for adding a work surface to your cooker.
Cajun Bandit Folding Side Table
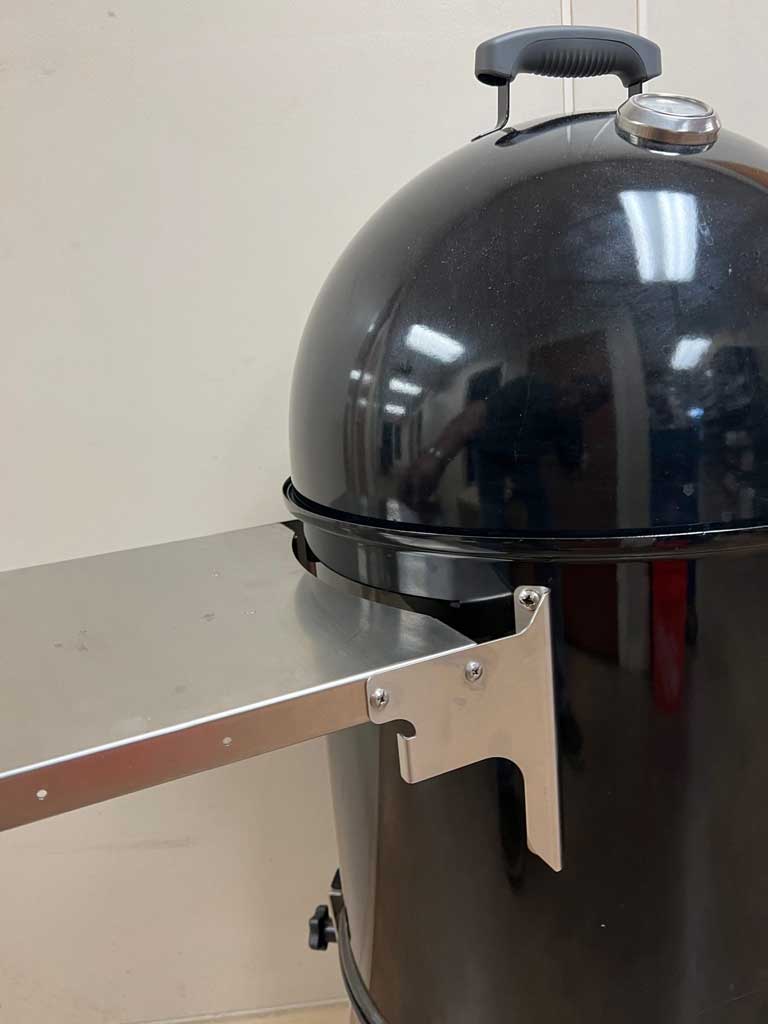
Cajun Bandit sells this Folding Side Table for the 18.5″ WSM (measuring 12″ x 14″) and for the 22.5″ WSM (measuring 16.5″ x 14″). It’s made of stainless steel and folds down when not in use. It fastens to the middle cooking section using existing grill strap holes, so no drilling is necessary.
Lavalock Folding Side Shelf
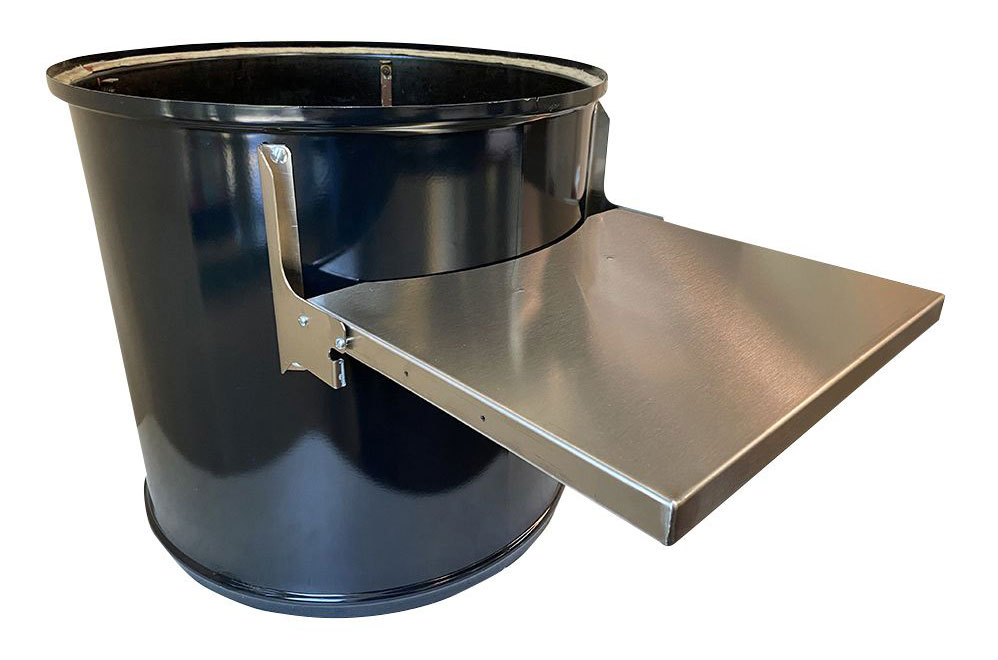
Lavalock sells this Folding Side Shelf for the 22.5″ WSM constructed of stainless steel and measuring 16.5″ x 14″. It folds down when not in use and fastens to the middle cooking section using existing grill strap holes, so no drilling is necessary.
Weber 7413 Work Table
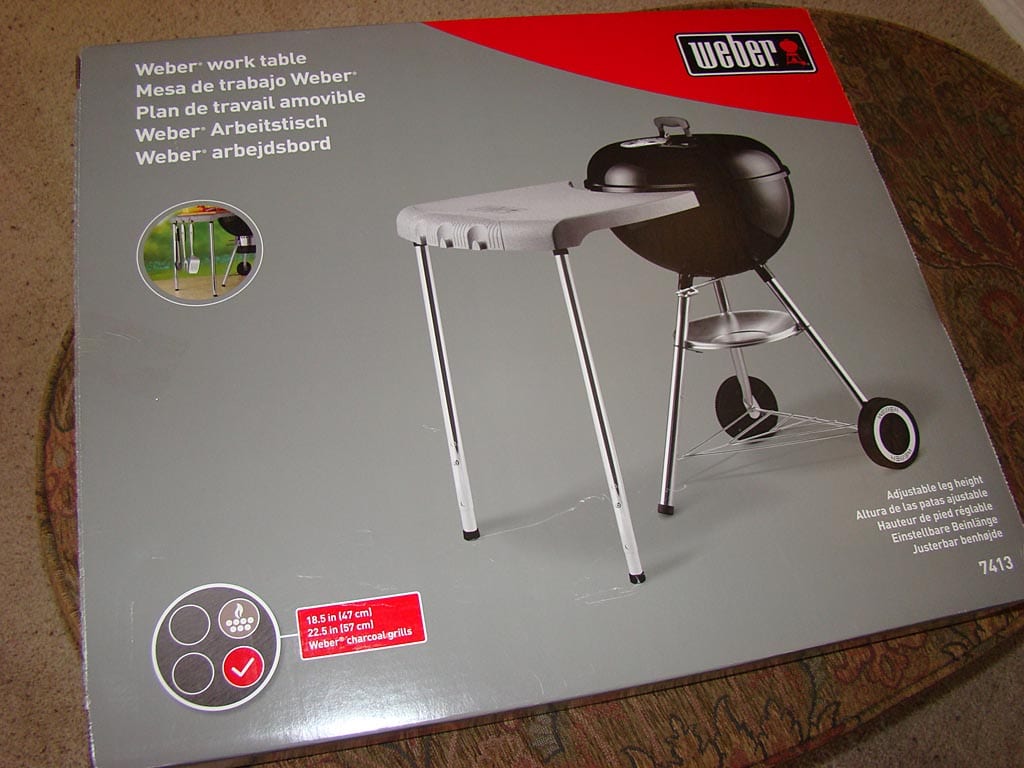
Note: Weber no longer sells the Weber 7413 Work Table shown here, but they occasionally come up for sale through online auctions and retailers.
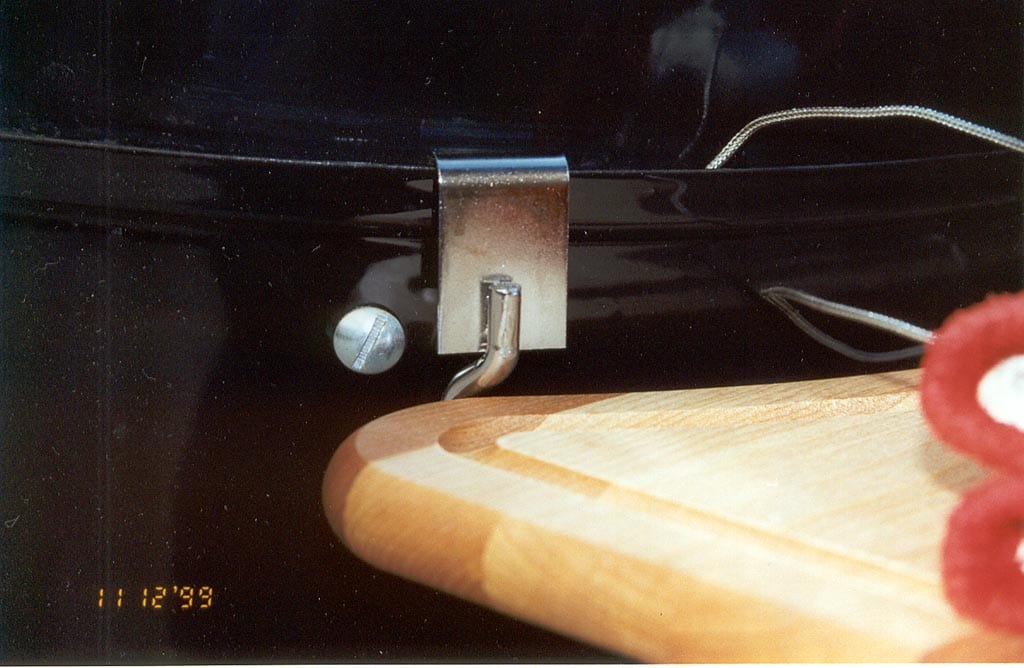
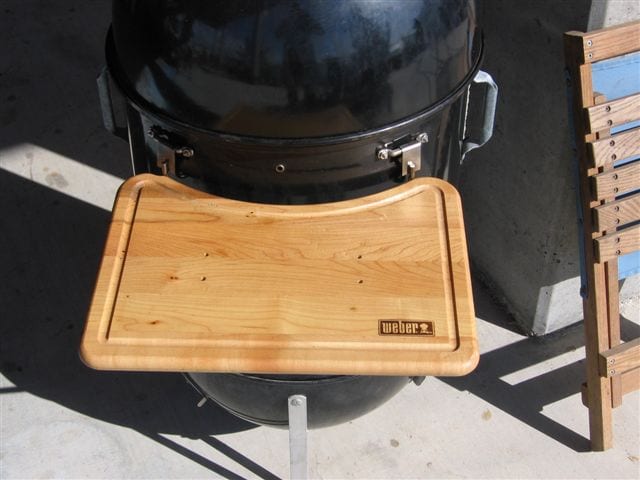
The Weber 7413 Work Table is not designed for use with the Weber Bullet. The hooks are designed to snap tight over the edge of an 18.5″ or 22.5″ Weber kettle grill, but they won’t on the WSM. However, if you’re extremely careful in how you place and remove the lid, and if you are careful to not bump the table during use, it is workable. If you’re handy, you can modify the hooks so they attach more securely to the cooker.
Despite the drawbacks, this is a handsome work table. The sturdy plastic surface is easy to clean, and three tool hooks are provided. The table breaks down quickly for storage.
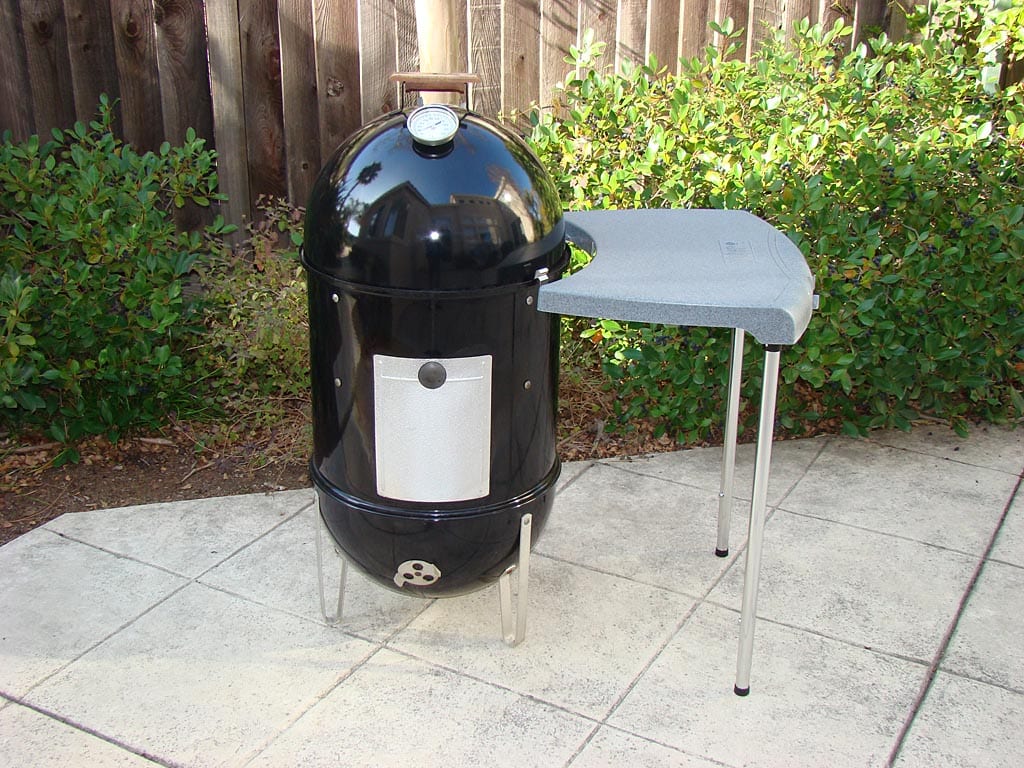
Weber 1800 Work Table
Note: Weber no longer sells the Weber 1800 Work Table shown here, but they occasionally come up for sale through online auctions and retailers.
The first time I saw this work table was at the 1999 West Coast Barbecue Championship in Santa Cruz, CA. Tom Brohamer of BBQ’n Fools adapted it to his Weber Smokey Mountain Cooker. I liked the idea so much that I tried it myself—twice—as shown below.
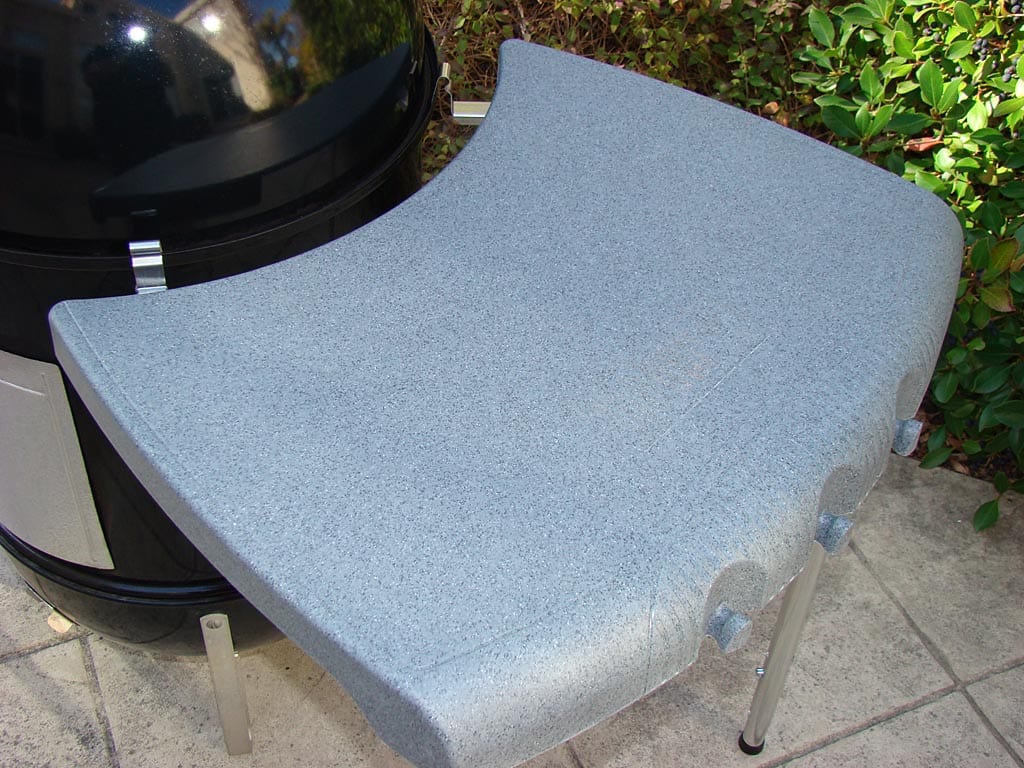
The Weber 1800 Work Table is designed for use with 18.5″ Weber kettle grills. It is not meant to be used with the Smokey Mountain Cooker, but with a few modifications it can be installed successfully on a WSM and is quite functional. It provides a light duty work surface on which you can place tongs, gloves, or a probe thermometer.
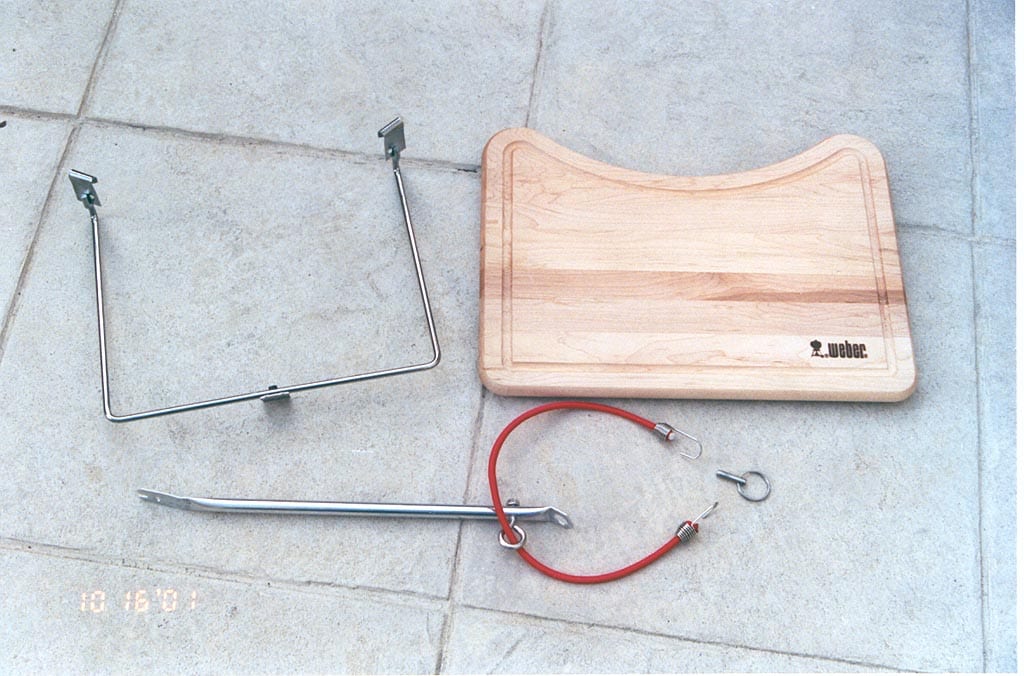
The work table kit consists of a rock maple work surface, a metal support bracket, a tubular metal brace, and some fastening hardware. The work surface is removable and doubles as a cutting board, with no-skid rubber feet for stability and a channel to catch meat juices.
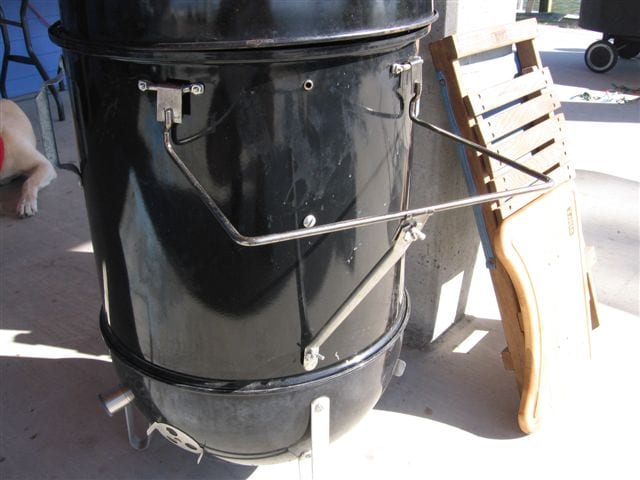
Installation Method #1: The Easy Way


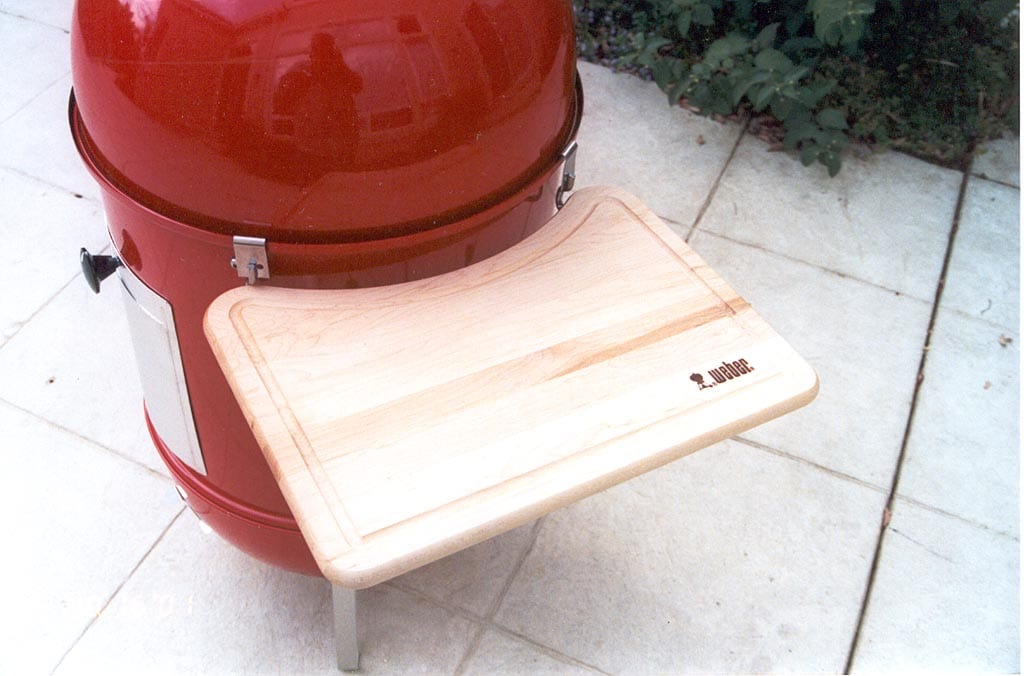
The easiest way to install the work table is shown here. The support bracket slips over the edge of the middle cooking section and the tubular brace runs diagonally from the support bracket to one of the legs on the charcoal bowl. The hardware pack included in the kit is used to make all the necessary connections. The work table can be installed or removed in about two minutes using a screwdriver and an adjustable wrench.
There are a couple of issues with this installation that you should be aware of:
- The work table can only be installed when the middle cooking section is inserted into the charcoal bowl, and you cannot remove the middle cooking section when the table is installed because the tubular brace connects to one of the legs. This method of installation does not allow you to leave the table installed at all times—you install the table after the fuel is in the cooker and remove it before emptying the ashes from the charcoal bowl.
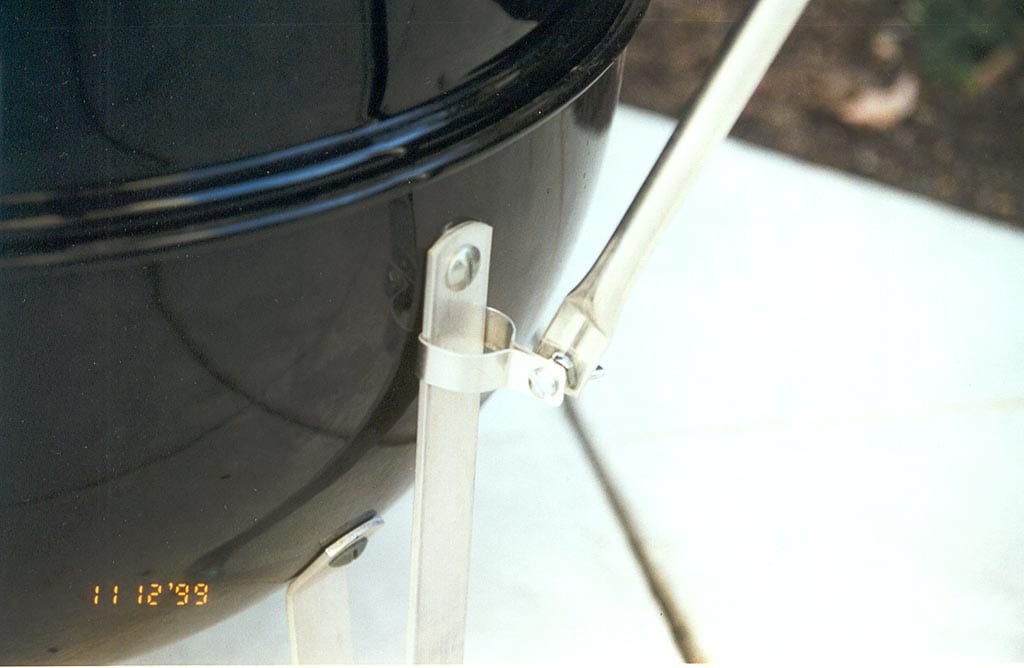
- Weber supplies a clamp for connecting the tubular brace to the round leg of a kettle grill. Since the WSM has flat legs, you’ll need to flatten the clamp on one side and slide it up between the leg and charcoal bowl, securing it with the screw and nut supplied. This is sufficient if you don’t plan on putting anything heavy on the work table. For added strength, drill a small hole through the clamp and leg and fasten with a nut and bolt.
Installation Method #2: A Better Way


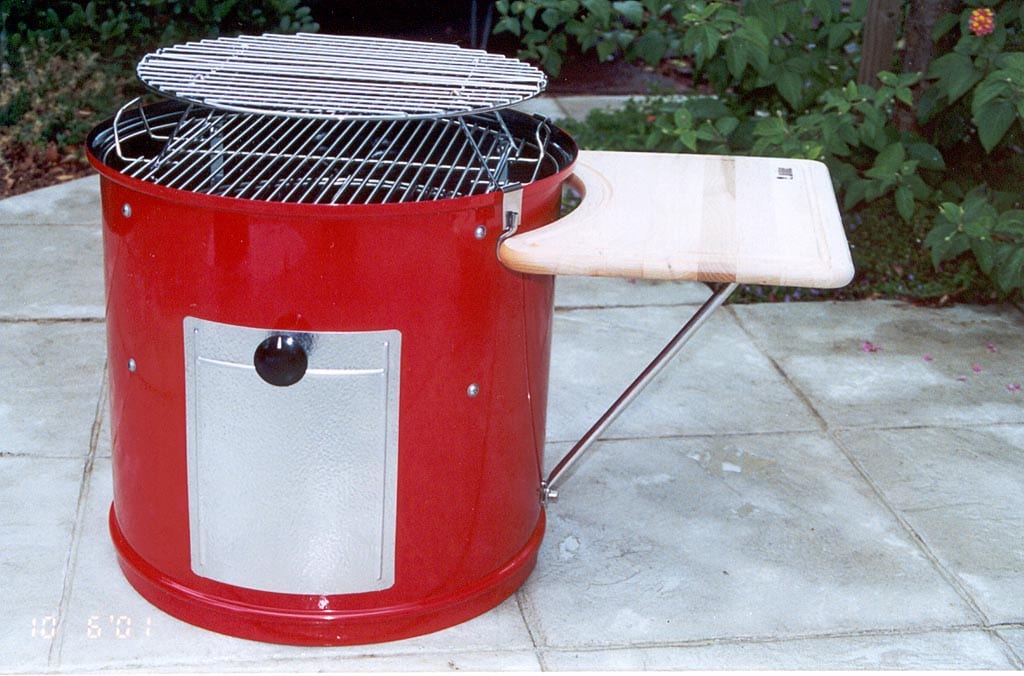
A better, but more complicated, approach is the one I used on The Little Red Bullet project. The advantages of this method are that:
- The work table connects only to the middle cooking section, allowing it to be removed with the table in place.
- The work table can be installed or removed in seconds without any tools.
- The work surface is much more stable than in Method #1 due to the addition of a shock cord that connects the cutting board to the tubular brace.
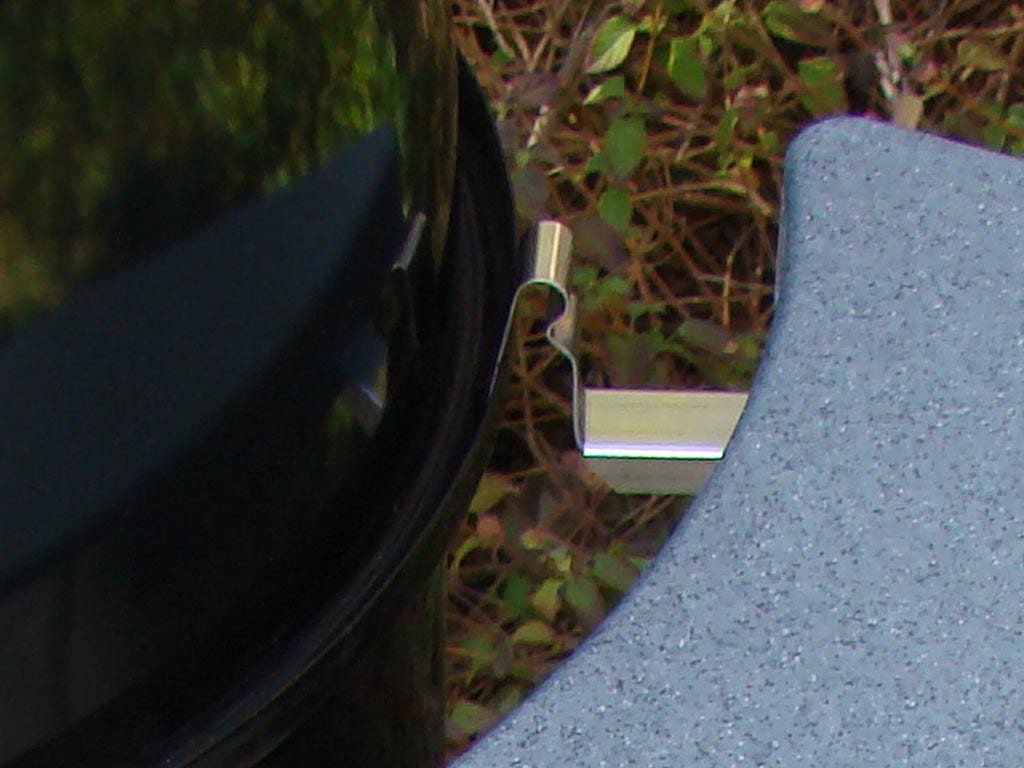
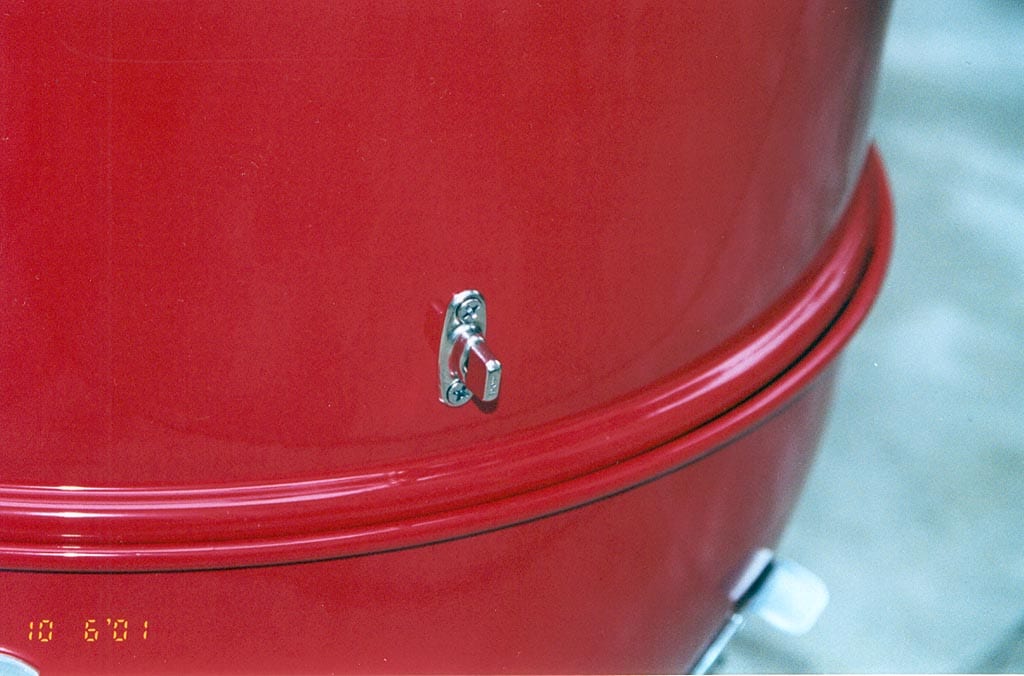
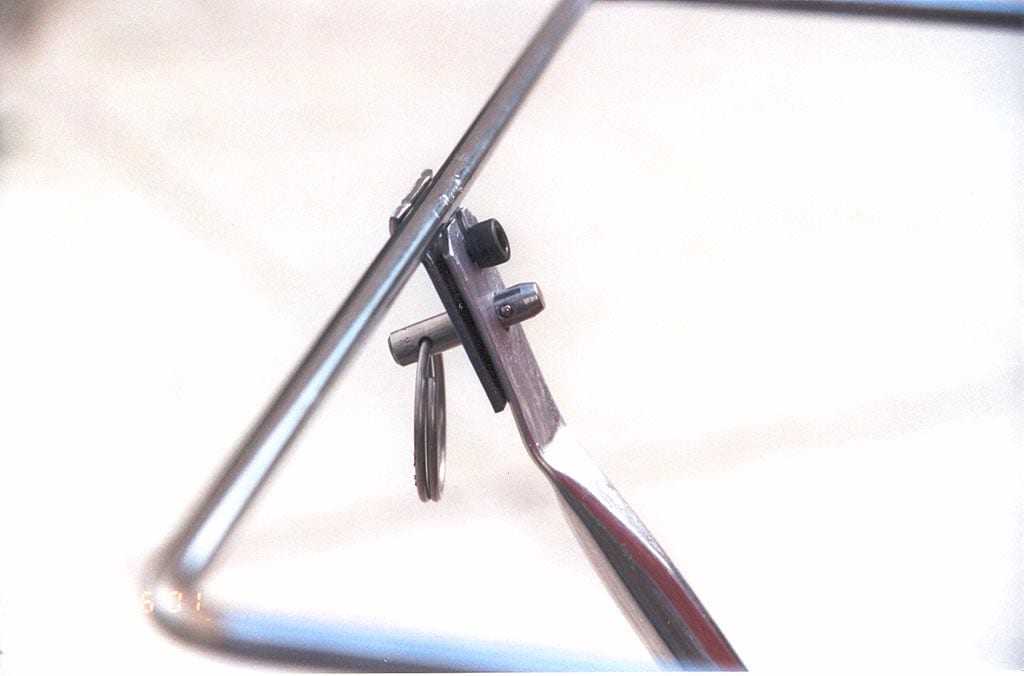
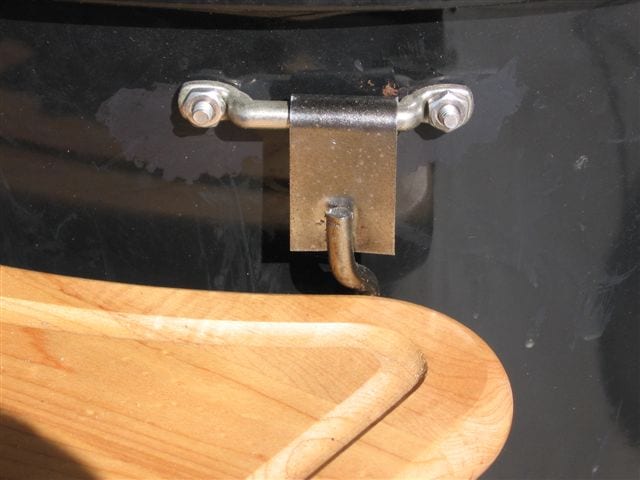
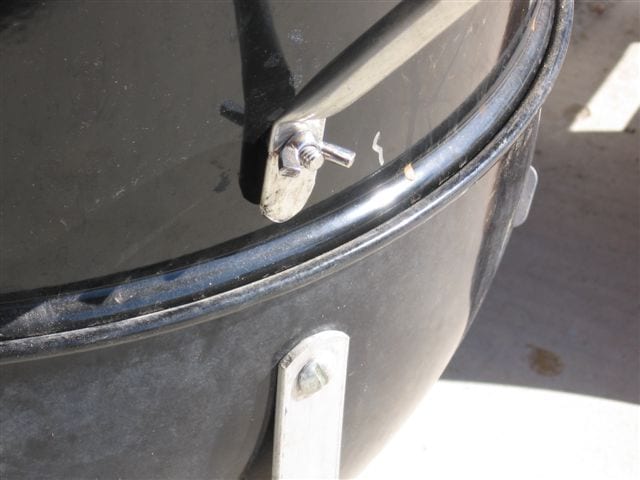
The first step is to attach some mounting hardware to the middle cooking section. I used a fastener called a turn button. It has a spring-loaded head that turns 90° to lock down whatever is placed over the head. You can find this fastener at most hardware and marine supply stores. The turn button is attached with two stainless steel screws, washers and nuts near the bottom edge of the middle cooking section. Two small holes must be drilled in the middle section so the fastener can be attached.
Next, the tubular brace is modified and a new type of connection is formed between the brace and the support bracket. I shortened the brace and made an oval-shaped hole in one end to fit over the turn button. On the other end I created a fork and a hole. The fork slides under a screw that I mounted in the flange, then a cotterless hitch pin is inserted through holes in each piece to lock them together.
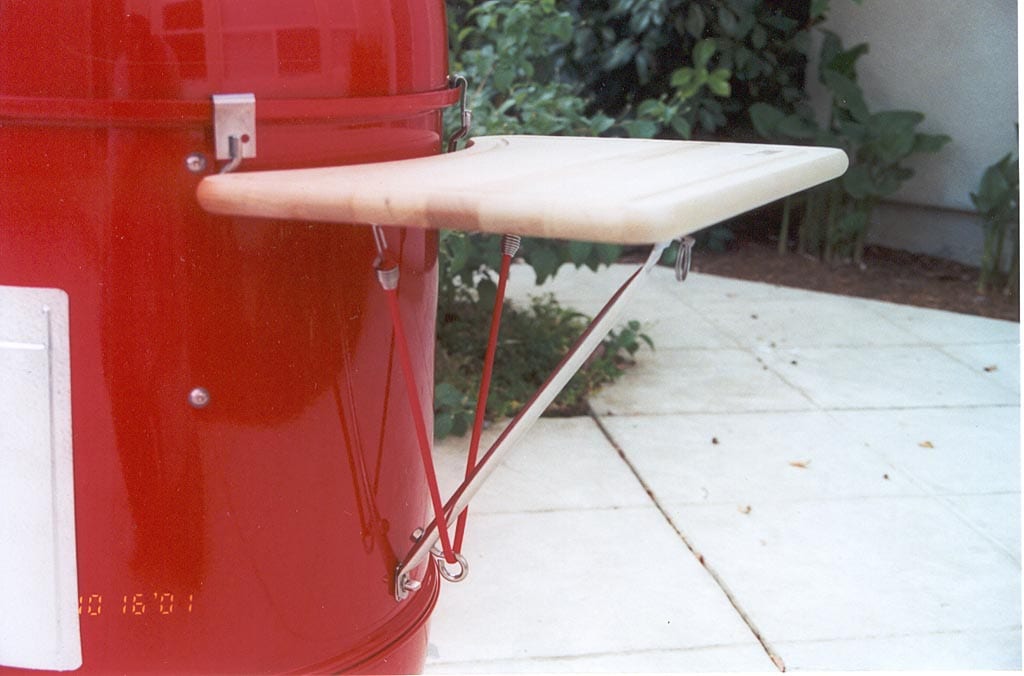
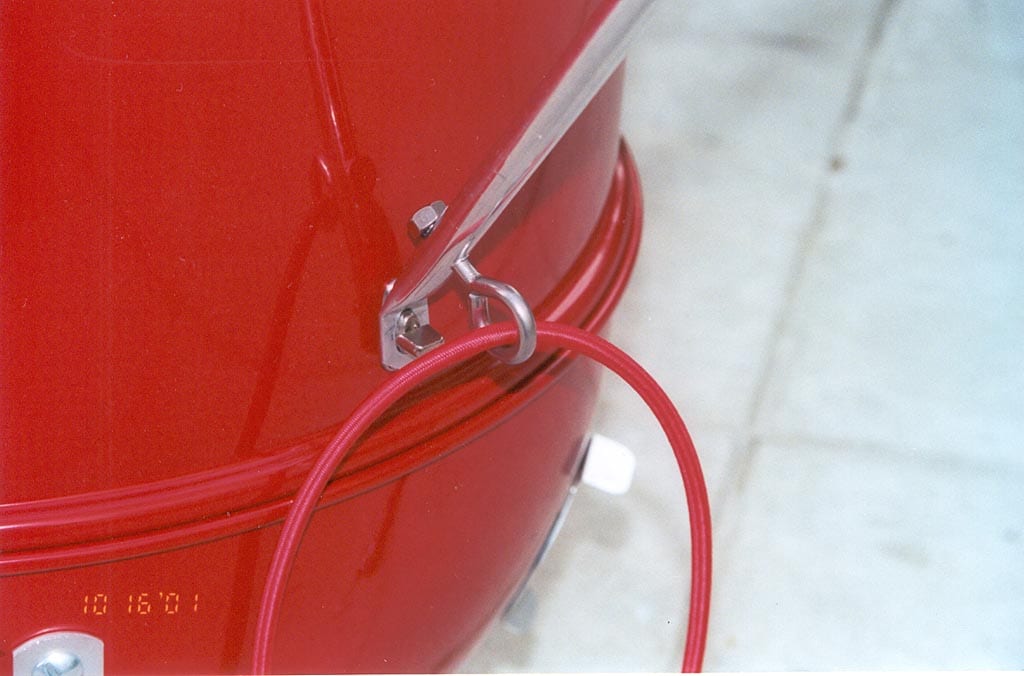
The last step is to add a shock cord to keep the cutting board and support bracket tightly connected to the cooker. I added an eye bolt to the bottom of the tubular brace and D-rings to the bottom side of the cutting board. A short shock cord passes through the eye bolt and connects to the D-rings, helping to stabilize the whole assembly.
To attach the work table to the cooker, simply connect the brace to the support bracket using the hitch pin, hang the bracket from the edge of the cooking section and fasten the other end of the brace to the turn button. Put the cutting board in place and attach the shock cord to the D-rings. To remove the work table, just reverse these steps.
The total cost of this installation is about $50 including the work table kit and connecting hardware.
Important Points
There are several things you should understand before attempting any of these Weber kettle work table conversions for the WSM:
- It’s easy to catch the rolled edge of the lid on the table support brackets. Your best bet is to remove the lid, install the table, then put the lid back in place. Be careful when removing the lid to not dislodge the brackets.
- The protective vinyl cover will not fit over the WSM when a work table is installed.
- These work tables are not specifically designed for use with the Smokey Mountain Cooker. You undertake this modification at your own risk. Do not place heavy items on these tables, as they may detach from the cooker or cause the cooker to tip over.
More Work Table Projects
Here are some photos sent in by TVWB readers showing how they’ve installed work tables on their Weber Smokey Mountain Cookers.
Another Weber 1800 Work Table Installation
Tom Point from Houston, TX shares his installation of a Weber 1800 Work Table on an 18.5″ WSM. “I took your idea and altered it some,” says Tom. “It appears that Weber no longer makes this table, but if someone already has one and wants to make it a lot more sturdy they could try this. You can also pickup the center section without removing the table.”
Tom’s installation hangs the work table from two brackets installed just under the lip of the middle cooking section. The tubular brace is fastened near the bottom edge of the middle cooking section with a screw and wing nut.
Middle Cooking Section Handles/Work Table Modification
Brian Moriarty from Bothell, WA posted this elegant modification on The Virtual Weber Bulletin Board. He mounted Genie garage door handles on the middle cooking section, then used them to support two work tables.
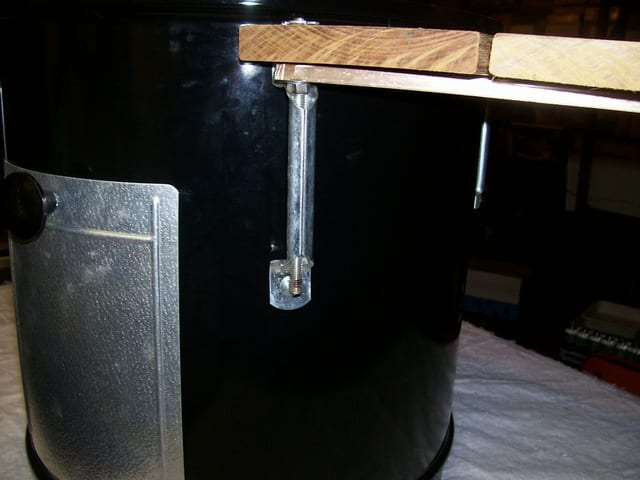
Brian writes, “The tables are made of ipe decking, fastened to pieces of U-shaped aluminum channel with wood screws. On the two corners of each table are 5/16” T-nuts. I screwed a threaded rod into each T-nut until it was flush with the table top, then tightened a stop nut underneath into the aluminum channel.
“The tables are not meant to be a permanent addition—they simply slide in and out of the handles—nor are they intended to hold anything more than a thermometer, tongs, gloves, or maybe a spray bottle. The Weber cover still fits over the handles. Some folks have suggested a fold-down leg, but I’ll leave that for someone else!”
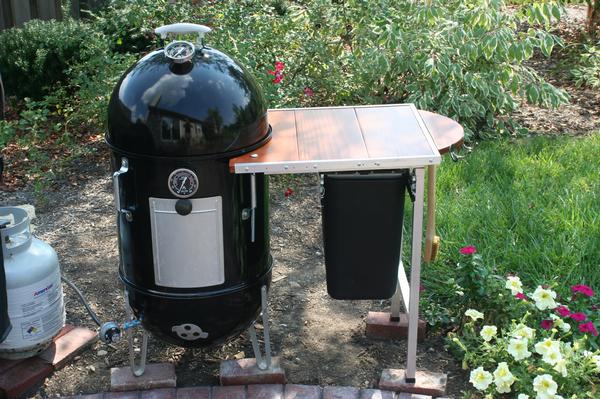
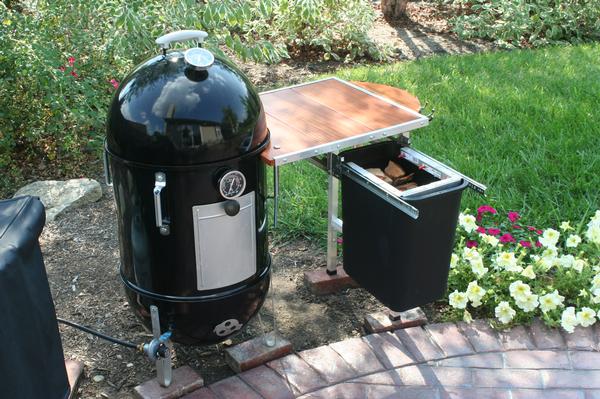
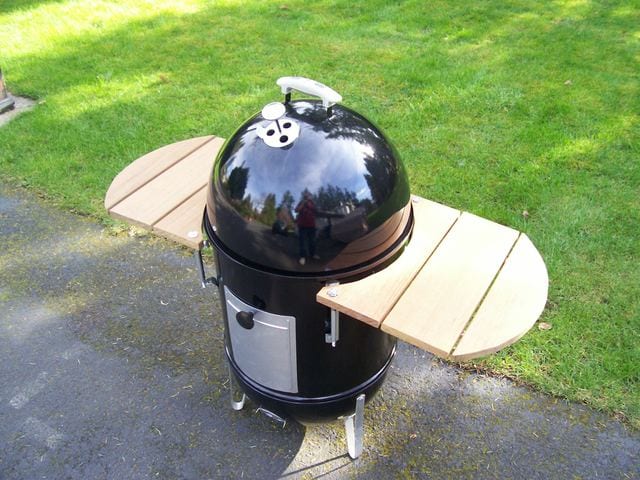
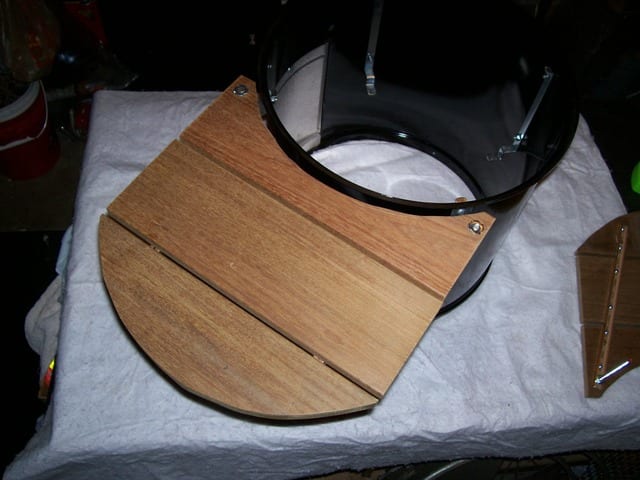
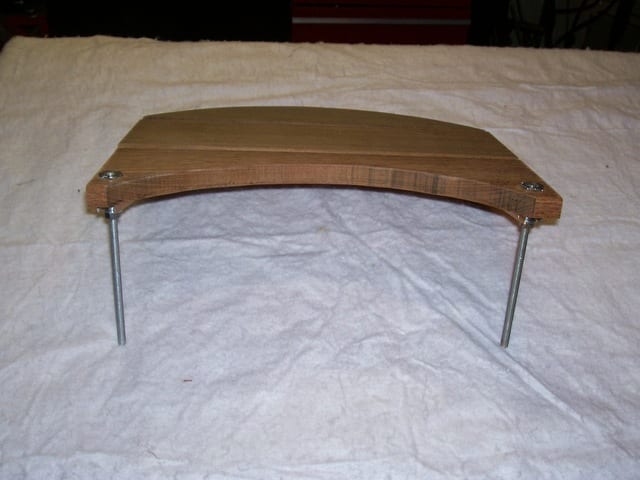
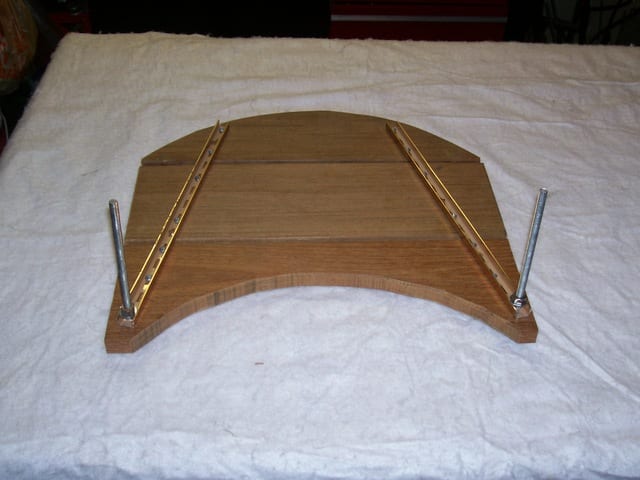
M.P. Lyons from Fishers, IN took inspiration from Brian Moriarty’s table design and came up with a version that includes a storage bin for smoke wood chunks. To prevent the table from tipping due to the weight of the drawer and its contents, Lyons mounted the table under the lip of the middle cooking section instead of flush with the lip. “I also beefed-up the size of the carriage bolts (that run through the garage door handles) to eliminate any wiggle,” said Lyons.
The table includes a curved extension at the end with hooks for barbecue tools.
WSM Metal Workstation
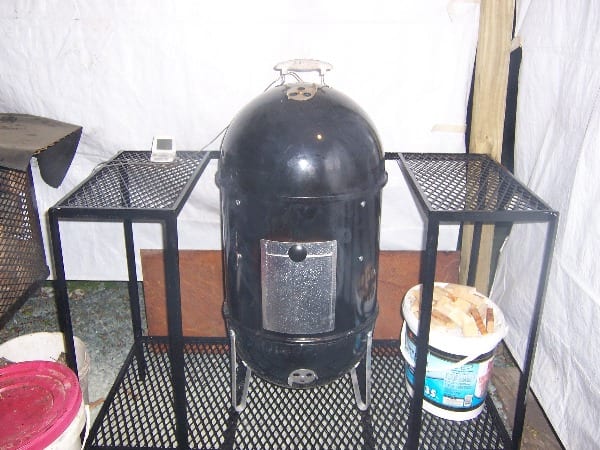
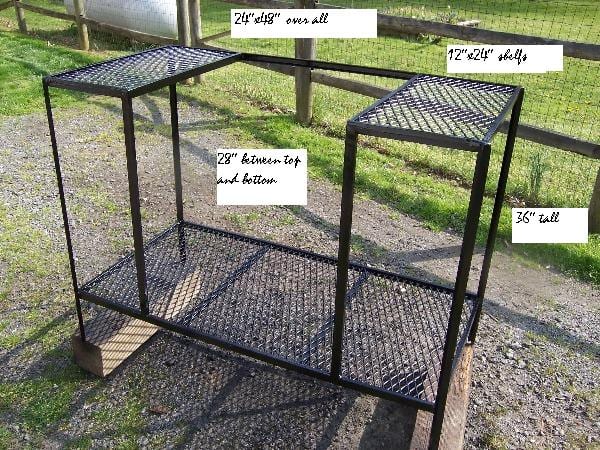
Bill Small from Virginia posted this metalworking project on The Virtual Weber Bulletin Board.
Bill writes, “It took me a couple of days to weld this, but I finally got it done. It’s 48″ wide, 36″ high, and 24″ deep. The side tables are 28″ above the base and measure 12″ x 24″.”
Photo of Lavalock folding side shelf: 2023 by Lavalock
Photos of Weber 1800 Work Table installation: 2012 by Tom Point.
Photos of garage door handle/side table project: 2007 by Brian Moriarty
Photos of side table with storage drawer: 2008 by M.P. Lyons
Photos of WSM metal workstation project: 2007 by Bill Small


