Summary
- Buy the rib section of a whole, bone-in pork loin for best flavor.
- Have your butcher “crack the chine bone” between the ribs or saw off part of the backbone for easy slicing after cooking.
- Use the orange juice marinade for great flavor.
- Leave the bones intact during cooking for better moisture retention and flavor.
- Cook to 145-150° internal temp, then reverse sear in a 500°F oven for 5-8 minutes.
- Cover loosely with foil and let rest 20 minutes before carving.
- If meat is red near the bones, cut off the bones and roast for another 5-10 minutes in the oven.
- For leftovers, cut into rib chops, apply your favorite rub to both sides, and grill for fabulous flavor.
A whole, bone-in pork loin weighs 14-17 pounds and consists of the loin back (baby back) ribs, the loin muscle running the entire length of the backbone, and the tenderloin. This cut is too large to cook whole in the 18.5″ Weber Smokey Mountain Cooker, but you can cut it in half or you can buy just the best part of it—the rib section—as I did here and cook it “low and slow” with great success.
Here are some photos I took on May 26, 2002 when I smoked a pork loin rib roast on the WSM using two different marinades.
Prep The Loin
I told my butcher I wanted the entire rib section of a whole bone-in pork loin for a special occasion. Ask your butcher to either “crack the chine bone” between each rib or saw off part of the backbone (chine bone and backbone are the same thing). This makes it easier to cut the loin into portions after cooking.
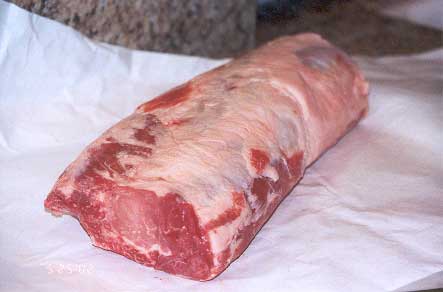
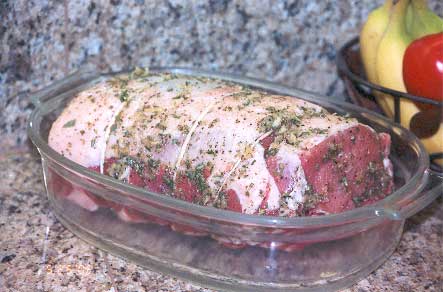
The result was the 7.53 pound bone-in roast you see here. It includes both the blade chops and the rib chops. This photo shows the meat side of the loin.
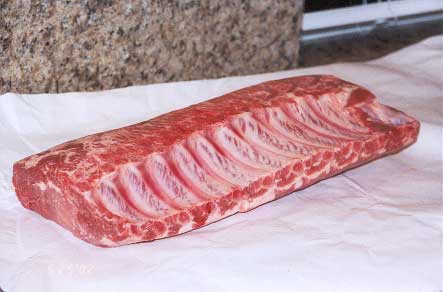
This photo shows the bone side of the loin (those are the baby back ribs you’ve cooked on many occasions).
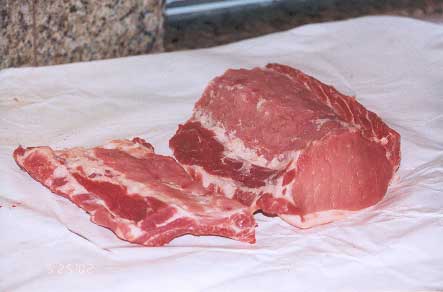
I wanted to try using two different marinades, so I cut the loin in half. Some recipes suggest that you cut the meat from the bone, marinate, then tie the meat and bone back together. Since I now had two pieces, I decided to try this method with one of them.
This photo shows how I cut the meat from the bone. I starting at the end of the bones and made a series of small cuts close to the curved bones, cutting down toward the backbone until the meat and bone were separated. A sharp boning knife helps for this task.
Marinate The Loins
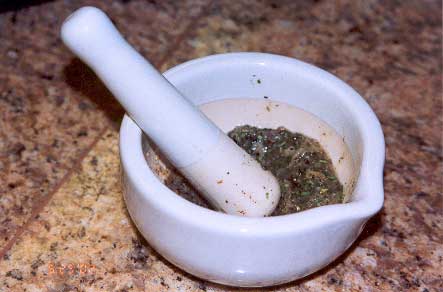
I chose a garlic and herb paste from The Complete Meat Cookbook for the piece of loin that I cut off the bone.
Garlic & Herb Paste
- 6 cloves garlic
- 1-1/2 Tablespoons kosher salt
- 1 Tablespoon chopped fresh sage
- 1 Tablespoon chopped fresh rosemary
- 1 teaspoon freshly ground black pepper
- 1 Tablespoon olive oil
Mash the garlic and salt together in a mortar and pestle. Add remaining ingredients and combine to form a paste. Makes enough paste for a 3-4 pound pork loin roast. Two teaspoons dried sage or rosemary may be substituted for 1 TBSP fresh.
I rubbed this mixture all over the meat and bones, then tied them back together in three locations using kitchen twine. This loin marinated overnight in the refrigerator.
For the other half of the loin, I used a variation on an orange juice marinade posted by Kevin Taylor, aka “Stogie”, on The Virtual Weber Bulletin Board. Kevin’s original recipe called for stuffing the pork loin with 10 garlic cloves, then marinating overnight in the liquid ingredients. I skipped the stuffing and added 2 crushed garlic cloves directly to the marinade.
Orange Juice Marinade
- 2 cloves garlic
- 2 Tablespoons Tiger Sauce (Try Me brand)
- 2 Tablespoons Worcestershire sauce
- 2 Tablespoons A-1 brand steak sauce
- 2-1/2 Tablespoons yellow mustard
- 3/4 cup orange juice
Crush the garlic cloves with the bottom of a heavy drinking glass or pan. Combine all ingredients and mix thoroughly. Makes enough marinade for a 3-4 pound pork loin roast. Leftover marinade can be boiled and used as a mop.
Tiger Sauce is a hot sauce containing red peppers, vinegar, sugar, and other spices and flavorings. It is found in most supermarkets.
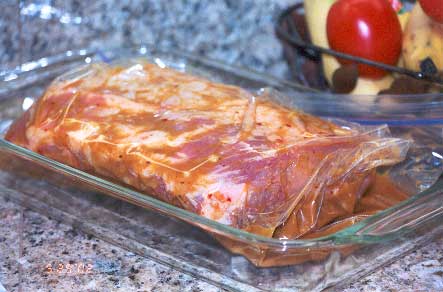
I put the pork loin into a 2-gallon Ziploc bag and poured in the marinade. After making sure the meat was well coated, I pressed the air out of the bag and sealed it. This loin marinated overnight in the refrigerator, just like the garlic and herb paste version.
High-Heat Or Low-Heat Cooking?
Many cookbooks suggest that you roast a pork loin in the oven at 450°F for 15 minutes to develop a flavorful crust on the outside, then reduce the heat to 300°F and cook to an internal temp of 145-150°F. Remove the roast from the oven, cover loosely with foil, and let rest 20 minutes before carving. Residual heat in the meat will bring the final internal temp up to about 160°F.
A smaller number of cookbooks—for example, Shirley O. Corriher’s CookWise and Alton Brown’s I’m Just Here For The Food—suggest a low-heat approach. Sear the meat in a hot pan on the stovetop, then roast in the oven at 200-250°F until the meat reaches 140°F internal temp. Remove the meat from the oven and turn up the heat to 500°F. Put the meat back in the oven for a final surface browning, maybe 5-8 minutes. Remove the roast from the heat, cover with foil, and let rest 20 minutes before carving.
Advocates of the low-heat approach say that roasts cooked by this method will have a larger cross-section of meat cooked to your target internal temp than roasts cooked using the high-heat method. There are some good illustrations and scientific explanations of this in Alton Brown’s book.
I decided to try the low-heat approach without the initial stovetop sear. I’d cook the meat low & slow, which is consistent with the way most meat is cooked in the Weber Bullet, then sear the meat in a 500°F oven at the end of cooking. This is commonly referred to as a reverse sear method.
Fire-Up The Cooker
On a recent trip to Southern California, I picked up several bags of Stater Bros. Premium Hardwood Briquettes, a grocery store brand of charcoal. I’d heard good things about it and wanted to give it a try, so Kingsford got the day off during this cooking session.
At about 3:00pm, I lit a full Weber chimney starter of briquettes and got them good and hot. As the briquettes lit, they had the unmistakable smell of mesquite. The mysterious “premium hardwood” was revealed.
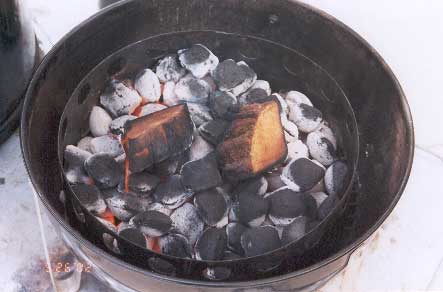
At 3:30pm I spread the hot coals on the charcoal grate and added another 3/4 full chimney of unlit briquettes on top. At 4:00pm I dropped two big chunks of dry apple wood on the coals and assembled the cooker.
I put the foil-wrapped water pan in place, but left it dry, and put only the top cooking grate in position.
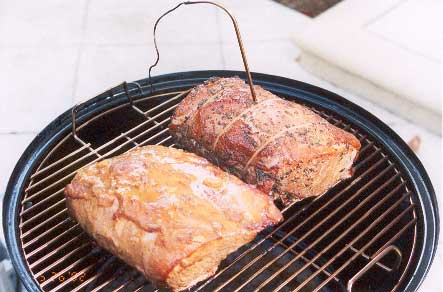
At 4:05pm, the two pieces of loin went straight from the refrigerator, bone-side down, onto the cooking grate. I stuck a probe thermometer into the middle of the garlic and herb loin and put the lid on the cooker.
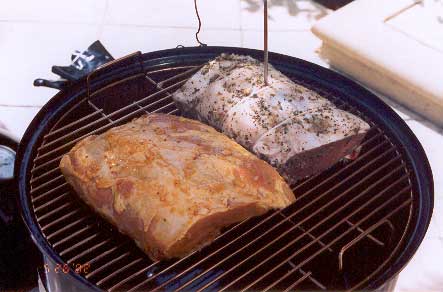
In this photo, the orange juice loin on the left looks bigger than the garlic and herb loin on the right, but it actually weighed less. The difference in appearance is caused by the tying. The tied garlic loin has a more compact appearance than the relaxed, untied orange juice loin.
I left the top vent wide open throughout the cooking session and initially set all three bottom vents to 50% open.
Cooking Plan, Times And Temps
My plan was to maintain a temperature of 225-250°F (measured through the lid) and cook the roasts to an internal temp of 145°F. I would then transfer the roasts to a 500°F oven for 5-8 minutes until browned, then let rest 20 minutes loosely covered with foil before carving.
The cooker took about 50 minutes to get down to 250°F, which indicates I could have started with a little less fuel and should have closed the vents a bit more at the start. But I’m not going to worry too much about 25-30° and you shouldn’t either.
Here’s how the temps and vent settings went during the cooking session. Sorry…I missed a couple of temp readings.
| Time | Lid Temp | Meat Temp | Vent 1 % | Vent 2 % | Vent 3 % |
| 4:05 pm | – | – | 50 | 50 | 50 |
| 4:15 pm | 285 | 44 | 50 | 50 | 50 |
| 4:30 pm (b) | 275 | 74 | 50 | 50 | 0 |
| 4:45 pm | 263 | 93 | 50 | 50 | 0 |
| 5:00 pm | 253 | 109 | 50 | 50 | 0 |
| 5:15 pm (b) | – | 125 | 50 | 50 | 0 |
| 5:30 pm | 250 | 132 | 50 | 50 | 0 |
| 5:45 pm | 250 | 143 | 50 | 50 | 0 |
(b) basted the orange juice marinated loin
Note that the vent percentages represent the way I set the vents at the time indicated.
I did not turn the meat during cooking—I just left them bone-side down. I did not baste the garlic and herb loin at all, but I did baste the orange juice loin with some leftover marinade that I boiled on the stovetop before use.
By 5:45pm the probe thermometer was reading 143°F, close enough to my 145°F target. This shows how the loins looked at this point—remember, orange juice loin on the left, garlic and herb loin on the right.
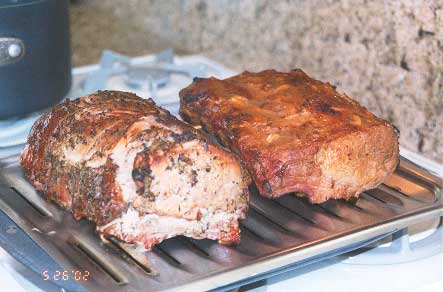
I transferred the loins to a preheated 500°F oven and browned them for 6 minutes. This photo shows how they looked after browning. The loins have traded places in this photo—garlic and herb loin is now on the left and orange juice loin is on the right. Notice how the orange juice loin really got much more attractive looking after browning.
Finally, I covered both loins with foil and allowed a 20 minute rest before carving.
And The Winner Is…
Both loins were pretty tasty, but I have to say that Stogie’s orange juice marinated loin definitely was the winner! It had better flavor, more moisture, and seemed more tender than the garlic and herb paste loin. I’m guessing that there may have been enough salt in the marinade to actually brine the meat, because it was extremely juicy compared to the garlic and herb loin.
The garlic and herb loin tasted a bit like prime rib, which was no surprise because the herbs are similar to those used on prime rib. It even looked a little bit like prime rib. There was a slight smoke ring in the garlic and herb loin, but none in the orange juice loin.
This photo shows the garlic and herb loin after carving. The butcher’s twine has been cut and the bones removed in this photo.
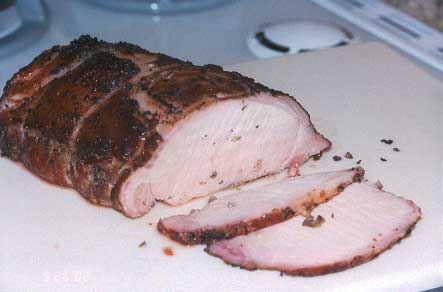
Since it is now boneless, it can be sliced as thin or thick as you like, which is kind of nice. Notice that the meat is snow white all the way through—no pink whatsoever. The bones were thoroughly cooked, too.
This photo shows the orange juice loin. The bones are still attached on the left side of the roast.
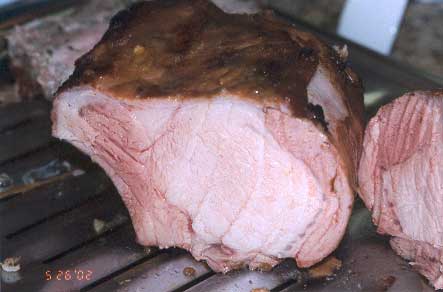
The meat is slightly pink throughout, which is what I wanted, but the meat near the bones is a little red. This sometimes happens when the bones are left intact—it doesn’t always happen, but it’s not uncommon. At this point, you’re supposed to cut the meat from the bones and cook the bones an additional 5-10 minutes before gnawing on them. For the purposes of my taste test, I just didn’t eat the portion near the bone. For the remainder of this roast, I had other plans that are detailed below.
To serve a bone-in roast, cut between the bones into thick pork chops, just like you’d cut ribs into individual pieces.
So What About That Bone Removal and Tying Method?
I wasn’t too impressed by this method of removing the bones and then tying them back on. I admit that the method did have two advantages:
- Before cooking, it allowed me to apply marinade between the meat and the bones.
- After cooking, I could quickly cut the twine, remove the bones, and slice the meat as thick or as thin as I wanted.
However, the reason you cook meat with the bones intact is to achieve better flavor and moisture retention. According to an article in the May/June 2002 issue of Cook’s Illustrated magazine, there are four reasons to leave the bones intact on a pork loin:
- Bones are a poor conductor of heat. The meat near the bones doesn’t cook as quickly as the rest of the meat (as evidenced in the photo above), contributing to overall juicier meat.
- Bones prevent a portion of the meat from being exposed to the air. This means that less of those precious juices evaporate during cooking.
- Bones have fat deposits around them. As the fat melts during cooking, it lends moisture and a perception of juiciness to the meat.
- In a blind tasting, all taste testers said that bone-in loin was much juicier and had more pork flavor than boneless loin.
I don’t think I got any of these benefits on the deboned and tied loin. Next time I cook a pork loin, I’ll just leave the bones alone.
Mighty Fine Leftovers

I read about this approach to pork loin leftovers in a post on The BBQ Forum that was attributed to Ray Lampe aka “Dr. BBQ”.
Cut a nice, thick slice of loin, apply your favorite rub to both sides, then grill each side over medium-high heat for a few minutes on your charcoal or gas grill.
You can see the result here with a slice of the orange juice loin. It’s fabulous. In fact, you’ll probably think it tastes better as leftovers than it did the first time you ate it. It’s smoky, it’s well-seasoned, and it’s got those sexy grill marks. It also takes care of any red meat near the bones.
It’s my understanding that Dr. BBQ serves this (without the bone) on a bun with grilled onions!


