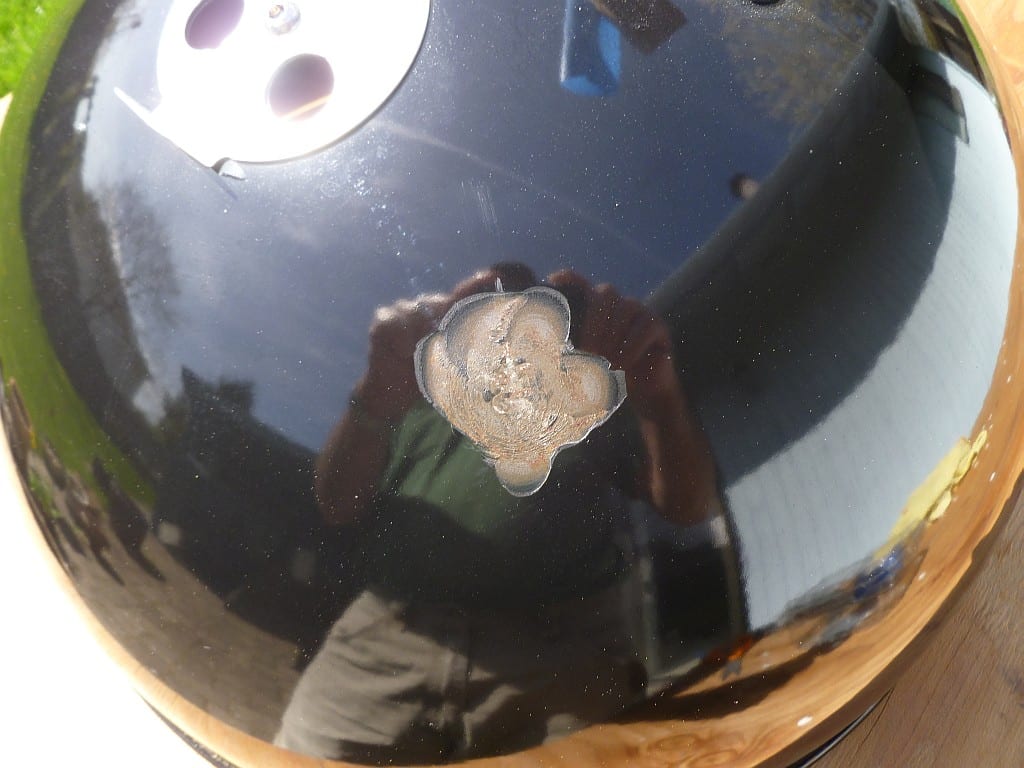
Joe F from Vancouver, WA bought a used Weber Smokey Mountain Cooker with a bad chip in the lid.
“Looked like a lawnmower threw a stone at it and made a direct hit,” says Joe. “I read everything I could find on porcelain repair and nothing really sounded very promising. I finally saw where one guy used JB Weld HighHeat for filler, so I thought I’d give that a go. It’s supposed to be good to 500°F and that’s well above where I will operate the WSM.”
Here’s how Joe went about making the repair.
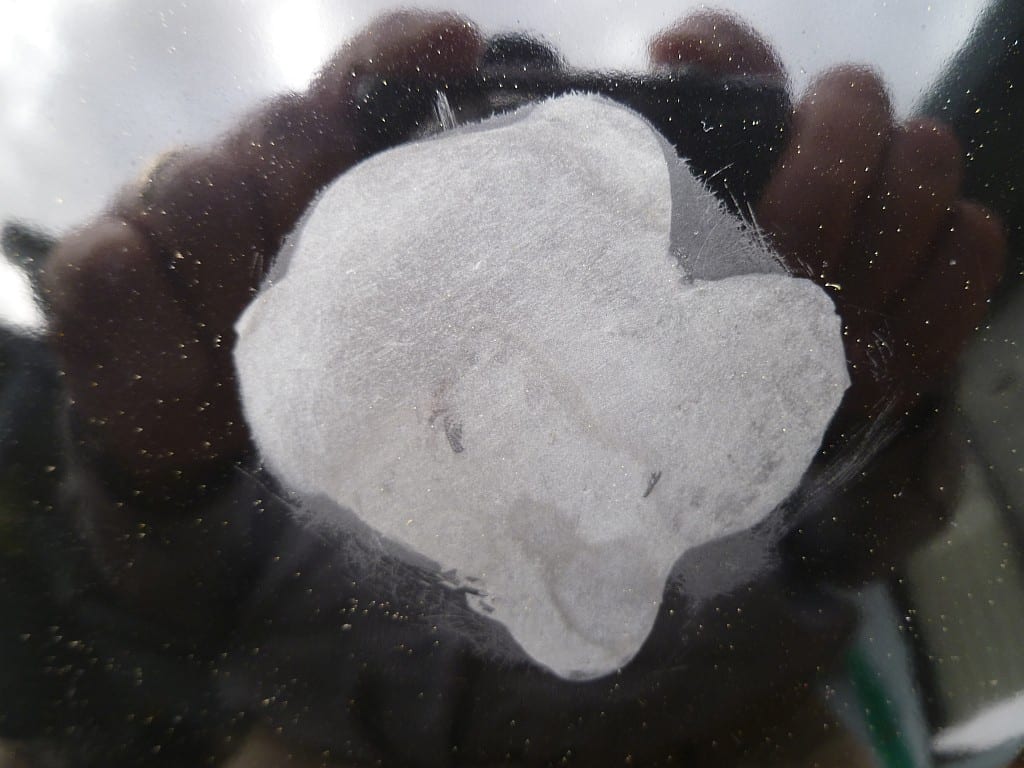
Using a hammer and a piece of 1x (3/4″ wood), Joe carefully hammered out the dent in the lid. The damaged area of porcelain measured about 2″ in diameter.
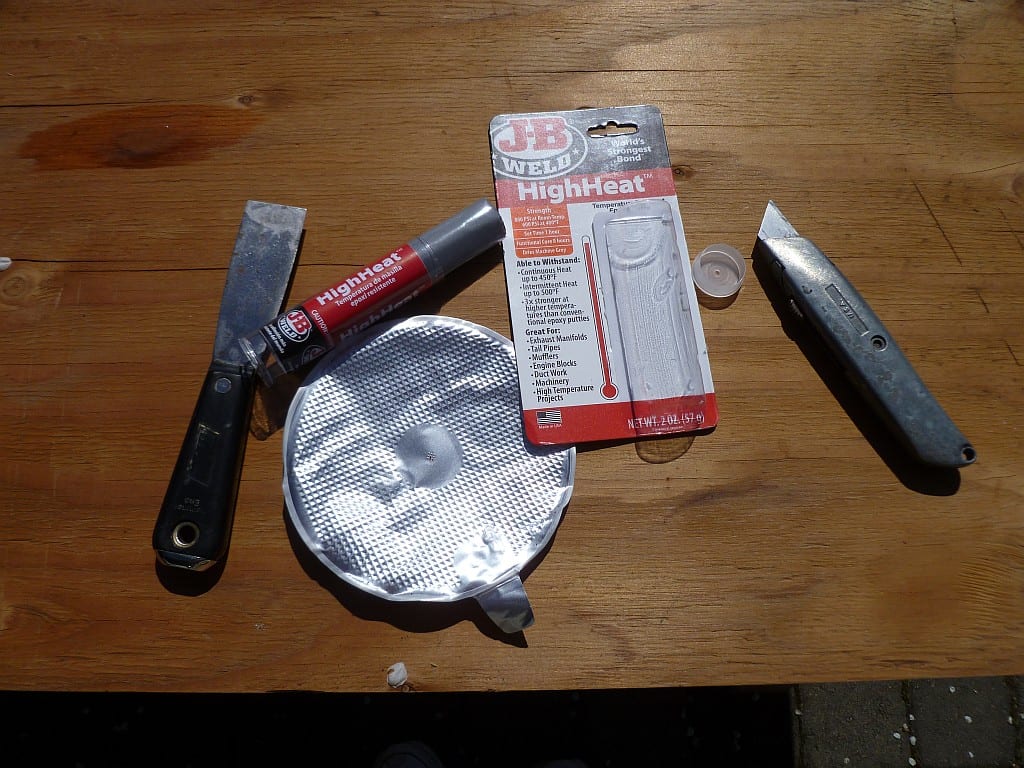
The repair material consisted of a tube of JB Weld HighHeat epoxy putty as well as a few tools and sandpaper. Joe mixed the two-part epoxy on the round foil disc shown in the photo. He filled the damaged area with the mix, being careful to not overdo it. “JB Weld is hard…do not apply it heavily,” says Joe.
Once the epoxy had cured, Joe wet-sanded the area with 220 grit and 320 grit sandpaper. Blue painter’s tape was used to protect the surrounding area during sanding. Joe says it took three applications of JB Weld followed by wet sanding to achieve the results shown here.
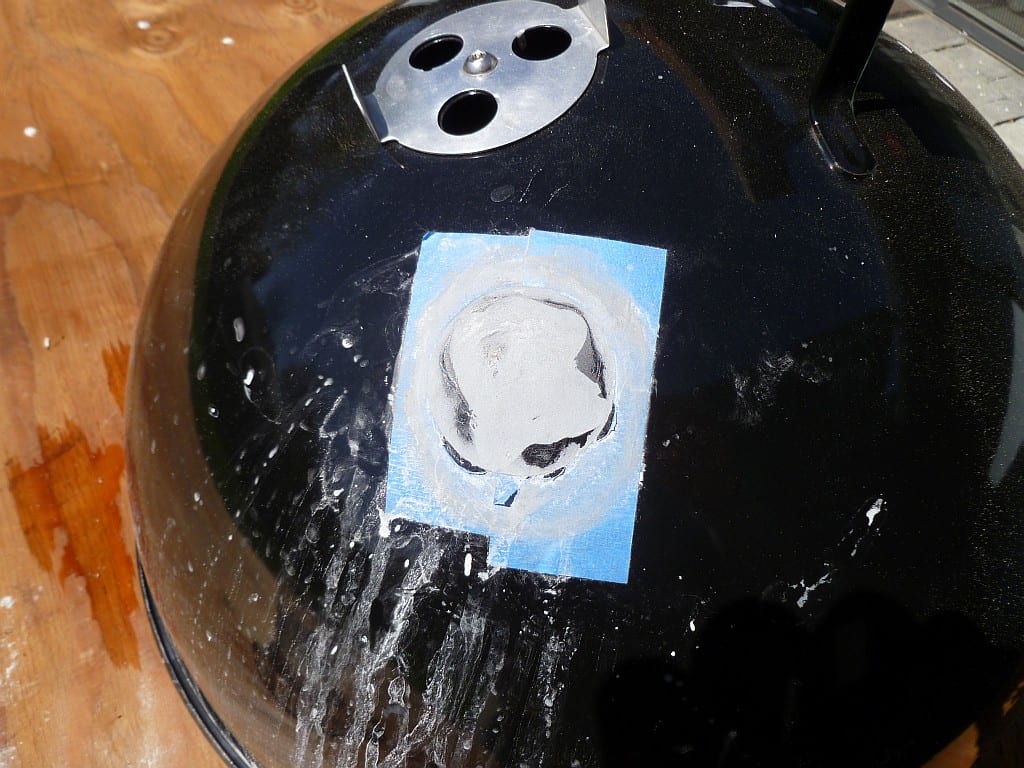
As a final step, Joe removed any excess JB Weld around the perimeter of the repair using 0000 steel wool. The repair was now ready for painting.
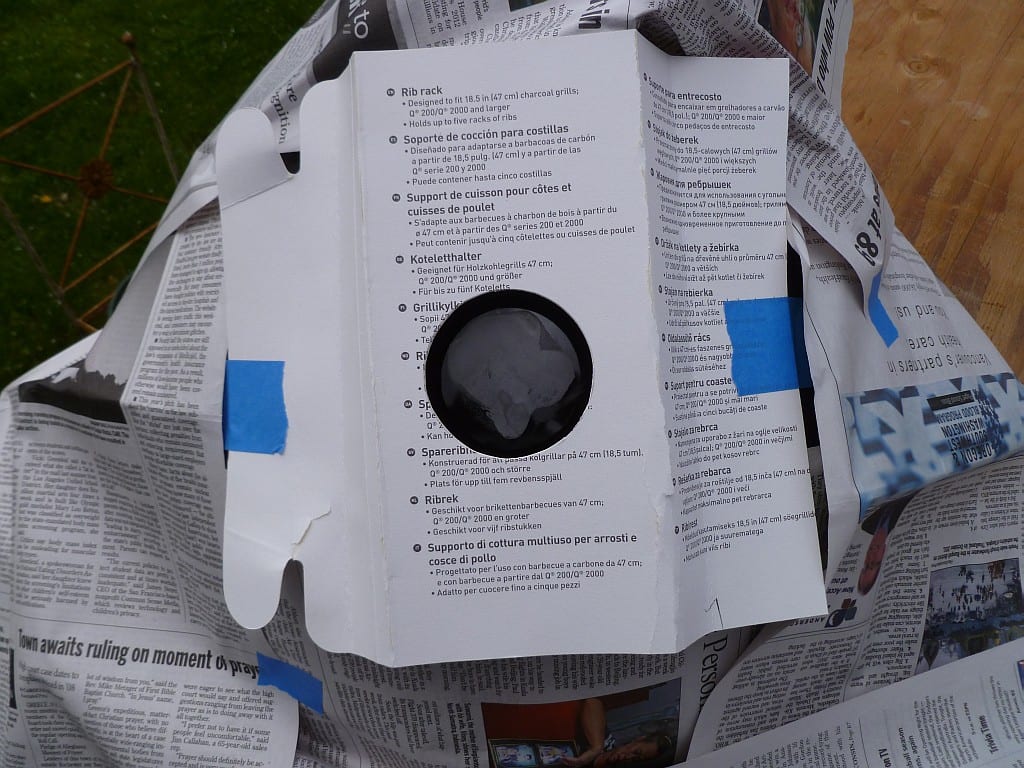
Joe fashioned a paint shield and positioned it about 1/2″ above the surface so he could feather the spray paint. “This worked well, and better than spraying freehand and very likely enlarging the repair area,” says Joe. He used Rustoleum Engine Enamel high gloss black spray paint.
The final result in shown below. “It’s much better than looking at that battle damage,” says Joe, “not perfect, but not bad.”