In This Topic
- Lid Thermometer Installations
- Middle Cooking Section Thermometer Installations
- Access Door Thermometer Installations
- Double Thermometer Installations
- More Thermometer & Temperature Links On TVWB
Here are some photos sent in by TVWB readers showing how they’ve installed thermometers in their Weber Smokey Mountain Cookers.
Lid Thermometer Installations
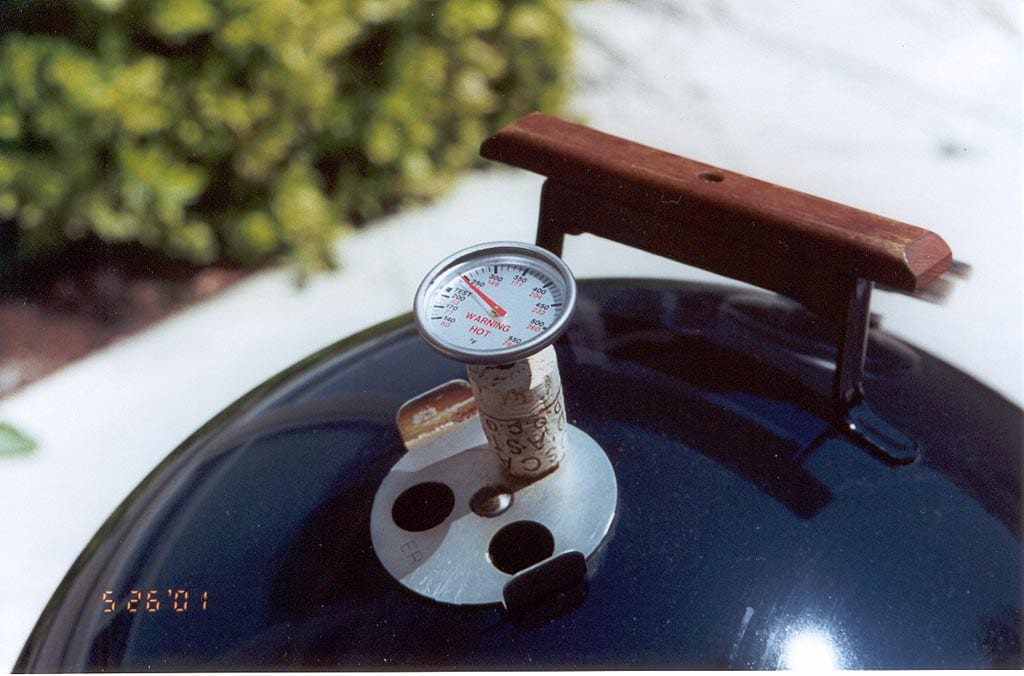
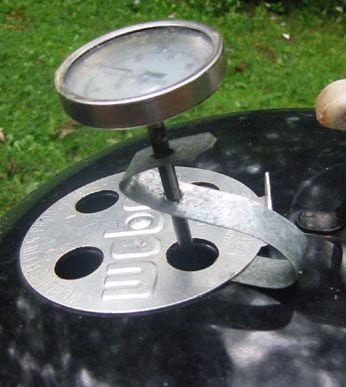
Thermometer Through Cork
A Weber #9815 Replacement Thermometer inserted through a wine bottle cork makes for a simple thermometer installation. Just whittle the end of the cork to fit the hole. Does the cork block one-third of the exhaust vent capacity? Yes. Does that seem to affect cooker performance. No.
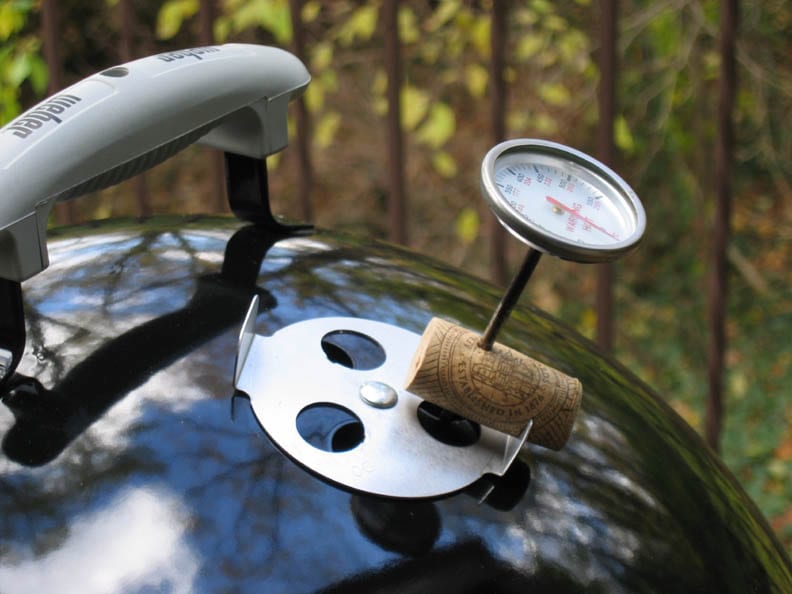
Dave Henry offers an alternative through-the-cork method that doesn’t block the vent much at all.
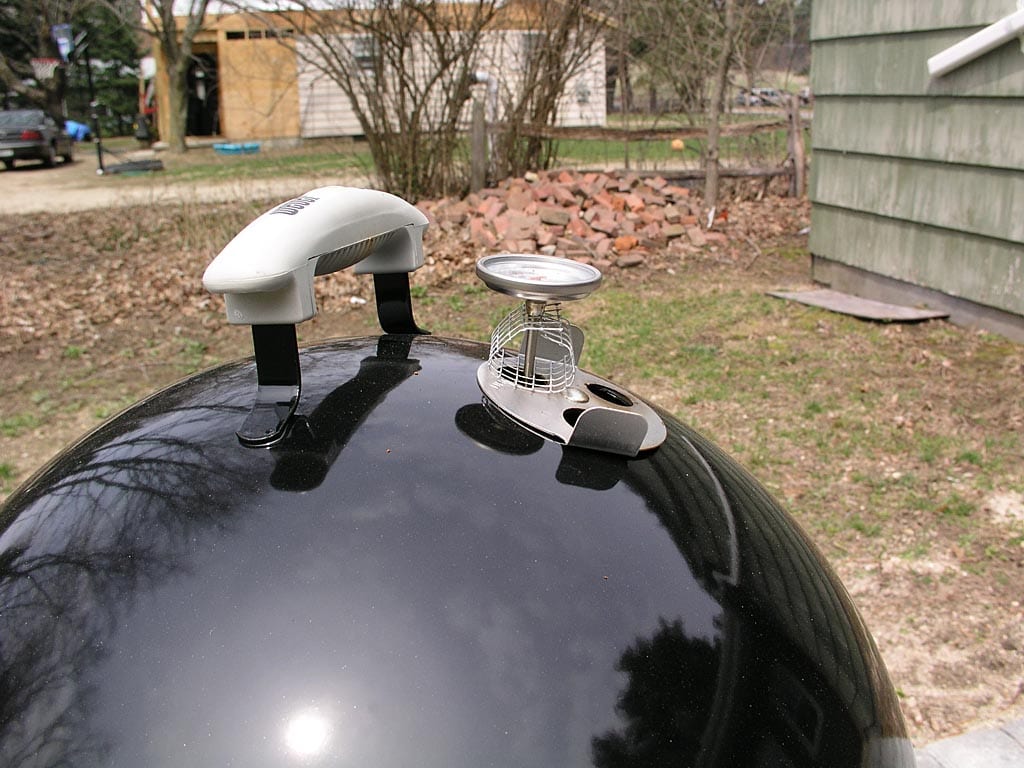
Lid Vent Clip
Back in 1999, I took the clip from a Taylor candy thermometer, bent it out of shape, enlarged the holes in the clip with a drill, and used it to hold a Trend bi-metal thermometer in the lid vent.
Dean Torges did something similar by drilling two holes in a thin strip of metal and bending it into an S-shaped clip.
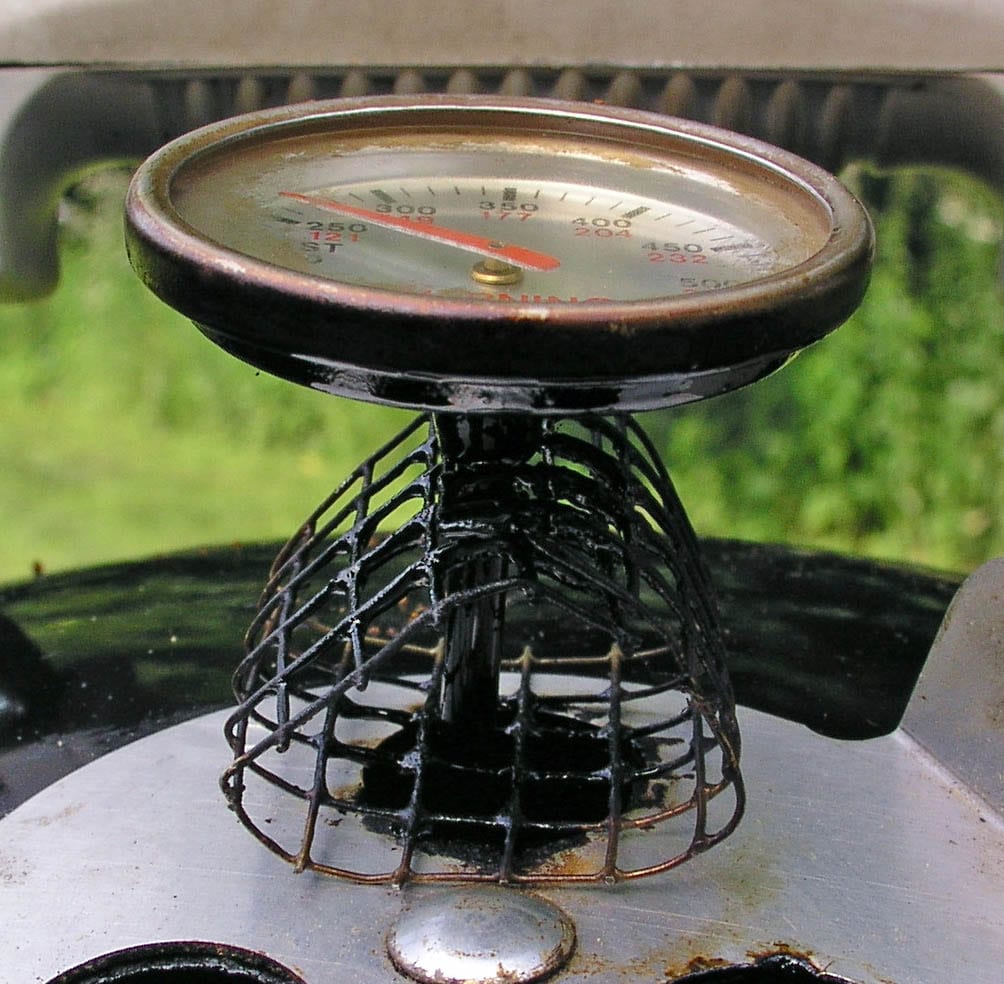
Metal Screen Holder
Jon Weinberg fashioned a tube using metal screen material to hold a Weber #9815 Replacement Thermometer in the lid vent. “I’ve found this method to be excellent and does not involve any drilling or other mod to the cooker. The trick is to overlap the ends of the screen at least one row so the thermometer goes through the overlapped section on top and then a hole on the bottom as it enters the vent hole. It also helps to bend it into a mild triangle so it is less inclined to roll over.”
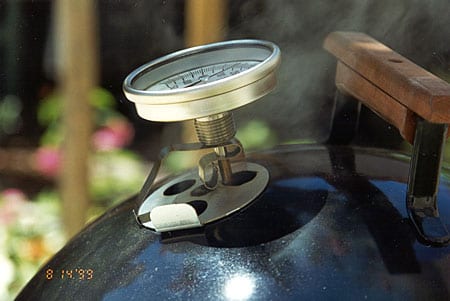
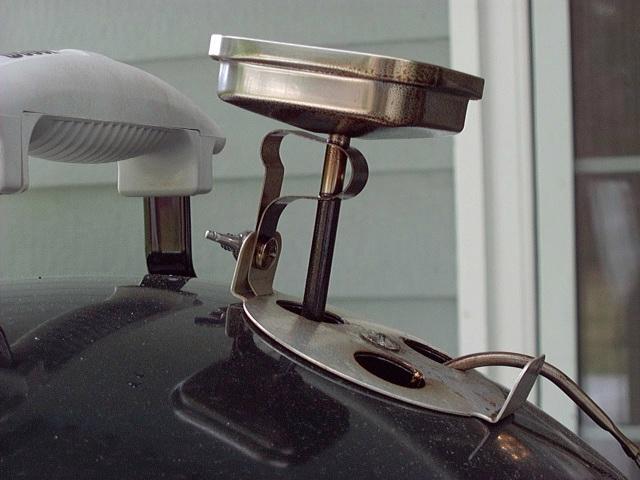
Candy Thermometer Attached To Lid Vent
Don Hilliard attached a candy thermometer to the lid vent. “I only had to drill one hole in the tab and a hole in the thermometer clip. I used a stainless steel wing nut and machine screw (10-24 x 1/2″) to attach the clip. I elongated the hole slightly in the clip so that I can squeeze the clip to get the thermometer in and out. The beauty is that the assembly is easily removed, there’s only one small hole in the vent tab, and since it’s aluminum it won’t rust.”
Handle As Thermometer Holder
Everett Jones drilled a hole through the lid handle to hold a Weber #9815 Replacement Thermometer.
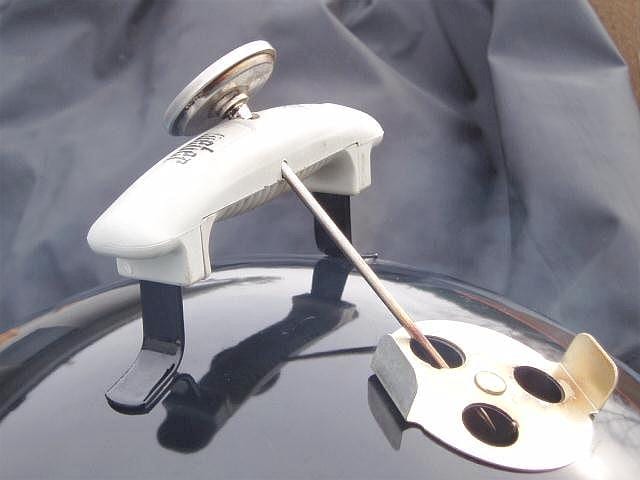
Everett writes, “I used my best eye-line-of-sight to establish a drilling angle. It would go through the already established screw hole of the handle and to the upper most vent hole. Using a 1/8″ bit, I drilled a test hole to verify my line-of-sight. If the angle was off, I just used the 1/8″ bit to correct it. After verification, I changed to a 5/32″ bit and drilled the hole for the thermometer.”
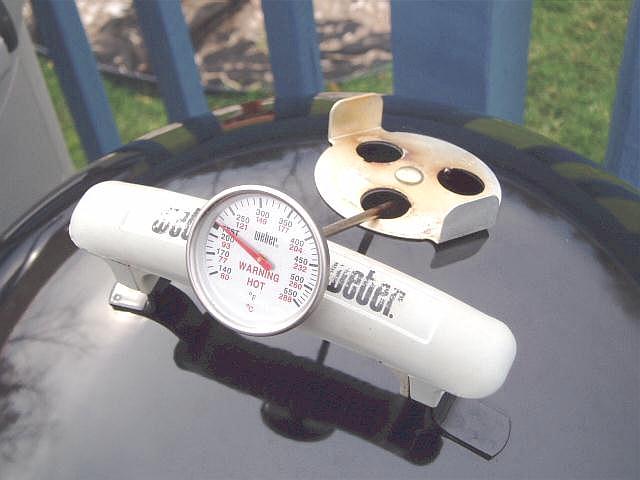
Weber Gas Grill Thermometer In Lid
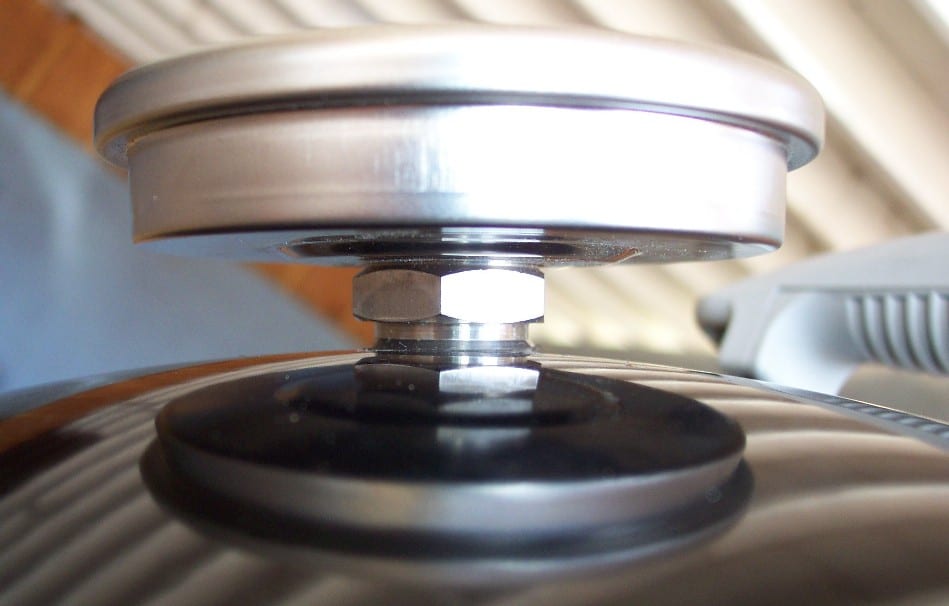
Dave Stamper installed a Weber #9815 Replacement Thermometer between the top vent and lid handle of his WSM. This is the standard thermometer used on classic Weber Genesis gas grills and is available online for about $14.
Dave put three layers of masking tape over the spot he intended to drill, then pressed a center punch into the tape to make an indentation. This kept the drill bit from wandering. Dave says, “You can make this hole just large enough for the Weber thermometer, but if you drill it a little bigger, it will also accommodate a Polder probe.”
Since the thermometer is just inserted through the hole and not fastened to the lid, it can be pulled from the lid and used as an instant-read thermometer to measure the internal temperature of meat. It has a range of 140-550°F.
Threaded Lid Installation
Scot Bogart of Evergreen, CO writes, “I just completed a threaded mounting of a 3″ Trend thermometer in my Bullet. I used a Milwaukee 3/4″ holesaw to cut a very clean hole with no chipping of the ceramic coating beyond the diameter of the hole. When I threaded the Trend in, it was almost like threads were cut for it by the holesaw. It went in perfectly by hand and fit quite tight by the last turn.
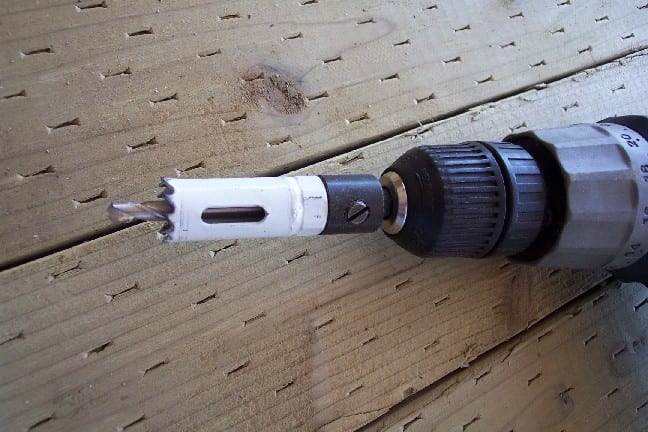
“As you can see by my photo, I made sure not to turn it in past the next-to-last thread as the unthreaded area near the hex head would just rattle loose. I’m smoking chickens with it now and there’s no leakage past the threads at all. A perfect fit! This whole process took all of 5 minutes, plus photo time. The holesaw and mandrel cost about $20 at Home Depot.”
Drilled Lid Vent Rivet
This thermometer installation is not for the faint of heart! I first learned of it from Ashley Z, and it was later perfected by Sean Flanagan. Both men had the nerve to drill a hole through the aluminum vent rivet to accommodate a Weber #9815 Replacement Thermometer.
Sean writes, “I drilled the rivet from the inside using a 5/32″ HSS (high speed steel) bit, resting the outside of the rivet on a piece of inner tube laying over a wood block. I figured the rubber would prevent the rivet from spinning, which seemed to work—no spinning at all. I slipped a little bit of drip irrigation tubing over the thermometer shaft to keep the dial away from the smoke.”
Middle Cooking Section Thermometer Installations
Middle Cooking Section Insert
Don Hilliard installed a tube through which a thermometer can be inserted into the middle cooking section. He removed one of the grill strap screws, passed a 1/4″ o.d. x 1″ aluminum tube though the hole, and fastened the tube inside and out with push-on e-clips.
Don inserts a Weber #9815 Replacement Thermometer (shown here) or a probe thermometer through the tube to measure cooker temperature just below the top cooking grate.
Middle Cooking Section Probe Thermometer Eyelet
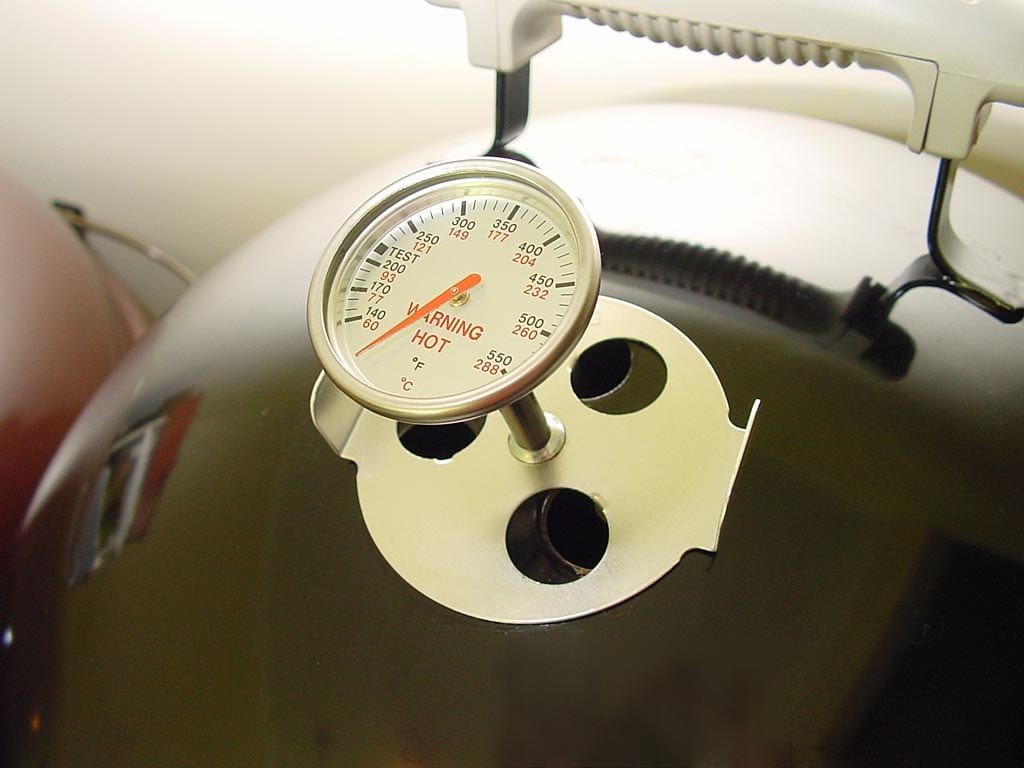
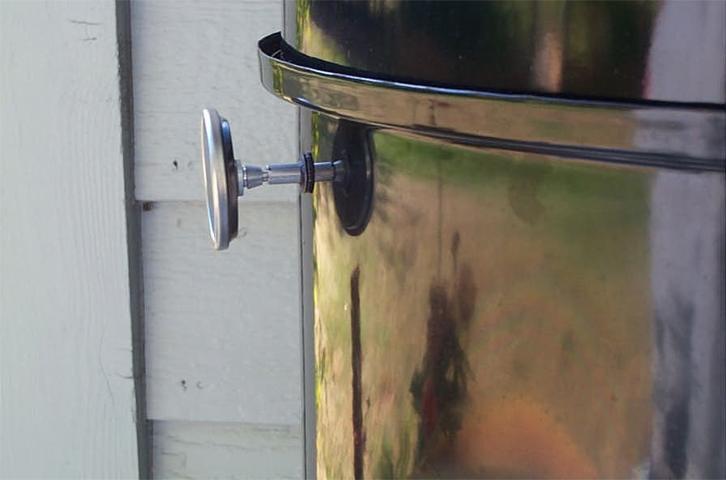
The good folks at The BBQ Guru make an eyelet kit that is a permanent replacement for one of the grill strap screws in the middle cooking section. It allows one or more probe thermometers to be passed through the opening into the middle cooking section.
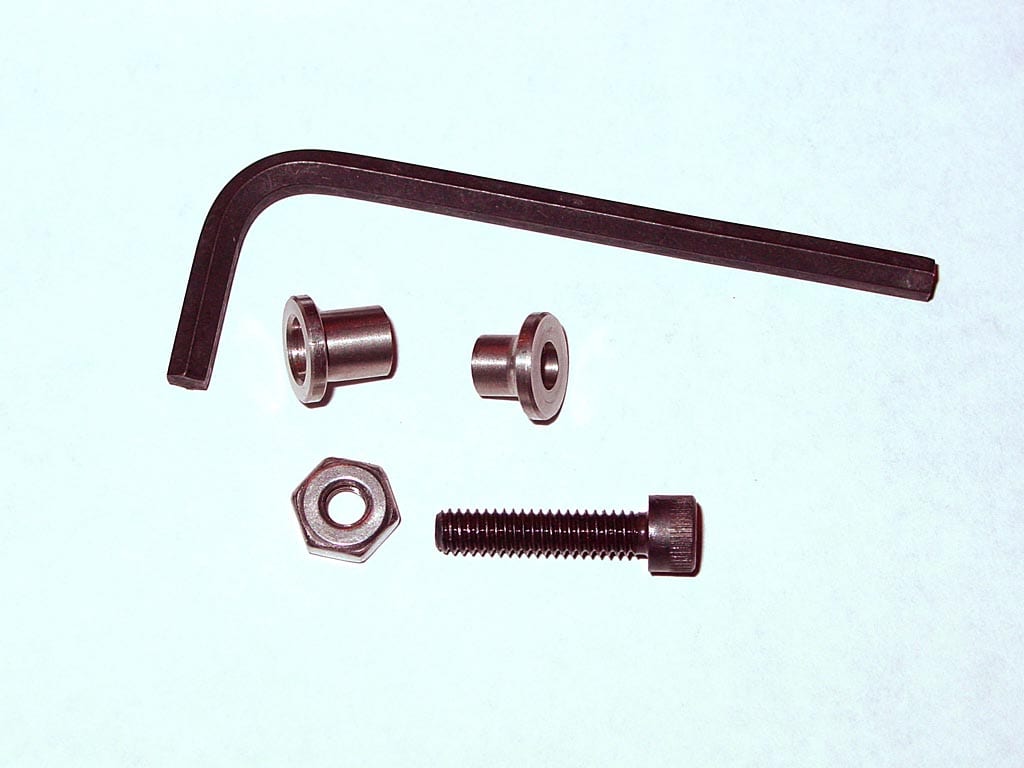
The kit consists of two eyelets (allowing for two eyelet installations), a hex head cap screw, an eyelet flaring tool, a hex nut, and an Allen wrench.
Installation is quite simple:
- Remove one of the grill strap screws and discard.
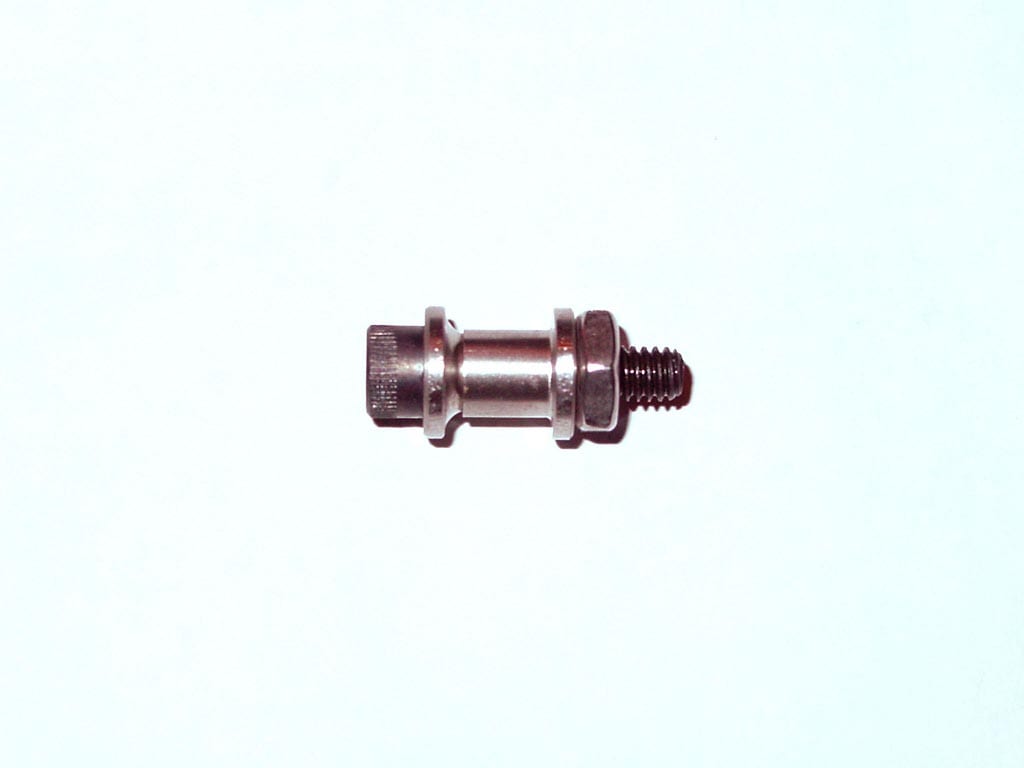
- Place the eyelet flaring tool on the hex head screw and insert it through the grill strap hole from the inside of the cooker.
- Place the eyelet over the hex head screw from the outside of the cooker and screw on the hex nut.
- While holding the hex nut with an adjustable wrench, tighten the screw using the supplied Allen wrench. Do not overtighten to avoid cracking the porcelain enamel finish.
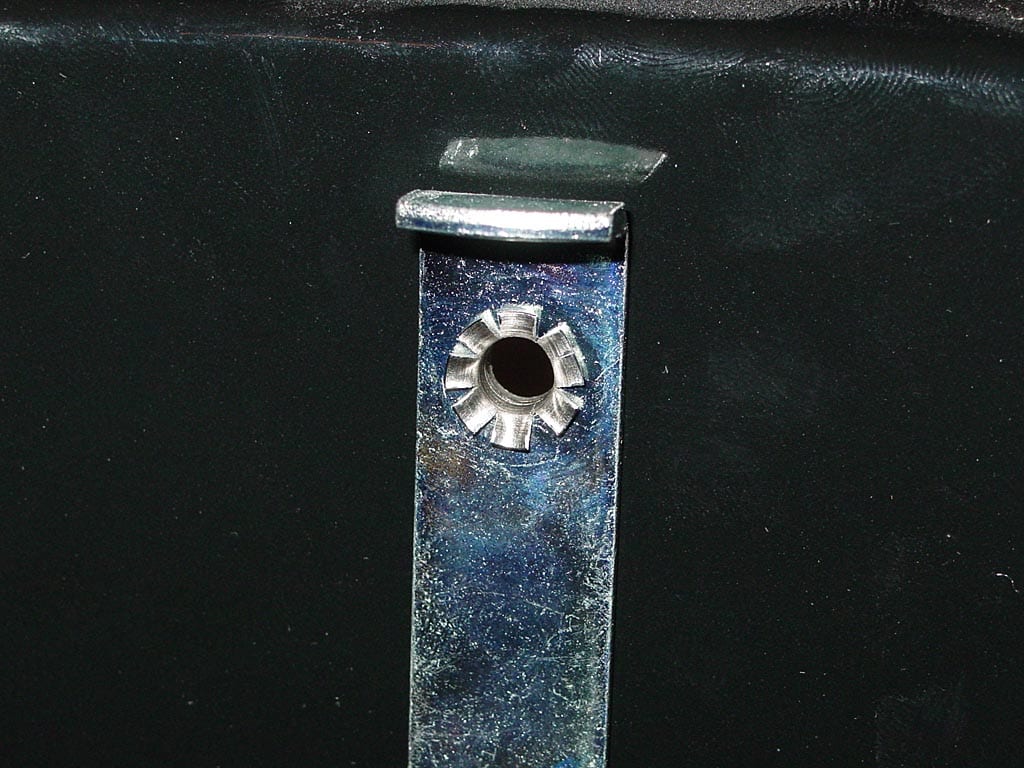
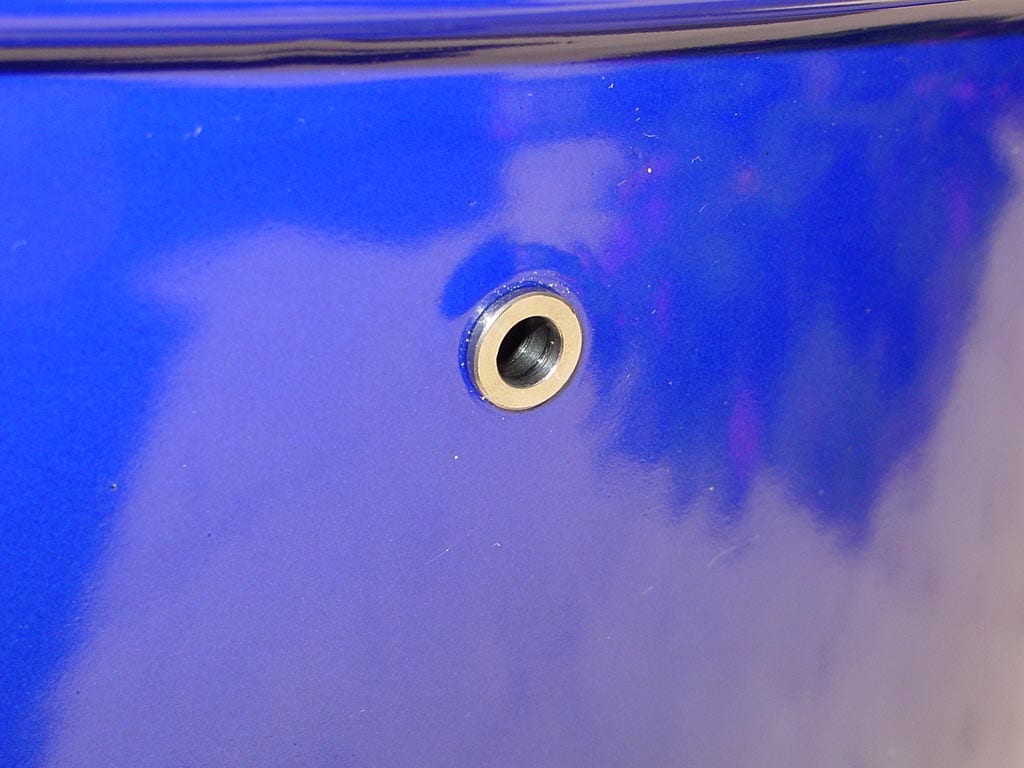
The flaring tool spreads the eyelet, making a strong mechanical connection that replaces the original screw and nut. You can see the neat appearance of the eyelet from outside the cooker in these photos. (And yes, that is a blue WSM.)
Middle Cooking Section Mounting
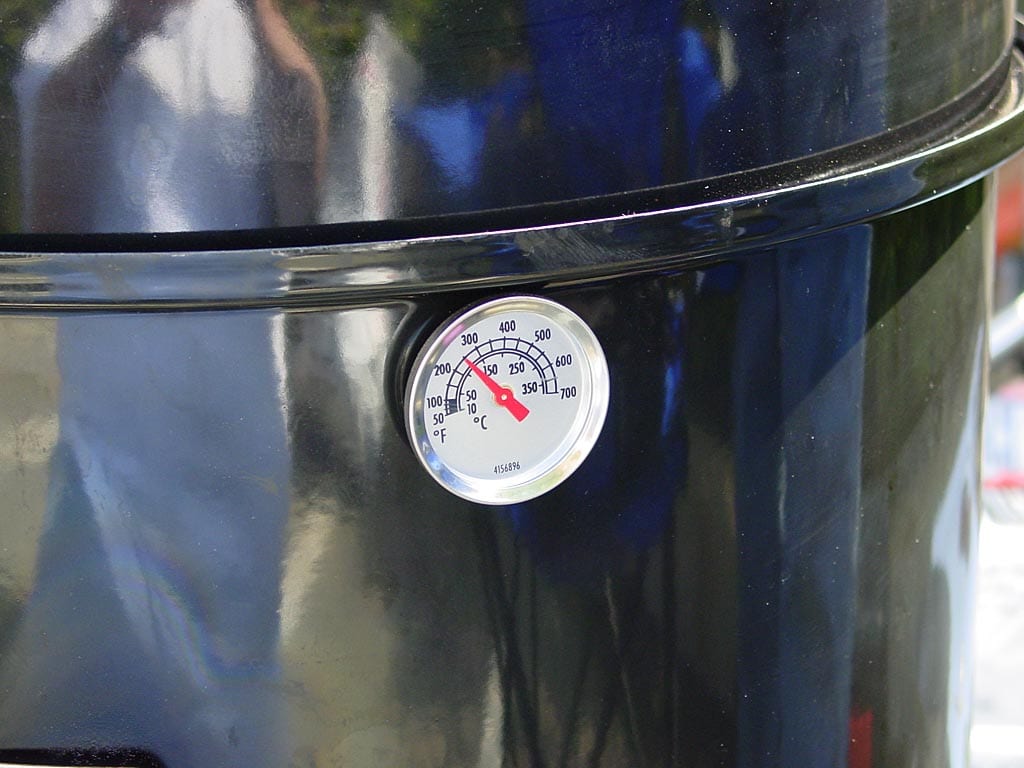
Elvin Giles bought an inexpensive 1/4″ threaded barbecue thermometer at The Home Depot and inserted it through one of the grill strap holes, fastening it with a nut.
Access Door Thermometer Installations
Access Door Mounting
In 2004, Jon Weinberg mounted a replacement grill thermometer in the access door, just above the bottom cooking grate. At the time, Jon said, “Much easier drilling (than through the middle cooking section) and easier to recover from if I screw up.”

In 2005, Jon provided this follow-up: “I’ve found this to be practically useless. It measures the temperature of the convective heat going up the sides of the cooker which is totally unrelated to the temperature on the grates. The only useful thing I’ve found is that it can tell you when your temperature is dropping and you might want to add more charcoal.”
Double Thermometer Installations
Lid & Middle Cooking Section
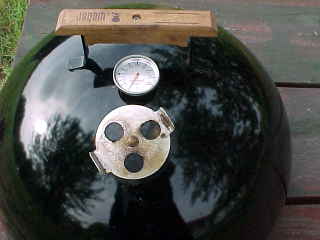
Here’s a double thermometer installation done by Gary Davis. Gary installed two 2-1/2″ Ashcroft thermometers in his WSM using a knockout punch. He installed one at the edge of the lid and the other in the middle cooking section, both about 1″ above the cooking grate.
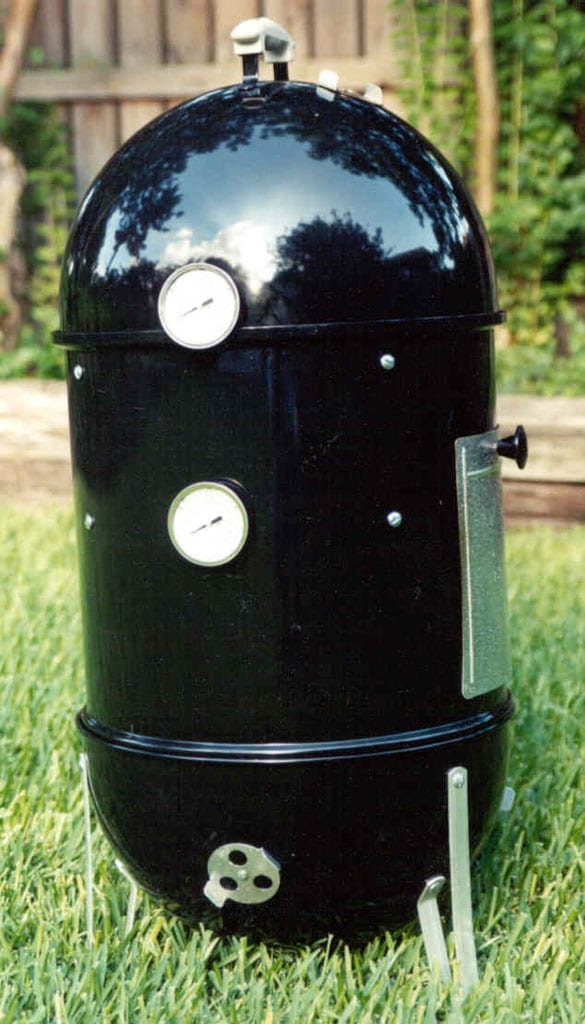
Gary writes, “Having two thermometers may be a bit excessive as they typically read within 5°F of each other during normal operation of the WSM.”
A closer inspection of Gary’s photo shows that the lid thermometer appears to extend below the bottom edge of the lid. A thermometer mounted in this location should be far enough above the edge of the lid so it won’t hit the ground when you set down the lid.
Lid & Middle Cooking Section With Probe Thermometer Holder
Ken Breit mounted two Trend thermometers in his WSM like Gary Davis did, but he didn’t stop there.
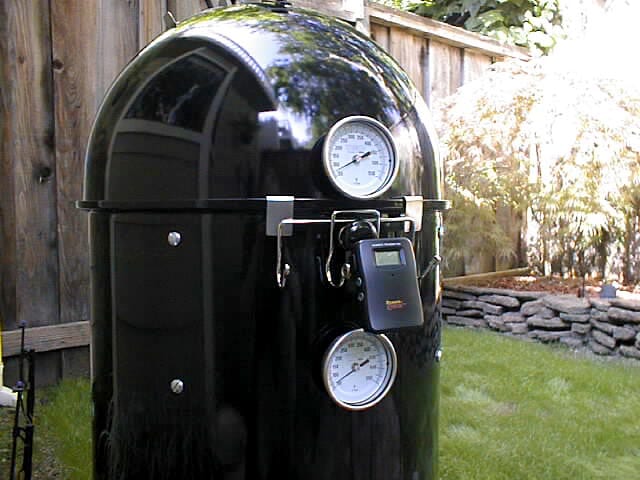
Ken also added ceramic handles to the middle cooking section and modified the Weber 7401 Tool Holder to act as a remote probe thermometer holder. A wooden block is fastened with screws between the two middle tool holders, then the Maverick wireless remote thermometer transmitter is attached to the block using Velcro. Two holders are still available on either side for hanging tongs.
More Thermometer & Temperature Links On TVWB
- Installing A Thermometer
- Cutting A Probe Thermometer Slot
- Measuring Temperature In The Weber Bullet
- Temperature Control Problems: Too Hot, Too Cool
- Cooking In The Wind, Rain & Cold
- Vent Damper Modifications
- WSM Temperature Tests
- Testing Thermometers For Accuracy: Ice Bath Test & Boiling Water Test
- Boiling Point Calculator
- WSM Modifications Forum on The Virtual Weber Bulletin Board
Thermometer through cork: 2005 by Dave Henry
Thermometer clipped to lid vent: 2003 by Dean Torges
Metal screen holder: 2004 by Jon Weinberg
Candy thermometer fastened to lid vent: 2001 by Don Hilliard
Handle as thermometer holder: 2006 by Everett Jones
Weber gas grill thermometer installation: 2001 by Dave Stamper
Threaded lid installation: 2003 by Scot Bogart
Drilled lid vent rivet: 2004 by Sean Flanagan
Middle cooking section thermometer insert: 2001 by Don Hilliard
Access door mounting: 2004 by Jon Weinberg
Double Ashcroft thermometer installation: 2000 by Gary Davis
Double Trend thermometer installation: 2001 by Ken Breit


