In This Topic
- Closing The Gaps In The Charcoal Grate
- Preventing Lump Charcoal From Falling Through The Grate
- Separating Leftover Charcoal From Ashes
- 3-in-1 Charcoal Grate Modification
- More Charcoal Grate Mods
Here are a few easy modifications to improve the performance of the lowly charcoal grate.
Closing The Gaps In The Charcoal Grate
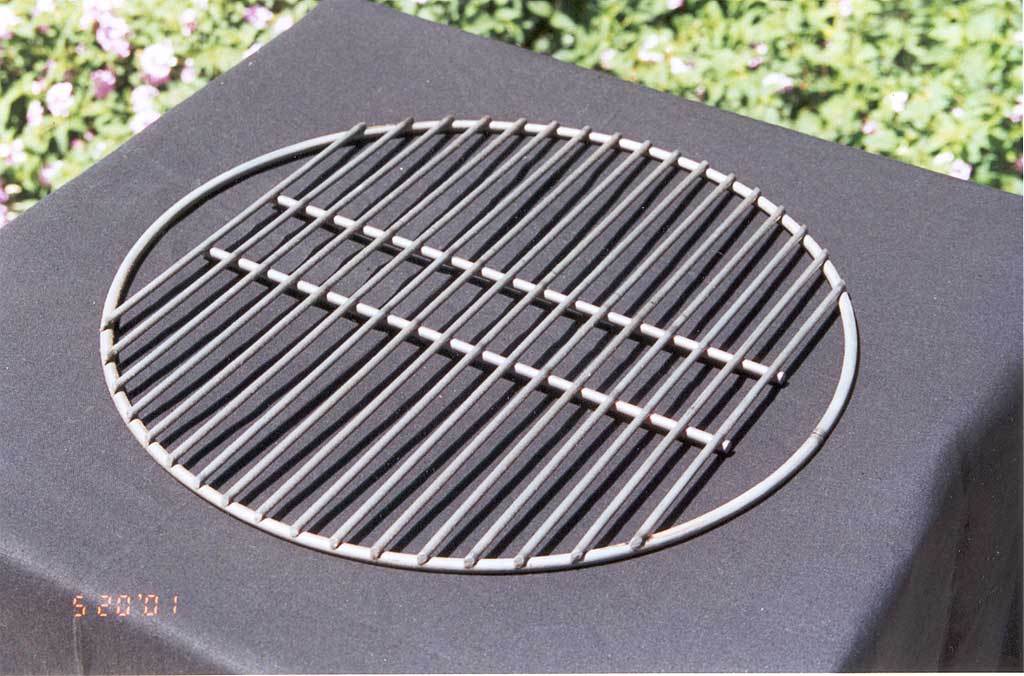
Note: This modification applies to 18.5″ WSMs manufactured prior to 2009. Starting in 2009, Weber closed the gap in the charcoal grate.
If you’ve got a Weber Bullet manufactured prior to 2009, you may notice that a small amount of charcoal falls through the gaps on either side of the grate. Why are those gaps there, anyway—who knows?
I don’t find this to be much of a problem when I use my cooker. I just accept the fact that a few coals will find their way through the gaps. If this really chaps your hide, you have a couple of options. You can order a new charcoal grate from Weber Customer Support at 800-446-1071 that fixes this problem.
If you have welding skills or know someone who does, you can weld two additional rods in place to close the gaps.
 Otherwise, use the double grate or expanded metal solution described in the next section.
Preventing Lump Charcoal From Falling Through The Grate
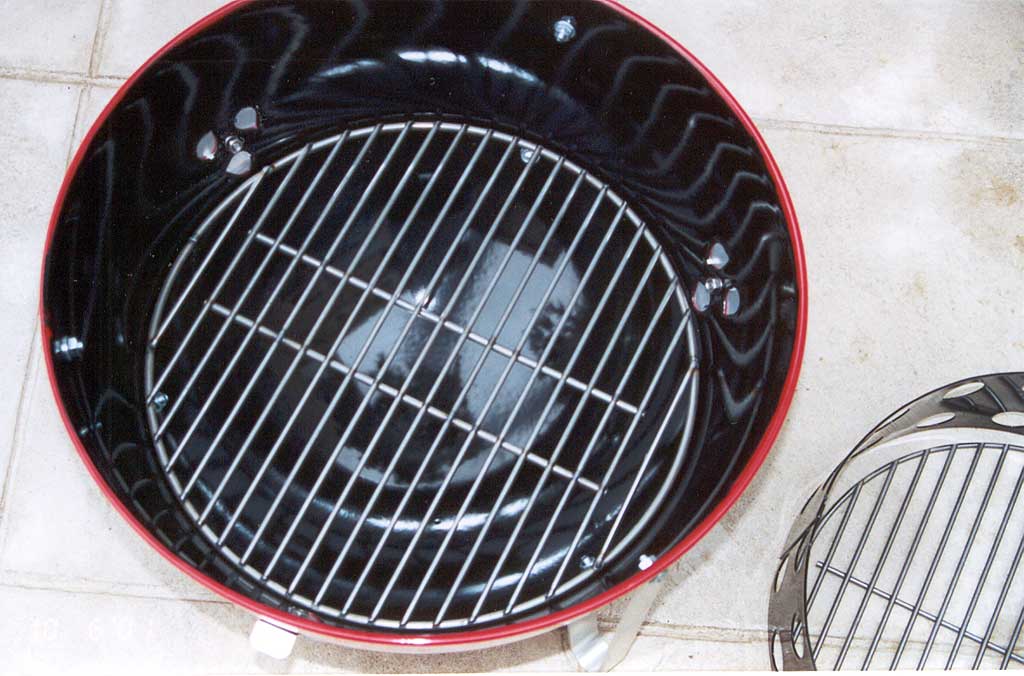
One of the challenges of using lump charcoal in the Weber Bullet is that the smallest pieces tend to fall through the charcoal grate into the bottom of the cooker. There are two ways to solve this problem.
The first approach is to place a second charcoal grate on top of the original one, turned 90° so the two grates run in opposite directions. This creates a grid that prevents little bits of charcoal from falling through.
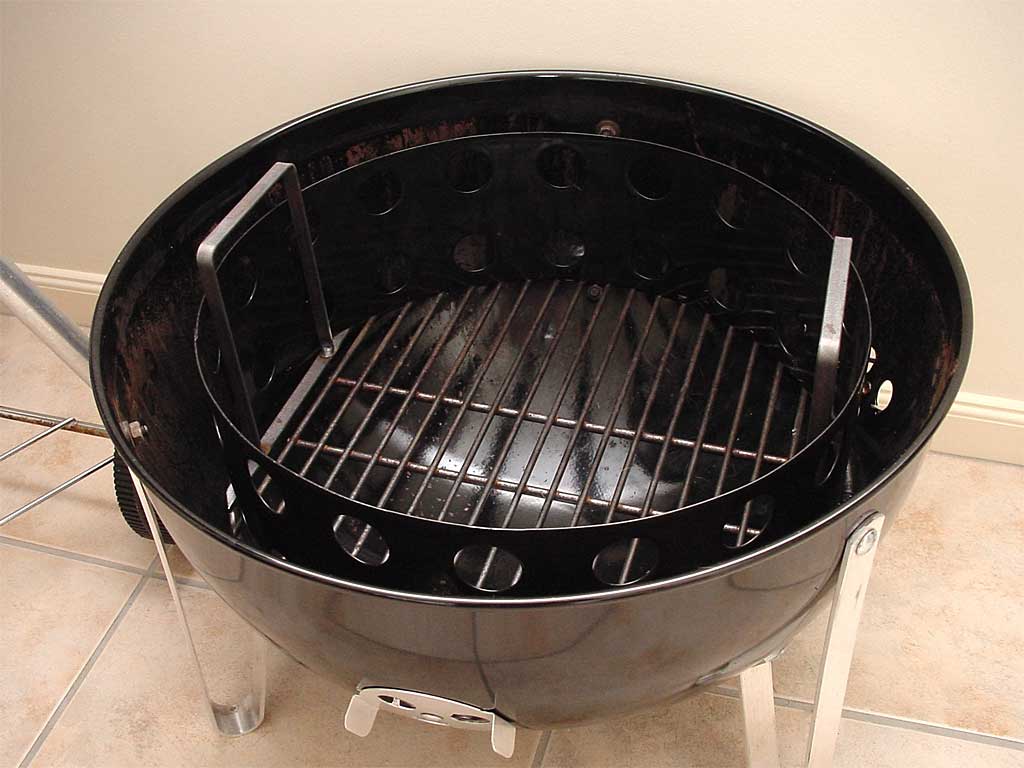
This photo shows a Weber #7440 Charcoal Grate placed inside the charcoal ring—it’s a perfect fit. This 13-1/2″ grate, intended for use in 18.5″ kettle grills, is readily available at hardware stores, home centers, and barbecue specialty stores.
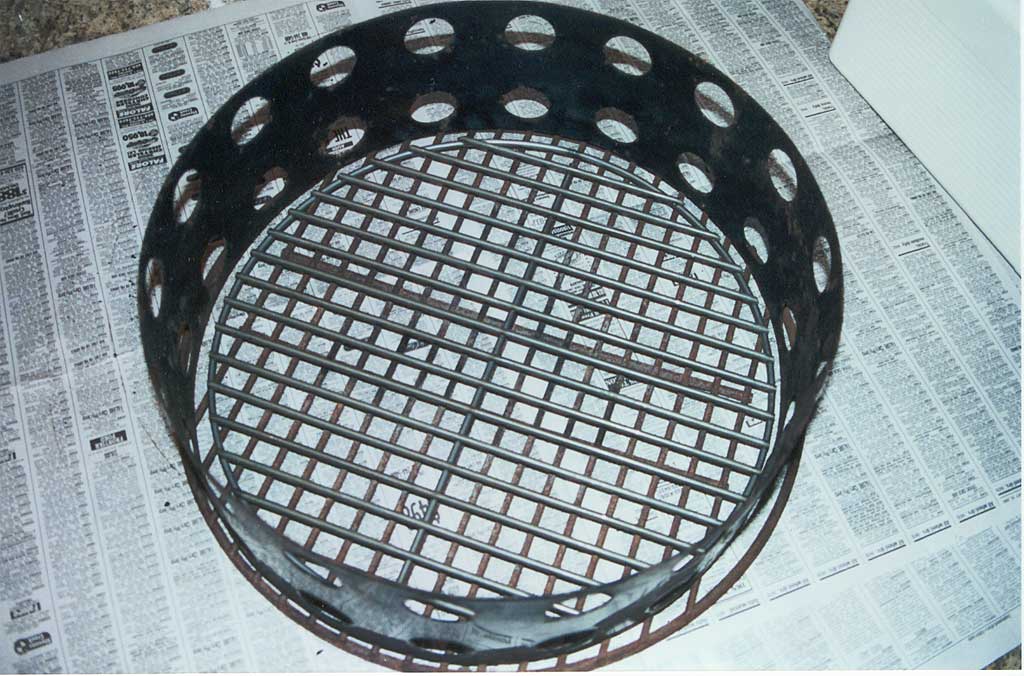
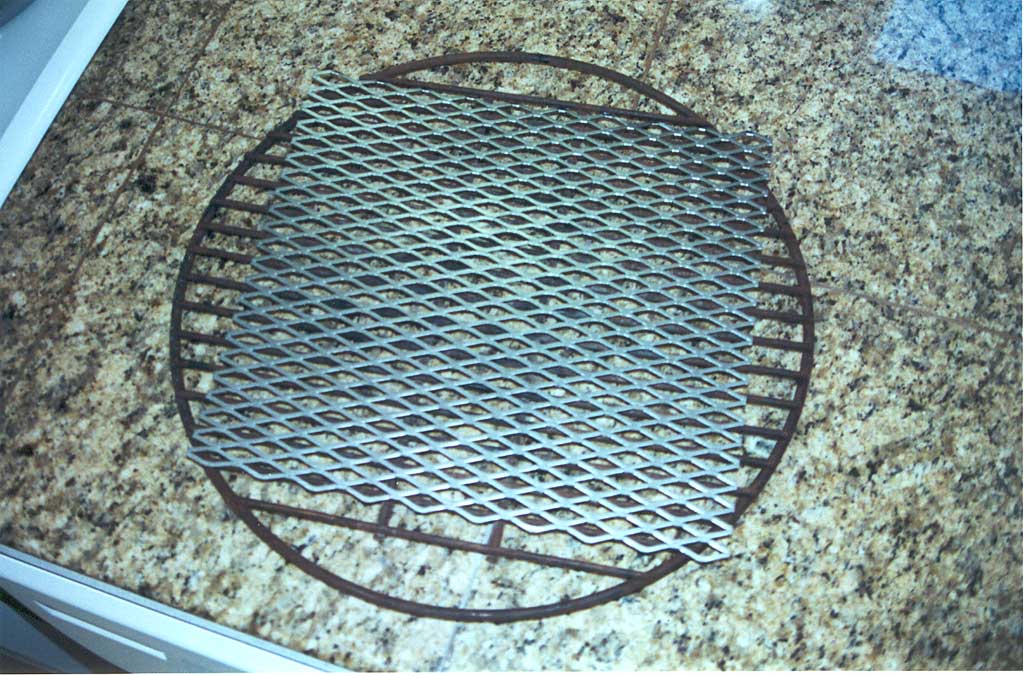
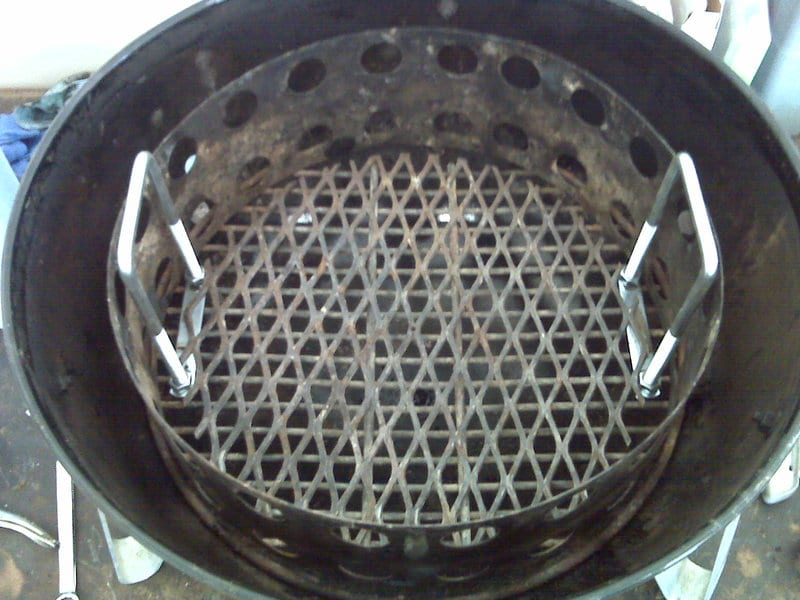
The second approach is to place a section of expanded metal over the original charcoal grate. The holes in the expanded metal are small enough to prevent even the smallest pieces of lump charcoal from falling through.
This photo shows an example of expanded metal on the WSM charcoal grate. Expanded metal can be purchased in small sheets at hardware stores and home centers for just a few dollars. Don’t buy the thickest variety available—a relatively thin gauge is sufficient and will cut easily with tin snips.
Remember that when using double grates or expanded metal, it’s more difficult for ashes to fall through the grate into the charcoal bowl. If you notice that the fire seems to be dying out when it shouldn’t, it may be smothering in its own ashes. Stir the coals gently, dislodging the ashes and rejuvenating the fire.
Separating Leftover Charcoal From Ashes
By wiring the charcoal chamber to the charcoal grate, the two pieces can be handled as a single unit. When the cook is over and the coals are cold, shake back and forth to remove the ashes, leaving behind clean, reusable charcoal. Next time you barbecue, fill a Weber chimney starter half-full with fresh charcoal, then add the leftover charcoal on top. This increases airflow in the chimney starter since used charcoal tends to pack too closely together.
This video demonstrates one method of connecting the charcoal chamber to the charcoal grate using stainless steel zip ties.
This video demonstrates how to effectively light leftover charcoal in a Weber chimney starter.
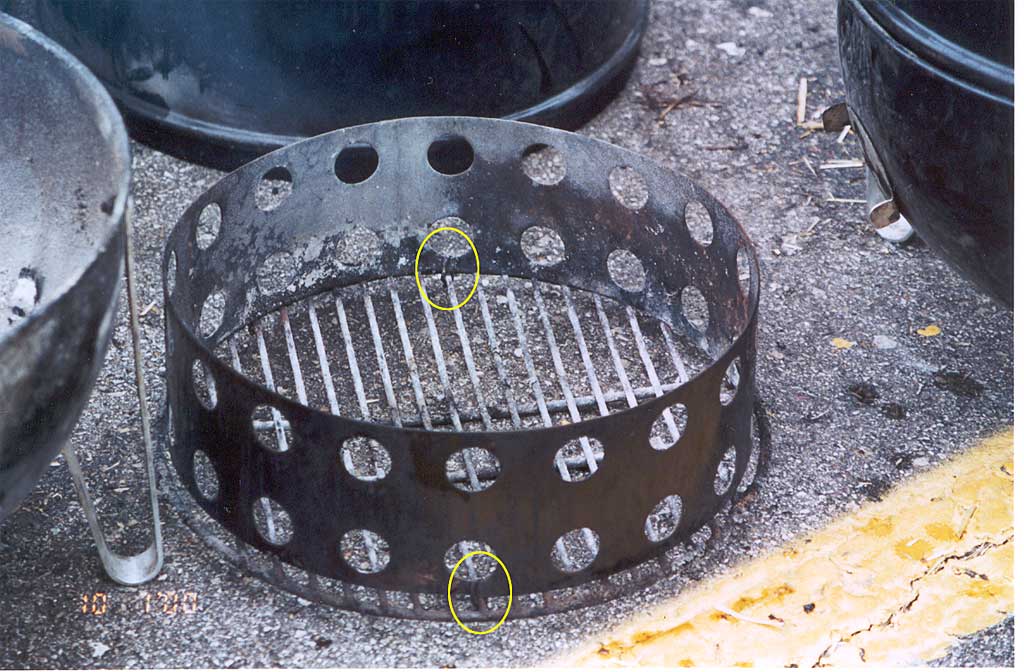
This photo shows this modification from a cooker belonging to Jim Minion and Jack Rogers of the Cardogs Barbecue Team. Click on the photo to view a larger image and you’ll see where I’ve circled the points at which they have been fastened together.
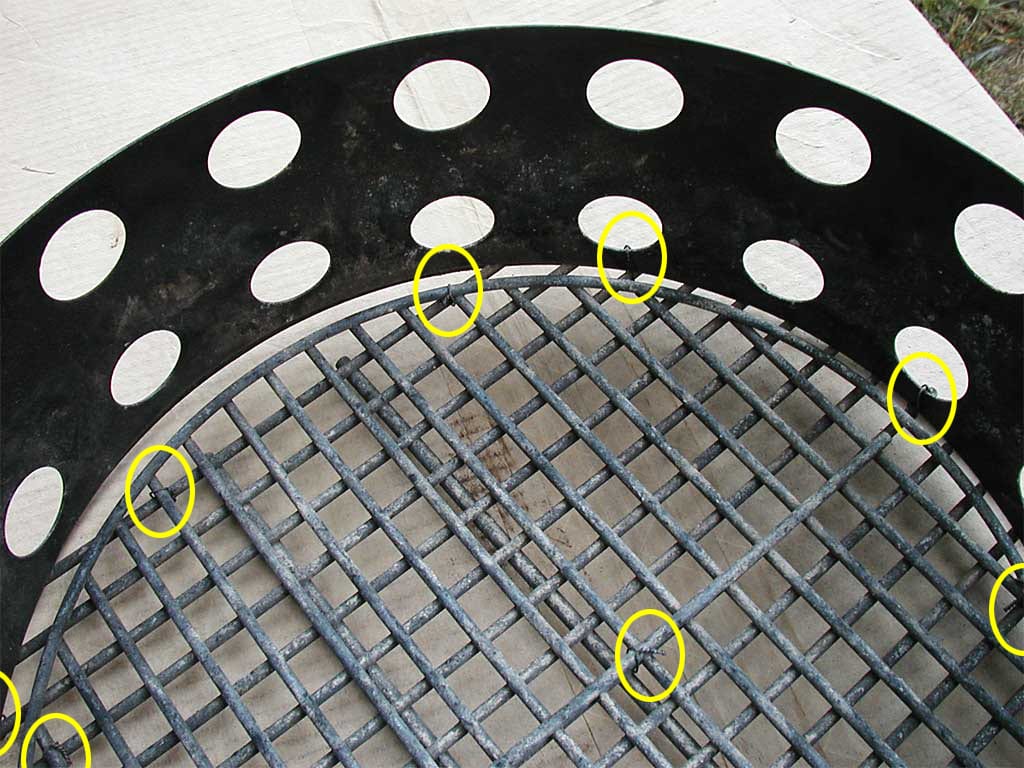
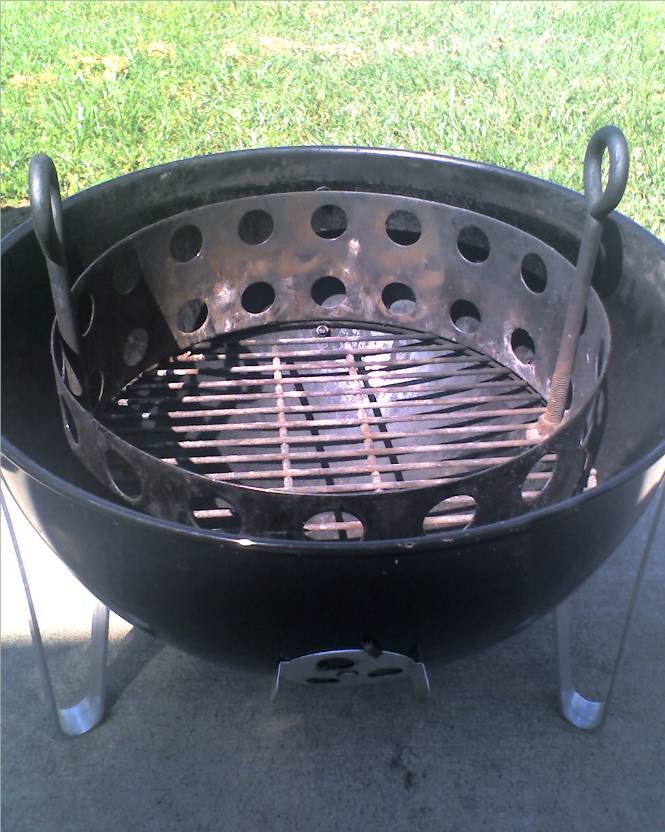
This photo shows how Phil from Texas wired both a smaller grate turned 90° and the charcoal chamber to an original WSM charcoal grate.
3-in-1 Charcoal Grate Modification
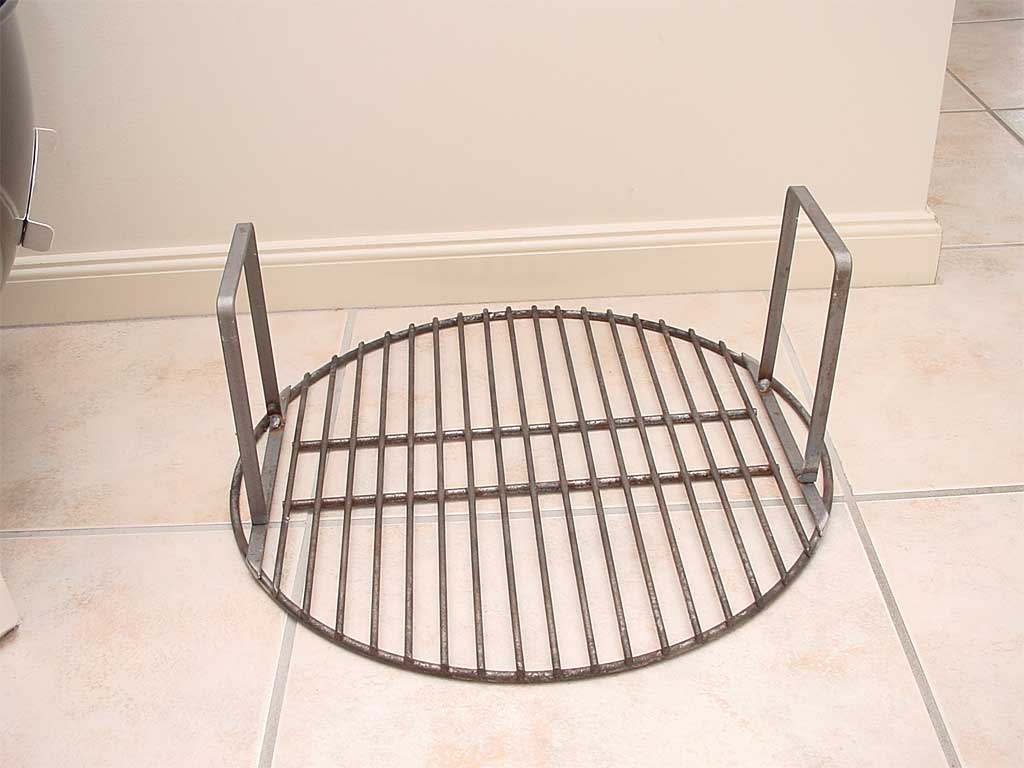 Sean Flanagan from Australia created this elegant modification for the charcoal grate that 1) closes the gaps on each side of the grate, 2) adds handles for lifting the grate out of the cooker, while 3) holding the charcoal chamber in place so the ashes can be shaken out. Thus, the “3-in-1″ grate modification.
Sean fabricated the bars and handles using 10mm x 3mm (about 3/8″ x 1/8”) mild steel flat stock and welded them in place.
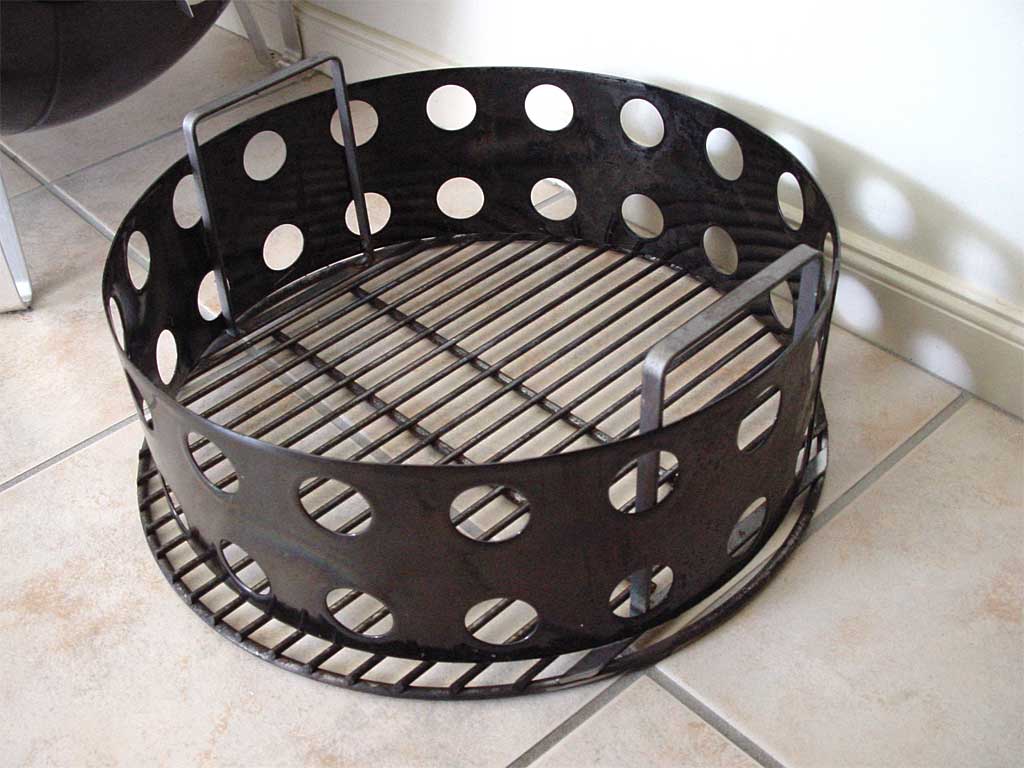
“I spaced the handles so that the charcoal ring slides down over them,” writes Sean, “and I slightly leaned the handles out, so that the charcoal ring locks in place and stays firmly against the grate.”
“The handles stick up above the charcoal ring 3cm (about 1-1/2″) to give comfortable handles to grab onto. It works like a charm!”
More Charcoal Grate Mods
David Michael from Missouri fastened large eye bolts to the charcoal grate using nuts and washers to create some very sturdy-looking handles.
Glenn W. from Mississippi found U-shaped bolts at Ace Hardware and fastened them to the charcoal grate using nuts and fender washers. He added expanded metal to keep charcoal from falling through the grate, thus achieving a 3-in-1 modification with no welding required.
Charlie Noble works in a small welding shop. One benefit of his employment is that he gets to barbecue on the job…as long as he shares the ‘que with the boss! He welded handles made from 3/8″ square stock directly between the metal rods on the grate.
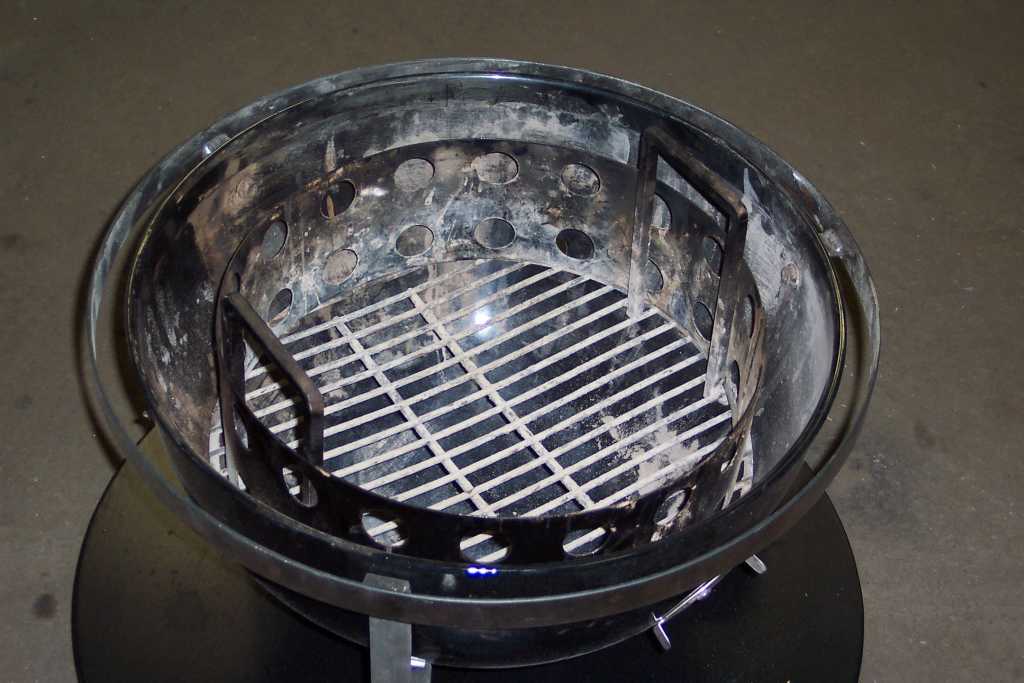
Photo of two grates wired to charcoal chamber: 2011 by Phil from Texas
Photos of 3-in-1 charcoal grate: 2004 by Sean Flanagan
Photo of eye bolts fastened to charcoal grate: 2010 by David Michael
Photo of handles fastened to charcoal grate: 2010 by Glenn W
Photo of welded handles: 2006 by Charlie Noble


