In this topic:
- Remove Fat From Cavity Opening
- Remove The Backbone
- Remove The Breastbone
- Remove Fat Inside Carcass & Pat Dry
- More Chicken Links On TVWB
Video: How To Butterfly A Chicken
This video demonstrates the steps described in this article.
Introduction
Here are the steps involved in butterflying a whole chicken. This process is also known as spatchcocking. By removing the backbone and the breastbone (also called the keel bone), a whole chicken lays flat on the grill and cooks more evenly, since all the meat is about the same thickness. It makes for a nice presentation, too.
Another advantage of butterflying a chicken is that it makes separating the two halves easy, either before or after cooking.
Remove Fat From Cavity Opening
Start with a whole broiler/fryer chicken weighing 3-1/2 to 4 pounds.
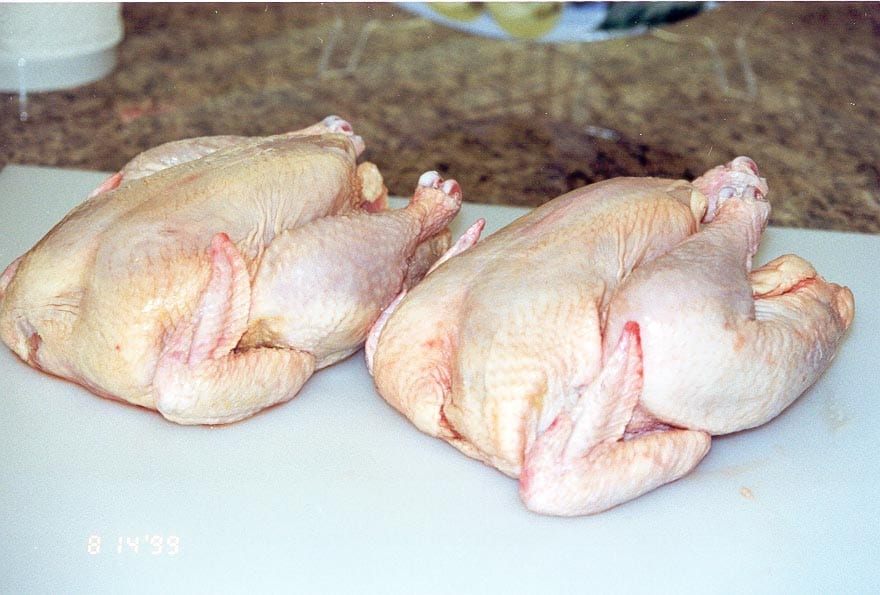
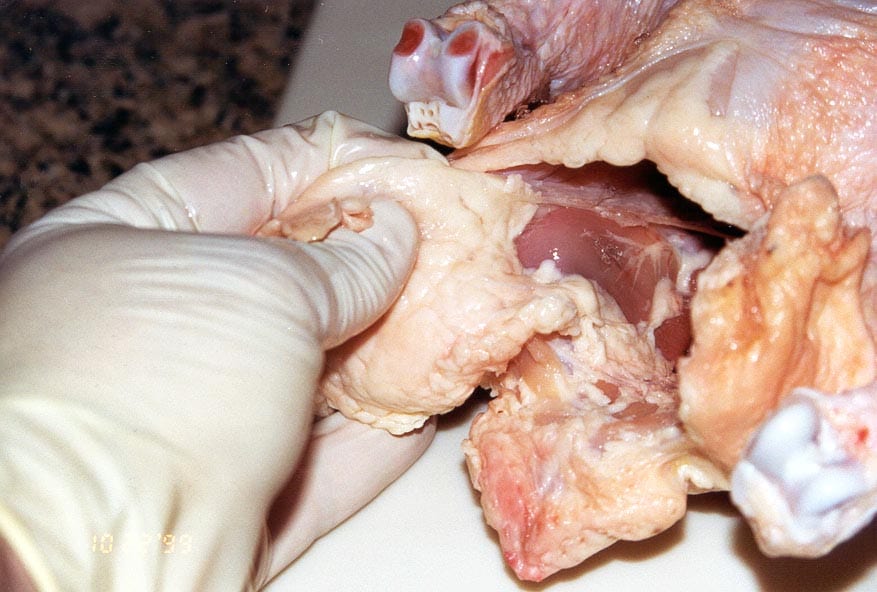
Remove the neck and giblets from the body cavity, then trim away any excess fat from around the cavity opening.
Remove The Backbone
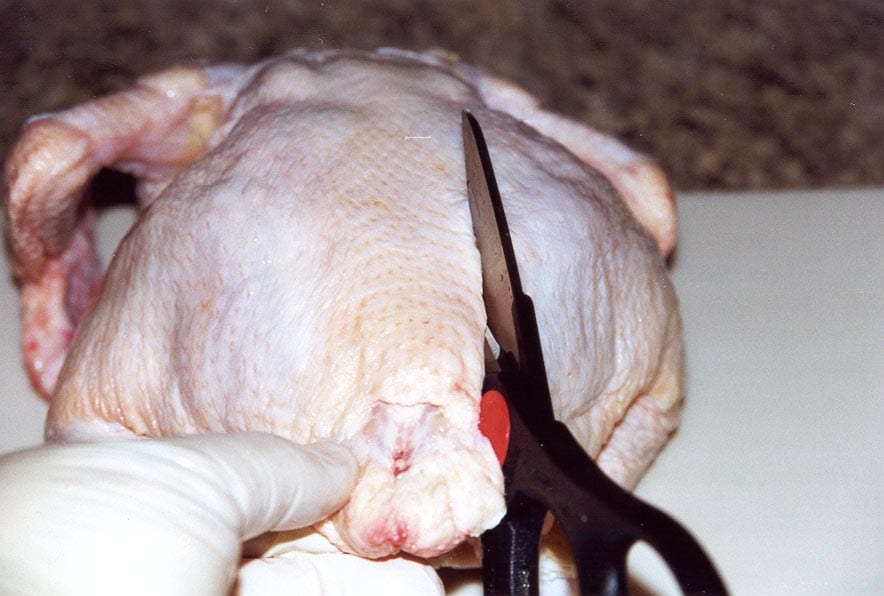
Position the chicken so the back is facing up and the drumsticks are pointing towards you.
Using a pair of kitchen shears, cut all the way down one side of the backbone. You’re just cutting through the small rib bones, not through the center of the backbone itself. Cut close to the backbone so you don’t lose too much meat.
Next, cut all the way down the other side of the backbone, removing it completely.
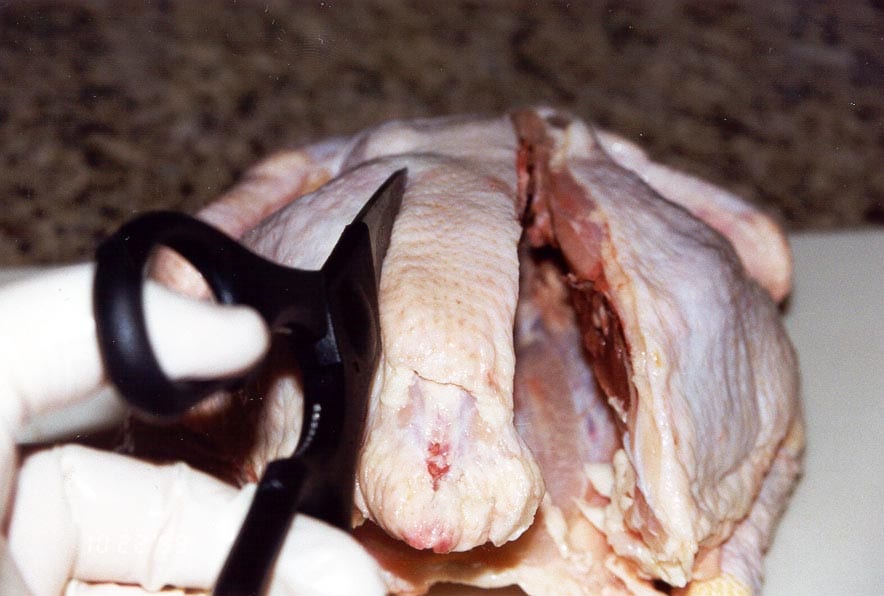
Some people like to cut down only one side of the backbone, leaving it intact. I remove the backbone completely, since I’m not going to eat it. Reserve the backbone for making chicken stock, if you’re so inclined.
Remove The Breastbone
Now position the chicken so the drumsticks are pointing away from you.
Use a paring knife to make a small cut in the white cartilage that conceals the top of the breastbone (circled in yellow).
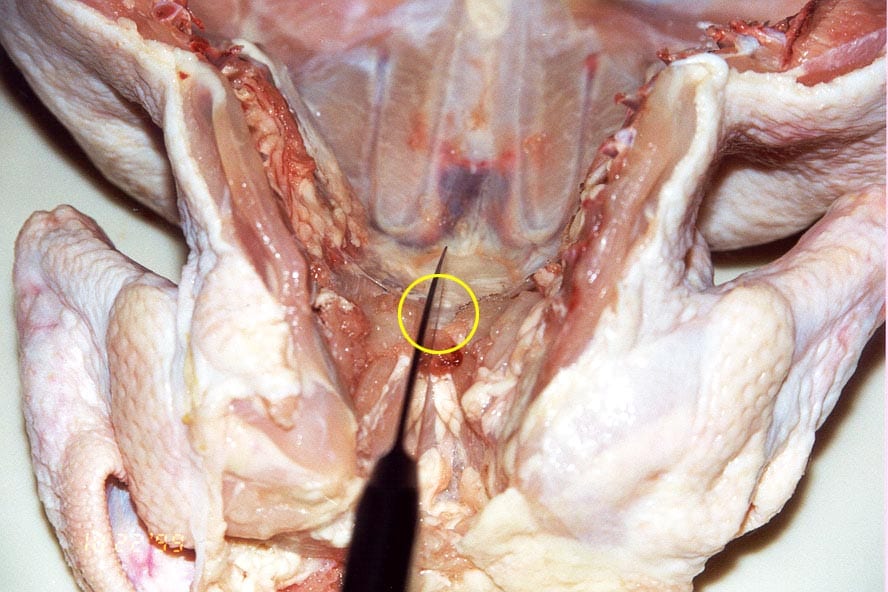 Bend both halves of the carcass backward at the cut to expose the breastbone. It should pop right up through the cut.
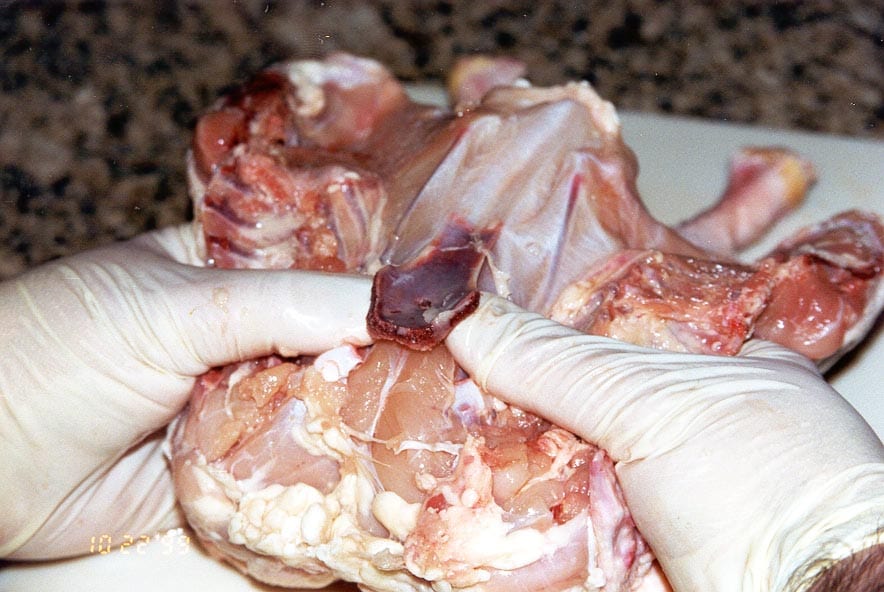
Run your thumbs down both sides of the breastbone to separate it from the meat.
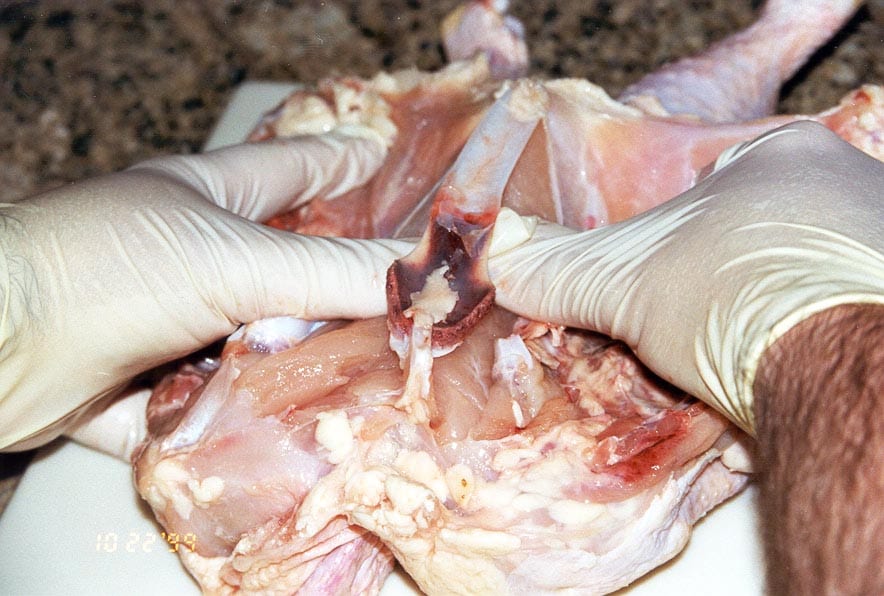
With the breastbone loosened on both side, pull the bone up and out.
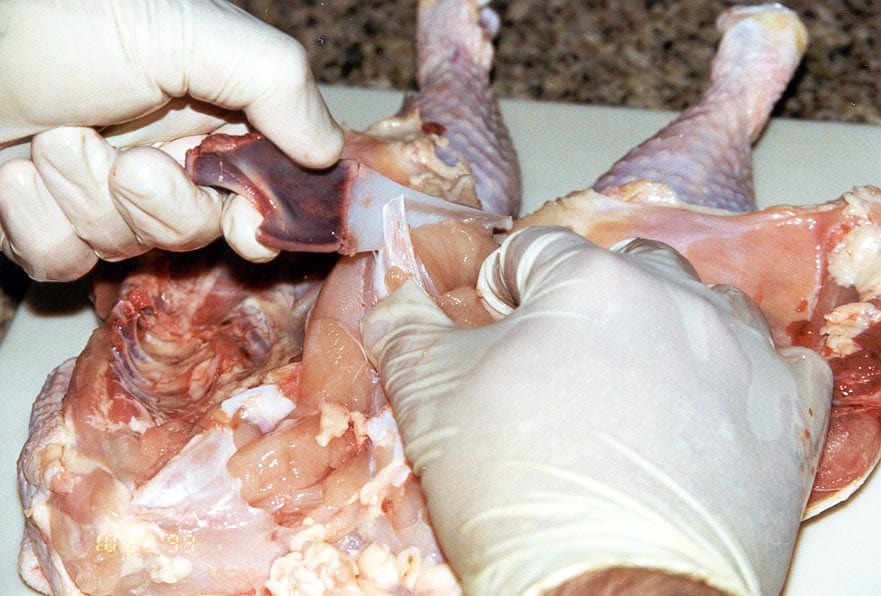
The breastbone may break into two pieces when you pull it out, especially if you haven’t separated it well enough from the breast meat using your fingers. No big deal, just pull out the two pieces.
This photo shows how the chicken lays flat after the breastbone is removed. At this point, if you want to cook the chicken in halves, simply cut between the two breast sections.

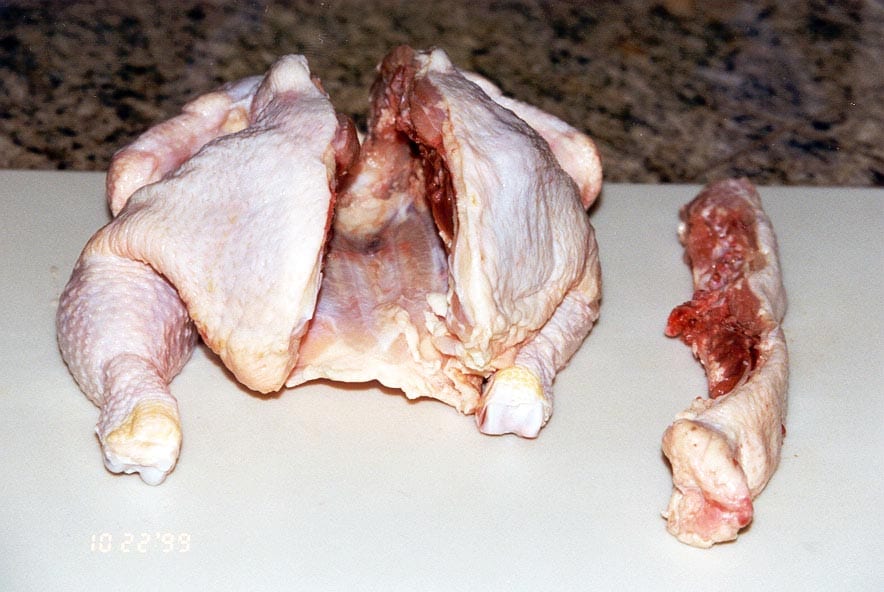
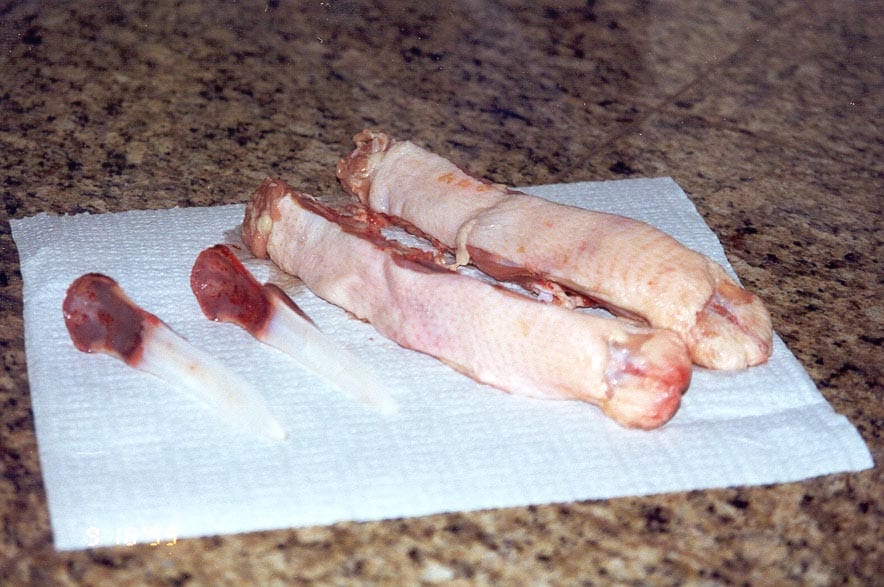
This photo shows the breastbones and backbones removed from these two chickens.
Some people leave the breastbone intact and simply push the carcass open to break the breastbone and flatten out the chicken. I think the few seconds it takes to remove the breastbone makes for a better presentation and easier cutting into halves after cooking.
Remove Fat Inside Carcass & Pat Dry
As a last step, remove any excess fat found inside the carcass and pat the chicken dry with paper towels before seasoning and cooking.
Rinsing the chicken under running water is not recommended from a food safety standpoint because bacteria will splash onto your sink, faucet, kitchen countertop, clothing, and other surfaces. Proper cooking will kill any bacteria on the meat without rinsing.
More Chicken Links On TVWB
- Basic Barbecued Chicken
- Basic Marinated Chicken
- Beer Can Chicken
- Hot & Fast Chicken
- Cornell Chicken
- Cornish Game Hens – Peach Glaze
- Pulled Chicken Sandwiches
- Alabama-Style Chicken Sandwiches With White Sauce
- Boneless Skinless Chicken Breasts
- Buffalo Wings – Smoked & Deep Fried
- Chicken Selection & Preparation


