In This Topic
- WSM Thermometer History
- For WSM Without Thermometers:
- Upgrading From A Stock Weber Thermometer To A Higher-Quality Thermometer
- Plugging An Unused Thermometer Hole
- Closing Thoughts
- More Thermometer & Temperature Links On TVWB
WSM Thermometer History
Back in the dark ages…before 2009…if you owned a Weber Smokey Mountain Cooker and wanted a thermometer, you had to add one yourself. You could stick one through the lid vent, you could drill a hole and mount one in the lid, or you could run a remote probe thermometer under the edge of the lid or through a grommet in the side of the cooker.
But Weber was paying attention to what customers were doing. Starting with the 2009 model year, Weber added a thermometer to the lid of all WSMs, and starting with the 2014 model year, they added a silicone grommet for probe thermometers to the middle cooking section of all WSMs.
When I first published this article in 2001, installing a thermometer in the lid was one of the most common modifications made by Weber Smokey Mountain Cooker owners. That’s not the case today, but if you acquire a pre-2009 WSM and want to add a thermometer, or you have a newer model and want to replace the stock thermometer with an industrial-grade thermometer, then this topic provides the detailed instructions you need for a professional installation.
For WSM Without Thermometers: Installing An Industrial-Grade Thermometer
The first question you should ask yourself is, “Do I want to drill a hole in my beloved WSM?” Measuring Temperature In The Weber Bullet provides a thorough discussion of all the options you have for measuring temperature in your cooker, including approaches that don’t require you to drill holes. For example, you can insert a thermometer through the lid vent or slip a remote probe thermometer under the lid or through a grommet to measure temperature at the cooking grate.
You should not undertake this modification unless you’re comfortable working with power tools and you’re willing to accept the risk that you might screw things up. Drilling holes in your WSM may void the manufacturer’s warranty, so take this into consideration before proceeding. Also, when drilling a hole in your cooker, make sure to wear eye protection since bits of porcelain enamel and steel may fly in all directions.
Where Should I Install A Thermometer?
You can install a thermometer in the lid or in the middle cooking section. A few people mount them in both locations. In my opinion, the lid is the best spot to get an overall temperature reading of your cooker.
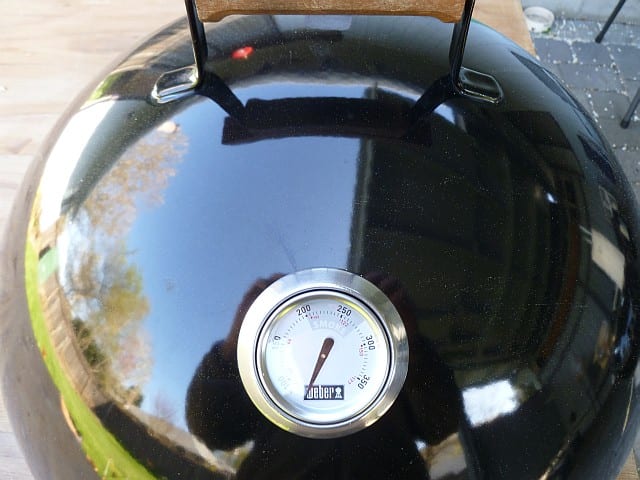
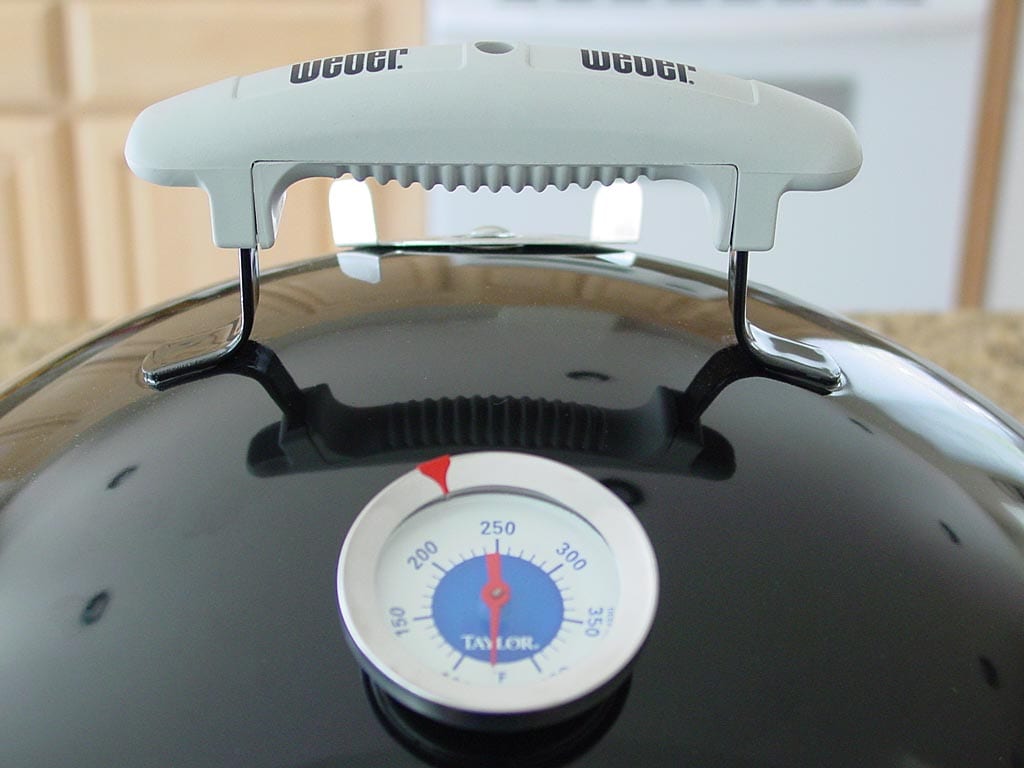
The most common lid location is on the other side of the handle opposite the vent. This is where Weber mounts the stock thermometer and it’s where I always mount thermometers on older WSMs.
For the middle cooking section, the most common approach is to install a thermometer just above the lower cooking grate. This is done by drilling a hole in the body of the middle cooking section itself, and less frequently by drilling through the access door.
Since lid installation is most popular, that’s what we’ll focus on in this article, but the process for installing in the middle cooking section is basically the same as for the lid.
Materials & Tools Required

To install an industrial-grade thermometer from scratch, you’ll need the following.
Parts & Supplies
- Industrial-grade thermometer
- Male 1/2″ NPT threaded mounting base
- 100-500°F operating range
- 3″ dial
- 2.5″ to 4″ stem length
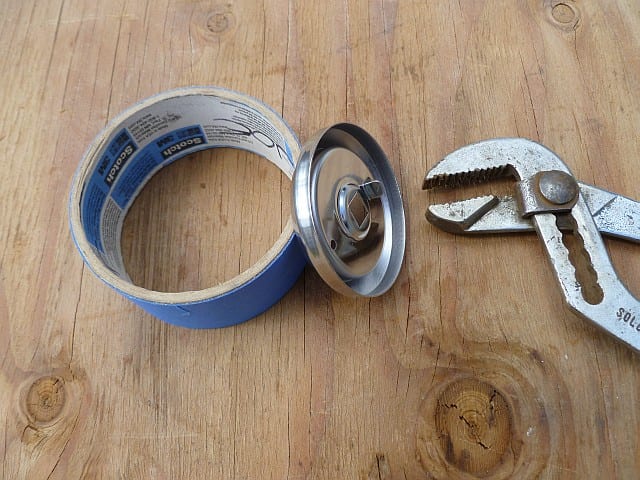
- Steel washer, about 1-3/8″ in diameter with a 3/4″ hole
- Steel 1/2″ lock nut
- Painter’s tape
- Black high-temp barbecue spray paint (optional)
- Newspaper for masking (optional)
Tools
- 3/4″ metal hole saw
- Electric drill
- Measuring tape
- Pen or pencil
- Pliers
- Center punch
- Eye protection
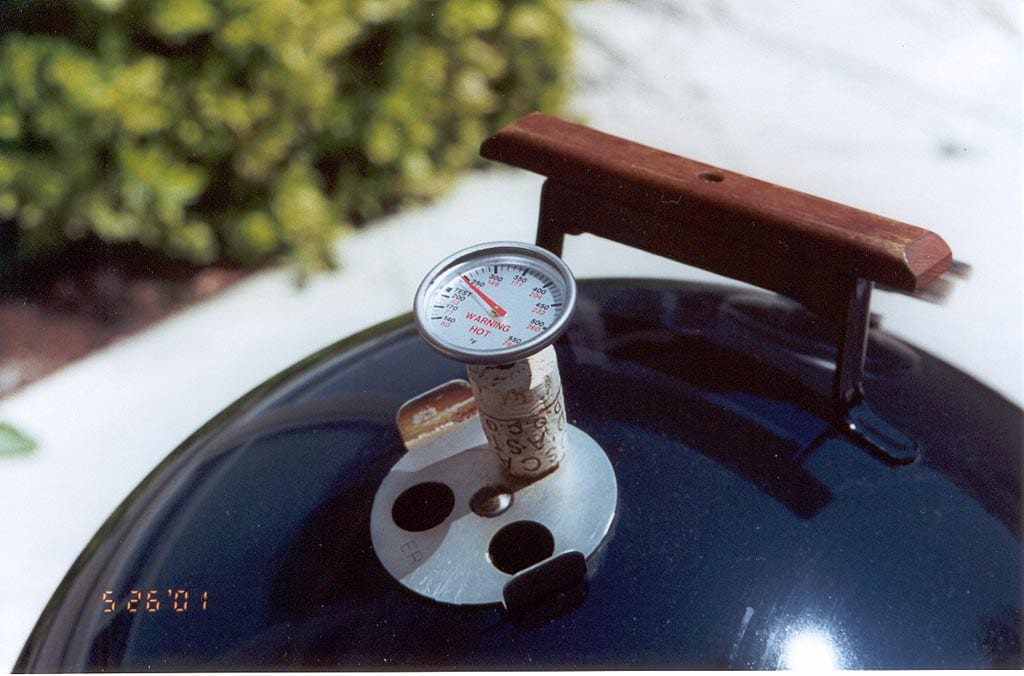
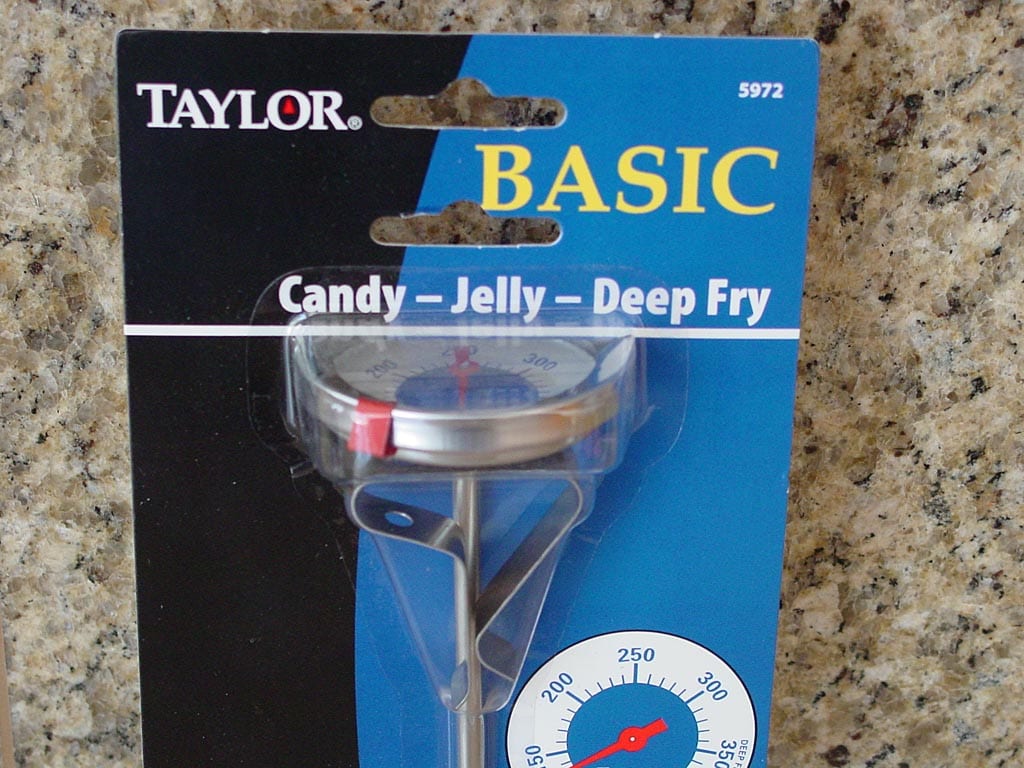
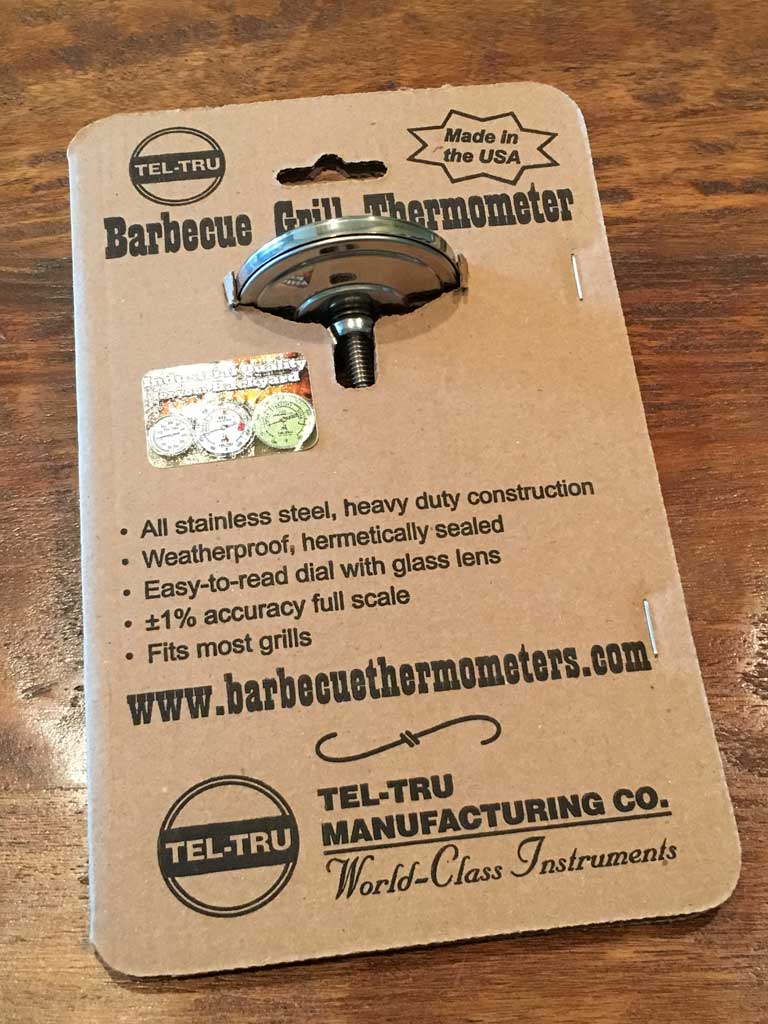
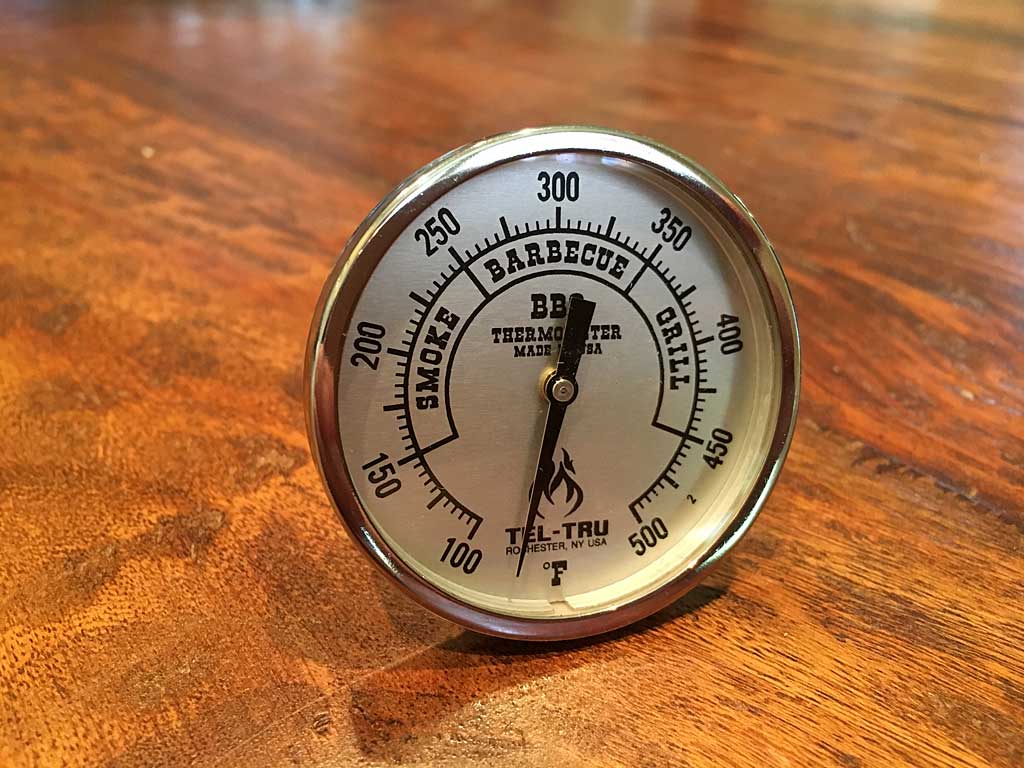
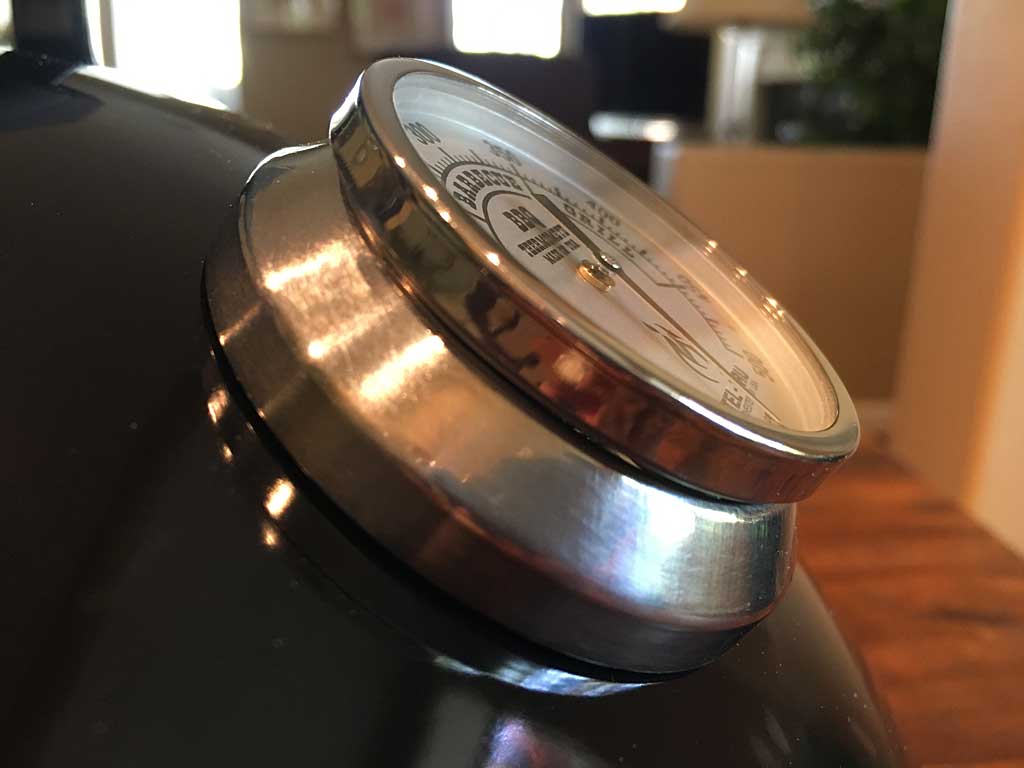
The thermometer shown here is the Tel-Tru BQ300 with a 100-500°F operating range, 3″ dial and 4″ stem. It sells for about $45 plus shipping. The shorter 2.5″ stem is preferred, but I’ve used a 4″ stem for many years and never had a problem with clearance between stem and meat.
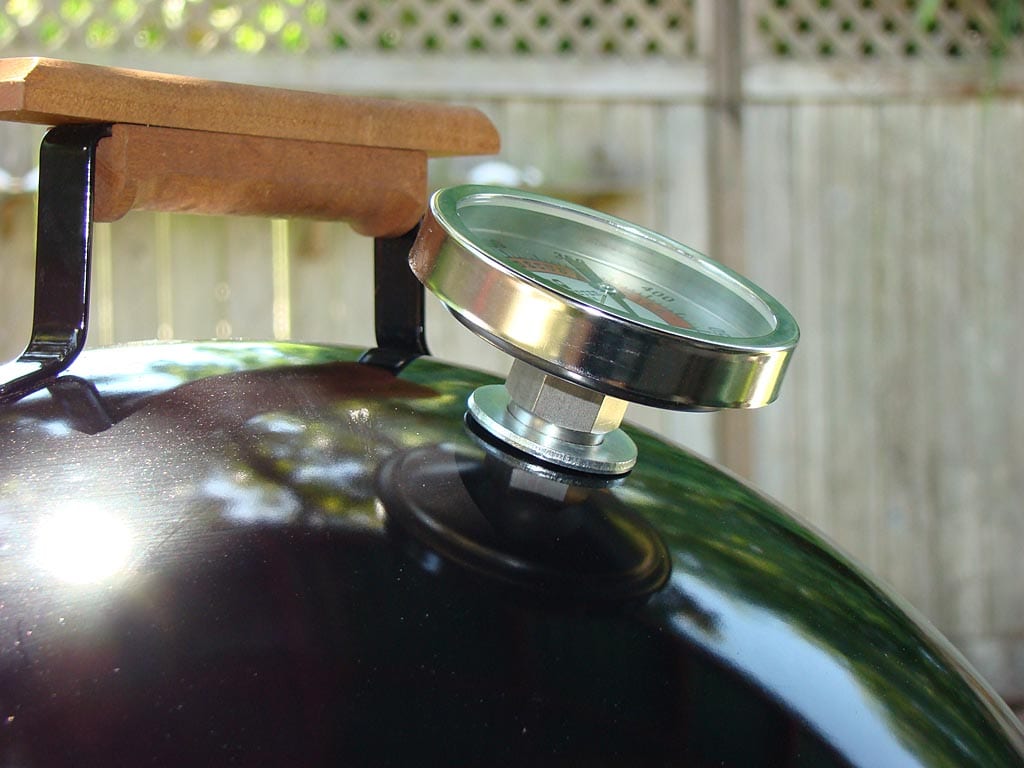
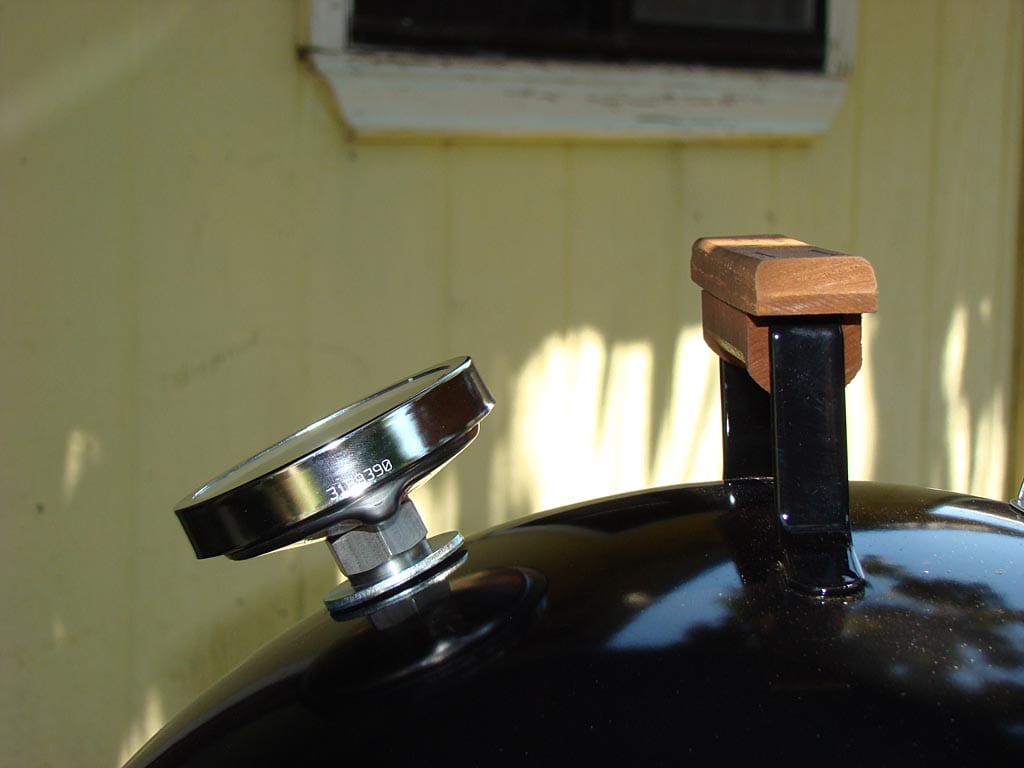
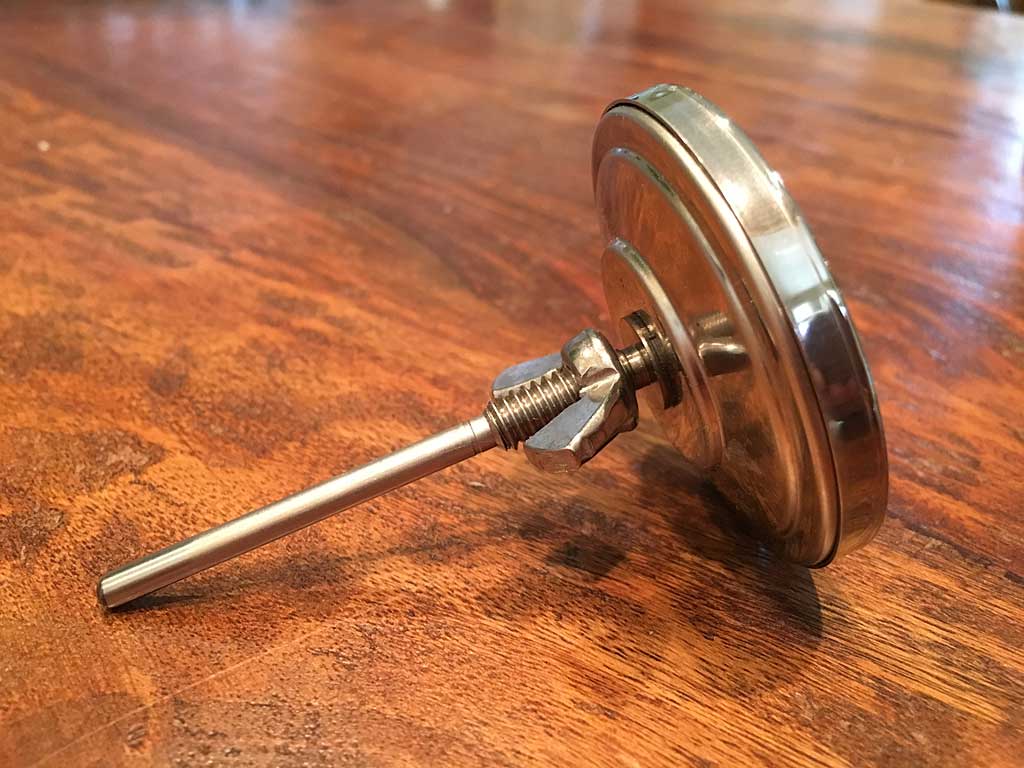
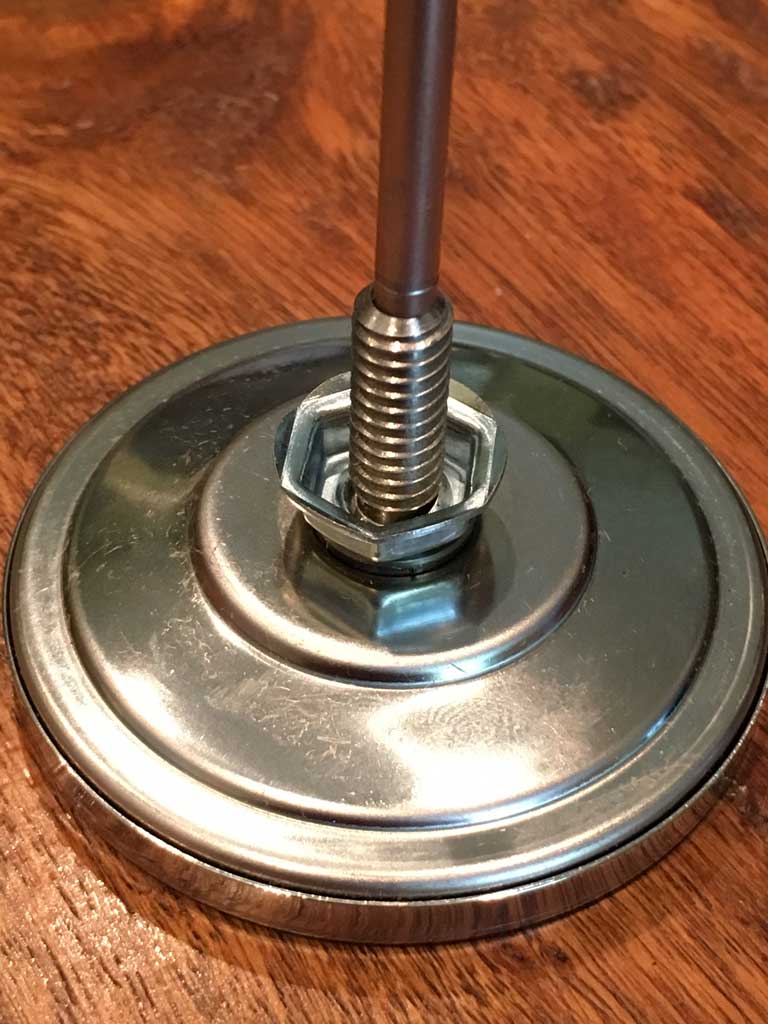
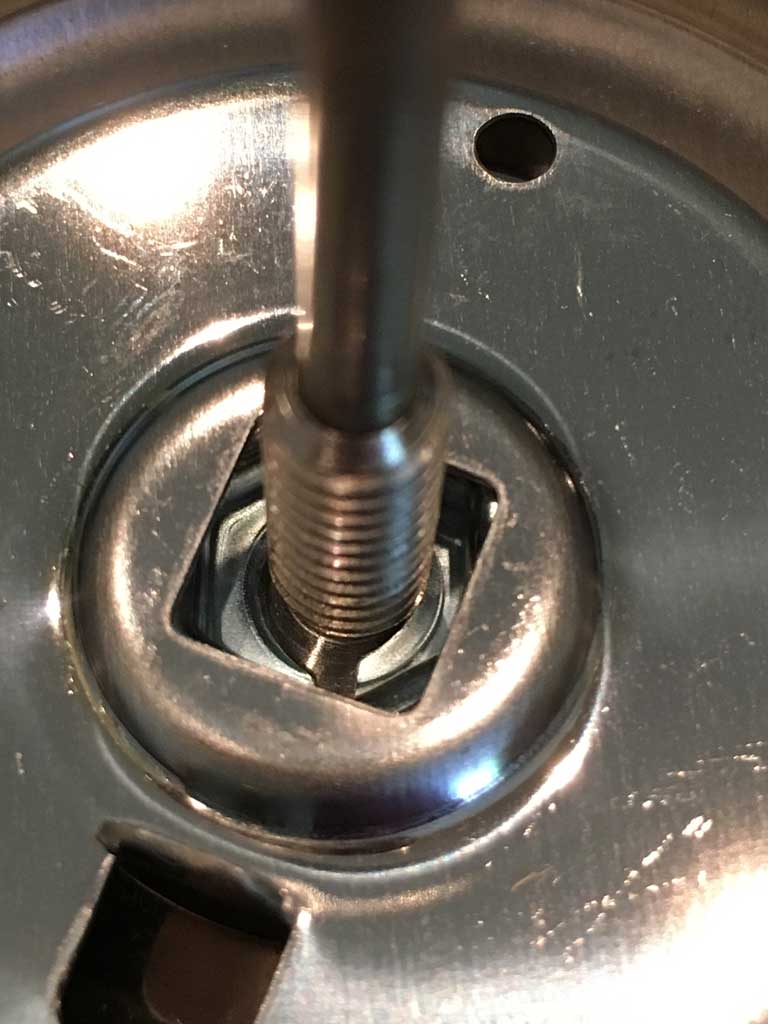
Industrial-grade thermometers have a male 1/2″ NPT (National Pipe Thread) mounting base on the backside of the dial. To fasten it to the lid, you’ll need a 1/2″ steel lock nut. These lock nuts are used to connect rigid metal conduit to electrical enclosures and boxes and you’ll find them at the hardware store in the electrical department for just a few cents. Brass versions are available at specialty fastener suppliers. For an online option, Amazon sells a Tel-Tru Thermometer Installation Kit that includes both the washer and lock nut.
Installation Steps
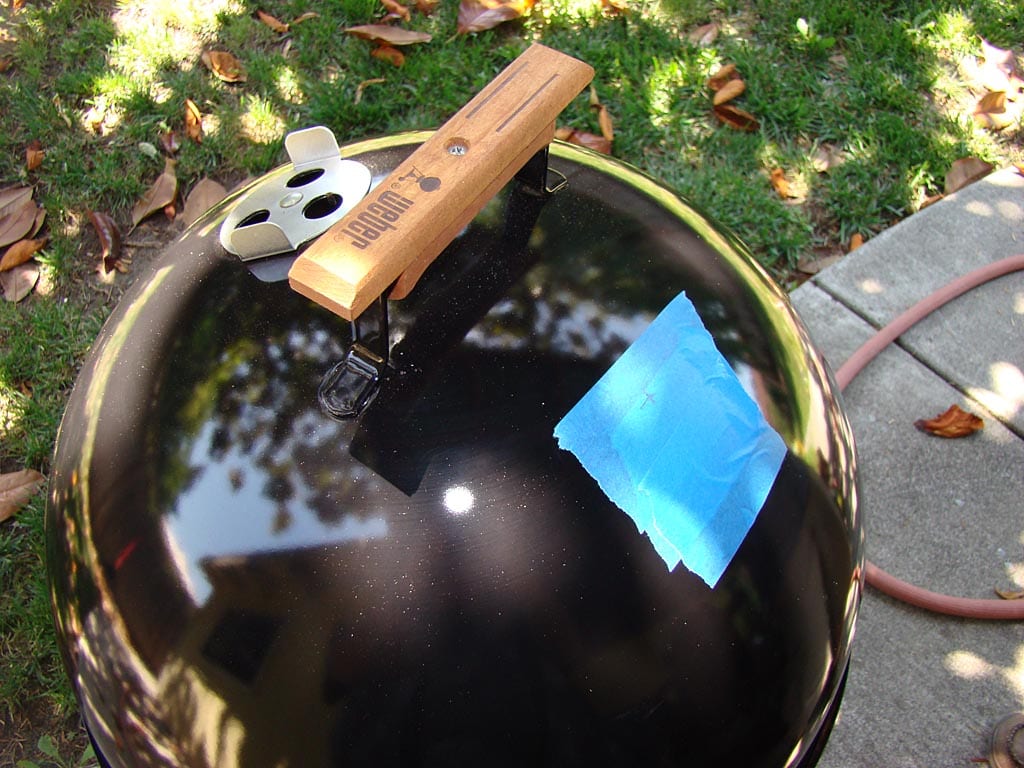
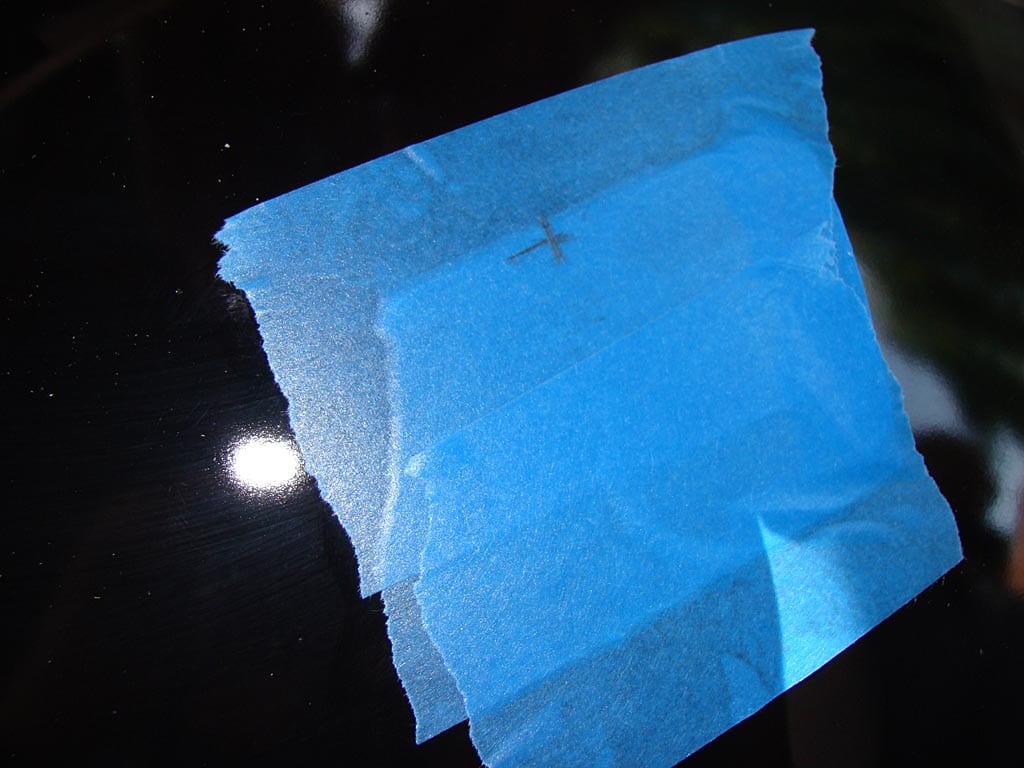
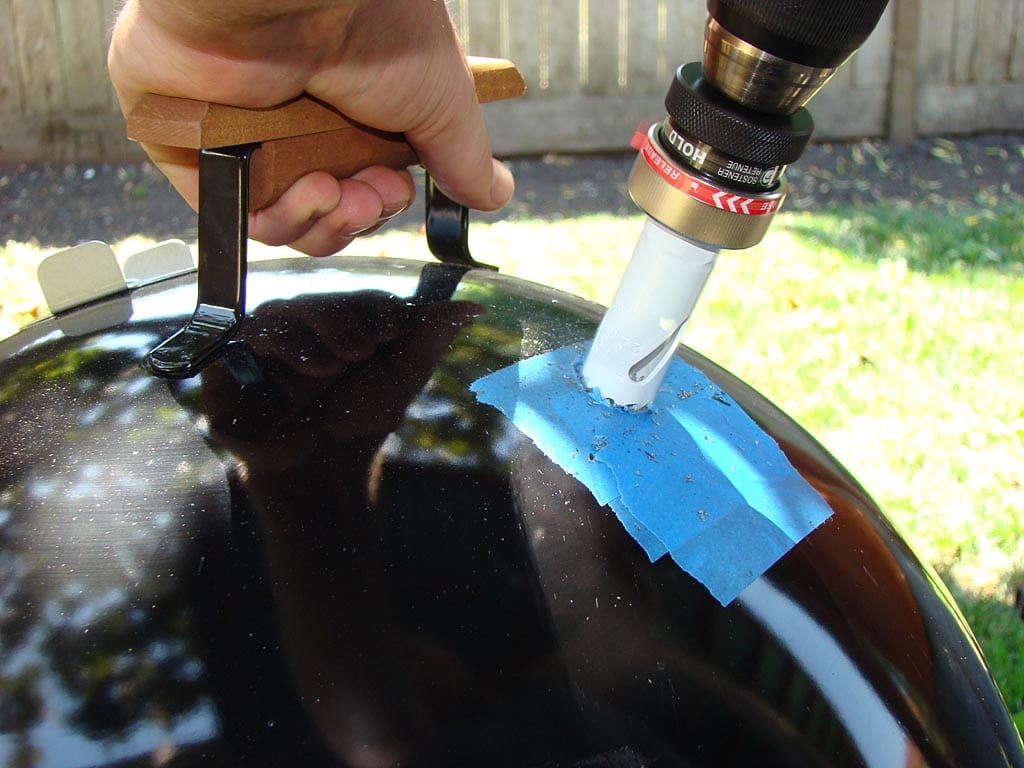

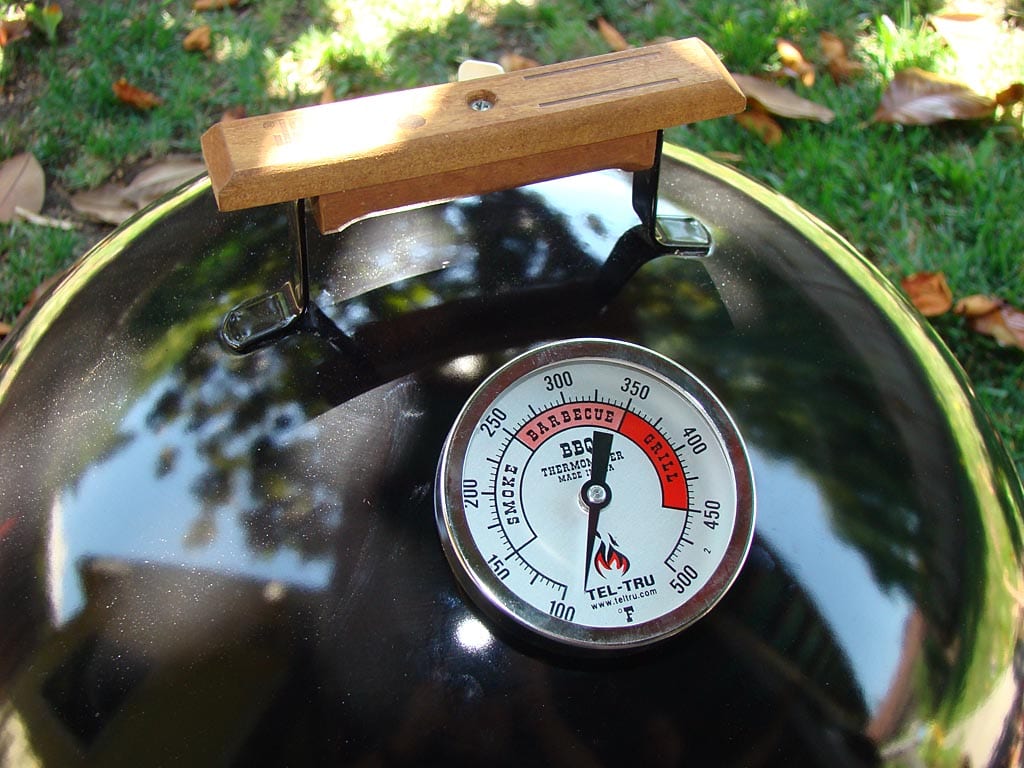
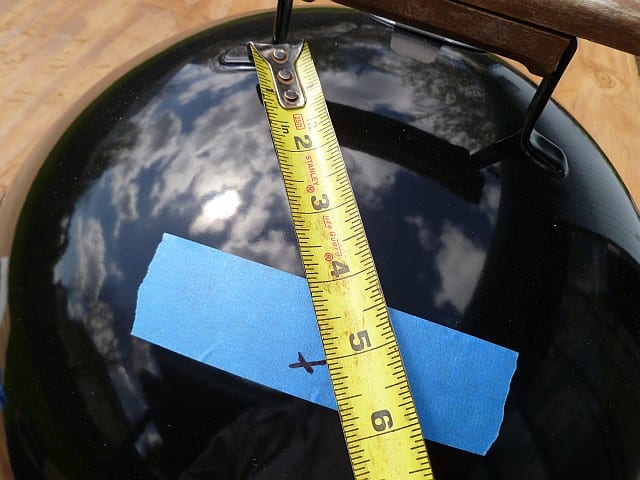
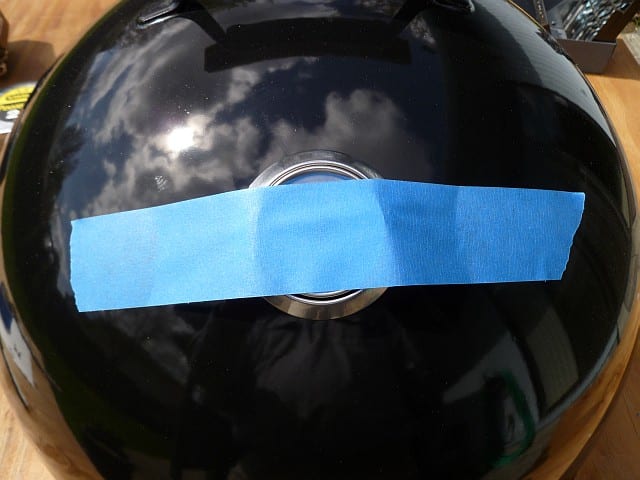
To determine the spot to drill, apply some painter’s tape over the approximate area where you will mount the thermometer. Measure 5″ down from each side of the metal lid handle to a point where both measurements cross. Mark the spot with an “X”.
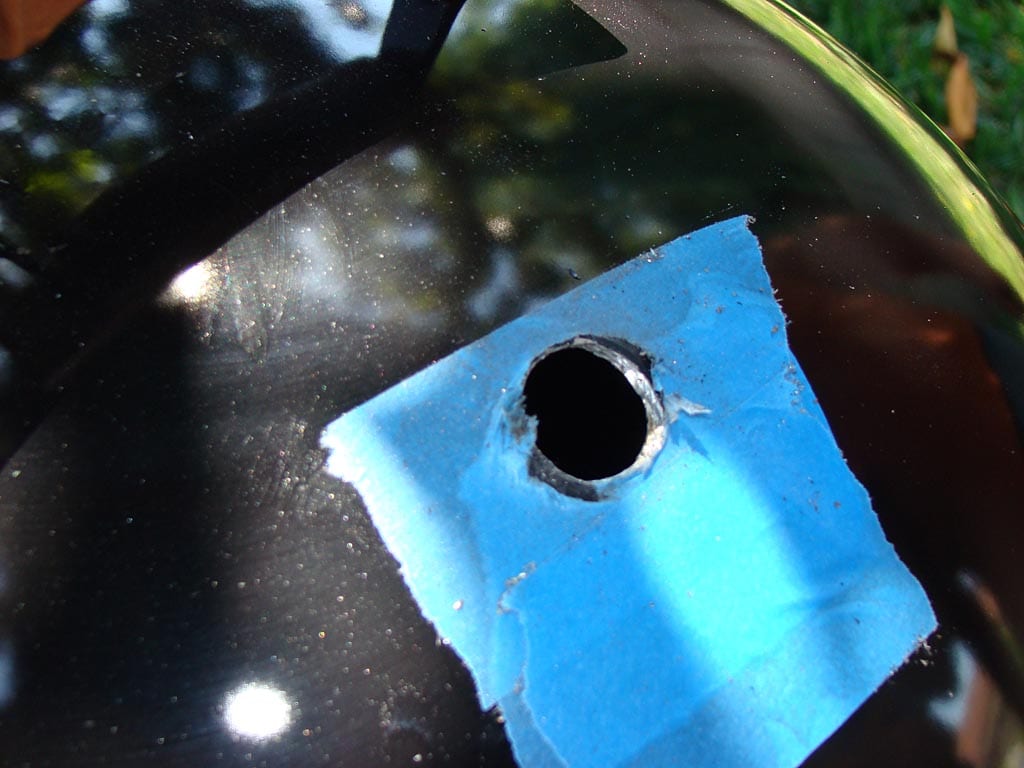
To drill the hole, use a center punch at the “X” to create a spot for the drill bit to grab. Use a 3/4″ metal hole saw to make the hole. Remove the painter’s tape.
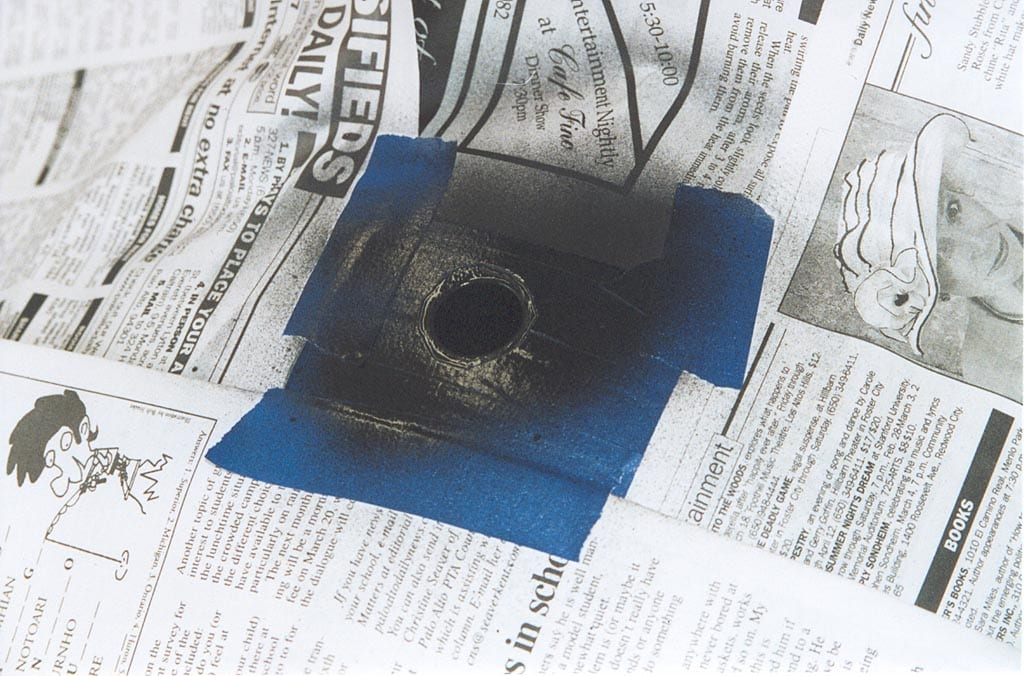
As an optional step to prevent rust, use painter’s tape and newspaper to mask just outside the hole and apply two coats of high-temp barbecue paint. Let paint dry.
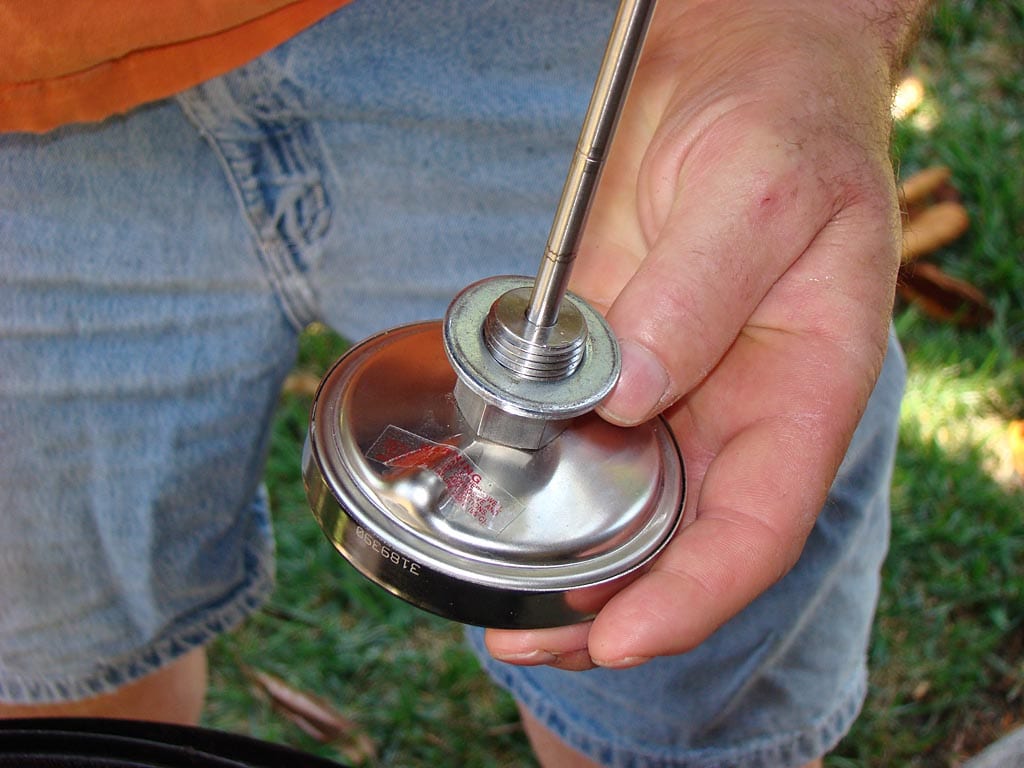
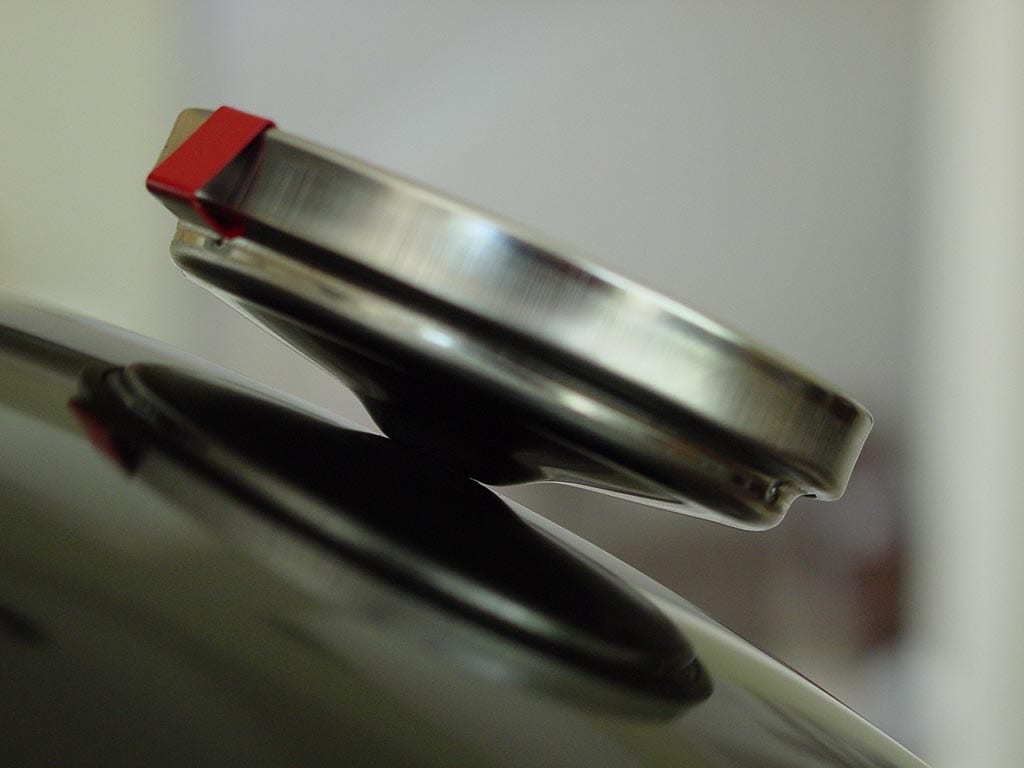
To fasten the thermometer, slip the washer over the thermometer stem and insert the stem into the hole. Thread the lock nut onto the thermometer’s threaded base and tighten until finger tight. Rotate the dial face so it’s properly positioned and tighten the lock nut using pliers. Do not overtighten.
For WSM Without Thermometers: Installing A Stock Weber Thermometer
To install a stock Weber thermometer, you’ll need the following.
Parts & Supplies
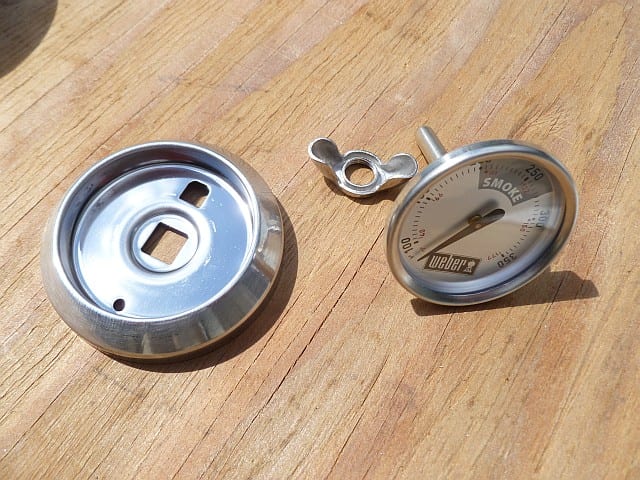
- Weber 63208 thermometer for 18.5″ WSM
- Includes wing nut fastener
- 100-350°F operating range
- 1.75″ dial
- 1.5″ stem length
- Weber 63027 bezel for 18.5″ WSM
- Painter’s tape
Tools
- 1/8″ metal drill bit + Unibit #4 step drill bit OR
1/8″ metal drill bit + 3/8″ metal drill bit - Electric drill
- Measuring tape
- Pen or pencil
- Pliers
- Eye protection
The Weber 63208 thermometer and Weber 63207 bezel are the stock thermometer for the 18.5″ WSM. The bezel can be difficult to find and may have be ordered directly from Weber Customer Service at 800-446-1071.
Installation Steps
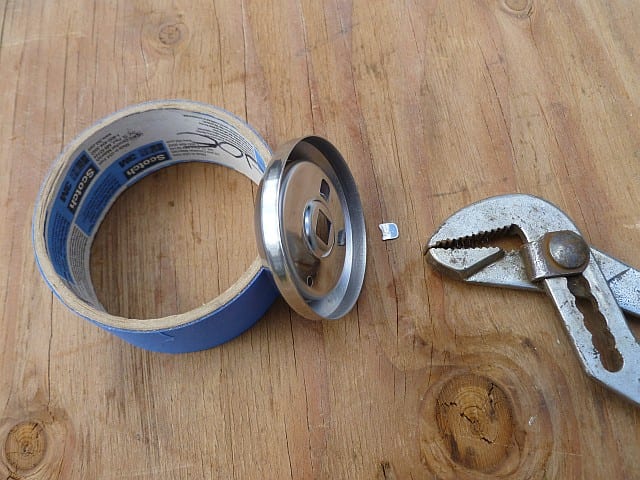
Start by breaking off or bending back the bezel tab. On a new WSM, this tab fits into a slot in the lid that locks the bezel in place, and the tab hole accepts another tab on the back of the thermometer that aligns the dial face and keeps it from spinning around. Use pliers to snap it off or bend it back.
To determine the spot to drill, apply some painter’s tape over the approximate area where you will mount the thermometer. Measure 5″ down from each side of the metal lid handle to a point where both measurements cross. Mark the spot with an “X”.
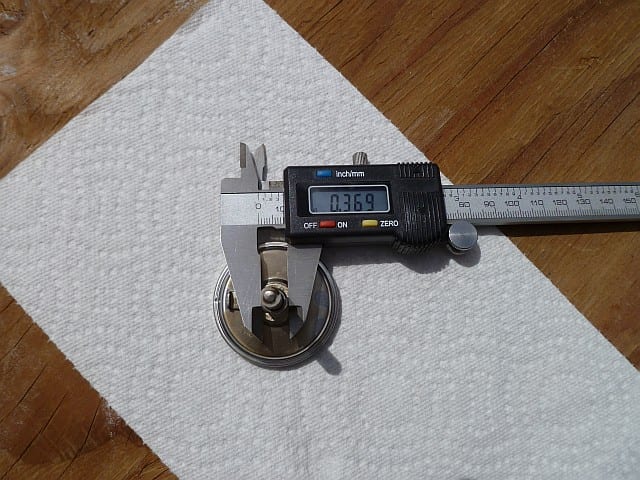
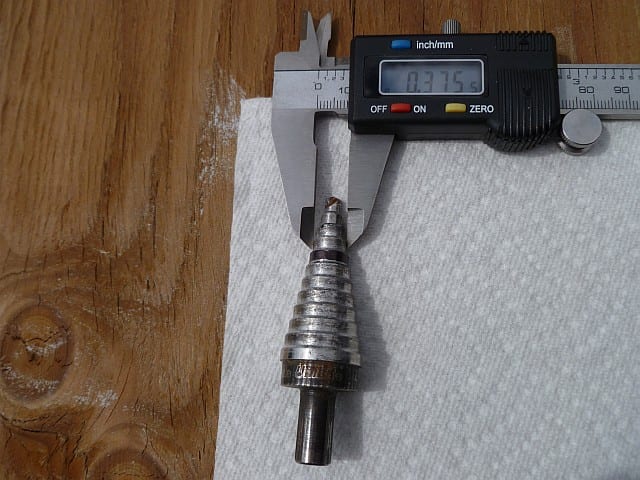
The thermometer’s threaded mounting base measures 0.369″, so you’ll want to drill a 3/8″ hole.
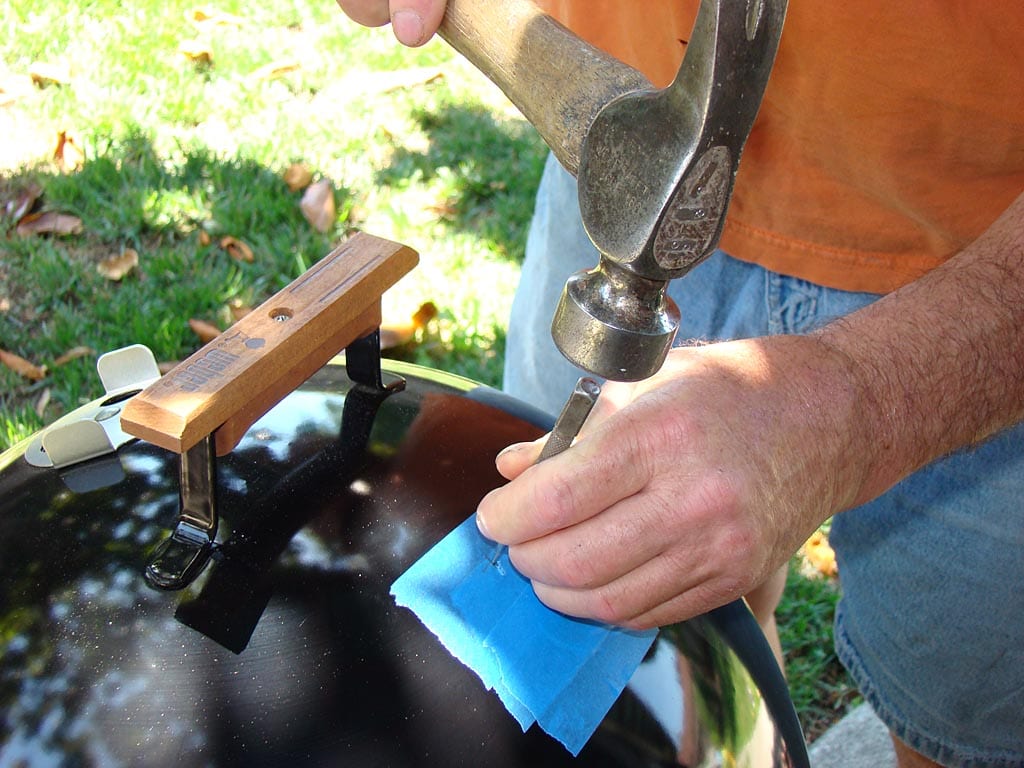
Use a sharp 1/8″ metal drill bit to make an initial hole. Switch to a Unibit #4 step drill bit or a 3/8″ metal drill bit and finish the hole. Using the 1/8″ drill bit first eliminates the need to use a center punch. Remove the painter’s tape.
Insert the thermometer into the bezel and insert the stem into the hole. Hold in place by hand or with tape and thread the wing nut onto the thermometer’s threaded base and tighten until finger tight. Do not overtighten. Rotate the dial face so it’s properly positioned.
Special thanks to TVWBB member Joe F for providing these steps and photos for mounting a stock thermometer.
For WSM Without Thermometers: Installing A Candy Thermometer
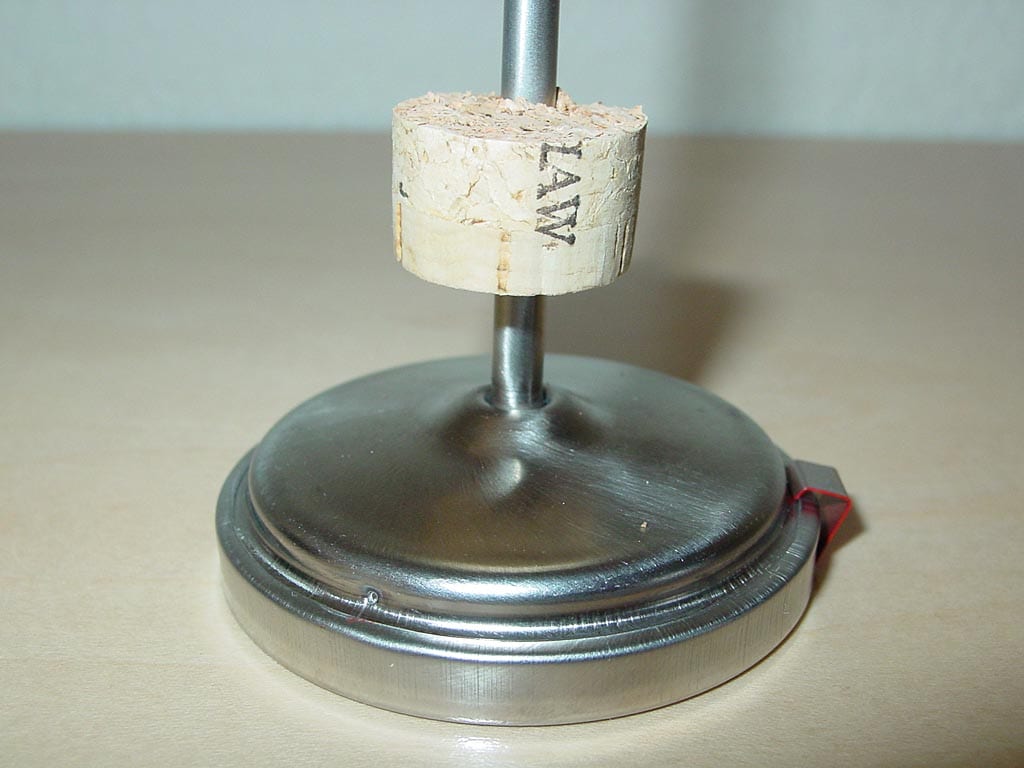
To install a candy thermometer, locate the spot for drilling as shown in either of the methods described above. Use a sharp metal drill bit to make a hole the same size or just slightly larger than the diameter of the thermometer stem.
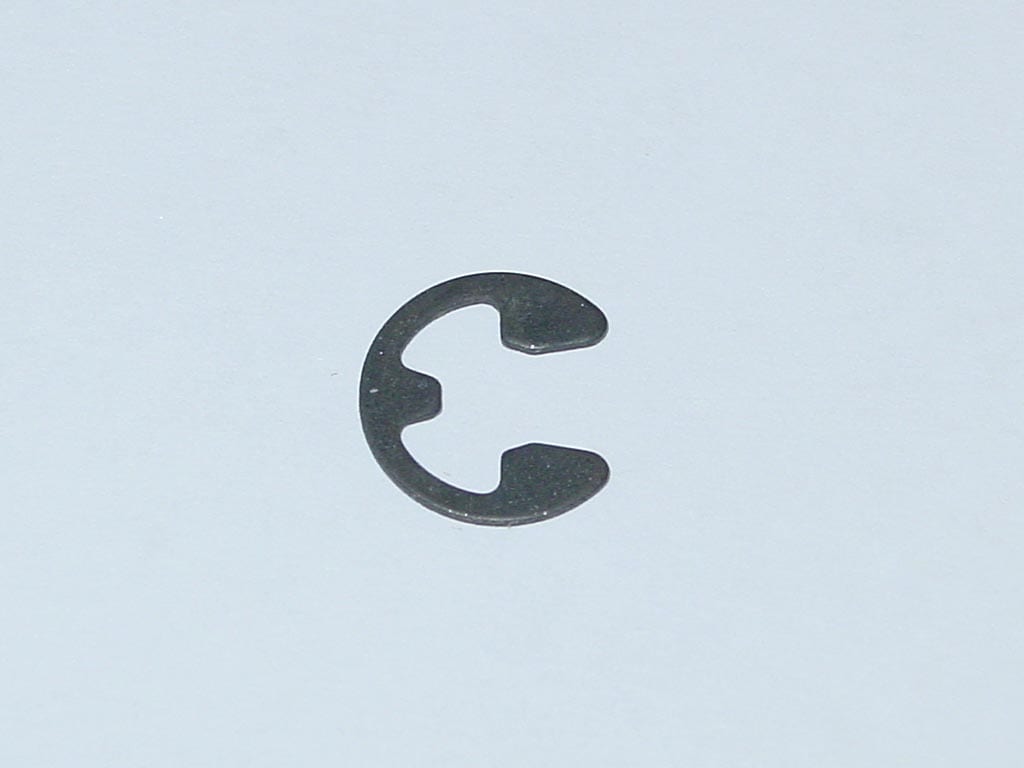
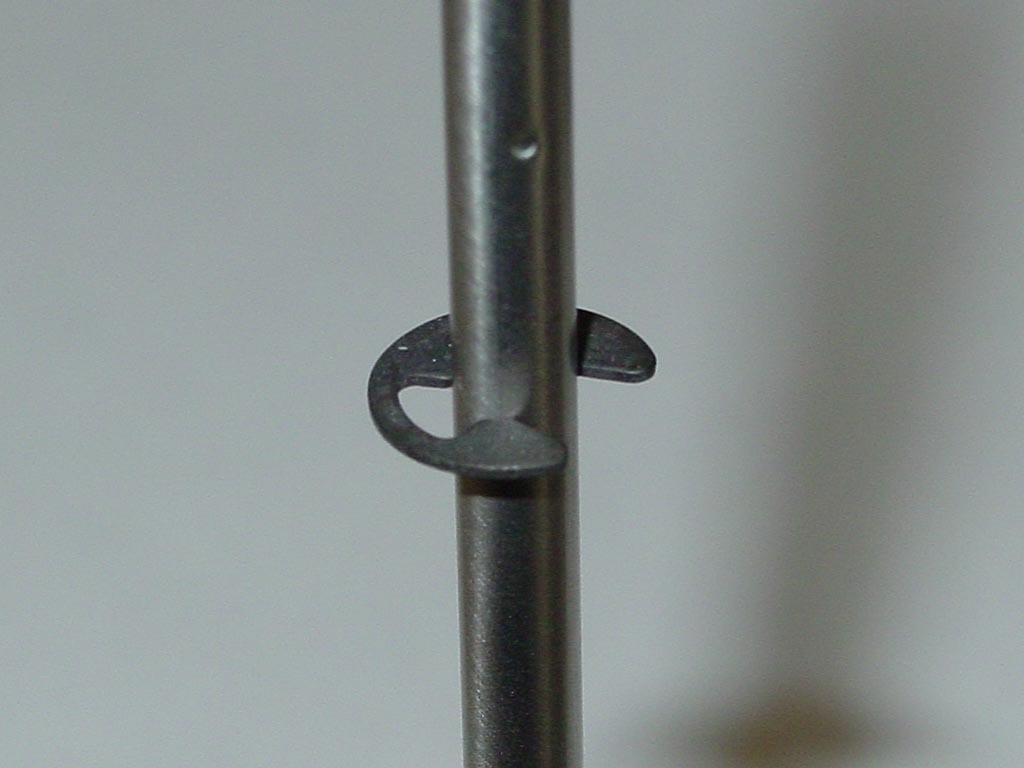
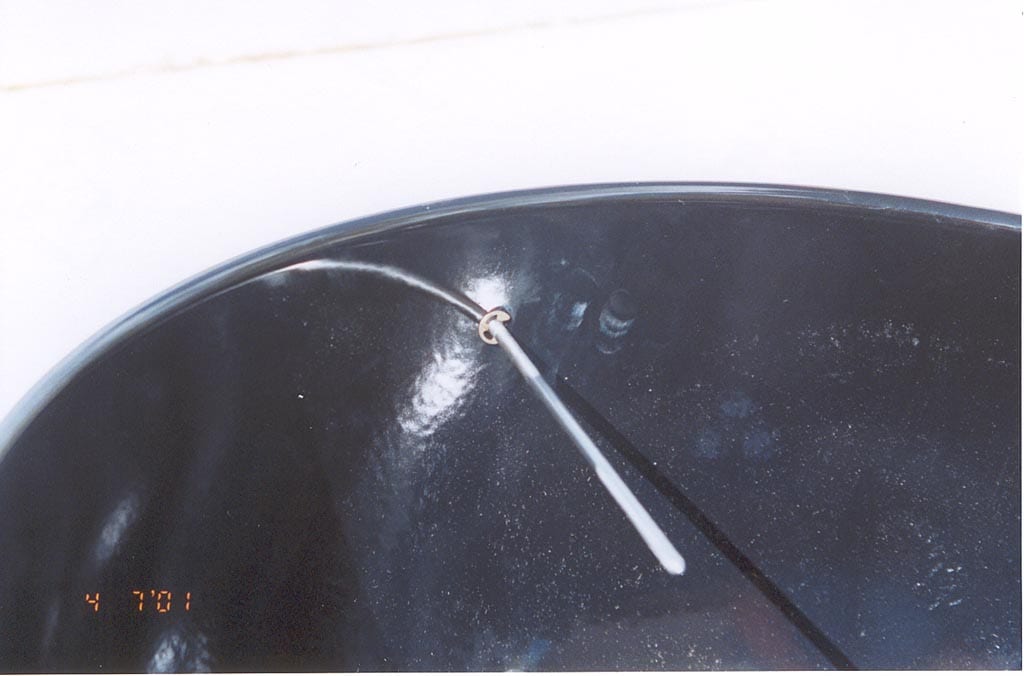
The stem of a candy thermometer is not threaded and will not accept a lock nut or wing nut. To hold it in place, fasten with a piece of cork or an “e” clip from the hardware store.
Upgrading From A Stock Weber Thermometer To A Higher-Quality Thermometer
Video: Replacing The Stock Thermometer In The Weber Smokey Mountain Cooker
This video discusses your options for replacing and upgrading the stock thermometer in your Weber smoker.
If you want to upgrade the stock Weber thermometer to a higher-quality thermometer with a large, easy-to-read 3″ dial, consider installing a Tel-Tru BQ300. It’s simple: Discard the bezel, enlarge the stock hole to 3/4″ using a 3/4″ metal hole saw or Unibit #4 step drill bit, and install the thermometer, washer, and steel lock nut as described earlier in this article.
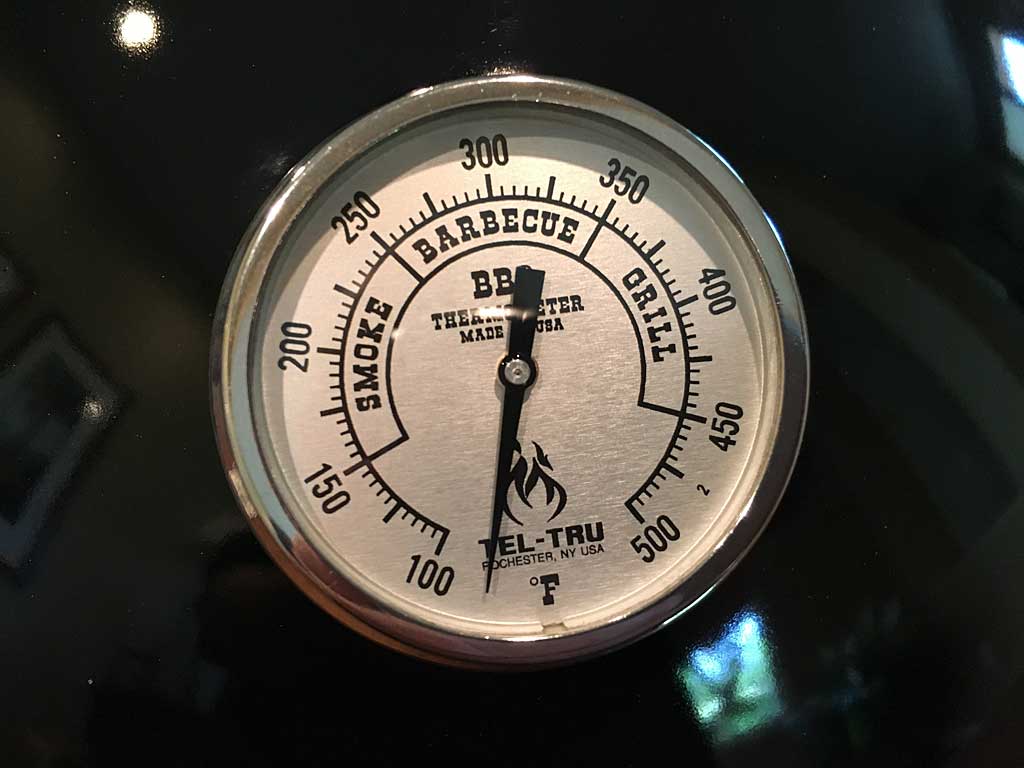
If you own a 14.5″ or 18.5″ WSM and want to continue using the bezel and existing hole in the lid, the Tel-Tru BQ225 is a good choice. It has a 2″ dial with 100-500°F temperature range and a 2.5″ stem. The dial face includes zones for “Smoke”, “Barbecue”, and “Grill” and is weatherproof.
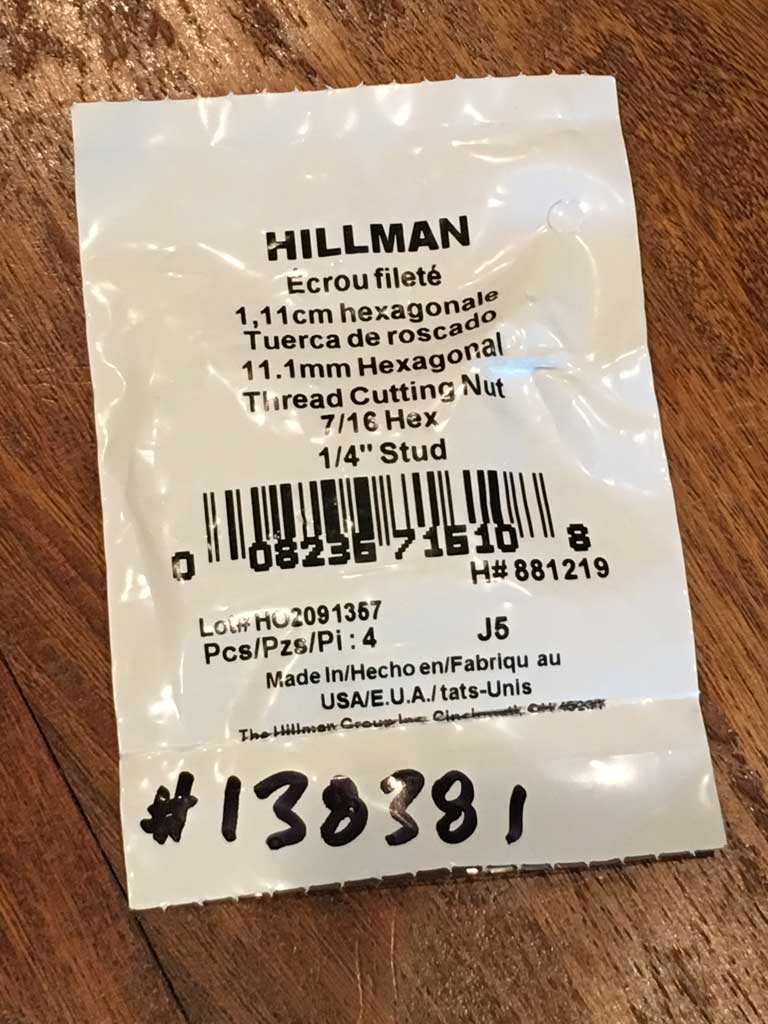
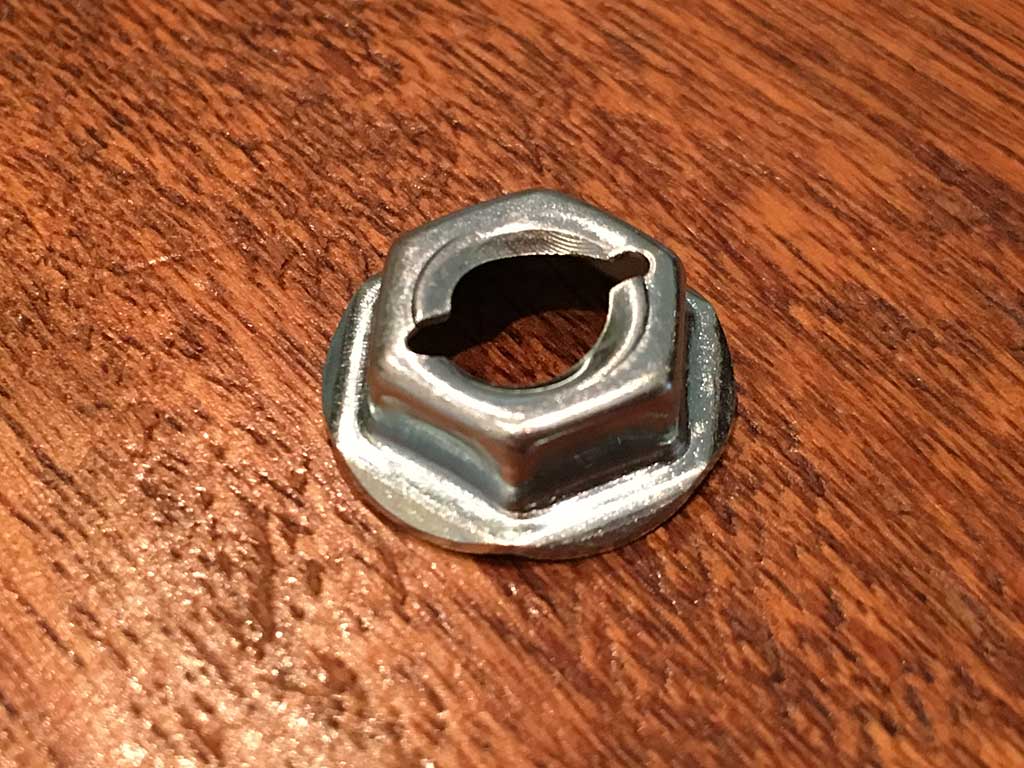
The Tel-Tru BQ225 dial face is 1/2″ wider than the stock Weber thermometer, but it sits neatly on top of the bezel and looks good when installed. Because the thermometer sits on top of the bezel, not inside of it, there is a 0.210″ gap between the back of the thermometer and the bottom of the bezel. To prevent deformation of the thermometer back when you tighten the wing nut fastener, consider filling the gap with a nut threaded 1/4-20 or with a 1/4″ bore. I used a Hillman Thread Cutting Nut 7/16 Hex 1/4″ Stud purchased at Lowe’s (4 for 68¢, Hillman part number 881219, Lowe’s item number 138381). This filled the gap perfectly.
Installation is simple: Remove the existing wing nut and stock thermometer, screw the gap-filling nut onto the stem of the new thermometer, pop the new thermometer into the bezel, and hold it with the dial face in the correct orientation and centered on the bezel while tightening the new wing nut.
Prior to this BQ225 mod, I tried using a Tel-Tru BQ100 thermometer. Its 1.75″ dial face fits neatly inside the stock bezel, but it has a 150-700°F temperature range and the 225-300°F barbecue range is only 3/8″ wide on the dial face, making it too small to be practical.
If you own a 22.5″ WSM and want to continue using the bezel, I’m not aware of any higher-quality thermometers that work with the bezel. Your best bet is to lose the bezel and go with the Tel-Tru BQ300 as described above.
Thanks to Matt M for providing information about the Tel-Tru BQ225 thermometer installation, especially the Hillman Thread Cutting Nut 7/16 Hex 1/4″ Stud.
Plugging An Unused Thermometer Hole
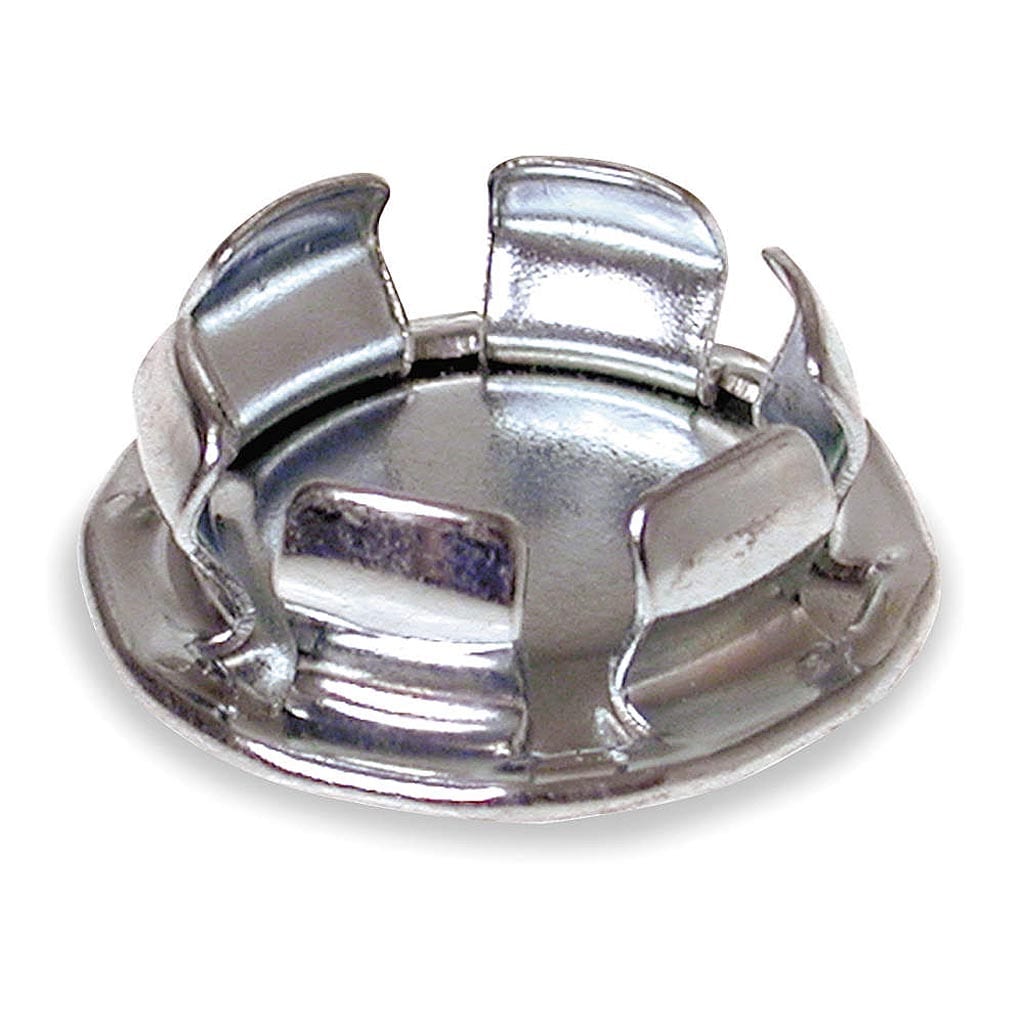
If you decide to remove a thermometer permanently, you may be able to plug the hole using a steel knockout plug found at the hardware store.
Closing Thoughts
These are all good looking modifications if you have the courage to poke a hole in your cooker! Take things slowly and use your common sense. But remember, you can get equally good results by sticking a thermometer through the lid vent or placing a remote probe thermometer on the cooking grate. What’s important is that you measure the temperature of your cooker in some fashion and do it consistently, so you have a sense how your WSM operates. Good luck and have fun!
More Thermometer & Temperature Links On TVWB
- More Thermometer Installations
- Cutting A Probe Thermometer Slot
- Measuring Temperature In The Weber Bullet
- Temperature Control Problems: Too Hot, Too Cool
- Cooking In The Wind, Rain & Cold
- Vent Damper Modifications
- WSM Temperature Tests
- Testing Thermometers For Accuracy: Ice Bath Test & Boiling Water Test
- Boiling Point Calculator
- WSM Modifications Forum on The Virtual Weber Bulletin Board
Stock thermometer install photos: 2014 by Joe F


